How to Stop Wood From Expanding: The 30–50% Humidity Rule
Wood expands when it absorbs moisture from humid air, not from heat itself, and no finish, however thick, stops that moisture exchange completely. Skip humidity control and a wide panel can bind in its frame or a floor can cup within one humid season. This guide covers the 30-50% shop humidity target, which finishes slow absorption best, and the real species movement numbers most guides get wrong.
The Science of Wood Expansion
Best Wood Moisture Meter Pick

General Tools MMD4E Wood Moisture Meter – $37.70
Rather than guessing from the species table above, a pin-type meter reads a board’s actual moisture content on the spot — the same 5-50% range this guide’s storage and drying sections reference.
- Best for: checking a board’s actual moisture content before you glue up or finish it
- Why we picked it: pin-type reading covers the 5-50% range this guide’s storage and drying advice depends on
- Main drawback: pins leave tiny holes, so avoid the visible show face on fine furniture
Compare more moisture meter options
 Option 1 Klein Tools ET140 Pinless Moisture Meter – $49.97
|
 Option 2 TopTes TS-630 Digital Moisture Meter – $29.99
|
 Option 3 General Tools MMP100 Compact Moisture Meter – $29.75
|
As an Amazon Associate we earn from qualifying purchases.
Wood movement is the ongoing swelling and shrinking of wood as it absorbs and releases moisture from the surrounding air — a property called hygroscopicity. High humidity pushes water into wood fibers, causing them to swell across the grain; low humidity pulls it back out, causing shrinkage. This never fully stops, since wood keeps exchanging moisture with the air for its entire life, even after finishing.
Temperature matters mainly because warm air holds more moisture than cold air. A heated shop in winter with no humidifier can actually run drier than an un-heated one, which is why swelling problems usually spike in summer, not during a heat wave.
📊 Tangential shrinkage runs roughly twice radial shrinkage for most domestic species — the reason flat-sawn boards cup and move far more than quarter-sawn boards from the same log. — Source: USDA Forest Products Laboratory, Wood Handbook
Which Wood Species Move the Most? (Real Shrinkage Data)
Every species expands with moisture — the old idea that some woods simply “don’t expand” is a myth. What actually differs is how much each species moves between its wettest and driest state, measured as tangential (T) and radial (R) shrinkage from green to oven-dry.
| Wood Species | Tangential Shrinkage | Radial Shrinkage | Movement Level |
|---|---|---|---|
| White Oak | 10.5% | 5.6% | High |
| Hard Maple | 9.9% | 4.8% | High |
| Yellow Birch | 9.2% | — | High |
| Red Oak | 8.6% | 4.0% | Moderate–High |
| Eastern White Pine | 6.1% | 2.1% | Moderate |
| Western Red Cedar | 5.0% | 2.4% | Low–Moderate |
This is why the common “cedar and birch don’t expand” claim floating around is backwards for birch specifically: yellow birch moves nearly as much as hard maple, while cedar moves the least of this group but still swells and shrinks measurably every season. For an exact figure on a specific board, run its species and moisture-content change through our own wood shrinkage calculator rather than relying on a Yes/No label.
Proper Wood Storage
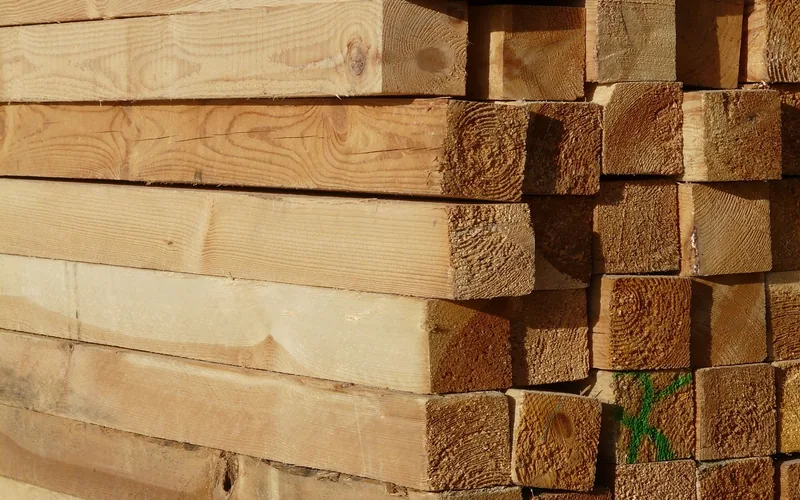
Store wood where relative humidity stays between 30% and 50%, ideally around 40% at roughly 70°F. Swings outside that range, not the absolute temperature, are what drive expansion and shrinkage.
Sticker boards on shelving or pallets with air gaps between each piece so humidity reaches every face evenly — a solid stack that only breathes on top will cup unevenly. Cover with a breathable tarp, not plastic sheeting, which traps moisture against the wood instead of letting it escape.
Check stored stock every few weeks for warping or surface checking (fine cracks). Catching a cupped board early, before it sets, is far easier than correcting one that has already dried into a permanent curve.
Preventing Expansion With Finishes and Sealants
A good finish slows moisture absorption — it does not stop it. Film finishes like polyurethane and lacquer resist moisture transfer better than penetrating oil-based finishes, but every finish is at least somewhat permeable, so wood sealed on one side will still slowly equalize with the humidity around it.
Finish every side, including hidden faces such as the underside of a tabletop or the back of a door panel. Sealing only the visible face lets moisture enter unevenly from the bare side, which is a common cause of cupping in tabletops that otherwise look well finished.
Apply two to three thin coats rather than one heavy one, sanding lightly between coats, and let each coat cure fully before the next. Reapply or refresh the finish every one to two years on pieces that see seasonal humidity swings, such as an unheated workshop or a porch.
Moisture Control Techniques
Run a dehumidifier in any shop or storage area that regularly reads above 50% RH, and check the reading with a hygrometer rather than guessing by feel — humidity perception is unreliable, especially in a shop that also has dust and temperature swings.
Use exhaust fans in kitchens and bathrooms near wood furniture, and run an air conditioner or open windows on dry days to help balance indoor humidity. Keep wood pieces away from exterior walls and un-insulated crawl spaces, where humidity runs highest and most inconsistent.
Kiln-Drying: The Step Most Guides Skip
Most of a board’s total shrinkage happens once, as it dries from freshly-cut (“green”) lumber down to a stable moisture content — typically 6% to 8% MC for indoor furniture in a heated home. Buying kiln-dried lumber means that first, largest round of movement already happened at the mill, under controlled conditions, instead of happening in your shop or in a client’s living room.
Air-dried lumber straight from a small mill is often still at 12% to 20% MC, well above the acceptable moisture level for indoor woodworking. Building with it before it acclimates means the wood keeps shrinking after the piece is assembled, which is a common, avoidable cause of glue-joint failure and drawer fronts that no longer sit flush.
Before using any new lumber, let it acclimate in the actual room or shop it will live in for at least one to two weeks, and confirm it has stabilized with a moisture meter reading rather than a fixed calendar rule.
Joinery Tips for Minimizing Expansion
Design joints that let wood move instead of fighting it. Frame-and-panel construction floats a panel in a grooved frame so it can expand without splitting the frame apart. Mortise-and-tenon joints hold structural strength while tolerating some seasonal movement in the surrounding parts. Avoid gluing a wide panel rigidly along its full width into a frame — that’s what cracks it.
Leave an expansion gap on wide panel glue-ups rather than fitting them dead-tight. Use flexible fasteners, such as figure-8 tabletop fasteners or slotted screw holes, for attaching wide solid-wood tops to a frame, so the top can slide slightly as it moves.
“On a wide glue-up — a 20-inch tabletop or wider — we leave roughly 1/8 inch of expansion room per foot of width when we fit it into a frame. Skip that gap and the panel finds the room itself by splitting the frame joint instead.”
Regular Maintenance and Troubleshooting
Inspect furniture and fixtures every few months for warping or cracking, and reapply sealant on high-exposure pieces before the old coat fully wears through, not after. Wipe spills immediately — standing water is a far faster moisture source than ambient humidity.
If a piece has already swollen, let it fully acclimate in a stable 30-50% RH environment first; wood often relaxes back toward its original size on its own once excess moisture leaves. Only sand a swollen edge flush after it has stabilized — sanding while it’s still swollen just means sanding off wood that would have shrunk back anyway.
If cracking or warping is severe, or the piece is structurally load-bearing, have a professional assess it rather than forcing a DIY fix that could weaken a joint further. For more on avoiding the common mistakes that cause problems like this in the first place, see our woodworking tips and fixes guide.
Frequently Asked Questions
How can I prevent wood from expanding?
Keep the wood’s environment at a stable 30-50% relative humidity, finish every side (not just the visible face), and let new lumber acclimate to the room before building with it. No single step fully prevents expansion, but combining all three keeps movement small and predictable.
What causes wood to expand?
Wood expands because it is hygroscopic — its fibers absorb water vapor directly from humid air. As humidity rises, the fibers swell, mostly across the grain rather than along its length. When humidity drops, the same fibers release moisture and the wood shrinks back.
Does temperature affect wood expansion?
Only indirectly. Warm air holds more moisture than cold air, so a temperature rise often brings a humidity rise that causes swelling — but temperature alone, without a change in relative humidity, has little direct effect on wood’s size.
Does sealing wood stop it from expanding completely?
No. Every finish, including polyurethane and lacquer, slows moisture transfer but is still somewhat permeable. Sealed wood moves less and more slowly than bare wood, but it will still expand and contract with large or sustained humidity swings.
How can I fix expanded wood?
Let the piece acclimate in a stable 30-50% RH space first, since wood often shrinks back close to its original size on its own. If it doesn’t fully recover, sand the swollen area flush only after it has stabilized, then refinish the sanded surface to match.
Conclusion
Wood expansion is manageable, not preventable outright: hold humidity between 30% and 50%, finish every side of the wood, let new lumber acclimate before building, and design joints that give it room to move. Do those four things consistently and swelling stays small and predictable instead of costing you a cracked panel or a jammed drawer.
Sponsored / affiliate links. As an Amazon Associate I earn from qualifying purchases. I may earn additional commission from eligible campaigns.