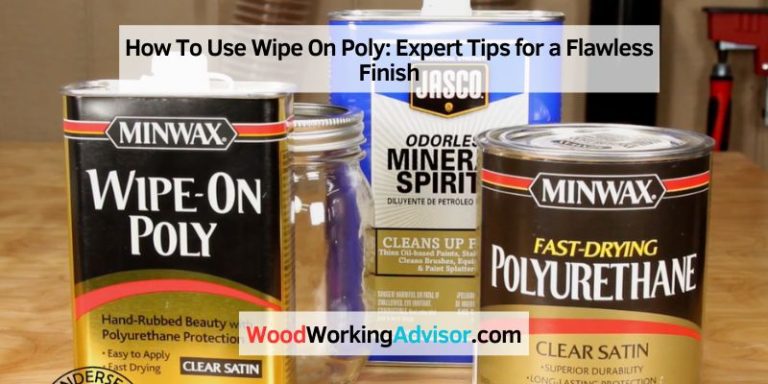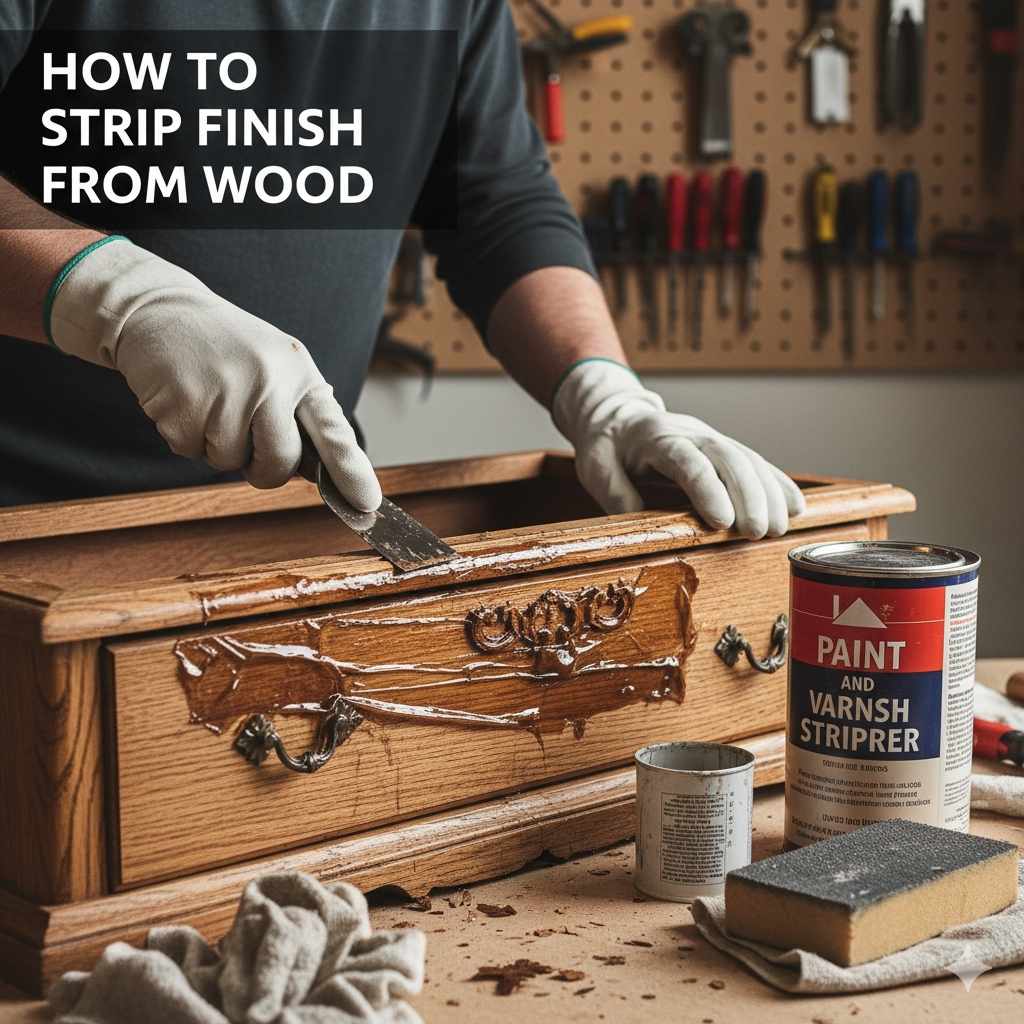
How To Strip Finish From Wood: Proven Method
Bolded Quick Summary: Learn how to strip finish from wood safely using chemical strippers and safe sanding. This proven, easy-to-follow method removes old layers of varnish, paint, or stain carefully, ensuring your new finish looks fantastic on reclaimed or refreshed furniture or trim pieces.
Are you staring at an old pine dresser or scratched-up dining table, itching to give it new life, only frustrated by that stubborn, flaky layer stopping you? You are not alone! Stripping off ugly or damaged wood finish—what we call a “restore to its former glory” job—often seems like the hardest part of a refinishing project. The messy chemicals and tons of elbow grease can feel overwhelming, especially when tackling woods you really care about. Fear not, fellow DIYer! With the right care and my step-by-step guidance, quickly removing stubborn finishes on any antique or piece of trim is completely achievable. We’ll focus keenly on keeping things safe while getting that slick, clean wood surface ready for its beautiful second act. Let’s uncover the proven, stress-free blueprint for conquering any stubborn wood finish!
Why Stripping Finish From Wood is Necessary
Before jumping into tools, let’s refresh why we bother stripping old coatings. Fresh paint or stain sticks beautifully to bare wood, and far less consistently to worn, chipped old finish. A good chemical strip smooths the slate, guaranteeing your professional-looking results.
If the existing finish is cracked, peeling badly, chemically incompatible with new coatings (think old oil-based varnish next to water-based stain), or significantly dark, skipping or lightly prepping the old finish is just asking for long trouble later. A true reset job starts with stripping.
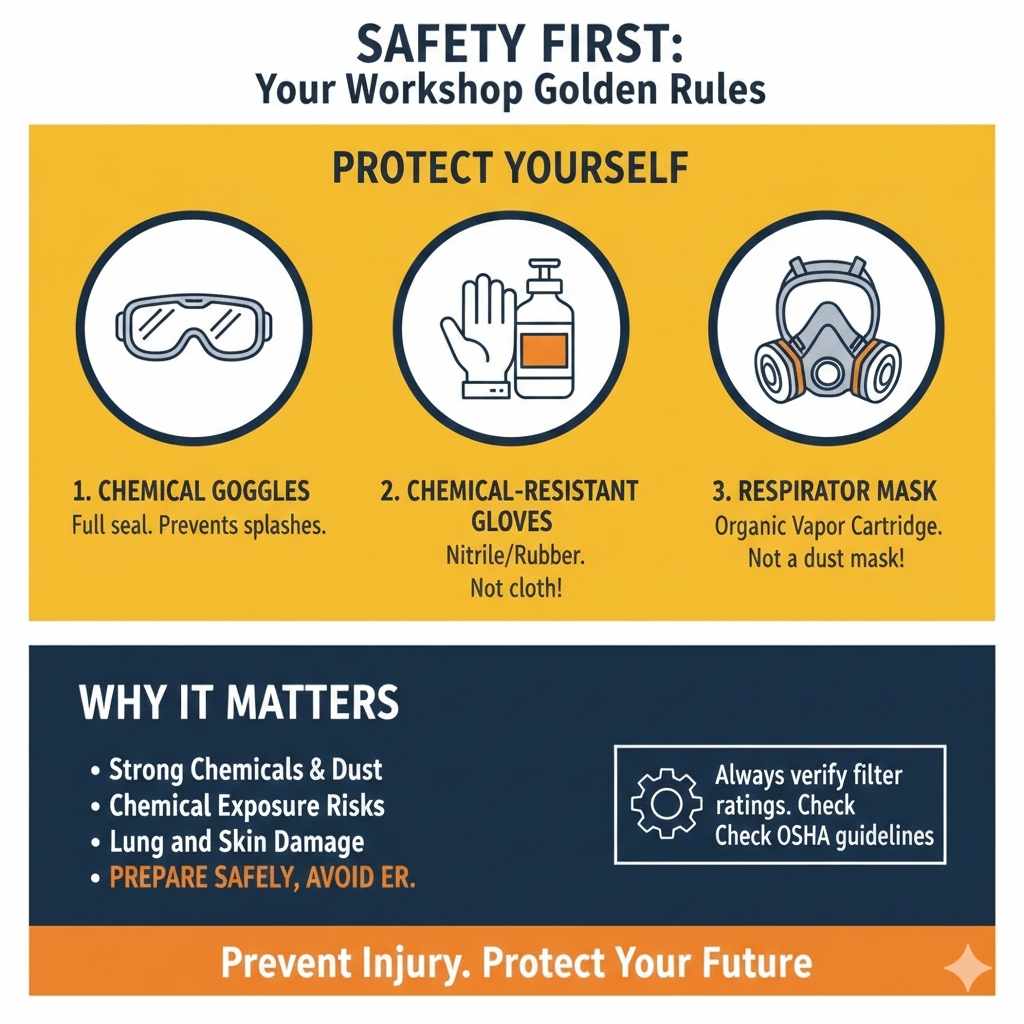
Safety First: The Golden Rule in the Workshop
When you strip, you deal with strong chemicals and dust—nothing is more important than safety here. I preach this on every project because preparing safely upfront prevents trips to the ER later. Every major retailer who sells wood finishes strongly advises eye and skin protection due to chemical exposure. Always treat the chemicals mentioned below with respect. We are protecting our lungs and our skin.
Essential Safety Gear You Must Have
Don’t skip purchasing or using these three items; they cost very little compared to potential injury or long-term health effects.
- Chemical Goggles: Full seal around the edges. Safety glasses alone can let splash-in splash happen.
- Chemical-Resistant Gloves: Nitrile or heavy rubber gloves that go up past your wrist. Traditional cloth or thin household chore gloves often degrade quickly where solvent chemicals touch them. Check any solvent container warnings.
- Respirator Mask (Proper Filter Needed): Simple dust masks are not enough! For chemical stripping, you need a half-face respirator with activated charcoal/organic vapor cartridges. Dust from sanding dry wood filler needs different cartridges. Always verify ratings based on chemical use. You can review guidelines from bodies like the Occupational Safety and Health Administration (OSHA) for best filtration practices against organic vapors.
Choosing Your Arsenal: Stripping Chemicals Versus Heat Guns
Generally, we can remove an old finish in one of two primary ways: chemical dissolution or applied heat blistering. Most hobbyists will default to chemicals, which I recommend for beginners tackling curvy, detailed furniture.
Chemical Strippers: The Go-Tos
Chemicals do the heavy lifting by breaking the bond between the finish and the wood universally applied to contoured surfaces. Today, formulas tend to fall into one of three big categories:
- Methylene Chloride Free (Safer/Slower): These often use safer solvents (like NMP or benzyl alcohol). They require more paste application time, often six hours or more resting time, and many coats may be very thick. They are less harsh on your lungs and skin compared to classics.
- Caustic/Alkaline Strippers (Heavy Duty): Historically popular, these look somewhat soapy once moisture is introduced. They work super fast, especially effective against ancient, super-thick old paint finishes, but are tougher to neutralize safely on the wood afterwards.
- Citrus/Eco-Friendly Strippers (Mildest/Slowest): Extremely mild, often soy/citrus-based lifts, sometimes odor-free. They are the safest but usually fail completely on many stubborn automotive enamels or modern hardened polyurethane. Often best reserved for extremely soft, decorative finishes.
Heat Guns: The Quick Blister Approach (Use With Caution!)
Heat guns use intense focused heat (often 1100°F or simply) to physically destabilize and bubble up finishes directly underneath.
Pros: Removes finish without requiring harsh bulk household chemicals. Great when you musty avoid solvents.
Cons (BIG): CRITICAL FIRE RISK PLUS BURNING THE WOOD. Excessive flame or dwelling too long on one spot scars furniture deeply with burnmarks. It is tedious or outright difficult on carved areas or corners.
Mentor Pro Tip: Due to the intricate nature of most refinishing pieces like cabinets or fancy chairs, chemical stripping combined with plastic scraper tool agitation is generally your strongest, simplest base method.
Master Recipe Charting Tool Success
Selecting the right tools minimizes frustration. Here is how your setup breaks down based on the method chosen (focusing on chemical separation due to safety and efficacy).
| Category | Description / Necessity | Why It Matters for Beginners |
|---|---|---|
| Surface Prep & Application | Trowel Notch Applicator or Cheap Paint Brush | Do not use your good brushes! You’ll toss them. Chemical thickness is key. |
| Scraping Agents A | Stiff Plastic Scrapers or Palette Knives | Plastic prevents you from digging into good wood beneath if the chemical hasn’t done its job fully. |
| Scraping Agents B | Medium and Fine Grade Steel Wool (#1, #000) | Used later paired with mineral spirits/striwater (see Neutralization) for heavy residue areas. |
| Waste Containment | Heavy-Duty Plastic Drop Cloth or Contractor Baggies | Stripped mess must be clearly quarantined. Seal later and dispose of according to locale health rules! |
| Final Cleaning Agent | Mineral Spirits or Denatured Alcohol | Required to clean off final stripper grease before sanding starts. Very mandatory! |
Phase One: Prepping Your WORK Station (Critical Containment)
Before you even open that chemical can, think spill control. If you strip the bottom of an antique buffet while it sits right on your garage floor, cleanup is miserable and possibly dangerous.
1. Ventilation is Non-Negotiable: Always perform heavy stripping in a well-ventilated area or outside on temperate days above 50°F. If in the garage, open the side huge. If using strong chloride strippers, run high-power fans to exhaust outward near ceiling level, drawing fresh air from low.
2. Set Up the Base: Lay down thick, impervious contractor-grade plastic sheeting that goes up and creates a slight dam like a wall section wrapping the area you are working on. You essentially box in the mess. I find setting the furniture piece on saw horses is vastly easier than bending over constant kneeling chairs.
3.Inspect the Piece: Check for any hardware, like loose hardware or hinges. I heartily advise completely removing any brass or simple plated metal hardware before chemical application. Sometimes, harsh solvents permanently stain or pit soft metals, and you cannot chemically treat the strips around hinge posts effectively. If you cannot remove ornate hardware, coat it heavily with painter’s tape first, followed by an aluminum foil barrier.
Phase Two: Applying The Great Thick Buffer (The Chemical Strip)
This process must be built on thickness. If a finish is six or seven layers old—from traditional shellac to four layers of house paint over the top—the chemical coating must stay continuously wet long enough for the solvents deep down to reach the wood bond line.
Preparation: Make sure the wood surface is dry as possible—remember, water slows down most strippers immediately or drastically dilutes their impact.
Step 1: First Slathering—Thick is Right
1. Stir Chemicals Slowly: If the stripper sits, the heavy chemical base and thin solvents separate near the top. Gently poke and swirl; usually do avoid whipping it into frothy bubbles or splatters.
2. Apply Like Peanut Butter or Frosting: Dump a reasonable puddle of the stripper onto the surface gently. Using your inexpensive varnish brush or small trowel (the kind used for drywall compound), spread this chemical material across the dried finish.
3. Apply Extra Thin Regions Generously: When you are near wood edges, carved feet, or crevices, use your scrapers to visually assess that all wood has at least triple the coat of sealant atop everywhere else. Chemicals leech out through porous parts fastest, so thicker spots save you time! It must look sloppy and thick over the old coating.
Step 2: Waiting Period—Patience is Craftsmanship’s Catalyst
This section tests beginner patience above all technical skill. Your initial chemical choices will rule this part. Read the specific product instruction chart near the container opener—it can range from thirty minutes (rare and for thin coats) up to eighteen hours (true, extreme industrial stuff sometimes).
For quality furniture restoration, look for the finish doing this: Cocking or Raising Cracks. If you stir the coated surface layer where your brush touched gently, if it feels thick yet movable, rather than liquid. That mush indicates failure. However, gentle cracks appearing on the surface strongly indicates that the layers separating down near the wood woodline are softening right as expected should happen! Let it sit until it starts wrinkling well.
Time Note: Environment matters wildly here. Sunlight is your enemy as external heat instantly evaporates the important working solvents. Cold means extreme waiting times! Garage temperatures around typical house 70 degrees Fahrenheit are optimal provided you wear your mandated face/eye safeguards throughout the wait. Don’t rush and introduce more chemicals. Let it work once you choose reliable materials from good manufacturers. Check the manufacturer data available from large finishing companies to verify your cure times under various external stresses.
Step 3: Gentle Mechanical Assistance (The Scrape)
Once the finish starts wrinkling powerfully, it generally means the adhesion has failed. Now we aid removal by scraping. This phase requires constant cleaning of your tool.
1. Use Plastic First: Always prioritize pulling off that soft, gelatinous coating using flexible, non-marring plastic spreaders or palette knives.
2. Angle of Attack: Keep the scraper nearly flat against the workbench surface (very shallow angle). If you stab downwards—that’s instantly gouging into your bare wood line—push over the sloppy coating like plowing. It must glide off like thick sludge pouring under a squeegee. It is better for this stage to leave too much soft chemical wash over the part than too little exposed for the next step.
3. Small Parts Management: Remove hardware that you scraped—often, just flipping the wood means gravity should drop small curls of old stain onto clear contained wrapping cloth so you can save, reuse later or discard them correctly where possible to prevent hardening.
Phase Three: Neutralization and Final Removal (It’s Not All Done Yet!)
Even after you scrape off 90% of the sludge, you still have dissolved stripper liquid sticking stubbornly both in the wood grain pores and chemically bonded itself right within the open gaps—this residuum needs cleaning before applying fresh sealant. If you sand onto chemicals residue chemically etched wood: you will trap solvents underneath, or cause your fresh chemical-based finish to wrinkle later on. The wood won’t allow coating bonding—yup, more total frustration!
What You Need for After-Cleaning
Because many of the effective stripping chemicals disrupt older lacquer or shellac (two types common in 80-and-under antiques compared to recent polyurethane formulas), neutralizing choice becomes tied to the previous formulation, although sometimes hard mixing two chemical classes together leaves strange messes that are best addressed right through rinsing.
- The Mild Rinse Route: If clear old paint was stripped OR thin oil topcoat only removed—hot Damp Rags only should cleanse the debris itself into contamination bins. Wipe entire surface area down with rags dampened solely in warm water. It dissolves sticky residues. Let area dry—always. Sometimes this needs multiple rinse rounds.
- The Chemical Chase Route (Recommended): Usually safer chemically to use an organic solvent that dissolves the chemical remnants, provided this solvent won’t lift up bare wood like thinner would.
Using Mineral Spirits or Naphtha First
Your best bet involves a trip back. Grab high-grade Mineral Spirits (often sold near paints) or lighter Naphtha.
1. Sloppy Wisp for Oil Cleanup (Recommended): While work is still tacky with residual gloppy stripper, lightly wipe all surfaces using Metal Spirits via a dedicated sanding shop towel, allowing dissolution of thicker organic material/pulp. Toss used rags carefully away sealed and contained not to flare up flammable risk.
2. Deep Detail Scrub: Fill gaps and cracks with loose sections like old stiff #1 fine steel wool you dipped in fresh Mineral Spirits or simple paint thinner. Gently work on details, using only pressure provided by dipping action rather than applying body pressure. Let this final moisture stage completely FLASH off. It’s critical that these volatile solvents evaporate fully. You should have no powerful chemical nose smell lingering if success happened.
Check your manufacturer links for safe application guides to guarantee new refinished item doesn’t react against lingering cleaner remnants. Safe sourcing can avoid big issues: [This image showcases appropriate ventilation requirements typically required for chemical handling according to general OSHA guidance].
Phase Four: Final Prep for Finishing (Sanding After Strip)
The chemical has completed its primary duty: dissolving and bubbling off most finish clumps. Now, the metal, the microscopic residue, and any deep burn marks must be addressed by abrasive removal. Stripping chemicals never reach microscopic chemical bonding points.
DO NOT begin any wood sanding before Step Two of the cleanup phase confirms at least one hour is allowed for air. Stripping products often contain oils that can gum sandpaper quickly if too soon in application.
Sanding Sequence Checklist: From Grain Management to Final Look Dust
We sand after the complete removal of almost every chemical to see exactly what state the wood is left inside of. What you see now is what your stain bottle will stain perfectly.
1. Initial Clean Sand (80 or 100 Grit): First use coarse paper only in strategic spot check where remnants look. If you removed finish layer 95% from wood successfully, you should need nothing coarse unless previous damage was super deep! Quickly move beyond 100 or 80 grit otherwise you risk sanding heavy scratch patterns which cause stain issues—especially on softer pine.
2. Main Grain Refinement (120 and 150 Grit): Sand every square inch using long, flowing strokes that follow the grain only. Do not let the portable-power rotary tool (if you are using one!) spin on one flat patch, causing dents near the wood ends. This step smooths out tool marks, chemical texture changes that the softener left behind, and light imperfections otherwise left exposed.
3. **Final Seal Surface (180 or 220 Grit Maximized): For standard interior furniture refinishing, stop before proceeding again up to 180 at absolute extreme. If you keep dialing your grits higher (using those 320s and 400s), you start to fill available, crucial hard wood pores, preventing stain saturation totally perfectly.
Your piece should now feel smooth as silk, no powdery roughness remains EXCEPT any lingering fine powder/dust stirred from the previous chemical stripping job. Finish cleanup next! Take advantage of good shop safety practices for sawdust dispersal. This will prepare grain perfectly for whatever the new finish desires accomplish finally.
Cleaning Post-Sanding Debris: The Glue Hater Dust Barrier
Many beginners seal right after 150 grit has left marks on them. Guess what appears looking right afterward? Dust from the scraping mixed down into that 150 area gets sealed underneath! Not visually pleasing and certainly not quality repairmanship.
Procedure:
Use Vacuum Only, Chemical Rinsing Next
Wipe the surface vigorously multiple turns using fine lint-free microfiber, a disposable tack-cloth designed for fresh application finishes for one last final polishing prior again to final painting. It pulls 99% remaining loose particles that sandpaper agitation stirred once again. Now put workpiece outside the vacuumed zone—keep clear the clear working zone totally!
Troubleshooting Common Beginner Challenges
Inevitably during a stripping job, weird things happen that make you drop confidence temporarily. I promise it is usually easy to fix! My trusty workshop advice focuses only simple visual fixes that prevent you destroying your project trying to apply another harsh strip coating when it isn’t needed right there.
Common Issues Checklist When Stripping Finish
| Symptom Experienced After Initial Strip Phase | Probable Cause | Fix You Must Try Sooner Than Needed! |
|---|---|---|
| Remaining Glaze Coating After Scraping | Finish did not sit long enough OR top coat has very unique resin content that resists first stripping chemical type. | Wait 3-4 more hours allowing additional material deeper action! Or plan on only softening down glaze layer with fresh chemical + scraping. |
| Slight Sticky “Gummy” Film After Second Mineral Cleaning/Drying | Residual chemical component trapped into the wood/fiber; maybe you dried surfaces too close to the water base strip phase mixing poorly during cleanup process. | Apply high-grade fresh Naphtha/Pure Thinner area only once, thinly, working in a small area first utilizing lint free clean application sponge. Wipe absolutely immediately (less than 30 seconds pass)! |
| Deep Circular Burn Marks Only Visible Mid-Stripping After Use/Inspection | Excessive application of a heat gun ONLY focusing in that spot recently. OR a heavy chemical spill applied accidentally or left alone for many hours that ate deep grain on soft wood. | Plan for extra sanding phase in next process section—this requires 100 and 120 grit attention specific to that indentation mark removal. Sand softly! |
| Dark Blotches Appearing Wet? | Excessive prolonged moisture application (too long using too wet of a neutralizing wipe in Phase Three) penetrating the unfinished porous wood pores | Place fans onto these boards. Move the board someplace dry. Let airflow desiccate the area completely for >24H. Refrain from any new chemistry until this specific area looks light in color or dry at sight. |
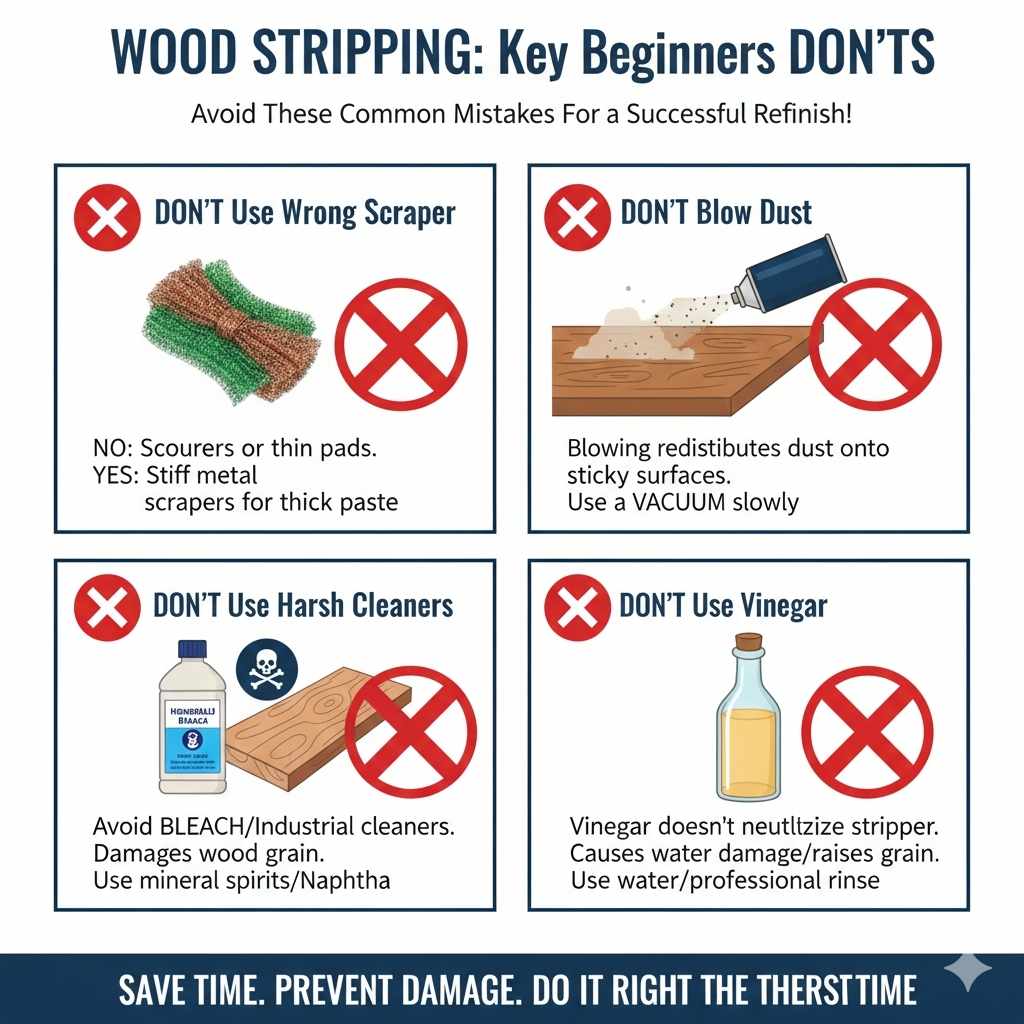
What NOT To Do When Stripping Wood Finish (Key Beginners Don’ts)
Sometimes avoiding errors accounts for 95% of a successfully completed refinishing project for woodworking newcomers. My greatest lesson ever was learning to step away when furious with stubborn coating, not doubling agent application when initial efforts failed.
- DON’T Use Dish Scrubber Pads as a Scraper: Steel wool is useful later, after chemicals have moved them to softer sludge. Thick copper scourers or non-woven dishwasher pads cannot move thick old finish paste correctly; use true stiff edge implements.
- DON’T Blow Dust Immediately: That fine sanding residue? When blown away by compressed air, it goes everywhere instantly redistributing onto slightly uncleansed sticky surfaces where it turns tacky and locks upon subsequent final finishes. You will pay much later! Vacuum slowly!
- DON’T Use High or Concentrated BLEACH or Industrial Cleaners Inside of Chemical Strip: Clean only with defined recommended solvent rinses (Mineral S; NAPH; IPA—usually). Aggressive cleaning agents upset cell structure of the bare wood, permanently robbing its final natural grain appearance or stopping proper subsequent staining. Don’t chemically over-clean finished item seeking for pristine look now, sand it away slowly at 120 or 180; be confident once that section smooths finally.
- DON’T Use Vinegar as a Neutralizer: Popular myth persists simple common vinegar fixes caustic stripper residue. Many people confuse this with paint stripping itself for cleaning the acidic wood, but it actually introduces water damage/raising grain fiber that you might need more aggressive final sanding for afterward. Pure water rinse, professional product follow-up is needed. Safe handling keeps finishes safe.
FREQUENTLY ASKED QUESTIONS (FAQ) BY HOMEOWNERS & DIYERS
Q1: How long must I let the chemical stripper rest on paint or varnish before starting to scrape?
A: This varies depending heavily on the stripper you used and finish thickness. Generally good results happen after the film begins wrinkling visibly, looking like crumpled tin foil sticking hard against surface contact areas. This can take between sixty minutes for thin modern polyurethanes and up to twelve hours for many old paint layers. Always check the container instruction for your specific brand setting.
Q2: Can I successfully strip wood using only sandpaper without chemicals?
A: You certainly can, but usually only recommended when stripping something remarkably thin, like natural oil waxes or very delicate final clear polyurethane on stable domestic woods. If dealing with hard lacquer, thick old shellac layers, or heavy house paint, sanding will require removing tons of wood; very tough effort, often very harsh finish damage, almost always wastes time before you quit and switch to chemical helper.
Q3: Is heat gun temperature too dangerous for old, perhaps glued woods?
A: Heat guns pose two real immediate dangers: scorching—creating permanent black burn marks across the wood grain—and overheating the wood glue holding mortise and tenon joints or curved laminated veneer areas, making them soften and cause early structural joints or separations right there. If your piece seems incredibly fragile, older, made with hide glue, stick exclusively to chemical options.
Q4: What’s the single best sandpaper grit finish after I strip the wood of its layers for restaining?
A: Most experts agree you end up sanding only until 180 grit max for final prep. If you plan to penetrate deep with colored oil stain into soft woods, sometimes finishing at 150-grit prevents filling those essential grain apertures and allows dye pigment sink in without issue. Avoid above 180 until very far post-stain application final finish applications (unless applying a primer coat).
Q5: My stripper seems too runny! It just drips off the curved front leg. Should I thin it down?
A: Please do not thin stripping chemicals! Runny strips are ineffective. The desired approach, often taught through woodworking forums, is choosing a different product design called a “Paste” or often marketed in jars meant like frosting that sticks hard until active solvents start making lifting lift off material. Use their applicator tool (simple brush maybe thicker) sparingly thick coating onto that difficult area once again, securing a cover of large damp cloth (wretched chemical cloth), over this one to slow evaporation.
Q6: How do I properly dispose of all that stripped, heavy gloopy refuse? It feels almost like hazardous spill!
A: Chemical process refusal containers require special drop-offs right! Never, ever pour liquid chemical mixture down the same drain line! Containerize all sludgy solids—chemical-soaked scrapings on dropping sheets—inside strong contractor bags right where all of it accumulated. Seal them well so smell can’t exit/liquid won’t leak if possible. Finally consult municipality waste section to ascertain where such waste requires final acceptance for processing—usually Hazardous Waste Drop-Off Days provided throughout all weekends across major cities at specific collection/transfer sites.
We have walked across the entire challenging process now, from confirming safety essentials just before opening that jar right up until we feel that pristine final smooth touch before staining: how to strip finish from wood. Successfully stripping finish is primarily about allowing the helper (the strong solvent) long enough working presence without environmental interruption—then making completely that harsh stuff has been fully rinsed clear into special disposal bins. Remember these small actions: Thick initial coat, cover it up against surface heat evaporation, clean deeply even with mild scrubbing post-scrape—always waiting that final full 60 mins before running any finer-grit sandpaper gently across the clean bare structural element surface. Your finished project isn’t just rescued wood, it’s confirmation a beginner (that’s you!) can deeply refine, salvage cherished, meaningful timber pieces by understanding little crucial physics and taking the correct preliminary safety preparation always before any new task starts! Go ahead—apply that desired beautiful fresh look beautifully smooth finish.