How to Thin Stain: Easy Techniques for Perfect Finishes
To thin stain, mix it with a solvent like mineral spirits or paint thinner. Start with a small amount and adjust to your desired consistency.
Thinning stain is essential for achieving a smooth application and enhancing the wood grain. It helps the stain penetrate better, resulting in a more even finish. Many woodworkers prefer to thin their stain for specific projects, such as furniture refinishing or cabinetry.
The right thinning technique can also improve drying time and reduce blotchiness. Understanding how to thin stain properly ensures optimal results, whether you’re a beginner or a seasoned pro. This guide will walk you through the best practices for thinning stain, ensuring your wood projects look professional and polished.
The Basics Of Staining
Choosing the right stain is essential for a great finish. Stains come in various types, such as oil-based and water-based. Oil-based stains offer deep colors, while water-based stains dry faster.
Thinning stains can improve their application. Thinning allows for better absorption into the wood. It can also help achieve a smoother finish. Use mineral spirits for oil-based stains and water for water-based stains.
| Stain Type | Thinning Agent | Benefits |
|---|---|---|
| Oil-based | Mineral Spirits | Deeper color, better flow |
| Water-based | Water | Faster drying, easy cleanup |
Tools And Materials Needed
To thin stain, gather the right tools and materials. Essential tools include:
- Stir stick for mixing
- Measuring cup for accuracy
- Clean cloth for application
- Brush or sponge for even spreading
Selecting the right thinner is crucial. Common options are:
- Mineral spirits for oil-based stains
- Water for water-based stains
Always read the manufacturer’s instructions. This ensures the best results for your project.
Preparing Your Workspace
To create a safe workspace, choose a well-ventilated area. Open windows and doors to allow fresh air in. Wear a mask to protect your lungs from fumes. Use gloves to keep your skin safe. Set up a drop cloth to protect surfaces from spills.
Gather all necessary materials before starting. You will need thinner, stain, brushes, and rags. Keep everything within reach to avoid accidents. Organize your materials in a clear space. This helps you work faster and safer.
Prepping The Surface
Start by cleaning the surface thoroughly. Use soap and water to remove dirt. Allow it to dry completely before applying any stain.
Next, sand the surface for smoothness. This helps the stain adhere better. Use fine-grit sandpaper for best results. Sand in the direction of the wood grain.
After sanding, wipe off the dust. A clean surface ensures an even finish. Use a tack cloth or a damp rag.
Mixing The Perfect Ratio
Mixing the right thinner to stain ratio is essential for the best results. A common ratio is 1:4, which means one part thinner and four parts stain. Adjusting this ratio helps achieve the desired consistency.
Testing the mixture is important. Take a small amount of the stain and mix it with thinner. Apply it to a scrap piece of wood. This test shows how the stain looks when applied.
| Ratio | Thinner (parts) | Stain (parts) |
|---|---|---|
| 1:4 | 1 | 4 |
| 1:3 | 1 | 3 |
| 1:2 | 1 | 2 |
Application Techniques
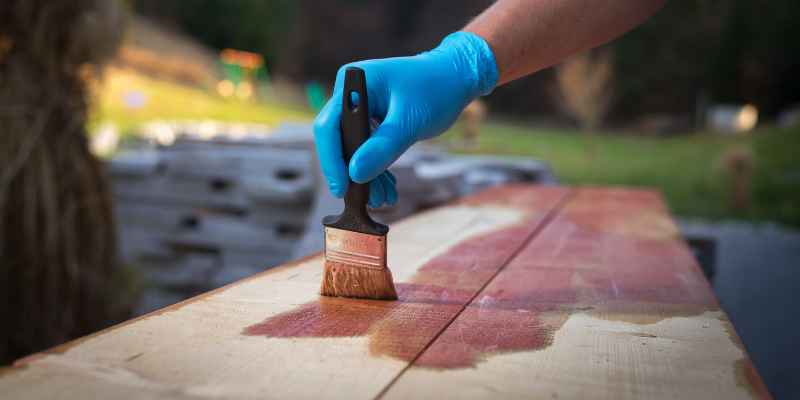
Choosing between a brush and a rag can affect your stain results. A brush allows for better control and coverage, especially in tight spots. However, it may leave streaks if not used carefully. Rags are great for quick application and can create a smooth finish. They also help to absorb excess stain, reducing the risk of pooling.
Applying an even coat is essential for a professional look. Start with a thin layer and allow it to dry. Use long, smooth strokes with your brush or rag. Always work in the direction of the wood grain. This helps to avoid visible lines and ensures uniform color. Remember to check for any drips and smooth them out quickly.
Troubleshooting Common Issues
Dealing with runs and sags in stain can be tricky. Start by applying thin coats. This helps prevent excess stain from pooling. Use a brush or a rag to spread the stain evenly. Check for drips and wipe them away right away.
Adjusting stain density is important. Mix the stain with solvent or water to thin it. Test the mixture on a small area first. This ensures the color remains true. Keep the stain smooth and consistent for the best results.
Final Touches And Protection
After staining, applying a top coat is essential. This layer protects the wood from damage. It also enhances the beauty of the stain. Choose a high-quality sealant for the best results.
Use a brush or roller for an even application. Allow the first coat to dry completely. Sand lightly before applying a second coat. This ensures a smooth finish.
| Long-Term Maintenance Tips |
|---|
| Regularly clean surfaces with a damp cloth. |
| Avoid harsh chemicals that can damage the finish. |
| Reapply the top coat every few years. |
| Keep furniture out of direct sunlight. |
Frequently Asked Questions
How Do You Thin Wood Stain Effectively?
Thinning wood stain is crucial for better application. You can effectively thin it using mineral spirits or water, depending on the stain type. Start with a small amount, usually one part thinner to three parts stain. Mix well and test on scrap wood to ensure desired consistency.
What Can I Use To Thin Stain?
You can use mineral spirits, paint thinner, or water. The choice depends on whether you’re using an oil-based or water-based stain. For oil-based stains, mineral spirits work best. For water-based stains, simply use water. Always check the manufacturer’s instructions for specific recommendations.
Why Should I Thin My Stain?
Thinning your stain enhances its application and absorption. A thinner stain provides a smoother finish and reduces the risk of blotchiness. It also allows for deeper penetration into the wood, highlighting its natural grain. Ultimately, this ensures a more professional-looking result.
Can I Use Water To Thin Oil-based Stain?
No, water should not be used to thin oil-based stains. Instead, use mineral spirits or paint thinner for oil-based products. Water can cause the stain to separate and affect its performance. Always opt for the recommended thinner specified by the manufacturer for best results.
Conclusion
Thinning stain can enhance your woodworking projects significantly. It allows for better penetration and an even finish. Always test your mixture on a scrap piece first. This ensures you achieve the desired effect. With the right technique, your stained pieces will look professional and polished.
Happy staining!