Can You Stain Wood Without Sanding? Gel Stain & Deglosser Guide
You can stain wood without sanding, but only if you change your approach along with your prep. Traditional penetrating stain relies on open wood pores to soak in evenly, so on an unsanded, glossy, or previously finished surface it usually goes on blotchy. Gel stain and a liquid deglosser sidestep that problem in different ways, and each has a real limit worth knowing before you start. Here’s what actually works, what to expect from the result, and when skipping sanding just isn’t worth it.
The Short Answer: Yes, With the Right Stain
Gel stain is the product that makes this possible. Unlike a liquid oil- or water-based stain, which needs open pores to penetrate the wood, gel stain is thick enough to sit on top of the surface almost like a thin paint. That means it doesn’t depend on sanding to open the grain — it just needs the surface clean, dry, and not actively glossy or greasy. A light scuff with a liquid deglosser gets a sealed or painted surface ready for it in about fifteen minutes, no sandpaper involved.
Best Gel Stain for Skipping Sanding
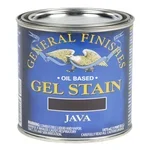 |
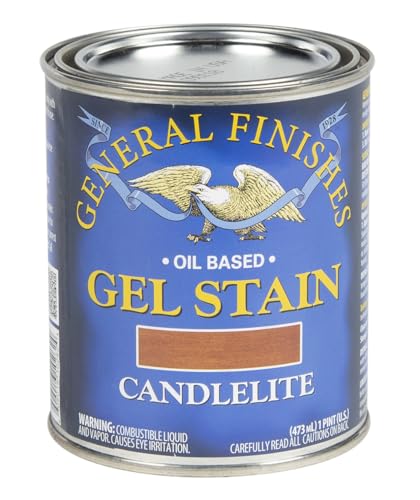
General Finishes Oil Base Gel Stain, Java, 1 Pint – $39.95 The thick, surface-sitting formula this whole method depends on – built to grab a cleaned or deglossed surface without sanding it first.
|
Why Sanding Is Still the Default Advice
Most guides tell you to sand before staining, and for bare wood with a traditional penetrating stain, that advice is correct. Sanding opens the wood’s pores so the stain can soak in evenly; skip it and a liquid stain pools in some spots and skims over others, leaving the blotchy result everyone’s trying to avoid. If you’re staining bare wood and you have the time, sanding first is genuinely the more reliable route, and our full sanding-before-staining grit guide walks through exactly which grit to use for softwood, hardwood, and previously stained pieces. This page is for the specific situations where sanding isn’t practical or isn’t necessary in the first place – a quick touch-up, a piece you don’t want to strip down, or a surface that’s already sealed.
Gel Stain vs. Traditional Stain on Unsanded Wood
The difference comes down to how each product gets its color onto the wood. Oil- and water-based penetrating stains are thin liquids that need to travel into the wood’s cell structure; mill glaze, an existing finish, or tight unsanded grain all block that path and cause uneven absorption. Gel stain is formulated thicker – closer to a soft paste – so it doesn’t rely on penetration at all. You wipe it on, let it sit briefly, and wipe off the excess, and the color builds on the surface itself. That’s also why gel stain is the standard choice for restaining kitchen cabinets and furniture without stripping the old finish first: it grabs onto a sealed or lightly scuffed surface that a liquid stain would simply slide off.
The tradeoff is texture and depth. A penetrating stain on properly sanded wood shows the grain through translucent color, because you’re seeing color inside the wood fibers. Gel stain sitting on the surface looks slightly more uniform and less transparent – closer to a light stain-and-seal combination than a true in-grain stain. On new, bare wood most people can tell the difference up close. On furniture, cabinets, or trim being restained over an existing finish, it’s much less noticeable, which is exactly where gel stain earns its reputation as the “no-sanding” option.
Using a Liquid Deglosser Instead of Sandpaper
A liquid deglosser (sold as a “liquid sandpaper” or sander deglosser) is a chemical wipe-on solution that softens and roughens a glossy finish just enough for a new coat to bond to it. It doesn’t strip the old finish off the way a paint stripper does – it just breaks the surface tension of the gloss. Wipe it on with a rag or synthetic scrub pad, let it work for roughly ten to fifteen minutes per the label, then wipe the surface clean with a dry cloth before staining. It’s most useful on painted or previously varnished pieces you’re not willing to sand back to bare wood, and it pairs specifically well with gel stain, since gel stain needs that same “not glossy, not greasy” surface rather than fully open pores.
Deglosser is a poor substitute for sanding on bare, unfinished wood – there’s no gloss to break down, and it won’t open the pores a penetrating stain needs. Save it for surfaces that already have a finish on them: previously stained or varnished furniture, painted trim, or cabinet doors.
Step-by-Step: Staining Without Sanding
- Clean the surface. Wipe away dust, wax, and grease with a mild degreaser or a damp cloth, then let it dry fully. Any residue left behind will show up as a dull or blotchy patch under gel stain.
- Deglos if the surface is glossy or previously finished. Apply a liquid deglosser with a rag or scrub pad, let it sit for the time listed on the label (usually 10–15 minutes), then wipe dry. Skip this step on bare, unfinished wood – there’s nothing to deglos.
- Test in a hidden spot. Apply a small amount of gel stain to an inconspicuous area first. Confirm the color and the way it grabs the surface before committing to the whole piece.
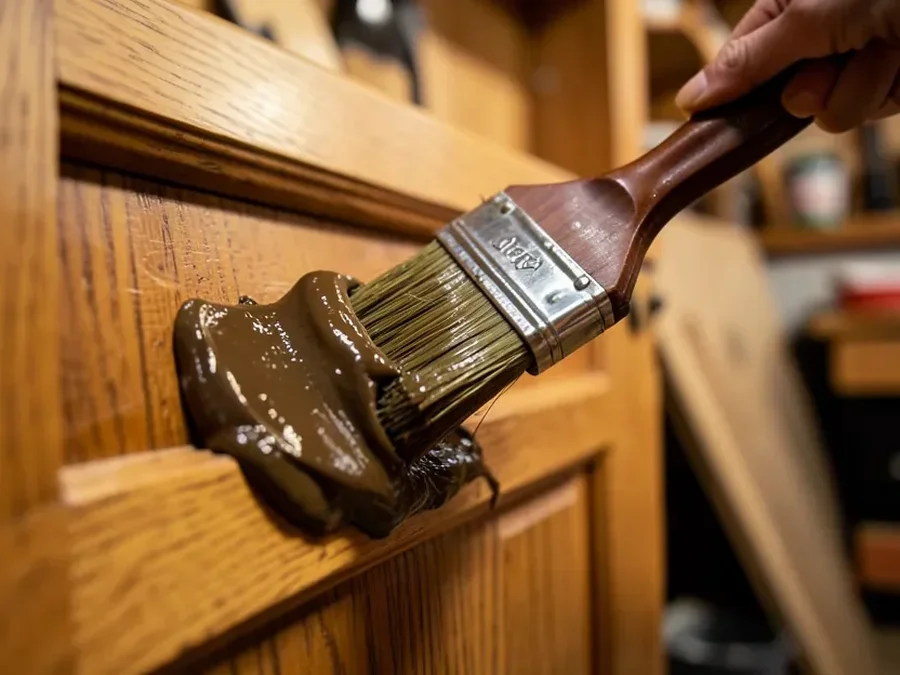
- Apply the gel stain with a rag or foam brush. Work in the direction of the grain, apply a thin, even layer, and don’t flood the surface – gel stain builds color with each coat rather than soaking in on the first pass.
- Wipe off the excess within a few minutes. Leaving gel stain to sit too long before wiping causes a sticky, uneven film instead of a smooth finish. A clean, dry rag worked with the grain removes the excess and levels the color.
- Let it dry fully, then add a second coat if needed. Gel stain typically needs 24 hours between coats. A second coat deepens the color if the first pass looks too light.
- Seal it. Gel stain still needs a topcoat – a wipe-on poly or water-based polyurethane – to protect the color once it’s fully cured.
Where This Shortcut Falls Short
Be honest with yourself about what you’re trading for the time saved. A surface prepped with a deglosser and finished in gel stain will generally look and wear slightly worse than one that was properly sanded: the color sits closer to the surface, so it’s more prone to showing wear patterns and scuffs over years of use, and it’s less forgiving of an uneven application since there’s no wood grain underneath to help hide small inconsistencies. On large flat surfaces like a tabletop, that difference is more visible than it is on carved furniture, cabinet doors, or trim, where the smaller, broken-up surfaces make minor unevenness much harder to spot.
If the piece gets heavy daily use – a dining table, a stair handrail, a kitchen countertop – the extra thirty minutes of sanding is worth it for the added durability. If you’re refreshing furniture that isn’t taking that kind of abuse, or you’re specifically trying to avoid stripping an existing finish down to bare wood, gel stain over a degreased or deglossed surface is a legitimate, commonly used method, not just a corner-cutting workaround.
Frequently Asked Questions
Can you stain wood without sanding it first?
Yes, if you use gel stain instead of a traditional penetrating stain. Gel stain sits on the surface rather than soaking into the wood’s pores, so it doesn’t need sanding to work – it just needs a clean surface that isn’t actively glossy or greasy.
Does a liquid deglosser really replace sanding?
It replaces sanding for the specific job of breaking down a glossy finish so a new coat can bond – it does not open wood pores the way sanding does, so it isn’t a substitute for sanding on bare, unfinished wood.
Will skipping sanding make the stain look worse?
With a traditional liquid stain, yes – expect blotchy, uneven color on unsanded wood. With gel stain on a properly cleaned and deglossed surface, the result is close to a sanded finish, though slightly more surface-level and less transparent than color that has soaked into open grain.
Is gel stain as durable as a sanded, penetrating stain finish?
It holds up well under normal use once sealed with a topcoat, but it’s slightly more prone to showing wear on high-traffic surfaces since the color sits closer to the top of the wood rather than down in the grain. For tabletops, stair rails, or anything that takes daily abuse, a sanded surface and penetrating stain will outlast it.
Do I still need to seal wood after staining without sanding?
Yes. Gel stain and deglosser-prepped surfaces both still need a topcoat, such as a wipe-on or water-based polyurethane, once the stain has fully cured. Skipping the topcoat leaves the color unprotected regardless of how it was applied.
Bottom Line
You can stain wood without sanding, but “without sanding” really means “with gel stain and, if needed, a liquid deglosser instead of sandpaper” – not simply skipping prep altogether and using whatever stain was already in the garage. For bare wood you have time to prep properly, sanding and a traditional stain still gives the more even, more durable result. For furniture, cabinets, and trim you don’t want to strip down, gel stain over a cleaned and deglossed surface is a proven shortcut, not a compromise you have to apologize for.
Sponsored / affiliate links. As an Amazon Associate I earn from qualifying purchases. I may earn additional commission from eligible campaigns.