How to Treat Cedar Wood Properly
Many people love cedar wood for its beautiful look and natural insect-repelling qualities. But when it comes to making it last even longer or giving it a different finish, beginners often wonder, how do you treat cedar wood. It might seem tricky at first with all the options out there.
This guide will make it super simple. We’ll walk through each step so you can feel confident taking care of your cedar projects. Get ready to learn easy ways to protect and beautify your wood, and see what happens when you give it the right care.
Understanding Cedar Wood Properties
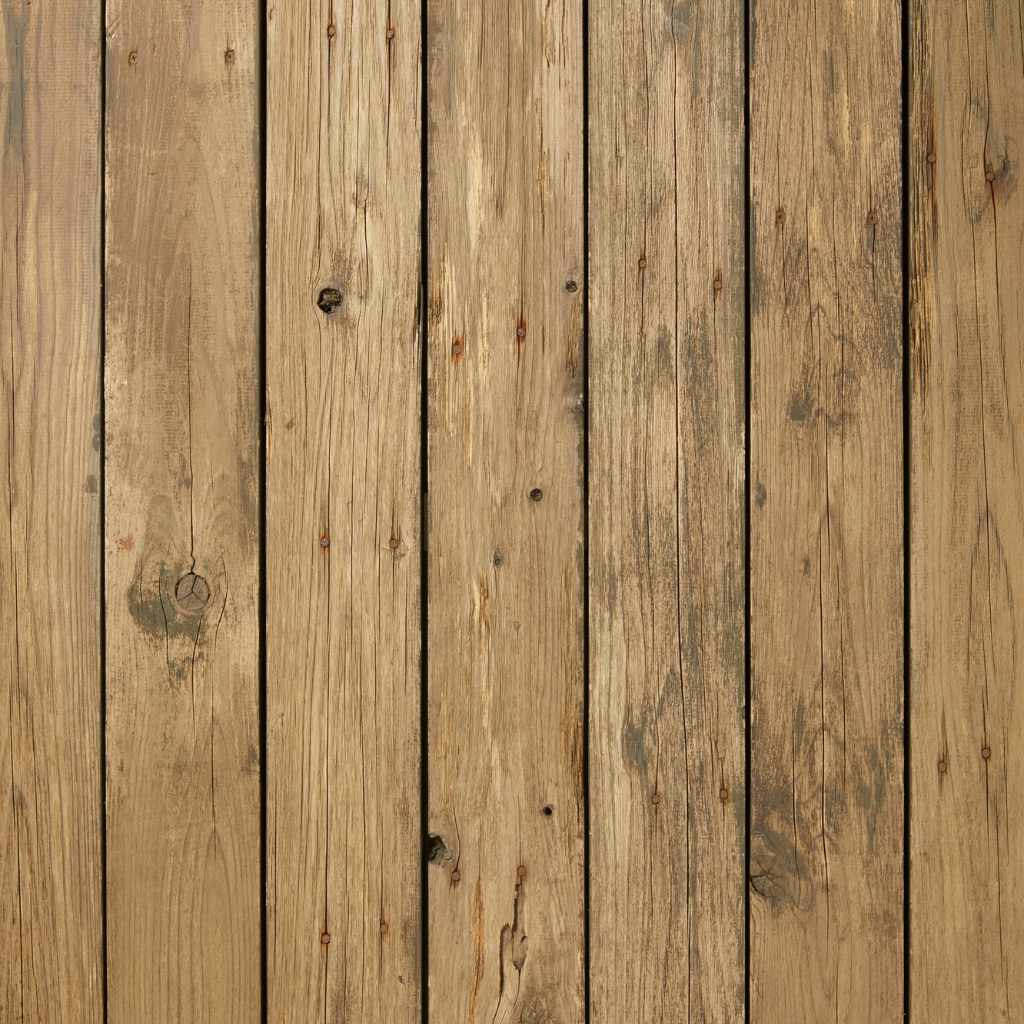
Cedar wood is special because it naturally contains oils. These oils make it resistant to rot, decay, and insects like moths and termites. This is why it’s a popular choice for outdoor furniture, decks, fences, and even cedar chests for storing clothes.
However, these same natural oils can sometimes affect how finishes, like stains or sealers, soak into the wood. This is a key reason why knowing how do you treat cedar wood is important. Without the right preparation, your finish might not stick well or could look uneven.
This section will explain what makes cedar unique and why this matters for treatment.
Natural Resilience Of Cedar
Cedar wood is naturally tough. Its aromatic oils are like a built-in shield against bugs and moisture. This means cedar projects can often stand up well on their own, especially outdoors.
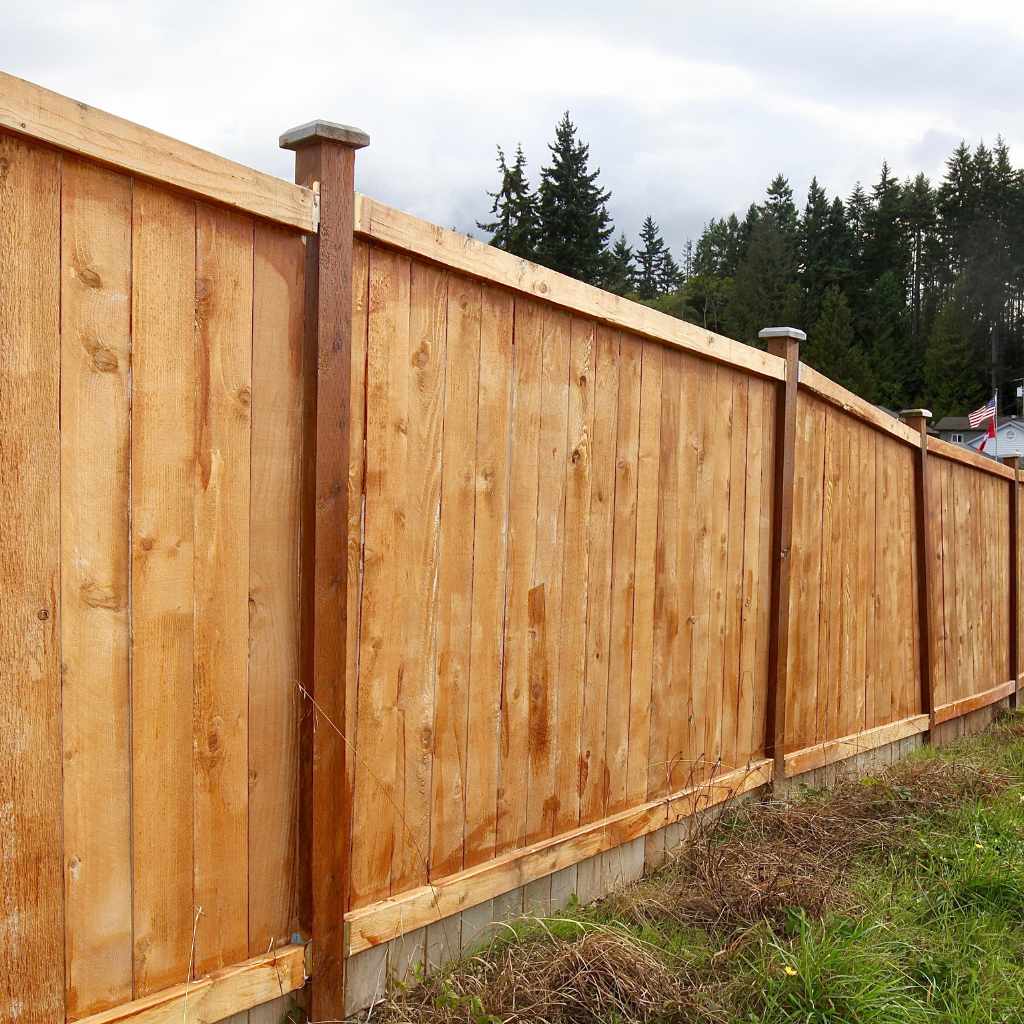
Think of a beautiful cedar fence that ages gracefully to a silvery gray. This natural aging process is a form of ‘treatment’ by the elements, showcasing cedar’s durability.
These oils are compounds called extractives. They are released slowly over time, providing protection. This makes cedar a fantastic material for things that need to withstand the weather.
Many people choose cedar precisely because it requires less chemical treatment than other woods. Its inherent properties mean you might not need as many products to keep it looking good for a long time.
The Role Of Cedar Oils
The oils in cedar are what give it that distinctive scent and its natural defenses. These oils are volatile, meaning they can evaporate over time, especially when exposed to sun and heat. This evaporation is part of why cedar’s natural protection can decrease.
When you decide to apply a finish, these oils can also create a barrier, making it harder for the finish to penetrate the wood grain. This is a common challenge when learning how do you treat cedar wood for aesthetic purposes.
For instance, a stain might bead up on the surface of un-prepped cedar rather than soaking in evenly. Some sealers might not adhere as well as they would on wood without these natural oils. Understanding this interaction is key.
It guides the choices you make about cleaning, sanding, and the type of product you use. This knowledge helps ensure your finish bonds properly and looks its best.
Preparing Cedar Wood For Treatment
Before you apply any kind of finish, preparing the cedar wood properly is a very important step. This might involve cleaning off dirt and old finishes, and sometimes sanding. Proper preparation ensures that whatever you put on the wood will stick well and last longer.
It also helps create a smooth, even surface for a beautiful final look. Skipping this can lead to blotchy finishes or peeling later on. Let’s look at the easy steps to get your cedar ready.
Cleaning Cedar Wood
Cleaning is the first practical step when you’re figuring out how do you treat cedar wood. Over time, cedar can collect dirt, mold, mildew, and sometimes old finishes. These things can prevent new finishes from adhering properly.
A good cleaning will remove these surface contaminants. For light dirt, a simple wash with mild soap and water can do the trick. Use a soft brush or cloth to gently scrub the surface.
For tougher grime, mold, or mildew, a specialized wood cleaner or a diluted bleach solution can be effective. Always test any cleaner in an inconspicuous spot first to ensure it doesn’t damage the wood or cause discoloration. Rinse the wood thoroughly with clean water after cleaning to remove all soap or cleaner residue.
Allow the wood to dry completely, which might take a day or two depending on the weather, before moving on to sanding or applying a finish. This drying time is crucial for the treatment to be effective.
Sanding Cedar Wood Surfaces
Sanding cedar helps create a smooth surface for finishes and can also help open up the wood grain slightly to accept stains or sealers better. It’s a key part of learning how do you treat cedar wood for a polished look. Start with a medium-grit sandpaper, perhaps 100 or 120 grit, to remove any rough spots or imperfections.
Always sand in the direction of the wood grain. This prevents visible scratch marks.
After the initial sanding, move to a finer grit sandpaper, like 150 or 220 grit. This will smooth the surface further, making it ready for finishing. If you are planning to use a stain, sanding with finer grits might make the wood absorb the stain more evenly.
For surfaces that will be painted or have a clear sealant, a smooth finish is essential for a professional appearance. After sanding, wipe away all dust with a clean cloth or a vacuum attachment.
Removing Old Finishes
If your cedar wood already has an old stain, paint, or sealer, you’ll likely need to remove it before applying a new one. Old finishes can peel, crack, or prevent new products from adhering properly. This removal process is vital for a successful outcome when you are thinking about how do you treat cedar wood that has been previously treated.
You can use a chemical stripper, which you apply to the surface, let it work, and then scrape or wipe away the old finish.
Another option is sanding. If the old finish is thin, aggressive sanding with a coarser grit sandpaper might remove it. However, be careful not to remove too much of the wood itself.
Power tools like orbital sanders can speed up this process, but they require a steady hand to avoid damaging the wood. After removing the old finish, you’ll still need to clean and possibly sand the wood again to prepare it for the new treatment.
Choosing The Right Treatment For Cedar
Once your cedar wood is clean and smooth, the next big question is what kind of treatment to use. There are many options, each offering different levels of protection and appearance. Some treatments aim to preserve the natural look of cedar, while others change its color or offer maximum protection.
Picking the right one depends on where the wood will be used and what look you are going for. Understanding these choices will help you make the best decision.
Sealers And Water Repellents
If you want to keep the natural color of your cedar wood and protect it from moisture and UV rays, a clear sealer or water repellent is a great choice. These products are designed to penetrate the wood and create a barrier against water absorption. Water damage can cause wood to swell, shrink, and eventually crack.
UV rays from the sun can also cause the wood to fade and turn gray.
Sealers typically contain UV inhibitors that help prevent the wood from degrading in sunlight. They are relatively easy to apply, usually with a brush, roller, or sprayer. Most sealers require reapplication every one to two years, depending on exposure to the elements.
They don’t typically change the color of the wood much, though some might give it a slightly ‘wetted’ look. This is a common way to answer how do you treat cedar wood when you prefer its natural beauty.
It’s important to choose a product that is specifically formulated for exterior wood. Some sealers are oil-based, while others are water-based. Oil-based sealers tend to penetrate deeper and offer longer-lasting protection but can sometimes yellow over time.
Water-based sealers are easier to clean up and are generally more environmentally friendly, but might need more frequent reapplication.
Stains For Cedar Wood
Stains are a fantastic way to change the color of cedar wood while still allowing some of its natural grain to show through. They come in a wide range of colors, from light tans to deep browns and even vibrant hues. Stains not only add color but also provide protection against UV rays and moisture, similar to sealers.
Learning how do you treat cedar wood with stain involves understanding the different types available.
There are transparent, semi-transparent, and solid stains. Transparent stains add a hint of color and allow the wood grain to be clearly visible. Semi-transparent stains offer more color depth and hide some of the grain, while still showing texture.
Solid stains are like thin paint; they completely cover the wood grain and look similar to paint but are formulated to be more flexible and allow the wood to breathe.
When staining cedar, it’s crucial to use a quality exterior stain. Apply it evenly, working with the grain. If you’re using a semi-transparent or transparent stain on wood that hasn’t been treated before, you might notice some blotchiness due to the natural oils.
This is why proper preparation, including light sanding, is so important. Some people even apply a pre-stain wood conditioner to ensure a more uniform color absorption, especially on softer woods like cedar.
Oils And Waxes For Natural Look
For those who truly want to preserve the natural, organic feel of cedar wood, penetrating oils and waxes are excellent options. These treatments soak into the wood fibers, enhancing the natural color and providing protection from within. They don’t form a surface film like sealers or paints, meaning they won’t peel or flake over time.
This approach is popular for anyone asking how do you treat cedar wood for a truly natural aesthetic.
Tung oil and linseed oil are popular choices. They nourish the wood, bringing out its rich tones and offering some water resistance. Teak oil is another option, often containing a blend of oils and resins that provide good protection.
Waxes can be applied over oils or on their own to add an extra layer of protection and a smooth, satiny finish.
The main benefit of oils is that they are easy to reapply. As the oil wears away over time, you can simply clean the wood and apply another coat. This maintenance is much simpler than stripping and refinishing.
However, oils offer less protection against UV damage than some other finishes, so cedar treated with oil may still turn gray over time if exposed to direct sunlight. Some woodworkers prefer this natural graying process.
Painting Cedar Wood
While many prefer to let cedar’s natural beauty shine, painting is also an option. Painting provides the highest level of protection against UV rays and moisture. It can completely change the look of your cedar project, allowing you to match it to your home’s exterior or create a bold statement.
If you’re looking for a durable, opaque finish, painting is a strong contender when considering how do you treat cedar wood.
The key to successful painting on cedar is proper preparation. You’ll need to clean and sand the wood thoroughly. Using a high-quality exterior primer is essential.
A good primer will adhere well to the cedar, block any stains from the natural oils, and provide a uniform base for your paint. Choose a primer specifically designed for wood.
After priming, apply two or more coats of exterior-grade paint. Latex-based paints are generally a good choice for cedar because they are flexible and can expand and contract with the wood as temperatures change, reducing the risk of cracking. Ensure you paint in the direction of the wood grain.
Avoid applying paint too thickly, as this can trap moisture. Regular cleaning of painted cedar will help maintain its appearance for years.
Application Techniques For Cedar Treatments
Applying the chosen treatment correctly is just as important as selecting the right product. The method of application can affect how well the treatment penetrates, how evenly it looks, and how long it lasts. Whether you’re brushing, rolling, or spraying, taking your time and following best practices will yield the best results.
This is the practical side of knowing how do you treat cedar wood.
Brushing Techniques
Brushing is a very common and effective way to apply stains, sealers, oils, and even some paints to cedar wood. A good quality brush allows for precise application, especially on detailed areas or edges. Start by applying the product generously but avoid letting it pool.
Work in long, even strokes, always following the direction of the wood grain.
For stains and sealers, it’s often recommended to ‘back-brush’ or ‘back-wipe’. This means applying the product and then immediately going over it with a clean brush or rag to remove any excess. This helps prevent lap marks, which are lines that appear where one stroke of the brush ends and another begins, and ensures an even finish.
If you are using an oil-based product, wiping off excess is particularly important to prevent a sticky surface.
When painting, multiple thin coats are always better than one thick coat. This allows for better adhesion and a smoother finish. Ensure you cover all surfaces, including ends and edges, as these are often the most vulnerable to moisture.
Let each coat dry according to the manufacturer’s instructions before applying the next.
Spraying For Efficiency
Using a sprayer can significantly speed up the process of treating large areas of cedar wood, like decks or fences. There are several types of sprayers, including pump sprayers for simple jobs and airless sprayers for more professional results. When spraying, it’s crucial to maintain a consistent distance from the wood surface to avoid uneven application or drips.
Always test your spray pattern on a scrap piece of wood before starting on your project. Adjust the nozzle and pressure as needed. Overlap each pass by about 50% to ensure complete coverage without missing any spots.
If you’re spraying a stain or sealer, back-brushing or back-wiping might still be necessary to ensure the product penetrates the wood properly and to remove any excess that could lead to drips.
Safety is paramount when spraying. Wear appropriate personal protective equipment, including a respirator, safety glasses, and gloves, especially if you are using solvent-based products. Protect surrounding areas, such as plants, siding, and windows, with drop cloths, as overspray can travel.
This method is great for efficiency when tackling large cedar projects.
Using Rollers And Pads
Rollers and applicators can be useful for certain cedar wood treatments, particularly for large, flat surfaces like decks or tabletops. A roller can apply stains and sealers quickly and evenly. Choose a roller cover with a nap thickness appropriate for the product you are using – shorter naps are generally better for stains and sealers, while longer naps might be suitable for thicker paints.
Applicator pads, often made of foam or synthetic fibers, are another option. They can offer good control and are easy to clean. Like with brushing, work with the grain and avoid overloading the applicator.
For stains, wiping off excess product after application is still a good practice to ensure an even look.
For any of these application methods, proper ventilation and drying time are essential. Ensure the area is well-ventilated, and allow ample time for the treatment to cure before allowing the wood to be used or exposed to the elements. This careful application is part of the answer to how do you treat cedar wood effectively.
Maintaining Treated Cedar Wood
Even the best treatment needs upkeep to keep your cedar wood looking its best and performing well. Regular maintenance will extend the life of your project and prevent minor issues from becoming major problems. Thinking about how to maintain treated cedar is the final, ongoing part of learning how do you treat cedar wood.
Periodic Inspection And Cleaning
Make it a habit to inspect your cedar wood projects at least once or twice a year. Look for any signs of wear, such as fading, cracking, peeling, or the early signs of mold or mildew. Gentle cleaning with a soft brush and mild soap and water can remove dirt, pollen, and other debris that can accumulate over time.
This prevents these substances from breaking down the finish or the wood itself.
Rinse thoroughly after cleaning and allow the wood to dry completely. Pay special attention to areas that are prone to standing water or constant moisture, as these are more likely to develop problems. Promptly addressing any issues you find during your inspection can save you a lot of work and expense down the line.
Reapplication Of Finishes
Most exterior finishes for cedar wood will need reapplication over time. The frequency depends on the type of product used, the climate, and the amount of exposure the wood receives. For instance, a clear water repellent might need to be reapplied every year or two, while a solid stain or paint might last longer.
Before reapplying, clean the surface and lightly sand any rough spots if necessary. If the old finish is peeling or flaking, you may need to remove it entirely before reapplying. Always check the product manufacturer’s recommendations for reapplication intervals and procedures.
This ensures you maintain the protective qualities of the finish.
Addressing Fading And Graying
Cedar wood naturally turns gray when exposed to sunlight, a process called oxidation. This is a cosmetic change and doesn’t necessarily mean the wood is deteriorating. If you prefer the original color or a stained color, you’ll need to reapply a finish with UV protection.
This process is essential for maintaining the appearance you desire when you ask how do you treat cedar wood to keep its color.
If the wood has already turned gray, you can often restore its original color. Products specifically designed to remove graying and brighten wood are available. These often contain oxalic acid, which helps lift the graying pigments.
After using a brightener, you’ll typically need to rinse the wood thoroughly and allow it to dry completely before applying a new protective finish to prevent future graying.
Real-Life Examples And Scenarios
Seeing how others have treated cedar wood can offer great practical insight. Let’s look at a couple of common situations and how treating cedar wood makes a difference.
Case Study 1 A Cedar Deck In The Pacific Northwest
A homeowner in Seattle wanted to protect their new cedar deck from the region’s frequent rain and dampness. They decided on a semi-transparent, water-based stain that offered UV protection. First, they cleaned the new deck with a mild wood cleaner and a scrub brush to remove any mill glaze.
After letting it dry for two days, they applied two coats of the semi-transparent stain using a stain pad applicator, working in sections to ensure an even finish and back-wiping any excess.
The result was a beautiful deck with a warm, slightly deepened cedar tone. The semi-transparent nature of the stain allowed the natural wood grain to remain visible. After two years, the homeowner noticed some slight fading in high-traffic areas.
They cleaned the deck and applied a single maintenance coat of the same stain, which refreshed the color and renewed the water repellency. This practical application shows how do you treat cedar wood for longevity and appearance in challenging climates.
Scenario 1 Building A Cedar Planter Box
Imagine you’re building a planter box for your garden. You’ve chosen beautiful cedar for its rot resistance. You want it to last a long time and look good.
- Clean the cedar boards thoroughly to remove any dust or debris from cutting.
- Lightly sand the surfaces with 150-grit sandpaper to create a smooth finish.
- Apply a penetrating, clear exterior wood sealer. Use a brush and apply it in the direction of the grain.
- Wipe off any excess sealer that remains on the surface after about 15 minutes.
- Allow the planter box to dry completely for at least 24 hours before filling it with soil and plants.
This simple approach ensures the cedar will resist water from the soil and weather, extending the life of your planter.
Case Study 2 Cedar Shingles On A Gazebo
A property owner installed cedar shingles on a gazebo roof. They wanted to maintain the natural silver-gray patina that cedar develops over time. They chose not to apply any stain or sealer, allowing the wood to weather naturally.
They did, however, ensure the roof was properly installed with adequate ventilation to prevent moisture buildup.
Over the first few years, the shingles gradually turned a beautiful, even shade of gray. They periodically cleaned the roof using just water and a soft brush to remove accumulated moss and debris, especially in shaded areas. This approach demonstrated a philosophy of minimal intervention, highlighting that sometimes, the best way to treat cedar wood is to let its natural properties shine.
This showcases that understanding how do you treat cedar wood also involves knowing when to do very little.
Scenario 2 Refinishing An Old Cedar Adirondack Chair
You have an old cedar Adirondack chair that has seen better days. It’s faded and has some surface checks.
- Scrape off any loose or peeling old finish.
- Sand the entire chair thoroughly, starting with 100-grit sandpaper and finishing with 220-grit to smooth all surfaces.
- Clean the chair with a mild detergent and water, then rinse well and let it dry completely.
- Apply a high-quality exterior wood oil, working it into the grain with a brush or rag.
- After allowing the oil to penetrate for about 20 minutes, wipe off any excess.
- Once dry, apply a second coat of oil for added protection and richness of color.
This process will revive the chair’s appearance and provide a good level of protection.
Frequently Asked Questions
Question: Do I need to treat cedar wood if it’s used indoors
Answer: Generally, cedar wood used indoors does not require the same level of treatment as outdoor wood. Its natural resistance to insects is still beneficial, and it adds a pleasant aroma. However, if you want to change its color or add a protective layer against scratches or light moisture, you can use a clear sealer, a light stain, or even a wax finish.
Question: How often should I reapply a sealer to my cedar deck
Answer: Most clear sealers and water repellents for cedar decks need reapplication every 1 to 2 years. This depends on your local climate and how much direct sunlight and rain the deck receives. It’s best to do a quick inspection each spring to see if the water beads up on the surface; if it soaks in, it’s time to reapply.
Question: Can I paint over a stained cedar surface
Answer: Yes, you can paint over a stained cedar surface, but proper preparation is key. You will need to clean the stained surface thoroughly and then lightly sand it to create a surface for the primer to adhere to. Applying a high-quality exterior wood primer is essential before painting to ensure good adhesion and coverage.
Question: Will cedar wood rot if left untreated
Answer: Cedar wood is naturally resistant to rot and decay due to its inherent oils. This means it can withstand exposure to the elements for a significant amount of time without treatment, especially compared to other types of wood. However, ‘untreated’ doesn’t mean it will last forever without any wear.
Over time, it will gray, and eventually, its resistance to rot might diminish, especially in very damp or harsh conditions.
Question: What is the best way to clean mold and mildew off cedar
Answer: For mold and mildew on cedar, you can use a solution of 1 part bleach to 3 parts water, or a specialized wood cleaner. Apply the solution with a soft brush, scrub gently, and let it sit for about 15-20 minutes. Rinse the area thoroughly with clean water and allow the wood to dry completely before applying any new finish.
Final Thoughts
Figuring out how do you treat cedar wood doesn’t have to be complicated. By taking the time to prepare your wood properly, whether it’s cleaning off dirt or giving it a light sanding, you set yourself up for success. Choosing the right treatment, like a sealer to protect from moisture, a stain to add color, or oil for a natural look, depends on what you want your cedar to achieve.
Applying these products carefully, using brushes, rollers, or sprayers, ensures an even and lasting finish. Don’t forget that a little bit of regular maintenance, like cleaning and periodic reapplication of your chosen finish, will keep your cedar looking great for years to come. Even if your cedar turns gray, there are ways to bring back its original color or simply embrace its natural aging process.
With these simple steps, you can confidently care for your cedar projects, ensuring they remain beautiful and durable.