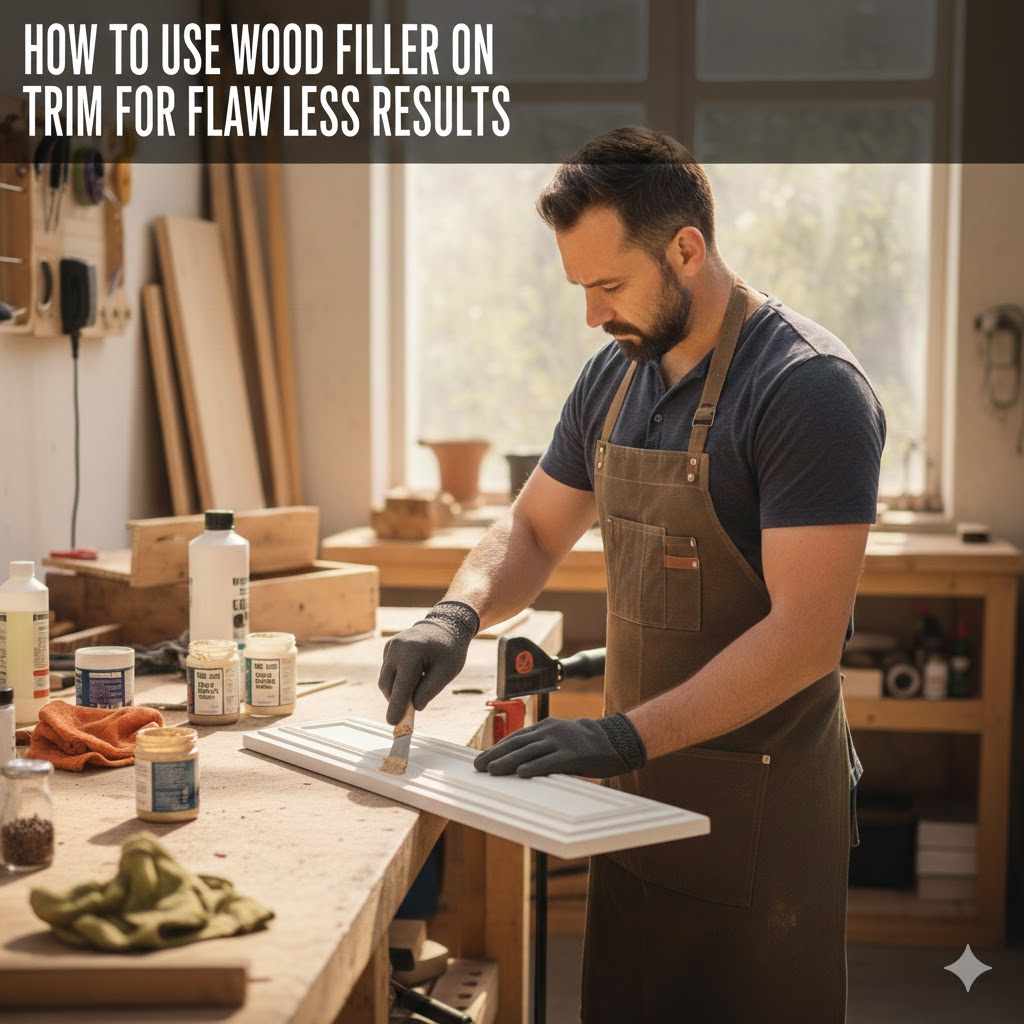
How to Use Wood Filler on Trim for Flawless Results
To use wood filler on trim, first clean the surface of dust and debris. Apply the filler with a putty knife, pressing it firmly into the hole or crack and overfilling slightly. Scrape off the excess, let it dry completely, then sand it smooth until it’s flush with the trim. Finally, clean away the dust before priming and painting for a perfect finish.
Do you ever look at your beautiful baseboards or window trim and cringe at the sight of nail holes, dents, or small gaps? It’s a common problem that can make an otherwise perfect room look unfinished. Many people feel intimidated by the thought of fixing it, worrying they might make it worse. But what if I told you there’s a simple solution that anyone can master?
You don’t need to be a professional woodworker to get flawless results. With the right product and a little guidance, you can make those imperfections disappear completely. In this guide, I’ll walk you through every step of using wood filler on your trim. We’ll cover choosing the right filler, applying it correctly, and getting that perfectly smooth finish you’ve been hoping for. Let’s get started!
What Exactly Is Wood Filler?
Think of wood filler as a special kind of dough for your woodwork. It’s a paste-like substance designed specifically to fill holes, cracks, dents, and other imperfections in wood surfaces. When you have nail holes from installation, small gouges from moving furniture, or gaps where trim pieces meet, wood filler is your go-to solution.
It works by filling the void and then hardening into a solid, sandable surface. Once it’s dry and sanded smooth, you can prime and paint it just like the rest of your trim. The goal is to make the repair completely invisible, creating a seamless, professional-looking finish. It’s an essential tool for any DIYer looking to give their home a polished, high-quality look.

Choosing the Right Wood Filler for Your Trim
Walking down the aisle at the hardware store, you’ll see a lot of different options for wood filler. It can be confusing, but picking the right one is crucial for getting great results. The type of filler you need depends on your specific project—whether you plan to paint or stain the trim, and if the trim is indoors or outdoors. Let’s break down the main types.
Water-Based vs. Solvent-Based Fillers
The first big choice is between water-based and solvent-based fillers. For most indoor trim projects, a water-based filler is the perfect choice for beginners.
- Water-Based Fillers: These are the most user-friendly. They have a low odor, dry relatively quickly, and clean up easily with just soap and water. They are ideal for filling nail holes and small cracks in trim that will be painted. They are also very easy to work with and smooth out.
- Solvent-Based Fillers: These are more heavy-duty. They are extremely durable and water-resistant, making them a good choice for exterior trim or high-moisture areas like bathrooms. However, they have a strong chemical smell, require mineral spirits for cleanup, and can be a bit trickier to work with. For most beginners working on interior baseboards or window casings, a water-based product is all you need.
Paintable vs. Stainable Fillers
This is a simple but important distinction. What are you going to do with the trim after you fill the holes?
- Paintable Filler: If you plan on painting your trim (which is the case for most baseboards and casings), a standard paintable wood filler is perfect. It’s designed to be sanded smooth and accept primer and paint beautifully, blending right in.
- Stainable Filler: If your trim is natural wood and you want to stain it, you need to use a “stainable” wood filler. These fillers contain wood fibers that allow them to absorb stain. Be aware, though, that even stainable fillers rarely absorb stain exactly like real wood. It’s always a good idea to test the filler and stain on a scrap piece of wood first to see how it will look.
Here is a simple table to help you decide:
| Filler Type | Best For | Pros | Cons |
|---|---|---|---|
| Water-Based | Indoor painted trim, beginners | Easy cleanup, low odor, dries fast | Less durable than solvent-based |
| Solvent-Based | Exterior trim, high-moisture areas | Very durable, water-resistant | Strong fumes, requires mineral spirits for cleanup |
| Stainable | Natural wood trim that will be stained | Can be stained to match wood | May not absorb stain perfectly |
| Epoxy-Based | Large structural repairs, rotted wood | Extremely strong and durable | More complex to mix and apply |
Gathering Your Tools and Materials
Having everything you need ready before you start will make the job go much faster and smoother. You don’t need a lot of fancy equipment—just a few simple tools will do the trick. Here’s a checklist of what to gather:
- Wood Filler: Choose the right type based on your project (likely a water-based, paintable filler for indoor trim).
- Putty Knife: A flexible putty knife, about 1.5 inches wide, is perfect for applying and smoothing the filler. A plastic one is less likely to scratch your trim.
- Sandpaper: You’ll need a couple of different grits. A medium grit (like 120-grit) for the initial sanding and a fine grit (like 220-grit) for the final smooth finish.
- Sanding Block: A simple cork or rubber block will help you sand evenly and avoid creating dips in the trim.
- Clean Rags or Tack Cloth: For cleaning the surface before you start and wiping away dust after sanding.
- Painter’s Tape: Optional, but helpful for protecting the wall or floor right next to the trim.
- Safety Gear: A dust mask is a good idea for when you are sanding.
- Primer & Paint: You’ll need primer to seal the filler and paint that matches your trim’s color and finish.
Step-by-Step Guide: Applying Wood Filler Like a Pro
Alright, you’ve chosen your filler and gathered your tools. Now comes the fun part! Follow these simple steps, and you’ll have those holes and dents filled in no time. The key is to be patient and not rush the process.
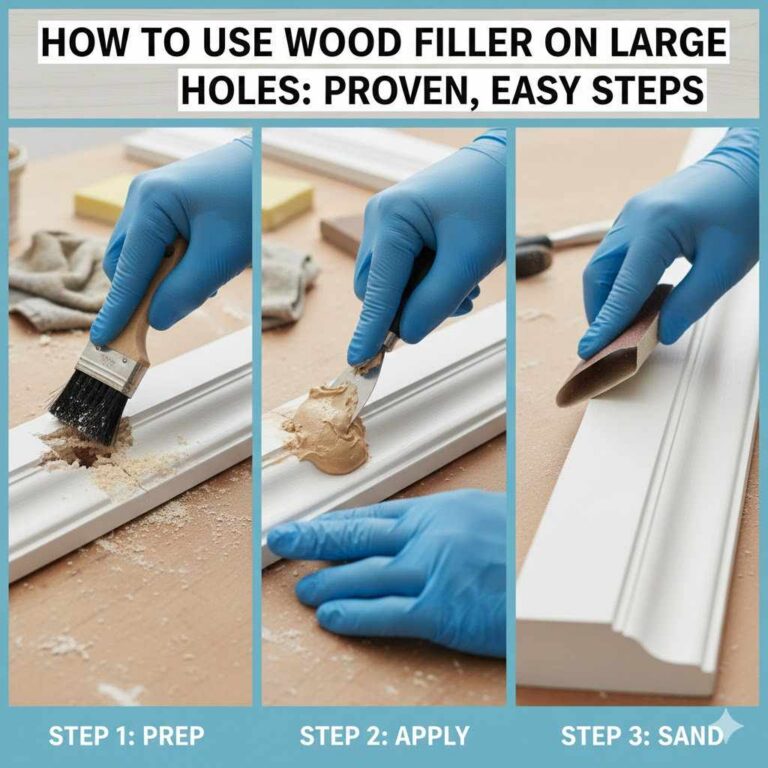
Step 1: Prepare the Surface
This is the most important step for a lasting repair. Wood filler won’t stick well to a dirty or dusty surface. Take a damp cloth and wipe down the area of the trim you plan to fill. Make sure to remove all dust, dirt, or grease. If you’re filling a hole with loose wood fibers, use the corner of your putty knife or a small tool to gently clean them out.
Let the area dry completely before you move on to the next step. A clean, dry surface ensures the filler will bond strongly to the wood.
Step 2: Apply the Wood Filler
Open your container of wood filler. Using the tip of your putty knife, scoop out a small amount—a little goes a long way. For a standard nail hole, a pea-sized amount is usually plenty.
Position the blade of the putty knife at a 45-degree angle to the trim and press the filler firmly into the hole or crack. The goal is to make sure the filler gets all the way to the bottom of the void. Make one or two firm passes over the hole to pack it in.
Here’s a key tip: Overfill the hole slightly. Most wood fillers shrink a little as they dry. By applying a bit extra so it mounds up just above the surface, you ensure that when it shrinks, it will still be level with or slightly above the trim. This gives you material to sand down for a perfectly flush finish.
Step 3: Scrape Away the Excess
Once the hole is filled, turn your putty knife so the blade is almost flat against the trim (about a 90-degree angle). Pull it cleanly across the filled area to scrape away the excess filler. This will leave you with a smooth, mounded patch.
Try to get it as neat as you can, but don’t worry about perfection. The sanding step will take care of any minor ridges or imperfections. The less excess you leave on the surrounding trim, the less sanding you’ll have to do later!
Step 4: Let the Filler Dry Completely
Patience is a virtue in woodworking! You must let the wood filler dry completely before you can sand it. Drying times can vary depending on the type of filler, the size of the hole, and the humidity in your room. This could be anywhere from 30 minutes for a tiny nail hole to several hours for a deeper gouge.
Check the manufacturer’s instructions on the container for the recommended drying time. The filler should feel hard to the touch when it’s ready. If you try to sand it while it’s still soft, you’ll just make a gummy mess and have to start over. For more details on wood properties and drying, the Forest Products Laboratory’s Wood Handbook is an excellent technical resource.
Step 5: Sand it Smooth and Flush
Now it’s time to create that invisible repair. Wrap a piece of medium-grit sandpaper (120-grit is a good starting point) around your sanding block. The block helps distribute pressure evenly, preventing you from accidentally sanding a dip into the filler.
Gently sand the dried filler using light, even strokes. Your goal is to sand away the excess until the patch is perfectly level, or “flush,” with the surrounding trim. You can check your progress by running your fingers over the area—you shouldn’t be able to feel a bump or a dip.
Once it’s level, switch to a piece of fine-grit sandpaper (220-grit) and give it a final light sanding. This will remove any scratches left by the medium-grit paper and leave the surface silky smooth, ready for priming.
Step 6: Clean Up All the Dust
Sanding creates a lot of fine dust. If you paint over this dust, you’ll end up with a gritty, unprofessional finish. Use a tack cloth or a clean, slightly damp rag to carefully wipe away all the sanding dust from the trim and the surrounding area. A vacuum with a brush attachment also works great for this. Make sure the surface is completely clean and dust-free before proceeding.
Step 7: Prime and Paint
You’re almost done! The final step is to make the repair disappear. Priming is a crucial step that many beginners skip. Primer seals the porous wood filler, ensuring that your top coat of paint will have a uniform sheen. Without primer, the filled spot can absorb paint differently, leading to a dull or blotchy look known as “flashing.”
Apply a thin coat of a good quality primer over just the filled area. Let it dry completely. Once the primer is dry, apply your matching trim paint over the spot. You may need two thin coats to get a perfect blend. Feather the edges of your paint job to help it blend seamlessly with the existing finish.
Pro Tips for a Truly Professional Finish
Following the steps above will give you a great result. But if you want to take your work from “good” to “flawless,” here are a few extra tips I’ve learned over the years.
- Apply in Thin Layers for Deep Gouges: If you are filling a particularly deep hole or crack, don’t try to fill it all in one go. Apply the filler in thin layers, letting each layer dry before adding the next. This prevents cracking and ensures the filler cures properly all the way through.
- Use Painter’s Tape for Clean Lines: If you’re filling a crack where trim meets a wall, apply painter’s tape along the wall edge. This gives you a crisp, clean line and prevents you from getting filler on the wall.
- Mix It Well: Some fillers can separate in the container. Always give your filler a quick stir with your putty knife before using it to ensure a consistent texture.
- Dampen Your Putty Knife: For some water-based fillers, slightly dampening your putty knife with water can help you get an even smoother application and finish.
- Let the Wood Acclimate: If you’re installing new trim, allow it to sit inside your home for at least 48 hours before you install and fill it. This lets the wood acclimate to your home’s humidity level, reducing the chances of future gaps or cracks. For information on how moisture affects wood, you can consult resources like the guides provided by the Environmental Protection Agency (EPA).
Common Mistakes and How to Avoid Them
Everyone makes mistakes, but learning from others is a great shortcut to success. Here are some of the most common errors people make when using wood filler and how you can easily avoid them.
| Common Mistake | The Result | How to Avoid It |
|---|---|---|
| Under-filling the hole | A noticeable divot or depression remains after the filler dries and shrinks. | Always overfill the hole slightly, creating a small mound above the surface. You can easily sand this down. |
| Sanding too soon | The filler is still soft and gums up the sandpaper, creating a messy, uneven surface that’s hard to fix. | Be patient and always follow the manufacturer’s recommended drying time. Test it by touch—it should be rock hard. |
| Skipping the primer | The repaired spot absorbs paint differently, resulting in a dull or blotchy area that stands out from the rest of the trim. | Never skip primer! A quick coat of primer seals the patch and ensures your top coat has a beautiful, even sheen. |
| Using the wrong filler | The filler cracks, doesn’t stick properly, or won’t accept stain, ruining your finish. | Match the filler to the job. Use water-based for indoor painted trim and a stainable filler for stained wood. |
| Not cleaning the surface | Dust and debris prevent the filler from bonding correctly, causing it to fail or fall out over time. | Always start by wiping the area clean with a damp cloth and letting it dry completely. |

Frequently Asked Questions (FAQ)
What’s the difference between wood filler and wood putty?
This is a great question! Wood filler is applied before sanding and finishing (painting or staining). It dries hard and can be sanded smooth. Wood putty, on the other hand, is an oil-based product that is applied after finishing. It doesn’t harden completely and is used to fill nail holes in already stained and sealed wood. For trim you plan to paint, you always want wood filler.
Can I use wood filler on painted trim?
Absolutely! You can apply wood filler directly over a painted surface. Just make sure the paint isn’t peeling or flaking. Clean the surface as usual, apply the filler, sand it smooth, and then prime and paint over the repair.
How long does wood filler take to dry?
Drying time varies greatly. For small nail holes, it might be dry in as little as 30 minutes. For larger or deeper repairs, it could take several hours or even overnight. Always check the directions on the product label for the most accurate information.
Why did my wood filler crack?
Cracking usually happens for one of two reasons. The most common cause is applying the filler too thickly in a deep hole. To prevent this, fill deep gouges in thin layers, allowing each layer to dry before adding the next. Cracking can also happen if the wood itself is shifting or expanding due to moisture changes.
Do I absolutely have to sand wood filler?
Yes, for a truly invisible repair, you must sand the wood filler. Even if you apply it very smoothly, there will be a slight mound and a different texture. Sanding makes the patch perfectly flush with the trim and prepares the surface to accept primer and paint smoothly.
Can I stain wood filler?
You can, but only if you use a product specifically labeled as “stainable.” Standard wood fillers will not absorb stain and will stick out like a sore thumb on a stained surface. Even with stainable filler, it’s a good practice to test your stain on a small, hidden area first to see how it looks.
What is the best all-around wood filler for beginners?
For a beginner working on indoor painted trim, I highly recommend a quality water-based, paintable wood filler. Brands like Dap Plastic Wood-X or Minwax Wood Filler are excellent choices. They are easy to work with, low-odor, and clean up with water.
Conclusion: Your Trim Can Look Brand New!
And there you have it! Filling those pesky nail holes and dings in your trim really is that simple. It’s one of those small DIY tasks that makes a huge impact on the overall look and feel of a room. It takes a project from looking “homemade” to looking professionally finished.
Remember the key steps: start with a clean surface, overfill the hole slightly, let it dry completely, and sand it until it’s perfectly smooth. And don’t forget that crucial coat of primer before you paint! By taking your time and following these steps, you can confidently tackle this project and achieve results that you’ll be proud of.
So grab your putty knife and some filler, and go make those imperfections disappear. Your trim will thank you for it, and you’ll gain a valuable new skill for all your future projects.