How To Use Woodland Explorer Map: An Essential Guide
To use a Woodland Explorer Map, orient yourself by checking the player icon’s position and direction. As you travel in the game, your icon moves on the map. Keep your icon moving towards the large mansion symbol. The smaller your icon, the farther you are. Prepare for a long journey!
Hello, fellow crafters! It’s Md Meraj here. In our workshop, we learn to shape wood with care and precision. In the world of Minecraft, we shape our adventures with the very same spirit. Have you ever gotten a special map from a villager, only to feel completely lost? You see the little picture of a building, but your own marker is just a tiny dot. It can feel a bit confusing, I know.
Many new adventurers find the Woodland Explorer Map tricky at first. The journey can be long and dangerous, and the map doesn’t show you the rivers or mountains in your way. But don’t you worry. Just like learning to use a new tool in the shop, using this map is a skill you can master.
Today, I’m going to guide you step-by-step. We’ll turn that confusing piece of paper into a reliable guide for one of Minecraft’s greatest adventures. Let’s get you ready to find that mansion!
What Is a Woodland Explorer Map?
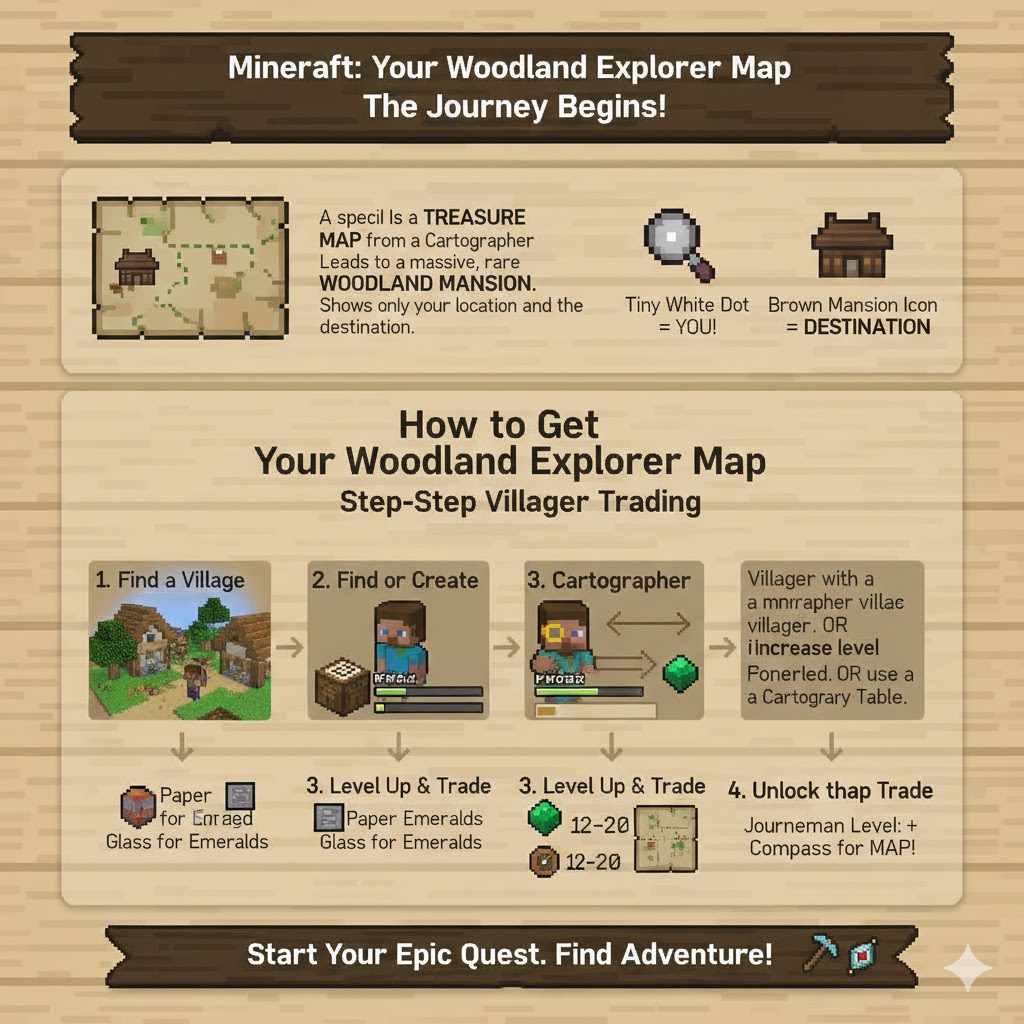
Think of a Woodland Explorer Map as a treasure map. But instead of leading to a chest of gold, it leads to a massive, rare structure called a Woodland Mansion. These mansions are huge buildings hidden deep in Dark Forest biomes, often thousands of blocks away from where you start.
These maps don’t show the terrain like a regular map. You won’t see forests, rivers, or deserts on them. Instead, they show a basic outline of the land and water, with two important symbols:
- A Tiny White or Gray Dot: This is you! It points in the direction you are facing.
- A Brown Building Icon: This is your destination—the Woodland Mansion.
The goal is simple: make your tiny dot move across the map until it reaches the building icon. It sounds easy, but the distance is what makes it a real adventure!
How to Get a Woodland Explorer Map
You can’t craft these maps yourself. The only reliable way to get one is by trading with a Cartographer villager. A Cartographer is a specific type of villager who wears a golden monocle.
Here’s how the process usually works:
- Find a Village: First, you need to locate a village with villagers.
- Find or Create a Cartographer: Look for a villager with a monocle. If there isn’t one, you can place a Cartography Table near an unemployed villager to give them the profession.
- Level Up the Cartographer: You will need to trade with the Cartographer to increase their experience level. You usually start by trading paper for emeralds, and then glass panes for emeralds.
- Unlock the Map Trade: Once the Cartographer reaches the Journeyman level (the third trade level), they will offer a Woodland Explorer Map for sale. The trade typically costs around 12-20 emeralds and a compass.
Getting the map is the first step of your epic quest. Once you have it in hand, the real preparation begins.
Preparing for Your Grand Expedition
Finding a Woodland Mansion is not a quick trip. You might travel for tens of thousands of blocks, which could take hours. Heading out unprepared is a recipe for disaster. Just like we wouldn’t start a woodworking project without the right tools and a clear plan, you shouldn’t start this journey without the proper gear.
Your preparation should be thorough. You’ll be crossing unfamiliar lands, facing dangerous monsters, and you might not see your home base for a very long time. Let’s get your inventory ready.
Essential Gear and Supplies Checklist
Here is a table with everything you should consider bringing. You don’t need to bring everything, but the more prepared you are, the smoother your journey will be.
| Category | Item | Recommended Quantity | Purpose |
|---|---|---|---|
| Tools | Diamond/Netherite Pickaxe | 1-2 | Mining through obstacles and gathering resources. |
| Tools | Diamond/Netherite Axe & Shovel | 1 each | Clearing forests and digging. |
| Combat | Diamond/Netherite Sword | 1 | Defending against hostile mobs. |
| Combat | Bow & Arrows | 1 Bow, 2-3 Stacks of Arrows | Ranged attacks are crucial. |
| Combat | Shield | 1 | Blocks attacks from skeletons, creepers, and mansion mobs. |
| Armor | Full Iron, Diamond, or Netherite Armor | 1 Set | Essential for protection. Enchantments are a bonus. |
| Navigation | Compass | 1 | Helps you find your original world spawn point if you get lost. |
| Food | Cooked Steak, Porkchops, or Golden Carrots | 2-3 Stacks | High saturation food to keep your health regenerating. |
| Building | Wood Planks or Cobblestone | 4-5 Stacks | For building shelters, bridging gaps, and pillaring up mountains. |
| Utility | Bed | 1 | To set your spawn point along the way. Be careful in the Nether! |
| Utility | Water Bucket | 1 | Crucial for climbing, descending, and stopping lava. |
| Utility | Torches | 3-4 Stacks | To light your way and prevent mob spawns. |
Having these items will make your journey much safer and less stressful. Think of it as packing for a long camping trip in a very wild place!
Reading and Using Your Map: A Step-by-Step Guide
Alright, you have your map and your gear. Now, let’s learn how to actually use this thing. It can seem a bit strange at first, but once you understand the logic, it’s quite simple.
Step 1: Open and Orient the Map
Hold the Woodland Explorer Map in your hand and right-click (or use the secondary action button) to view it. You’ll see the map interface fill your screen.
The first thing to notice is your player marker. It’s a dot that looks like a little arrow. This arrow points in the direction your character is currently facing. Turn your character around in the game, and you’ll see the dot on the map rotate as well. This is your primary orientation tool.
For map orientation, North is always at the top of the map. If you point your character so the map’s dot points straight up, you are facing North.
Step 2: Determine Your Direction of Travel
Look for the brown mansion icon on the map. Now look at your player dot. Your job is to travel in the direction that will move your dot closer to the mansion icon.
- If the mansion is in the top-right corner of the map, you need to travel Northeast.
- If the mansion is at the bottom of the map, you need to travel South.
Turn your character until your player dot points toward the mansion symbol. Now, you know which way to walk. That’s your heading!
Step 3: Watch Your Icon Grow
As you begin your journey, you’ll notice something important: your player dot is tiny. This indicates that you are very far away. The map covers a huge area, and you are not “on the map” yet in a detailed sense.
As you travel in the correct direction, your dot will slowly move across the paper. After a long, long time, your dot will seem to get larger. Once it becomes a full-sized player icon that no longer looks tiny, it means you have finally entered the region shown on the map! From here, navigation becomes much easier, as your movements will be tracked more accurately.
Step 4: Use Coordinates (The Pro Method)
For a more precise way to navigate, use the coordinates on your debug screen. You can see this screen by pressing the F3 key on your keyboard (on Java Edition). The coordinates are listed as X, Y, and Z values.
- X-coordinate: Your position on the East-West axis. Positive X is East, negative X is West.
- Z-coordinate: Your position on the South-North axis. Positive Z is South, negative Z is North.
- Y-coordinate: Your elevation (height). This is less important for map navigation.
Face each of the cardinal directions (North, South, East, West) and observe how your dot on the map moves and how your X/Z coordinates change. This will help you understand the map’s grid. For example, traveling South (toward positive Z) will move your dot down on the map. Traveling East (toward positive X) will move your dot to the right.
This technique removes all guesswork. If you need to go Southeast, you just need to increase both your X and Z coordinates.
Overcoming Obstacles on Your Journey
The path to a Woodland Mansion is almost never a straight line. You will face oceans, tall mountains, and dangerous forests. Here’s how to handle them like a seasoned explorer.
Crossing Oceans
Oceans are the most common major obstacle. They are vast and can take a long time to cross. You have a few options:
- Boat: This is the easiest and most resource-friendly method. Craft a boat before you leave, or be ready to make one from trees on the coastline. Boats are fast and protect you from Drowned (as long as you keep moving).
- Nether Travel: For very long distances, traveling through the Nether is much faster. Every one block you travel in the Nether is equal to eight blocks in the Overworld. This is an advanced technique, so be sure you know how to build a secure Nether highway. For more on portal safety, you can check resources from creators who specialize in game mechanics like those on the official Minecraft Creator portal.
Climbing Mountains
Extreme Hills and Mountain biomes can be slow to cross. Don’t try to walk up every single slope. It’s often better to go around a steep mountain, but sometimes you have to go over.
- Pillaring and Staircases: Use your stack of dirt or cobblestone to build a simple staircase up the side of a cliff.
- Water Bucket: A water bucket is an amazing tool for getting down safely. Place water at the top of a ledge and ride it down. You can pick the water back up at the bottom. This is much safer than jumping.
Setting Up Camp
Your journey might take several real-life hours. Don’t be afraid to stop for the night. Find a safe spot, dig into a small hill, or build a quick dirt hut. Place your bed to reset your spawn point. If you die, you will respawn at your last used bed instead of all the way back at your main base. This is the single most important tip for a long expedition!
You’ve Arrived! Exploring the Woodland Mansion
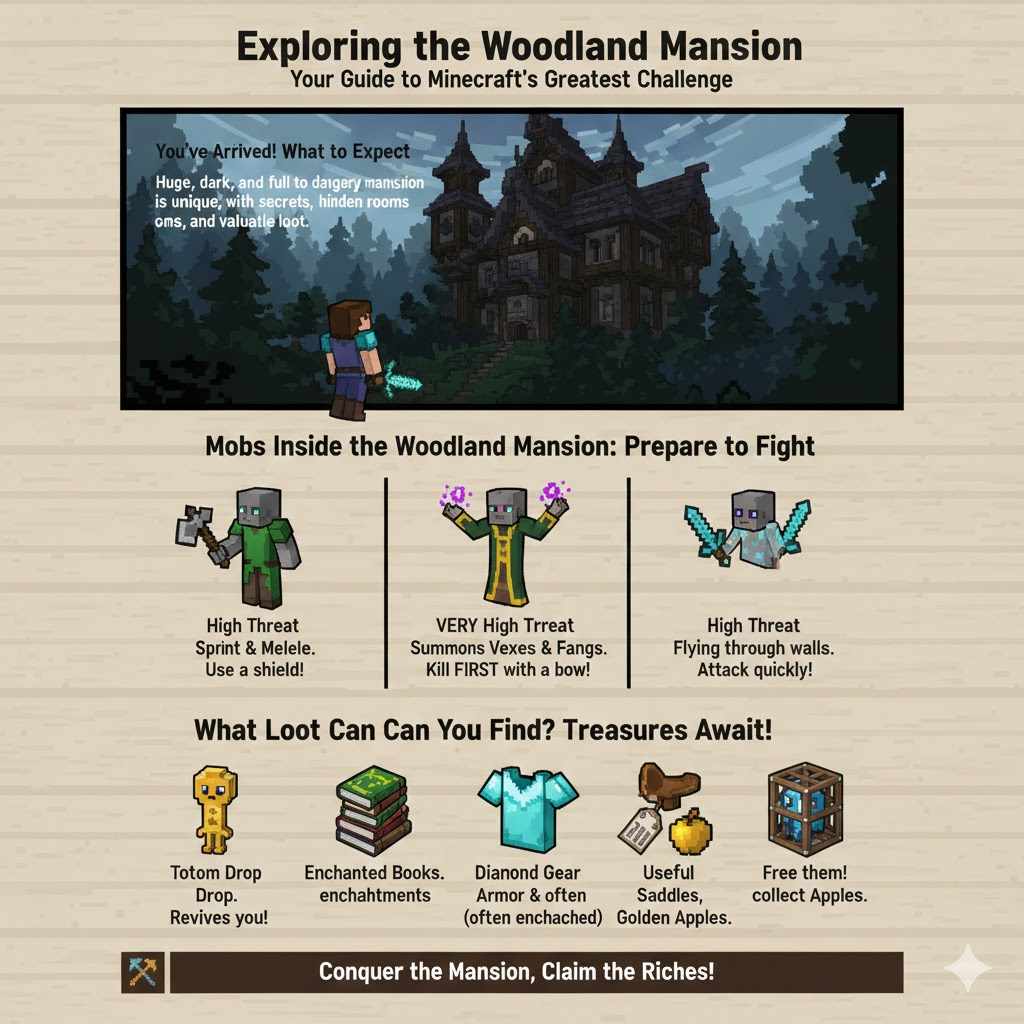
After a long and difficult journey, you finally see it: a huge, dark mansion looming in the forest. Congratulations! But the challenge isn’t over. This place is crawling with unique and dangerous mobs.
The Woodland Mansion is a procedurally generated structure, meaning no two are exactly alike. They are full of secrets, hidden rooms, and valuable loot. Take your time, be cautious, and light up every room you clear with torches to prevent more mobs from spawning.
Mobs Inside the Woodland Mansion
Prepare to fight. This is the home of the Illagers, a hostile faction of villagers. They do not like visitors.
| Mob Name | Appearance | Threat Level | Attack Style & Strategy |
|---|---|---|---|
| Vindicator | Gray-skinned villager holding an iron axe. | High | They will sprint at you and deal heavy melee damage. Use a shield to block their attack, then strike back while they are recovering. |
| Evoker | Gray-skinned villager in a robe who raises their arms to cast spells. | Very High | Summons flying Vexes and fanged attack from the ground. Prioritize killing Evokers immediately. A bow is very effective. |
| Vex | A small, flying, ghost-like mob with a sword summoned by Evokers. | High | They can fly through walls. Attack them quickly before they swarm you. Sweeping Edge enchantment on a sword helps. |
What Loot Can You Find?
The risk is high, but the rewards are great. Mansions contain many chests with valuable items that are hard to find elsewhere. Be sure to explore thoroughly and check for hidden rooms behind walls or under carpets.
- Totem of Undying: This is the grand prize. Every Evoker drops one. If you are holding it in either hand when you take fatal damage, the totem will be consumed and you will be brought back to life with a few hearts.
- Enchanted Books: Chests may contain powerful enchanted books.
- Diamond Armor & Tools: Sometimes found in chests, occasionally enchanted.
- Name Tags, Saddles, and Golden Apples: Other useful treasures often found here.
- Allays: In some rooms, you can find friendly blue Allays trapped in cages. Free them, and they will help you collect items!
For a complete list of all possible rooms and loot, the Official Minecraft Wiki is an excellent and detailed resource for dedicated explorers.
Frequently Asked Questions (FAQ)
1. My player dot on the map is tiny and not moving! Is my map broken?
No, your map is working correctly! A tiny dot means you are very far away from the area the map displays. You may need to travel hundreds or even thousands of blocks in one direction before you notice it move significantly. Keep going!
2. What happens if I die on the way to the mansion?
If you die, you will respawn at your world’s spawn point or the last bed you slept in. This is why it is so important to bring a bed with you and sleep in it periodically to update your spawn point along your route. Your items will be dropped where you died, so try to get back to them within 5 minutes if the area is loaded.
3. Why is North at the top of the Woodland Explorer Map? How do I know which way is North?
By default, all maps in Minecraft are oriented with North at the top. You can find North in a few ways: the sun and moon always rise in the East and set in the West. If you watch the sun, you can figure out your directions. Also, pressing F3 (on Java Edition) will show your cardinal direction in the debug information.
4. Can I use the map in the Nether or the End?
A Woodland Explorer map only works in the Overworld. In the Nether or the End, your player cursor will just spin around randomly, and the map will not guide you. You must do all your navigating in the Overworld, though you can use the Nether for faster travel between points in the Overworld.
5. The mansion icon is over a big blue area. Is my mansion underwater?
It’s very unlikely. The map shows basic landmass and water outlines, but it isn’t always perfectly accurate with coastlines. The mansion itself will always generate on land, inside a Dark Forest biome. The icon might just be near a coast or a large river.
6. I found the mansion! Can I use the map again to find another one?
A single Woodland Explorer map only points to one specific mansion. To find a different mansion, you would need to travel very far away (thousands of blocks) and trade for a new map with a different Cartographer villager, who will then generate a map for the nearest undiscovered mansion to them.
7. What if I lose my map?
If you lose the map, you unfortunately lose the location of that specific mansion. There is no way to recover it unless you remember the coordinates. If you have another cartographer, you can trade for a new map, which may or may not point to the same mansion depending on how far you are from it.
Conclusion: The End of One Journey, the Start of Another
There you have it—a complete guide to turning that mysterious map into a successful adventure. We’ve covered how to get your map, how to prepare for the long road ahead, the step-by-step process of navigation, and what to do when you finally reach your destination. It’s a journey that tests your patience and preparedness, much like a complex project in the workshop.
Finding a Woodland Mansion is one of the most rewarding experiences in Minecraft. It’s not just about the loot you bring home; it’s about the journey itself. The sights you see, the obstacles you overcome, and the satisfaction of finally arriving make it all worthwhile.
So gear up, orient your map, and step out with confidence. Your grand adventure is waiting for you. Happy exploring, and may you return with a Totem of Undying in hand!