How to Make Wood Clamps Longer: 4 Real Extension Methods (With Exact Hardware)
To make wood clamps longer, join two clamps together with a 3-inch butt hinge bolted through the clamp’s screw-hole, or bolt a 3/4-inch by 2-inch hardwood cleat with a beveled face onto the clamp head. For unlimited, adjustable reach, build a pipe clamp fixture onto standard 3/4-inch black pipe cut to any length you need.
Most bar and pipe clamps sold at the hardware store top out somewhere between 24 and 50 inches. That’s plenty for a drawer box or a small frame, but it comes up short the moment you’re gluing up a tabletop, a door panel, or anything wider than your current clamp collection can reach edge to edge. Buying a full set of 6-foot clamps just for one glue-up is expensive and eats shelf space you probably don’t have.
The fix usually isn’t a new clamp — it’s an extra hinge, a scrap of hardwood, or a length of pipe from the plumbing aisle. Each method below trades off differently on strength, cost, and how permanent the modification is, so pick based on how often you’ll actually need the extra reach.
Why Standard Clamp Length Falls Short
Best Pick For DIY Pipe Clamps
 |
Jorgensen Pony 50 Pipe Clamp Fixture (2-Pack) – $49.78 This is the exact style of fixture used in Method 3 below — thread it onto any length of 3/4-inch black pipe and it works like a full-length bar clamp.
|
Most off-the-shelf bar clamps are sized for cabinet and furniture work — plenty for face frames, drawer parts, and most joinery. The problem shows up on anything wider than about two feet: tabletops, door panels, workbench tops, and shop cabinets all regularly exceed what a stock 24-inch or 36-inch clamp can reach across. A pipe clamp fixture like the one above solves this permanently: thread it onto whatever length of 3/4-inch black pipe your project needs, and you have a full-length bar clamp for the cost of a plumbing fitting and a length of pipe.
Method 1: Join Two Bar Clamps With a Butt Hinge
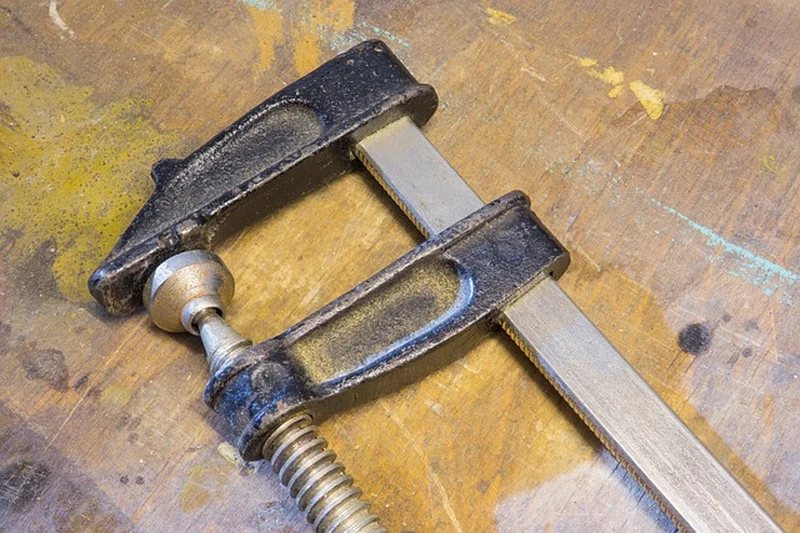
Remove the sliding head from two bar clamps so you’re left with two bare bars. Line the ends up and fasten them together with a standard 3-inch butt hinge: the hinge pins line up with the outer screw holes on each bar, and a single nut and bolt through the hinge’s center hole ties the two bars together. Reattach the sliding heads once the hinge is secure. This roughly doubles your clamp’s working length, and it holds real pressure because the load runs through the hinge pins and the bolt — not through glue or screws alone.
Method 2: Bolt On a Beveled Hardwood Cleat
For a cheaper, more permanent extension, cut a piece of 3/4-inch-thick, 2-inch-wide hardwood — oak or maple hold up best — to the added length you need. Cut a 5-degree bevel on the end that will contact the clamp head; the bevel centers the clamping pressure instead of letting it glance off at an angle. Drill a hole through the other end sized to fit over the clamp’s existing head, then bolt (or bolt-and-glue) the cleat in place. Sand the bevel face smooth so it seats flush against whatever you’re clamping.
Method 3: Build Your Own Pipe Clamp in Any Length
Pipe clamp fixtures like the one above thread onto standard 3/4-inch black pipe from any hardware store — you supply the pipe, cut to whatever length the project needs, and the fixture supplies the clamping head and tail stop. Because you’re buying pipe by the foot, there’s no upper limit: a 3-foot glue-up and an 8-foot one use identical hardware, just longer pipe. It’s the cheapest way to get genuinely long reach (a 6-foot length of 3/4-inch black pipe costs a few dollars), and the fixtures thread on and off in seconds if you want to reuse the same pipe across projects of different lengths.
Method 4: PVC and Metal Pipe Extensions for Light-Duty Jobs
For clamping jobs that don’t need full clamping pressure — holding jigs, positioning parts, light glue-ups — a section of PVC or thin-wall metal pipe bolted to the end of an existing clamp adds reach without much cost. Cut the pipe to length, drill through both the pipe and the clamp bar, and pin them together with a bolt. This isn’t as strong as the hinge or cleat method, so keep it to light-duty positioning rather than full-pressure glue-ups where the joint depends on that clamp holding tight.
Keeping Extended Clamps Strong and Safe
Whichever method you use, check the joint before every use — a bolt that’s backed out or a glue line that’s started to crack is exactly where an extension fails, usually right when it’s under the most load. Rubber pads on the clamp jaws help prevent slippage on the workpiece and let you tighten less aggressively while still holding securely. Always clamp on a stable, flat surface; an extended clamp under uneven load is far more likely to twist or pop loose than a standard-length one. Wear eye protection when tightening bolted extensions under load — a fitting that lets go under tension can move fast.
Where Extended Clamps Actually Earn Their Keep
Extended clamps aren’t a novelty — they’re standard practice anywhere the workpiece is wider than the clamps a shop normally stocks, including uses that reduce the chance of wood warping during a glue-up.
| Application | Why Extended Reach Helps |
|---|---|
| Tabletop and door glue-ups | Spans the full width in one pass instead of stepping panels together in sections |
| Workbench and cabinet carcasses | Reaches across a full case side without repositioning clamps mid-glue-up |
| Shop-built jigs and fixtures | Lets a single clamp hold a long fence or rail flat during assembly |
Frequently Asked Questions
How Can I Extend My Wood Clamps?
Join two bar clamps end to end with a 3-inch butt hinge bolted through the center hole, or bolt a beveled hardwood cleat onto the clamp head. For adjustable, unlimited-length reach, thread a pipe clamp fixture onto a length of 3/4-inch black pipe cut to the size you need.
What Materials Are Best For Making Clamp Extensions?
Hardwood like oak or maple works well for bolt-on cleats because it holds up under repeated clamping pressure. A standard 3-inch butt hinge and matching nut and bolt work for joining two clamp bars. For unlimited length at low cost, 3/4-inch black pipe paired with a pipe clamp fixture is the most flexible option.
Are There DIY Methods To Lengthen Wood Clamps?
Yes. Attach a beveled hardwood cleat to the clamp head for more reach, or use threaded rods to increase clamping length on certain clamp styles. Whichever method you use, check that the modification doesn’t affect the clamp’s stability before relying on it for a real glue-up.
Can I Use PVC For Clamp Extensions?
Yes, for light-duty jobs. PVC pipe is lightweight and easy to cut and drill, making it a reasonable extension for positioning jigs or holding light pieces. It isn’t as strong as a hinge-joined bar clamp or a metal pipe clamp fixture, so keep PVC extensions to jobs that don’t need full clamping pressure.
How Long Can You Make a Pipe Clamp?
As long as the pipe you use. Pipe clamp fixtures thread onto standard 3/4-inch black pipe of any length, from a couple of feet up to 10 feet or more. The practical limit is how much the pipe flexes over very long spans and how much room your shop has to maneuver it, not the fixture itself.
Conclusion
None of these extension methods require buying new clamps. A butt hinge, a beveled hardwood cleat, or a pipe clamp fixture and a length of pipe will all get you real reach for the cost of hardware you can find at any home center. Match the method to the job: a hinge join or pipe clamp for full-pressure glue-ups, a lighter PVC extension for jigs and positioning work that doesn’t need maximum clamping force. Check every extended joint before you trust it with a project, and you’ll get years of use out of clamps you already own instead of replacing them.
Sponsored / affiliate links. As an Amazon Associate I earn from qualifying purchases. I may earn additional commission from eligible campaigns.