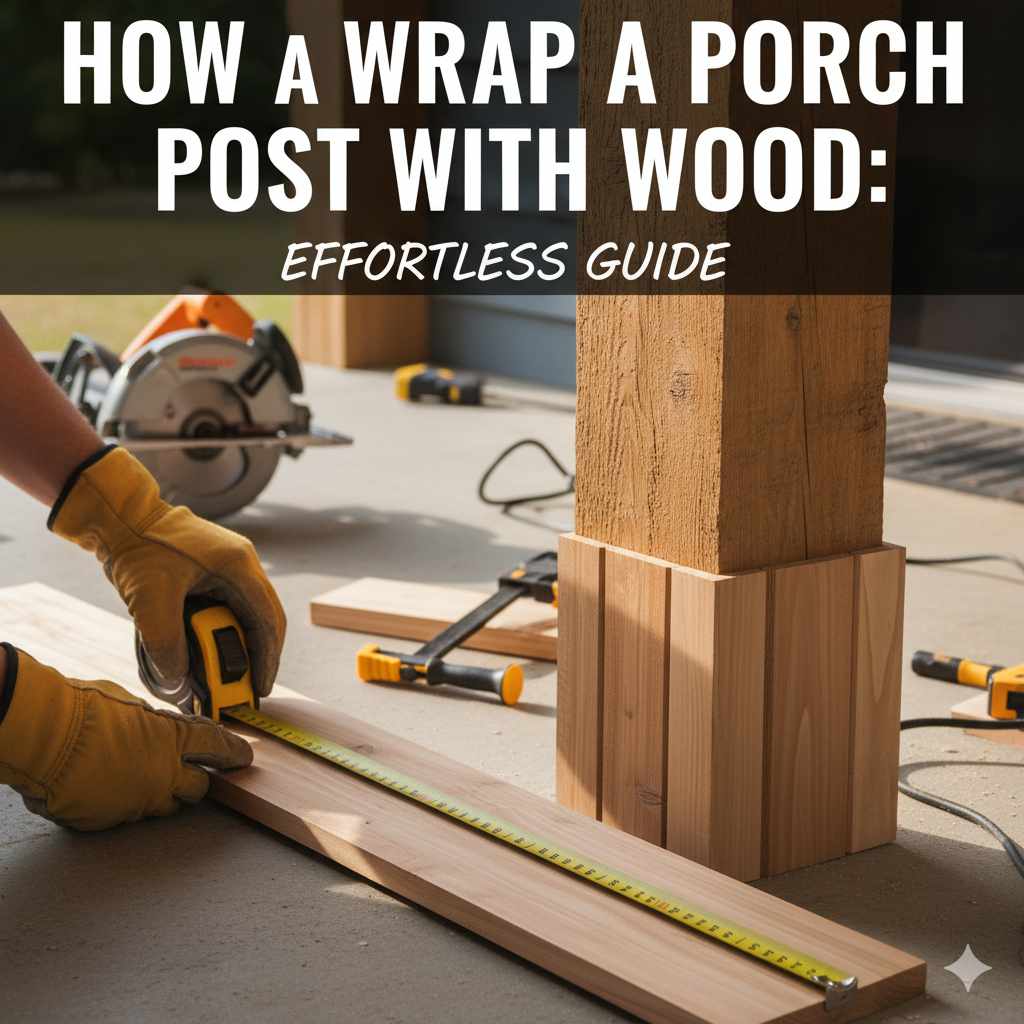
How to Wrap a Porch Post with Wood: Effortless Guide
Wrapping a porch post with wood is a fantastic way to enhance curb appeal and protect the existing post. This guide offers clear, step-by-step instructions perfect for beginners. You’ll learn to choose materials, make precise cuts, and secure the wood for a beautiful, durable finish on your porch.
Are your porch posts looking a bit weathered or plain? You’re not alone! Many homeowners want to refresh their porch’s look without a huge undertaking. Updating those posts with a beautiful wood wrap is a common DIY project that can completely transform your home’s exterior. It’s a project that looks impressive but is surprisingly achievable, even if you’re new to woodworking. We’ll walk through every step, from choosing the right wood to the final touches, making this seemingly daunting task feel simple and rewarding. Get ready to give your porch a stunning makeover!
Why Wrap Your Porch Posts with Wood?
Adding a wood wrap to your porch posts isn’t just about looks; it’s a smart decision for several reasons. It’s like giving your existing posts a stylish new coat that also offers a layer of protection.
Boost Curb Appeal: A fresh wood wrap instantly elevates the look of your porch, making your home more inviting and valuable.
Protect Existing Posts: It shields the original post from weather damage, pests, and rot, extending its lifespan.
Increase Home Value: A well-maintained and attractive exterior is a major selling point.
Customization: You can choose the wood type and finish to perfectly match your home’s style.
Cost-Effective: It’s often more affordable than replacing an entire support post.
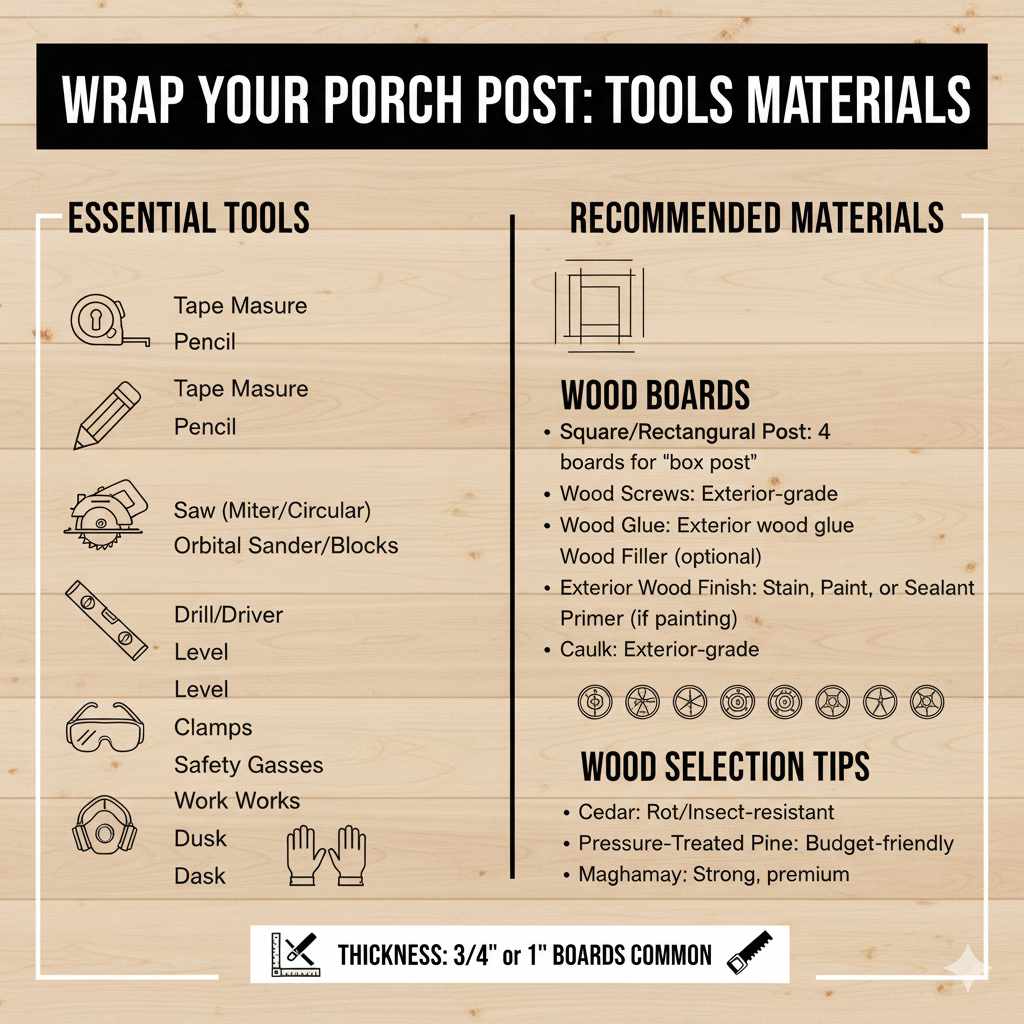
Tools and Materials You’ll Need
Gathering your supplies before you start is key to a smooth project. Here’s a handy list to get you prepped for wrapping your porch posts.
Essential Tools:
Tape Measure: For accurate measurements.
Pencil: To mark your cuts.
Saw: A miter saw is ideal for precise angles, but a circular saw or even a hand saw can work with care.
Orbital Sander or Sanding Blocks: To smooth edges and surfaces.
Drill/Driver: For pre-drilling holes and driving screws.
Level: To ensure your wood pieces are straight.
Clamps: To hold pieces in place while you work.
Safety Glasses: Always protect your eyes!
Work Gloves: For better grip and hand protection.
Dust Mask: Especially important when sanding.
Recommended Materials:
Wood Boards:
For a Square or Rectangular Post: You’ll typically need four boards to create a new, larger square or rectangular profile around the existing post. These are often called “box posts.” The width of these boards will depend on the desired look and the size of your original post.
For a Round Post (more advanced): This usually involves creating a box around the round post first, then applying decorative trim or custom-cut wood. For beginners, we’ll focus on wrapping square or rectangular posts.
Wood Screws: Exterior-grade screws are a must for durability. The length will depend on the thickness of your wood.
Wood Glue: Exterior wood glue adds extra strength to joints.
Wood Filler (optional): To fill any screw holes or small gaps.
Exterior Wood Finish: Stain, paint, or a clear sealant to protect the wood and achieve your desired look.
Primer (if painting): For better paint adhesion.
Caulk: Exterior-grade caulk to seal gaps between the wood and the porch surface.
Wood Selection Tips:
Choosing the right wood is important. For exterior projects, you want something that can stand up to the elements.
Cedar: Naturally resistant to rot and insects, looks beautiful.
Redwood: Similar to cedar, excellent durability and a lovely color.
Pressure-Treated Pine: A budget-friendly option, but it’s important to ensure it’s rated for ground contact if it touches the porch floor.
Mahogany: A premium choice, known for its strength and beauty.
Consider the thickness of the boards. For a sturdy wrap, boards that are 3/4 inch or 1 inch thick are common. The width will vary based on how much you want to enlarge the post’s profile.
Step-by-Step Guide to Wrapping Your Porch Post
Let’s get started! This guide focuses on creating a simple but elegant wood wrap for a standard square or rectangular porch post.
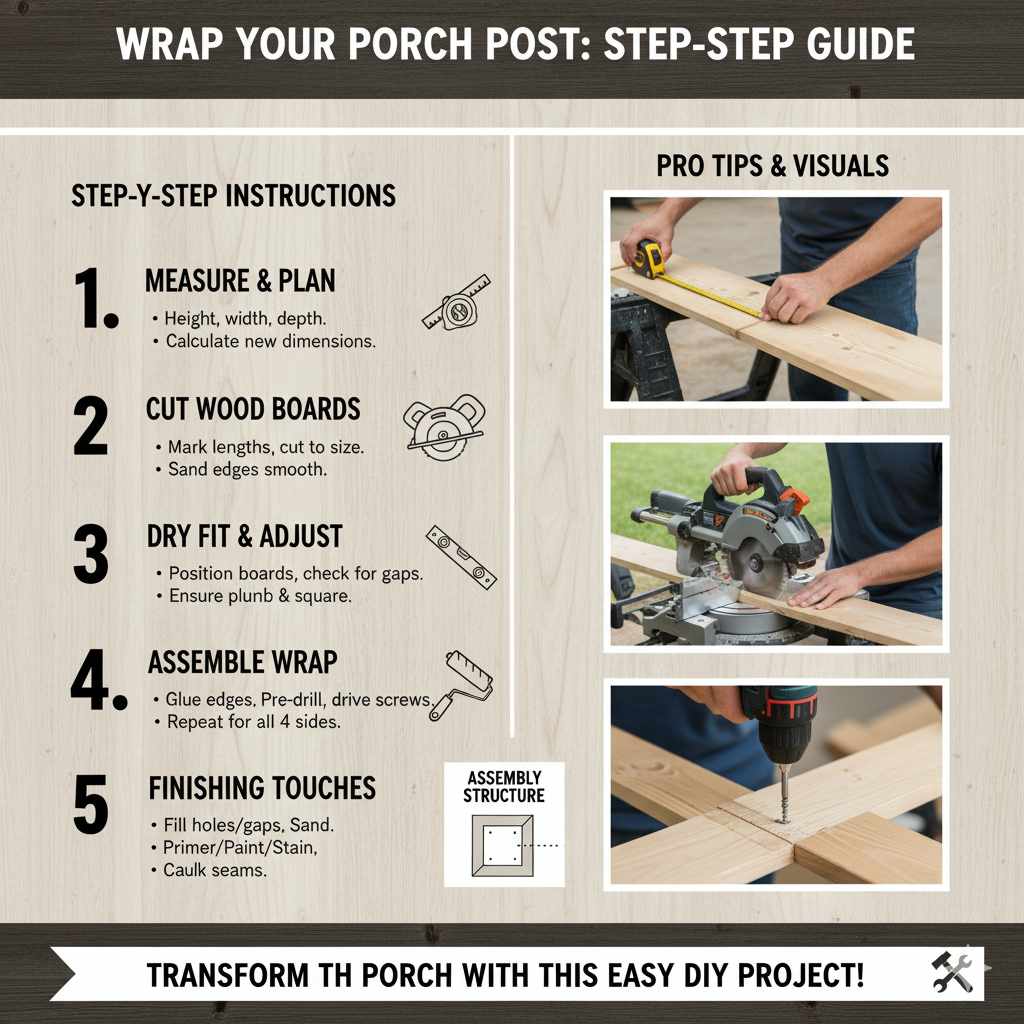
Step 1: Measure and Plan
Accurate measurements are the foundation of any successful DIY project.
1. Measure the Existing Post: Use your tape measure to get the exact width and depth of your current porch post. For example, if it’s a 4×4 post, its actual dimensions are likely closer to 3.5 inches by 3.5 inches.
2. Determine Your New Post Dimensions: Decide how much you want to enlarge the post and what shape you want the new wrap to be (square, rectangular). For a classic look, you might aim to make a 4×4 post into a larger 6×6 or 8×8 profile post.
Example Calculation: If your 4×4 post is 3.5″ x 3.5″, and you want to make it a 6×6 profile, you’ll need to add wood to all sides. Each side will need approximately 2.5 inches of new wood ( (6 inches – 3.5 inches) / 2 = 1.25 inches of wood thickness per side ). This means you’ll likely use 1×6 or 1×8 boards (which are actually 3/4″ or 7/8″ thick and 5.5″ or 7.25″ wide respectively) to create the new profile.
3. Calculate Board Lengths: Measure the height of your post from the porch floor to the beam or roofline. You’ll need pieces of wood cut to this length.
Step 2: Cut Your Wood Boards
Precision is key here. Measure twice, cut once!
1. Mark Your Cuts: Using your pencil and tape measure, mark the desired lengths on your chosen wood boards. Remember, the length should match the height of your porch post.
2. Make the Cuts:
For a Simple Square Wrap: You’ll need four identical pieces, each cut to the height of your post. Ensure the ends are cut square (90 degrees) for a clean fit against the porch and beam. A miter saw or a very steady hand with a circular saw is best for this.
For a More Finished Look (Optional but Recommended): Consider cutting your boards with a slight bevel (e.g., 45 degrees) on the edges that will meet at the corners. This gives a more custom, “joined” look. However, for absolute beginners, square cuts are perfectly acceptable and easier to manage.
3. Prepare the Boards: Once cut, lightly sand all edges to remove splinters and rough spots. This makes handling the wood safer and results in a cleaner finish.
Step 3: Dry Fit and Adjust
Before you start gluing and screwing, let’s see how everything fits.
1. Position the Boards: Place the four cut boards around the existing porch post. If you made any angled cuts for corners, ensure they meet snugly.
2. Check for Gaps: Look for any gaps between the new wood and the old post, or between the new boards themselves. Minor gaps can often be addressed with wood filler later, but significant gaps might indicate an issue with your cuts.
3. Confirm Squareness: Use your level to ensure the new “post” is plumb (perfectly vertical) and square. Adjust as needed.
Step 4: Assemble the New Post Wrap
Now it’s time to permanently attach the wood.
1. Apply Wood Glue: For each corner, apply a thin, even bead of exterior wood glue along the edge of the board that will meet its neighbor.
2. Assemble One Corner: Bring two boards together at a corner. If you’re using square cuts, one board will slightly overlap the edge of the other. This is common and creates good surface area for fastening.
3. Secure with Screws:
Pre-Drill: Before driving screws, drill pilot holes through the face of the outer board and into the edge of the inner board. This prevents the wood from splitting. The number of pilot holes will depend on the size of the board. Two or three per corner section is usually sufficient.
Drive Screws: Use your drill/driver to drive exterior-grade screws into the pilot holes. Countersink them slightly so they are flush with or just below the wood surface.
4. Repeat for All Corners: Continue this process, adding glue and driving screws to form the four sides of your new post wrap. You’re essentially creating a new, larger “box” around the old post.
5. Attach to Existing Post (Optional but Recommended): For maximum stability, you can optionally drive a few screws from the inside of your new wrap into the old post. This is best done if your wraps allow access to the original post’s sides.
Here’s a quick look at the structure:
| Component | Description | Purpose |
|---|---|---|
| Existing Porch Post | The original post you are covering. | Structural support. |
| New Wood Boards | Cut to height and width. | To create the new profile and aesthetic. |
| Wood Glue (Exterior) | Applied to joining edges. | Adds strength and seals joints. |
| Exterior Screws | Driven through boards to join them. | Primary fastening method. |
Step 5: Finishing Touches
With the wood wrap assembled, it’s time to make it look polished.
1. Fill Holes and Gaps: If you chose to countersink screws, you can fill the dimples with exterior-grade wood filler. Fill any small gaps between boards as well. Let the filler dry according to the manufacturer’s instructions.
2. Sand Smooth: Once the filler is dry, lightly sand the entire wrapped post to ensure a smooth, consistent surface. Pay attention to the filled areas.
3. Apply Primer (if painting): If you plan to paint your porch posts, apply a coat of high-quality exterior primer. This helps the paint adhere better and provides a more durable finish.
4. Apply Finish:
Staining: Apply your chosen exterior stain according to the product directions. You might need two coats for good coverage and protection.
Painting: Apply your chosen exterior paint. Two coats are usually recommended for best results.
Sealing: If you’re using a wood that’s naturally beautiful (like cedar or redwood) and want to preserve its color, apply a clear exterior sealant or a UV-protectant finish. Reapply as needed over time.
5. Caulk Seams (Important!): Apply a bead of exterior-grade caulk around the base of the new post where it meets the porch floor, and at the top where it meets the beam or roofline. This seals out moisture, preventing rot and water damage down the line. Smooth the caulk line with a wet finger or caulk tool before it dries.
Frequently Asked Questions (FAQ)
Can I wrap a round porch post with wood?
Yes, you can wrap a round porch post, but it’s a bit more complex. The most common method is to first build a square or octagonal “box” around the round post using flat boards. Then, you can add decorative trim or custom-milled wood pieces to create the desired round appearance. For beginners, embracing the square or rectangular look is a great starting point.
What is the best type of wood for exterior porch posts?
For exterior durability and resistance to rot and insects, woods like Cedar, Redwood, and Mahogany are excellent choices. Pressure-treated pine is also a common and more budget-friendly option, especially if it’s rated for ground contact. These woods can withstand moisture and temperature changes better than many interior wood types.
How much bigger should the wrapped post be?
This is largely a design choice. A common practice is to enlarge a standard 4×4 (actual 3.5″x3.5″) post to a 6×6 (actual 5.5″x5.5″) or even an 8×8 (actual 7.5″x7.5″) profile. This provides a more substantial and impressive look. Ensure the new dimensions are proportionate to your porch and home’s overall style.
Do I need to attach the new wood to the old post?
While you can create a strong structure by simply joining the four boards together to form a sleeve, it’s highly recommended to secure the new wrap to the existing post. This adds significant stability and prevents any shifting, especially if the existing post is slightly bowed or uneven. Pre-drilling and using screws from the inside of your wrap into the old post is a good method.
How do I ensure the wrapped post is straight?
Using a level is crucial. As you assemble the individual boards that form your new wrap, check them for plumb (vertical) alignment. Once assembled into a box, place the level against each of the new “faces” of the post and make any necessary adjustments before the glue fully cures. Ensuring it’s plumb before starting your finishing steps like caulking is a must.
What if my porch posts are different sizes or shapes?
If your porch posts are not standard square or rectangular shapes, you might need to adapt. For irregular shapes, it’s often best to build a simple square or rectangular box frame around the existing post first, then clad that frame with your chosen wood. This simplifies the process considerably. For uniquely shaped posts, consulting with a local lumberyard or experienced carpenter might offer custom solutions.
You can find more information on best practices for lumber and construction materials from resources like the Forest Products Laboratory, a division of the U.S. Forest Service, which provides valuable research and guidance on wood use.
Pro-Tips for Beginners
Start Small: If porch posts feel too big, practice wrapping smaller decorative posts first.
Test Cuts: Before cutting your main boards, make test cuts on scrap wood of the same thickness to ensure your saw is set correctly.
Take Your Time: Rushing can lead to mistakes. Enjoy the process, and don’t be afraid to pause and reassess.
Safety First: Always wear safety glasses and consider other protective gear like gloves and a dust mask. Ensure your work area is clear and stable.
Conclusion
Wrapping a porch post with wood is a rewarding project that adds beauty and longevity to your home’s exterior. By following these steps, taking accurate measurements, and using the right materials, you can confidently tackle this upgrade. You’ve learned how to select wood, make precise cuts, assemble the wrap, and finish it for maximum impact. The result is a porch that looks grander, feels more solid, and welcomes visitors with style. Enjoy your beautifully transformed porch!