
Portable Sawmills for Homesteading: Your Guide to Milling Lumber at Home
Hey there! If you’re a homesteader like me, or just someone who loves working with wood, you’ve probably dreamed of turning logs from your own land into usable lumber. That’s where portable sawmills come in, and let me tell you, they’re a game-changer. I’ve spent years exploring woodworking and homesteading, and getting my hands on a portable sawmill was one of the best decisions I made. It’s not just about saving money on lumber—it’s about the freedom to create exactly what you need, right on your property.
In this article, I’m going to walk you through everything I’ve learned about portable sawmills for homesteading. We’ll cover why they’re awesome, how to choose one, and tips to make your milling journey smooth and rewarding. So, grab a cup of coffee, and let’s dive in!
Why Portable Sawmills Are Perfect for Homesteaders
When I first started homesteading, lumber was one of my biggest expenses. I’d head to the hardware store, spend a fortune on boards, and still not get the exact sizes or quality I wanted. Then I discovered portable sawmills, and it was like a light bulb went off. These machines let you take logs—whether from your own land or sourced locally—and turn them into boards, beams, or slabs right where you are. No need to haul heavy logs to a distant mill or pay sky-high prices for lumber.
Portable sawmills are designed to be mobile, so you can set them up wherever your logs are. This is a huge win for homesteaders, especially if you’ve got a woodlot or access to fallen trees. I’ve used mine to mill lumber for everything from barn repairs to custom furniture, and the satisfaction of using wood from my own land is hard to beat. Plus, with lumber prices bouncing around like they have been lately, milling your own can save you a ton of money. It’s not just about cost, though—it’s about self-sufficiency and having control over your projects from start to finish.
Another big perk? You can repurpose trees that might otherwise go to waste. That old oak that fell in a storm? It’s not firewood anymore—it’s potential flooring or a dining table. I’ve even sold extra boards to neighbors, which helped pay for my sawmill faster than I expected. Whether you’re building a shed, crafting furniture, or just want to stockpile lumber, a portable sawmill gives you options.
Types of Portable Sawmills: Which One’s Right for You?
When I started shopping for a portable sawmill, I was surprised by the variety out there. Not all sawmills are created equal, and each type has its strengths. Let’s break down the three main types I’ve come across so you can figure out which one fits your homesteading needs.
Chainsaw Mills
These are the simplest and most affordable option. A chainsaw mill is basically a metal frame that clamps onto a log and guides your chainsaw to make straight cuts. I started with one of these because it was budget-friendly and easy to use. You just attach your chainsaw (with a bar long enough for your logs), and you’re ready to go. They’re super portable—some even fit in a truck bed—and great for small projects or occasional use.
But here’s the catch: chainsaw mills are slower and less precise than other types. They also produce more sawdust because the chainsaw blade is thicker. I found them perfect for milling a few boards for a small project, like a garden bench, but if you’re planning to mill a lot of lumber, they can feel like hard work. Still, for beginners or folks with smaller logs, they’re a great entry point.
Bandsaw Mills
Bandsaw mills are the most popular choice for homesteaders, and for good reason. They use a thin, continuous band of metal with teeth to cut through logs, which means less sawdust and more usable lumber. I upgraded to a bandsaw mill after my chainsaw mill, and the difference was night and day. The cuts are smoother, and you can handle larger logs—some models can cut logs up to 36 inches in diameter.
These mills come in a range of sizes and prices, from entry-level models around $4,000 to high-end ones with hydraulic log loaders that can cost $70,000. I went with a mid-range model, and it’s been perfect for milling lumber for my barn and custom tables. They’re still portable, often mounted on trailers, but they’re heavier than chainsaw mills. If you’re serious about homesteading and want efficiency, a bandsaw mill is probably your best bet.
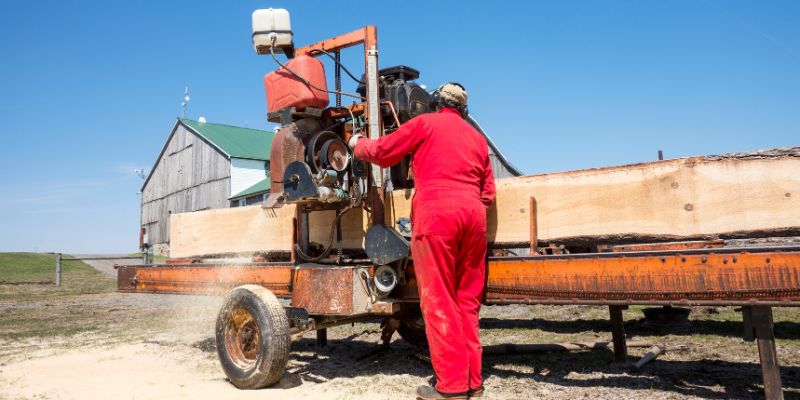
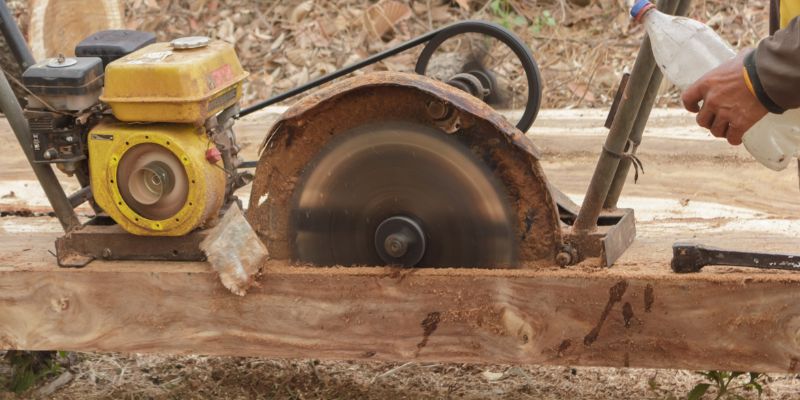
Circular Saw Mills
Circular saw mills are less common but worth mentioning. They use a large circular blade to cut logs, and they’re fast—really fast. I’ve seen them used by folks who need to process a lot of lumber quickly, like for commercial projects. But they’re expensive, and the blades can be costly to replace. They also produce more sawdust than bandsaw mills, which means you get less lumber from each log.
I didn’t go this route because they’re overkill for most homesteaders. Unless you’re planning to mill huge volumes of lumber or have very specific needs, a bandsaw or chainsaw mill will likely serve you better. Still, it’s good to know they’re out there if your projects scale up.
Here’s a quick comparison to help you decide:
| Type | Pros | Cons | Best For |
|---|---|---|---|
| Chainsaw Mill | Affordable, highly portable, easy to use | Slower, less precise, more sawdust | Beginners, small projects |
| Bandsaw Mill | Efficient, precise, less waste, handles larger logs | More expensive, heavier, requires maintenance | Serious homesteaders, frequent use |
| Circular Saw Mill | Fast, good for large-scale projects | Expensive, more sawdust, costly blade replacements | Commercial or high-volume milling |
Choosing the Right Portable Sawmill for Your Homestead
Picking a sawmill can feel overwhelming, but I’ve learned it comes down to a few key factors. When I was shopping, I focused on my budget, the size of logs I’d be milling, and how often I’d use the mill. Here’s what I recommend thinking about.
First, consider your budget. Chainsaw mills can cost as little as $100-$500, while bandsaw mills start around $4,000 and go up from there. I saved up for a bandsaw mill because I knew I’d be milling regularly, but if you’re just starting out, a chainsaw mill might be enough. Think about how quickly the mill will pay for itself—milling your own lumber can save you hundreds or even thousands compared to buying boards.
Next, look at the size of your logs. Most homesteaders deal with logs up to 28-36 inches in diameter, so check the mill’s cutting capacity. My bandsaw mill handles logs up to 30 inches, which is plenty for my oak and pine trees. If you’ve got bigger logs, make sure the mill can handle them without forcing you to split the logs first.
Also, think about power sources. Some mills run on gas or diesel, which is great for remote homesteads like mine where electricity isn’t always available. Others are electric, which can be quieter but requires a power source. I went with a gas-powered bandsaw mill for flexibility, and it’s been reliable even in the middle of my woodlot.
Finally, consider ease of use and maintenance. Bandsaw mills need regular blade sharpening and tensioning, but they’re not too complicated once you get the hang of it. Chainsaw mills are simpler but require a sharp chain and a steady hand. I spent some time watching YouTube tutorials to learn the ropes, and it made a big difference.
Setting Up Your Portable Sawmill: Tips for Success
When I got my first sawmill, I was excited but a little intimidated. Setting it up right makes all the difference, so here are the tips I wish I’d known from the start.
Find a level, stable spot for your mill. I set mine up on a flat patch near my woodlot, with enough space to maneuver logs. If the ground isn’t level, you’ll get uneven cuts, which is frustrating. I used a shovel and some gravel to make a solid base, and it’s worked great.
Safety is huge. I always wear goggles, gloves, and hearing protection. Sawmills are powerful machines, and things can go wrong if you’re not careful. Read the manual and get familiar with the controls—especially the emergency stop. I also keep a first-aid kit nearby, just in case.
Start with smaller logs to practice. My first few cuts were wobbly because I tried tackling a massive oak right away. Smaller logs are easier to handle and help you learn how to adjust the blade and set the depth. Once you’re comfortable, you can move on to bigger logs.
Keep your blades sharp. A dull blade makes rough cuts and can even damage your mill. I check my blade after every few logs and sharpen it regularly. Most manufacturers sell blade sharpeners, or you can take them to a local shop. It’s worth the investment.
Finally, manage your sawdust. It piles up fast! I collect mine in bags and use it for mulch or animal bedding. If you let it build up around the mill, it can clog things up and make a mess.
Milling Your Own Lumber: The Process
Milling lumber is simpler than it sounds, but it takes some practice to get it right. Here’s how I do it, step by step.
First, I pick the best logs. Look for straight logs without rot, excessive knots, or metal (like nails or wire) that could ruin your blade. I use a chainsaw to trim branches and cut the log to a consistent length—usually 8 to 12 feet for my projects.
Next, I set up the log on the mill. If your mill has a cradle, you’ll load the log onto it. For chainsaw mills, you clamp the frame directly onto the log. I use a log peavey (a long-handled tool) to roll heavy logs into place. If the log is irregular, I add shims or wedges to keep it steady.
Then, I adjust the blade height to set the thickness of the boards. Most mills have a scale for this—mine has markings for ¾-inch, 1-inch, and 2-inch boards. I usually start with 1-inch boards for versatility. Take your time here; a small mistake can mean uneven boards.
Now, start cutting. Go slow and steady, letting the blade do the work. I made the mistake of rushing my first few cuts, and the boards came out wavy. If you’re using a bandsaw mill, the blade moves along a track, so it’s easier to keep things straight. With a chainsaw mill, you’ll need a steady hand to follow the guide.
Once you’ve made your first cut, you’ll have a flat surface. Rotate the log and repeat until you’ve milled all sides. I stack my boards as I go, using spacers (small pieces of wood) to keep them from touching. This helps with drying later.
Drying and Storing Your Lumber
Freshly milled lumber is “green,” meaning it’s full of moisture. If you use it right away, it can warp or crack as it dries. I learned this the hard way when I built a shelf that twisted after a few months. Here’s how I dry and store my lumber.
Stack your boards in a dry, well-ventilated area. I use a corner of my barn, but a shed or even a tarp-covered stack works. Place stickers (1-inch thick pieces of wood) between each layer to let air circulate. This prevents mold and helps the wood dry evenly.
Drying takes time—usually 6 months to a year, depending on the wood species and thickness. I check my lumber every few months with a moisture meter to make sure it’s down to about 10-12% moisture content before using it. If you’re in a hurry, you can use a kiln, but that’s a bigger investment.
Cover the stack to protect it from rain, but don’t seal it completely—airflow is key. I also weigh down the top with cinder blocks to keep the boards from warping. Once it’s dry, I store my lumber indoors to keep it in good shape.
Making Money with Your Sawmill
One of the coolest things about my sawmill is that it’s not just a tool—it’s a side hustle. I’ve made extra cash by milling lumber for neighbors, selling live-edge slabs, and even crafting small items like cutting boards from scrap wood. Here are a few ways I’ve turned my sawmill into a money-maker.
First, offer custom milling services. If you’ve got a bandsaw mill, you can charge to mill logs for others. I charge by the board foot (a measure of lumber volume), and it’s been a steady income stream. Check local rates—around me, it’s about $0.50 to $1 per board foot.
You can also sell lumber. Live-edge slabs are super popular for furniture, and I’ve sold them to local woodworkers and artisans. Even scrap wood can be sold for crafts or firewood. I once made $200 just from selling leftover pieces on a local bulletin board.
Another idea is to make and sell finished products. I’ve built tables, benches, and shelves from my lumber and sold them at craft fairs. People love knowing the wood came from a local homestead—it adds a story to the piece.
Finally, consider teaching others. I’ve hosted a couple of workshops to show people how to use a chainsaw mill, and it’s been a hit. You don’t need to be an expert—just share what you’ve learned.
Maintenance and Troubleshooting
Keeping your sawmill in good shape is crucial. I’ve had a few hiccups, but regular maintenance keeps things running smoothly. Here’s what I do.
Clean your mill after every use. Sawdust can build up and cause problems, so I sweep it off and check for any loose parts. For bandsaw mills, check the blade tension and alignment regularly. A loose blade can wander and ruin your cuts.
Sharpen your blades often. I noticed my cuts getting rougher when I skipped sharpening, and it’s a pain to fix uneven boards. Most manufacturers include sharpening instructions, or you can buy a blade sharpener.
Check the engine or motor, too. If you’ve got a gas-powered mill, change the oil and check the fuel lines. For electric mills, make sure the wiring is secure. I keep a maintenance log to stay on top of things.
If you run into issues, like wavy cuts or a blade that keeps slipping, double-check your setup. Is the log secure? Is the track level? Is the blade sharp? Most problems come down to one of these. When in doubt, check the manual or online forums—there’s a big community of sawyers out there happy to help.
Why I Love My Portable Sawmill
After years of using my sawmill, I can honestly say it’s one of the best investments I’ve made for my homestead. It’s given me the freedom to build what I want, when I want, without breaking the bank. The satisfaction of turning a fallen tree into a beautiful piece of furniture or a sturdy barn beam is hard to describe. Plus, it’s opened up new ways to connect with my community, whether through selling lumber or sharing tips with other homesteaders.
If you’re thinking about getting a portable sawmill, I say go for it. Start small if you’re unsure, but don’t be afraid to invest in a quality machine if you know you’ll use it often. It’s not just a tool—it’s a way to take control of your woodworking and homesteading dreams. I hope my experience helps you find the perfect sawmill and start milling your own lumber. Trust me, once you start, you’ll wonder why you didn’t do it sooner!
FAQs
What’s the Cheapest Way to Start Milling Lumber at Home?
The cheapest way is to get a chainsaw mill. They cost $100-$500 and work with a chainsaw you might already own. They’re great for small projects or if you’re just starting out. You’ll need a chainsaw with a bar long enough for your logs, but it’s a low-cost way to try milling without a big investment.
How Long Does It Take to Learn to Use a Portable Sawmill?
It depends, but I got the hang of my chainsaw mill in a weekend. Bandsaw mills take a bit longer—maybe a week or two of practice to feel confident. Start with small logs and watch tutorials. Most manufacturers include good manuals, and there are tons of videos online to help.
Can I Make Money with a Portable Sawmill?
Yes! I’ve made money by milling lumber for others, selling boards, and crafting furniture. Custom milling can earn $0.50-$1 per board foot, and live-edge slabs are especially popular. You can also sell scrap wood or make small items like cutting boards for extra cash.
How Do I Maintain My Sawmill Blades?
Keep them sharp and clean. I sharpen my blades after every few logs using a sharpener or take them to a local shop. Check the tension on bandsaw blades regularly—too loose, and you’ll get bad cuts. Store blades in a dry place to prevent rust.
What Safety Gear Do I Need for Milling?
Always wear safety goggles, gloves, and hearing protection. I also recommend sturdy boots and long pants to protect your legs. Keep a first-aid kit nearby, and make sure you know how to use the emergency stop on your mill. Safety first!