Ryobi 14-Inch Chainsaw Chain: The Exact Spec (3/8″ LP, .050″, 52DL)
A Ryobi 14-inch chainsaw chain has one exact spec: 3/8-inch low profile pitch, .050-inch gauge, and 52 drive links — sold as an “S52” chain and matching Ryobi’s own RY14C1 replacement. That single spec covers every current 14-inch Ryobi, gas or 40V, so the “which chain fits my Ryobi” question has a shorter answer than most sites make it sound.
Below is where that spec comes from, which specific Ryobi models it covers, how to tell a worn chain from one that just needs tension, and a verified in-stock replacement that lists the exact fit.
The Exact Ryobi 14-Inch Chainsaw Chain Spec
Every 14-inch Ryobi chainsaw — the gas-powered RY3714 and the 40V cordless RY40503, RY40530, and RY43006 — runs a 3/8-inch low profile (LP) pitch chain, a .050-inch gauge, and 52 drive links. That combination is short-handed as “S52” by most aftermarket sellers and matches Oregon’s 91PX052G / 91VXL052G chains, which cross-reference directly to Ryobi’s own RY14C1 replacement chain.
Verified Exact-Fit Replacement
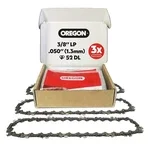 |
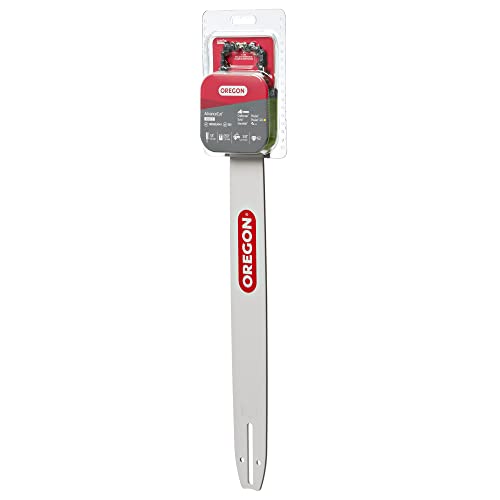
Oregon 14″ Chainsaw Chain, 3/8″ LP, .050″ Gauge, 52DL – $24.75 This is the exact spec a Ryobi 14-inch chainsaw takes, made by the company that invented modern saw chain.
|
You don’t need to measure your old chain to confirm this — if your saw is a 14-inch Ryobi, it’s this spec. Measuring only matters if you’ve swapped bars, are buying for a non-Ryobi saw, or want to double-check a chain someone already installed.
| Spec | Value |
|---|---|
| Pitch | 3/8″ Low Profile (LP) |
| Gauge | .050″ (1.3mm) |
| Drive links | 52 |
| File size | 5/32″ round file |
| Ryobi part number | RY14C1 |
| Oregon cross-reference | 91PX052G / 91VXL052G |
Which Ryobi Models Use This Chain
The 3/8 LP, .050″, 52-drive-link spec fits every 14-inch bar Ryobi currently sells or has sold in the last several years:
- RY3714 — 37cc gas chainsaw, Ryobi’s entry-level 14″ gas model
- RY40503 — 40V cordless chainsaw
- RY40530 — 40V cordless chainsaw (brushless variant)
- RY43006 — 40V cordless chainsaw, higher-capacity battery platform
If you’re not sure which model you own, the model number is stamped on a sticker near the rear handle or the battery bay on cordless models. Ryobi has sold 16-inch and 18-inch versions of some of these same chassis, so confirm the bar length reads 14″ before ordering — a 16″ bar takes a 56-drive-link chain of the same pitch and gauge, which will not fit a 14″ bar even though the spec name looks almost identical.
Low Profile vs. Full Chisel vs. Skip Tooth: Which One You Actually Have
Chain marketing throws around three cutter profiles, but a 14-inch Ryobi only ever ships with one of them from the factory:
| Type | Cutter shape | Where it’s used |
|---|---|---|
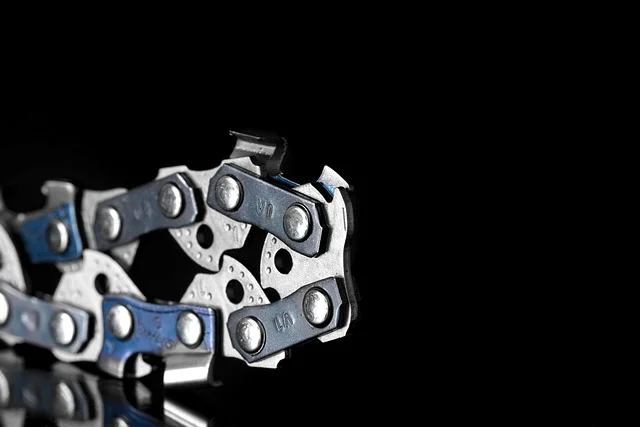
| Low profile (LP) | Rounded corner, bumper drive link ahead of the depth gauge | Ryobi’s factory chain — lower kickback, easier to control on a lightweight saw |
| Full chisel | Square corner cutter | Faster in clean hardwood, but bites harder and kicks back more on a 14″ saw — not what Ryobi ships |
| Skip tooth | Cutters spaced with an extra link between them | Longer bars (20″+) where fewer cutters reduce drag — irrelevant at 14″ |
The low-profile bumper design is the reason Ryobi’s 14″ saws feel controllable for a beginner: the bumper link ahead of each cutter’s depth gauge physically slows how aggressively the tooth can bite, which reduces (not eliminates) kickback. Swapping to a full-chisel chain on the same bar will cut faster in clean, knot-free hardwood, but it’s a real trade against control on a saw this light — most people replacing a worn Ryobi chain are better off staying with the same low-profile spec rather than “upgrading” to full chisel.
5 Signs Your Chain Needs Replacing, Not Just Sharpening
- The depth gauges sit level with the top plate. Every sharpening removes a tiny bit of the cutter’s top plate; once the depth gauge (the hook-shaped piece ahead of each cutter) is level with it instead of lower, the tooth can no longer bite into wood no matter how sharp the edge is.
- You can lift a link more than 1/8 inch off the bar rail. That’s stretch from normal wear on the rivets. A few millimeters is normal and fixed by tensioning; a chain that visibly sags even at full tension has stretched past a safe working length.
- A cutter is chipped or cracked, not just dull. Filing restores an edge; it can’t fix a tooth that’s missing a chunk from hitting a nail, rock, or dirt.
- The chain throws fine sawdust instead of chips. Coarse, chip-shaped debris means the chain is cutting; fine powder-like dust means it’s scraping, a sign it’s past the point sharpening will meaningfully help.
- It won’t hold an edge for more than a couple of cuts. If you’re filing every few minutes of runtime and it dulls again almost immediately, the steel itself has likely work-hardened or the rivets have loosened enough that the cutters flex under load.
How to Install and Tension a New Chain in 6 Steps
- Power off and disconnect. Remove the battery on 40V models or disconnect the spark plug wire on the RY3714 gas model before touching the chain.
- Remove the bar cover and loosen the bar nuts. Back them off enough to let the bar slide forward and slacken the old chain, then lift the old chain off the sprocket and out of the bar groove.
- Check rotation direction on the new chain. Cutters should angle forward along the top of the bar, toward the tip — a chain installed backward will not cut and will feel like it’s just bouncing off the wood.
- Feed it around the bar and onto the drive sprocket. Start at the nose of the bar, work the chain into the groove, then seat the drive links into the sprocket teeth at the back before reinstalling the bar cover loosely.
- Set tension. Turn the tensioning screw clockwise until the chain sits flush against the underside of the bar with no visible sag, then check you can still lift it roughly 1/8 inch at the bar’s midpoint and pull it around by hand.
- Torque the bar nuts and recheck after a few cuts. Tighten the bar nuts while holding the bar tip upward, then run the saw briefly and recheck tension — a brand-new chain stretches noticeably in its first 5–10 minutes of cutting and will need a second tightening.
Chain Maintenance That Actually Extends Life
Bar and chain oil matters more than sharpening frequency for how long a chain lasts. Ryobi’s 40V saws have a small oil reservoir with an automatic oiler; check it every time you check the battery, since running dry for even a few minutes accelerates wear on both the chain rivets and the bar rail far faster than normal cutting does. Use bar and chain oil specifically, not motor oil or vegetable oil substitutes — both break down or fling off differently at chain speed and leave the bar groove running dry.
After each use, brush sawdust and sap out of the bar groove and off the drive links with a stiff brush; packed sawdust in the groove is one of the more common causes of a chain that binds or won’t tension evenly. Flip the bar end-for-end periodically (every second or third chain change is reasonable) so it wears evenly on both rails instead of grooving deeper on one side, which shortens both bar and chain life.
File with a 5/32-inch round file matched to this chain’s pitch, at the factory angle stamped on most cutters (usually 30 degrees), and file every cutter the same number of strokes so the chain cuts straight instead of pulling to one side. Reset the depth gauges with a flat file and a depth gauge tool every third or fourth sharpening, since the top plate wears down faster than most people expect relative to the depth gauge height.
Troubleshooting: Jamming, Uneven Cuts, and Chain Throw
Chain jams or binds mid-cut: almost always packed sawdust in the bar groove or a chain that’s too loose and derails slightly under load. Clean the groove fully and reset tension before assuming the chain itself is bad.
Cuts curve instead of running straight: one side of the chain has been filed more than the other, or the bar rails are worn unevenly. Compare cutter length side to side under good light; if they’re visibly uneven, that’s the cause, not the bar.
Chain comes off the bar during a cut: tension is too loose, or the bar and chain aren’t a matched pitch (a mismatched chain can ride the sprocket incorrectly even if it physically fits onto the bar). Re-verify the 3/8 LP, .050″, 52-drive-link spec against what’s actually installed before re-tensioning.
Matching file size to your specific Ryobi chain and understanding how 3/8″ compares to other common pitches both go deeper into the sharpening and compatibility side of this if the troubleshooting above doesn’t resolve it.
Frequently Asked Questions
What size chain does a Ryobi 14-inch chainsaw use?
A Ryobi 14-inch chainsaw uses a 3/8-inch low-profile (LP) pitch chain with a .050-inch gauge and 52 drive links, commonly sold under the S52 designation. This covers the RY3714, RY40503, RY40530, and RY43006. Ryobi’s own branded replacement is the RY14C1; Oregon’s 91PX/91VXL 052G chains use the identical spec and physically interchange.
How do I know if my Ryobi chain is 3/8 LP and not a different pitch?
Measure across three consecutive rivets, divide by two, and compare to a ruler in 8ths of an inch, or just check the stamp on a depth gauge (drive link) — Oregon stamps the pitch and gauge directly on the cutter. If your saw is a 14-inch Ryobi RY3714 or RY40-series model, it takes 3/8 LP, .050 gauge, 52 drive links without needing to measure.
How do I know when to replace the chain instead of just sharpening it?
Replace instead of sharpen once the cutters have been filed back so far the depth gauges sit level with the top plate, once you can see 1/16 inch or more of play when you pull a link away from the bar tip, once a cutter is chipped or cracked rather than just dull, or once the chain won’t hold an edge for more than a few cuts no matter how carefully you file it.
How do I adjust the tension on a Ryobi chainsaw chain?
With the saw off and bar cool, loosen the bar nuts a half turn, turn the tensioning screw clockwise until the chain sits flush against the bottom of the bar with no sag, then confirm you can still pull the chain around the bar by hand and lift it slightly off the bar at the midpoint — roughly 1/8 inch of lift is correct. Re-tighten the bar nuts while holding the bar tip up, then recheck after a few minutes of cutting since a new chain stretches.
Conclusion
A 14-inch Ryobi chainsaw — gas RY3714 or any of the 40V RY40-series and RY43006 models — takes one specific chain: 3/8″ low profile, .050″ gauge, 52 drive links, sold as Ryobi’s RY14C1 or the equivalent Oregon 91PX/91VXL052G. Confirm that spec, check the wear signs above before assuming a dull cut just needs filing, and keep the bar groove clean and oiled between uses — that combination does more for chain life than any single upgrade.
Sponsored / affiliate links. As an Amazon Associate I earn from qualifying purchases. I may earn additional commission from eligible campaigns.