How to Cut a Tree Branch With a Chainsaw Safely
To cut a tree branch with a chainsaw safely, first assess which side of the branch is under tension and which is under compression, check overhead for loose or hanging “widowmaker” limbs, then use a three-cut method (undercut, top cut, final cut at the branch collar) so the branch’s own weight never gets to surprise you. The technique matters less than reading the branch correctly before the chain ever touches wood – most serious branch-cutting injuries trace back to a branch that released differently than the operator expected, not to a bad cut itself.
Why Branch Cutting Deserves More Caution Than People Expect
OSHA-COMPLIANT CHAPS FOR BRANCH WORK
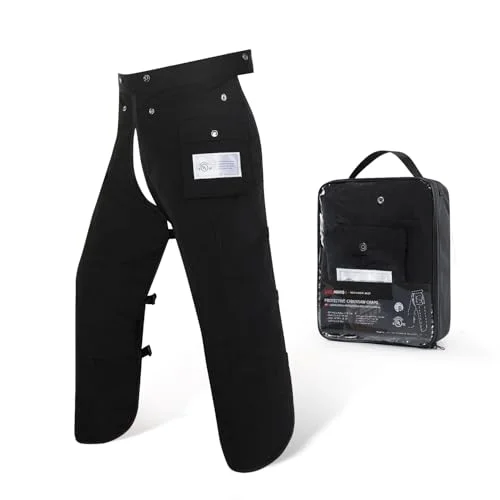 |
YARDMARIS 8-Layer Chainsaw Chaps – $57.99 Branch work means awkward angles and a bar that’s closer to your legs than a straight felling cut – certified leg protection is the one piece of gear you don’t skip.
|
Branch removal has a different injury profile than felling a whole tree. Felling puts the operator at ground level making one big, well-planned cut; branch work puts the bar closer to the body, often overhead or at an angle, and frequently on wood that’s already bent, pinned, or partially supported by other branches. That combination – awkward position plus loaded wood – is exactly what causes the three hazards below, and it’s why occupational data consistently ranks being struck by a falling tree or limb as one of the leading causes of death in tree work, alongside falls and electrocution.
Read the Branch First: Tension, Compression, and Spring-Poles
A “spring pole” is what arborists call a branch or limb that’s bent, pinned under another piece of wood, or leaning against something with enough stored energy that cutting it releases that energy violently – the wood can snap back and strike the operator, or clamp shut on the bar mid-cut. This is one of the most consistently documented causes of serious chainsaw injury in forestry and tree-care safety literature, and it’s almost entirely preventable once you know what to look for.
Every loaded branch has a tension side (being stretched) and a compression side (being squeezed). Cut into the tension side first and the wood can split explosively toward you; cut into the compression side and the kerf tends to close and pinch the bar instead. The safer approach used in professional training is to find the point of maximum tension – draw an imaginary line along the branch, a second line at a right angle from the top of the bend back to that line, and bisect the angle between them at roughly 45 degrees. That intersection point is where the stored energy is concentrated. From there, make a series of small shave cuts on the compression side at that point rather than one deep cut – each shave releases a little energy until the branch lets go in a controlled way instead of all at once.
Never stand in the direct line of a branch under tension while cutting it. Position yourself to the side, plan where the release will travel, and make sure nothing – including your own footing – is in that path.
Look Up First: Widowmakers and Overhead Hazards
A “widowmaker” is the specific term – recognized in OSHA safety guidance – for a broken or dead limb that’s no longer fully attached to the tree but is still resting in the canopy: wedged in a crotch, hung up in other branches, or balanced precariously overhead. It can fall without warning, from wind, vibration, or the impact of your own cutting, and it doesn’t announce itself the way a branch you’re actively cutting does. Widowmakers are estimated to account for roughly 11% of all chainsaw-related fatalities, which is a disproportionate share for a hazard that has nothing to do with the cut you’re actually making.
Before you start the saw, walk the full work area and look up – not just at the branch you’re removing, but at everything above and around it. Look for broken limbs hanging in the canopy, dead wood, cracked crotches, and anything that looks loosely attached. If you see one and can’t safely remove it first, treat that spot as off-limits and reposition your cut, or bring in a professional arborist with the right rigging to deal with it. This single check costs a minute and addresses a hazard that has killed people who did everything else right.
Gear Up Before You Start
Standard PPE for chainsaw branch work isn’t optional extra caution – it’s what OSHA 1910.266 and ANSI Z133.1 assume you’re wearing:
- Certified chainsaw chaps or pants rated to stop a running chain – see the pick above.
- A helmet with an integrated face screen and hearing protection, not just safety glasses – flying chips and kickback both threaten the face, and chainsaw noise exceeds safe exposure limits quickly.
- Cut-resistant gloves with a firm grip surface.
- Sturdy boots with good tread, ideally with reinforced toes.
Check the saw itself before you start: chain tension, bar and chain lubrication, and a chain that’s actually sharp – a dull chain forces you to push harder, which increases both kickback risk and fatigue-driven mistakes. If your chain has been through a lot of branch work, our guide on how to square-file a chainsaw chain covers getting a consistent, sharp edge back. And if the saw itself won’t cooperate, our Echo chainsaw starting guide walks through the correct cold- and warm-start sequence so you’re not fighting the tool before you’ve even started the job.
The Three-Cut Method, Step by Step
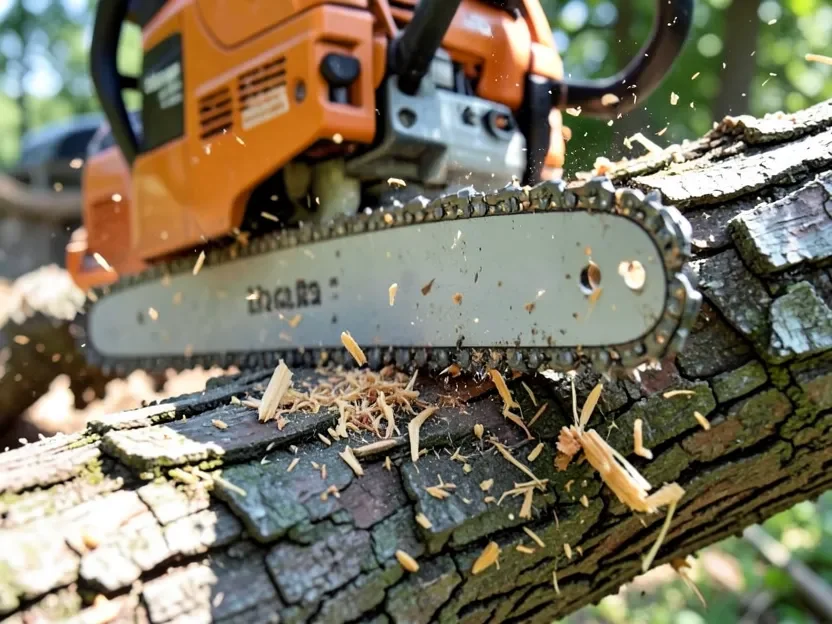
For any branch too heavy to control with one cut, the standard three-cut sequence prevents the branch’s own weight from tearing bark down the trunk or pinching your bar:
- Undercut: About 12-18 inches out from where the final cut will be, saw upward into the underside of the branch roughly a third of the way through. This stops the bark from tearing down the trunk when the branch drops.
- Top cut: A few inches further out from the undercut, cut down from the top until the branch’s weight snaps it off at that point. Stand clear – this piece falls once the cuts meet.
- Final cut: With the heavy stub gone, make the finishing cut just outside the branch collar (the slightly raised ring where the branch meets the trunk), angled to follow the branch bark ridge. Cutting flush against the trunk removes the collar and slows healing; leaving too long a stub invites decay. Just outside the collar is the target.
Cutting a Branch That’s Under Bind
If the branch you’re removing is already resting on the ground, leaning on another branch, or bent under its own weight, don’t run the three-cut method on autopilot – check for bind first. Push gently on the branch or look at how it’s supported to feel which side is compressed and which is stretched. If it’s under real load, apply the shave-cut approach from the tension section above: small relief cuts on the compression side at the point of maximum tension, working gradually rather than committing to one deep pass. If the kerf starts to close and grip the bar as you cut, stop – that’s compression wood squeezing shut, and forcing the saw through it is how bars get pinched and chains bind. Back the saw out if you still can, reposition to relieve the bind from a different angle, or use a wedge to hold the kerf open rather than fighting it with the saw’s motor.
Preventing Kickback at Awkward Angles
Kickback happens when the upper tip of the bar – the “kickback zone” – contacts wood or gets pinched, snapping the saw back and up toward the operator. Branch work makes this more likely than a straightforward felling cut because you’re often reaching around other limbs, cutting at odd angles, or working with reduced visibility of exactly where the tip is. A few habits matter specifically here:
- Know where the bar tip is at all times, especially when maneuvering around neighboring branches – it’s the part of the saw you can lose track of easiest.
- Keep a firm grip with your thumb wrapped under the front handle, both hands on the saw, so a kickback event doesn’t wrench the saw free.
- Engage the chain brake any time you’re repositioning between cuts rather than carrying a running saw with the chain exposed.
- Don’t force the saw into a cut at a stretch or off-balance angle – reposition your footing instead of reaching.
Working Overhead or From a Ladder: What to Actually Do
This corrects a piece of advice that circulates a lot in older guides: don’t operate a chainsaw from a ladder, and don’t cut above shoulder height with one. Safe chainsaw operation requires both hands fully committed to controlling the saw – ladder work takes one hand away to hold on for balance, which leaves you controlling a running saw one-handed on an unstable platform. Cutting above shoulder height compounds it further: you lose clear sightlines to the cut, you can’t apply controlled downward pressure, and chaps can’t protect legs from a cut that’s happening over your head anyway. This combination shows up repeatedly in tree-work injury data, which is why professional arborists reach for a pole saw for overhead branches within its range, or bring in climbing/bucket equipment and training for anything a pole saw can’t handle – not a stepladder and a chainsaw. If a branch is genuinely out of safe ground reach, that’s the point to call a professional rather than improvise a way to reach it.
After the Cut: Cleanup and Chainsaw Care
Once the branch is down, clear the work area before you relax – cut sections, scattered debris, and sawdust are all trip hazards, especially once you’re carrying wood instead of watching your footing. Buck larger pieces into manageable lengths for firewood or chipping, and keep the drop zone clear until everything’s off the ground. Wipe the saw down, check the chain and bar for embedded debris, and top off bar oil before storing it – branch work is often dirtier and more stop-and-start than a straight felling cut, and grit left on the chain accelerates dulling.
Frequently Asked Questions
How do I know if a branch is under tension before I cut it?
Look at how the branch is supported. If it’s bent, resting on something else, pinned under other wood, or leaning against a structure, assume it’s storing energy. Press on it gently or look for a visible bow – the outside of the curve is typically under tension, the inside under compression. When in doubt, treat it as loaded and use the compression-side shave-cut technique rather than a single straight cut.
What is a widowmaker and how do I spot one?
A widowmaker is a broken or dead limb still hanging in the canopy above – wedged in a crotch or tangled in other branches rather than fully attached. Spot it by looking up and scanning the full canopy before you start, not just the branch you’re removing. It’s responsible for an estimated 11% of chainsaw-related fatalities because it can fall with no warning, independent of the cut you’re making.
Is it safe to cut a tree branch from a ladder?
No – this is a well-documented dangerous combination. Chainsaw operation needs both hands fully on the saw, but a ladder requires one hand for balance, and cutting above shoulder height removes your clear sightline and control. Use a pole saw for overhead branches within reach, or hire a professional arborist with proper climbing or bucket equipment for anything higher.
What’s the correct order of cuts for removing a heavy branch?
Use the three-cut method: an undercut on the underside about a third of the way through, a top cut a few inches further out that lets the heavy stub drop off, then a final finishing cut just outside the branch collar. This sequence keeps the branch’s weight from tearing bark or pinching the bar during the main cut.
Sponsored / affiliate links. As an Amazon Associate I earn from qualifying purchases. I may earn additional commission from eligible campaigns.