Sealing Your Pressure Treated Wood Deck: A Complete Guide for Long-Lasting Beauty
Hey there, fellow woodworking enthusiast! If you’ve got a pressure treated wood deck, you know it’s a fantastic addition to your outdoor space. It’s sturdy, affordable, and built to withstand the elements. But here’s the thing—without proper care, even the toughest deck can start looking worn out, splintered, or faded. That’s where sealing comes in. Sealing a pressure treated wood deck is like giving it a protective shield, keeping it beautiful and strong for years.
I’ve spent countless hours working on my own deck and helping friends with theirs, so I’m excited to share everything I’ve learned about sealing pressure treated wood decks. Let’s dive into why it matters, how to do it right, and some tips to make your deck the envy of the neighborhood.
Why Sealing a Pressure Treated Wood Deck Matters
You might be wondering why sealing is such a big deal. After all, pressure treated wood is already treated to resist rot and insects, right? Well, yes, but that treatment only goes so far. The chemicals in pressure treated wood protect against decay and bugs, but they don’t shield the surface from sun, rain, or foot traffic. Over time, water can seep into the wood, causing it to swell, crack, or warp. UV rays from the sun can fade the wood, turning it a dull gray. And let’s not forget about dirt, mildew, and those annoying splinters that seem to pop up out of nowhere.
Sealing creates a barrier that locks out moisture, blocks UV rays, and keeps your deck looking fresh. It also makes cleaning easier and can prevent mold or mildew from taking hold. In my experience, a well-sealed deck not only lasts longer but also feels more inviting for barbecues, family gatherings, or just relaxing with a cold drink on a summer evening.
Understanding Pressure Treated Wood
Before we get into the nitty-gritty of sealing, let’s talk about what makes pressure treated wood special. This type of wood is infused with chemicals under high pressure to make it resistant to rot, insects, and fungal growth. It’s a go-to choice for outdoor projects like decks because it’s durable and cost-effective. However, the treatment process leaves the wood wet, and it needs time to dry out before you can seal it. I learned this the hard way when I tried sealing a deck too soon and ended up with a sticky mess!
The drying time depends on the weather and how the wood was stored. In dry climates, it might take a few weeks, while in humid areas, it could take months. A good rule of thumb is to wait until the wood feels dry to the touch and has a lighter color. You can test it by sprinkling a few drops of water on the surface—if the water beads up, it’s still too wet. If it soaks in, you’re ready to seal.
Choosing the Right Sealant for Your Deck
Picking the right sealant can feel overwhelming with so many options out there. I’ve tried a bunch of products over the years, and each has its pros and cons. Here’s a breakdown of the main types to help you decide what’s best for your deck.
- Water-Based Sealants: These are eco-friendly, easy to clean up with soap and water, and dry quickly. They’re great for beginners because they’re forgiving if you make a mistake. However, they might not penetrate as deeply as oil-based sealants, so you may need to reapply more often.
- Oil-Based Sealants: These soak deep into the wood, offering excellent protection against water and UV rays. They give the deck a rich, warm look but take longer to dry and can be messy to apply. I’ve found they’re worth the effort for high-traffic decks.
- Clear Sealants: These let the natural wood grain shine through. They’re perfect if you love the look of fresh pressure treated wood. Keep in mind they offer less UV protection, so the wood might fade over time.
- Tinted Sealants: These add a hint of color while still showing the grain. They’re a good middle ground if you want some personality without hiding the wood’s natural beauty.
- Semi-Transparent Stains: These offer more color and UV protection while still letting some grain show through. I used one on my deck to add a warm cedar tone, and it’s held up beautifully.
- Solid Stains: These act like paint, covering the wood completely. They’re great for older decks with imperfections but hide the grain. I’d avoid these unless your deck is already beat up.
Here’s a quick comparison to help you choose:
| Sealant Type | Pros | Cons | Best For |
|---|---|---|---|
| Water-Based Sealant | Eco-friendly, easy cleanup, fast dry | Less durable, frequent reapplication | Beginners, low-traffic decks |
| Oil-Based Sealant | Deep penetration, long-lasting | Messy, longer dry time | High-traffic decks, harsh climates |
| Clear Sealant | Shows natural wood grain | Less UV protection | New decks, natural look lovers |
| Tinted Sealant | Adds color, good UV protection | Slightly hides grain | Balanced look and protection |
| Semi-Transparent Stain | More color, strong UV protection | Covers some grain | Adding color while keeping texture |
| Solid Stain | Hides imperfections, durable | Hides grain, looks like paint | Older, worn decks |
When I sealed my deck last summer, I went with a semi-transparent stain because I wanted a pop of color but still loved seeing the wood’s texture. It’s held up great through rain and sun, and I’d recommend it for most homeowners.
Preparing Your Deck for Sealing
Preparation is where the magic happens. A well-prepped deck makes sealing easier and ensures the sealant lasts longer. I’ve skipped steps before, thinking I could save time, but trust me—it’s not worth it. Here’s how I prep my deck:
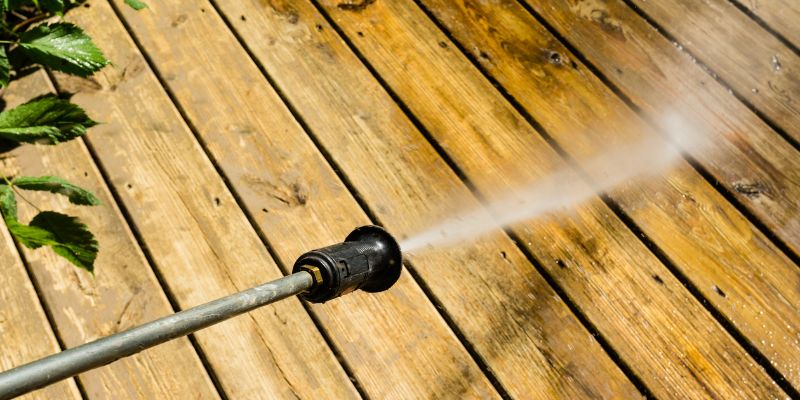
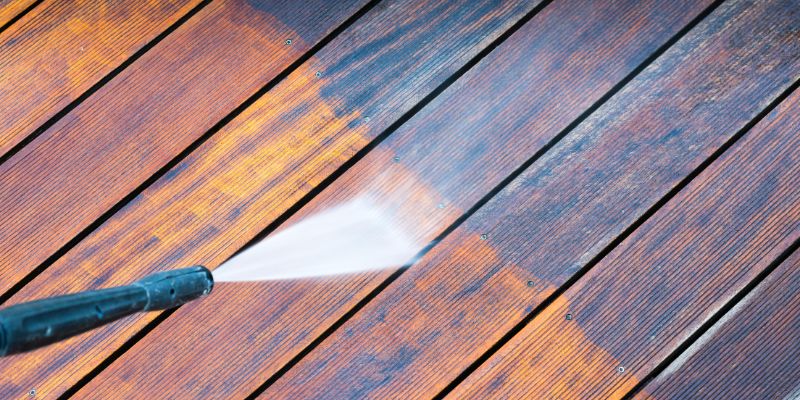
- Clean the Deck Thoroughly: Dirt, mildew, and old sealant can prevent the new sealant from sticking. Use a deck cleaner or a mix of water and mild dish soap. I scrub with a stiff brush to get into the grain. For stubborn stains, a pressure washer on a low setting works wonders, but be careful not to damage the wood.
- Sand if Necessary: If your deck has rough spots or splinters, lightly sand with 80-grit sandpaper. This smooths the surface and helps the sealant adhere. I learned this after my first sealing job peeled because I didn’t sand.
- Remove Old Sealant: If your deck was sealed before, strip off the old sealant with a deck stripper. Follow the instructions carefully—it’s messy but necessary.
- Let It Dry Completely: After cleaning, let the deck dry for at least 48 hours. Sealing wet wood is a recipe for disaster, as the sealant won’t stick properly.
- Test the Wood: Sprinkle water on the deck. If it soaks in, you’re good to go. If it beads, wait a bit longer or clean again.
Taking the time to prep properly makes a huge difference. My neighbor rushed this step, and his sealant started peeling within months. Don’t make that mistake!
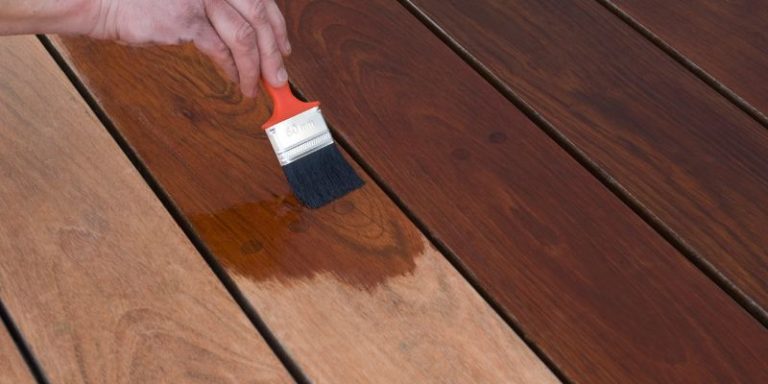
How to Apply Sealant Like a Pro
Now for the fun part—applying the sealant! I love this step because you can see your deck transform before your eyes. Here’s how I do it:
- Gather Your Tools: You’ll need a paint roller, a brush for edges, a sprayer (optional), and a drop cloth to protect nearby plants or furniture. I also wear gloves and old clothes because sealant can be messy.
- Check the Weather: Pick a dry day with temperatures between 50°F and 90°F. Avoid windy days to keep debris from sticking to the wet sealant.
- Stir the Sealant: Don’t shake the can—it can create bubbles that ruin the finish. Stir gently to mix it evenly.
- Start with a Test Patch: Apply sealant to a small, hidden area to check the color and absorbency. I once skipped this and ended up with a color I didn’t love!
- Apply Evenly: Use a roller for large areas and a brush for edges and railings. Work in small sections to avoid lap marks. If you’re using a sprayer, keep it moving to prevent puddles.
- Apply Thin Coats: Two thin coats are better than one thick one. Let the first coat dry completely (check the can for drying times) before adding the second.
- Clean Up: Clean tools with soap and water for water-based sealants or mineral spirits for oil-based ones.
I usually set aside a weekend for this project. It’s not hard, but it takes patience to do it right. The first time I sealed my deck, I rushed and ended up with uneven spots. Now, I take my time, and the results are worth it.
Maintaining Your Sealed Deck
Sealing isn’t a one-and-done deal. To keep your deck looking great, you’ll need to maintain it. Here’s what I do to keep my deck in top shape:
- Clean Regularly: Sweep off leaves, dirt, and debris weekly. Every few months, give it a gentle wash with a hose and mild soap.
- Inspect Annually: Check for signs of wear, like peeling sealant or fading color. Catching issues early saves time and money.
- Reapply Sealant as Needed: Most sealants last 1-3 years, depending on the type and weather. Water-based sealants might need reapplying every year, while oil-based ones can last longer. I check my deck every spring and touch up if needed.
- Protect from Furniture: Use pads under furniture legs to prevent scratches. I also move my patio furniture occasionally to avoid uneven wear.
Regular maintenance keeps your deck looking fresh and prevents costly repairs. My deck is five years old now, and it still looks brand new because I stay on top of these steps.
Common Mistakes to Avoid
I’ve made plenty of mistakes over the years, and I want to help you avoid them. Here are some common pitfalls:
- Sealing Too Soon: If the wood is still wet from treatment, the sealant won’t stick. Always test for dryness.
- Skipping Prep: Cleaning and sanding are tedious, but they’re crucial for a smooth, long-lasting finish.
- Using the Wrong Sealant: Make sure the sealant matches your climate and deck’s needs. A clear sealant in a sunny area might not hold up.
- Applying Too Much: Thick layers of sealant can crack or peel. Thin, even coats are the way to go.
- Ignoring Weather: Rain or extreme heat during application can ruin your hard work. Check the forecast before starting.
Learning from my mistakes has made me a better deck owner. Take your time, and you’ll get great results.
Benefits of a Well-Sealed Deck
A properly sealed deck isn’t just about looks—it’s about value. Here’s why I think sealing is worth the effort:
- Longer Lifespan: Sealing protects against water, UV rays, and wear, so your deck lasts decades instead of years.
- Better Appearance: A sealed deck looks vibrant and inviting, boosting your home’s curb appeal.
- Easier Maintenance: Sealed wood is easier to clean and resists mold and mildew.
- Increased Home Value: A beautiful deck can make your home more attractive to buyers if you ever sell.
Every time I host a barbecue, friends comment on how great my deck looks. That’s the payoff for putting in the work!
Conclusion
Sealing a pressure treated wood deck might seem like a big project, but it’s one of the best ways to protect your investment and keep your outdoor space looking amazing. From choosing the right sealant to prepping properly and maintaining it over time, each step is straightforward if you take it one at a time. I’ve loved watching my deck transform from a plain, treated surface to a warm, inviting space where my family makes memories. Whether you’re a DIY newbie or a seasoned woodworker, you can do this. Grab your tools, pick a sunny weekend, and give your deck the care it deserves. You’ll be amazed at how it elevates your home and your outdoor lifestyle. Happy sealing!
Frequently Asked Questions
How often should I seal my pressure treated wood deck?
It depends on the sealant and your climate. Water-based sealants usually need reapplying every 1-2 years, while oil-based ones can last 2-3 years. I check my deck every spring and reapply if I see fading or water not beading up anymore.
Can I seal my deck right after it’s built?
No, you need to let the wood dry first. Pressure treated wood is wet from the treatment process, and sealing too soon can trap moisture, causing peeling. Wait a few weeks to months, depending on the weather, and test by sprinkling water—if it soaks in, you’re ready.
What’s the best sealant for a sunny climate?
In sunny areas, go for a sealant with strong UV protection, like a semi-transparent or solid stain. These block more UV rays than clear sealants, keeping your deck from fading. I used a semi-transparent stain on my deck, and it’s held up great in the sun.
Do I need to sand my deck before sealing?
If your deck is rough or has splinters, sanding with 80-grit sandpaper helps the sealant stick better and gives a smoother finish. For a new deck, you might skip sanding if it’s already smooth, but always clean it thoroughly first.
Can I use a pressure washer to clean my deck?
Yes, but use a low setting to avoid damaging the wood. I’ve found a pressure washer is great for removing dirt and mildew, but go slow and keep the nozzle at least 12 inches from the surface to prevent gouging.