DIY Wood Deck Railing: Build Steps, Code Rules & Ideas (2026)
A DIY wood deck railing is judged on three measurable things: guard height of at least 36 inches above the deck surface, no opening that passes a 4-inch sphere, and posts that survive a 200-pound push at the top. The post connection decides the last one, not the lumber. This guide covers post attachment, build steps, baluster math, and a code-check table.
How to Attach DIY Deck Railing Posts So They Pass Inspection
Best Guard Post Hold-Down Pick
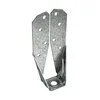 |
Simpson Strong-Tie DTT2Z Deck Tension Tie (ZMAX Galvanized) – $23.24 The post section below explains why bolts alone do not count as a guard post connection. A tension tie like this one carries the post back into the deck framing instead of relying on the rim joist alone.
|
As an Amazon Associate we earn from qualifying purchases.
The post connection is where most DIY railings fail. A guard has to resist a 200-pound concentrated load applied in any direction at any point along the top rail or the top of a post, per Building Advisor’s code summary. A post screwed to the face of the rim joist cannot do that for long.
| Post connection | What the sources say | Practical take |
|---|---|---|
| Notched 4×4 lagged to the rim | Simpson Strong-Tie: the post must be a 4×4 minimum and notching is not allowed | Avoid; replace notched posts when you rebuild |
| Machine bolts alone through the rim | Simpson: bolts alone to the rim joist do not meet the requirements in building codes | Not enough by itself |
| Two 1/2-inch through-bolts, braced rim | Building Advisor: two 1/2-inch bolts through the rim or end joist can meet code if the rim is adequately braced | Add blocking behind the post and ask your inspector |
| Post plus steel tension tie (hold-down) | Simpson and USP make tension ties designed for guard posts; Simpson says 42-inch guards need a stronger hold-down such as the HTT4 | Best DIY route when your inspector accepts the product |
Simpson also says the post must attach to a solid joist at least 2×8, and a 2×10 rim lets you spread the bolts wider. See Simpson Strong-Tie’s guardrail connection article for the details. Use hot-dip galvanized or stainless fasteners wherever steel touches pressure-treated wood.
Post spacing is also local. Building Advisor and Simpson both give 6 feet as the general maximum between guard posts, but a Mammoth Lakes, California detail sheet limits spacing to 4 feet on its wood guard drawing. Closer posts make every bay stiffer, so plan 4 to 5 feet if the deck layout allows it.
Tools and Materials You Need
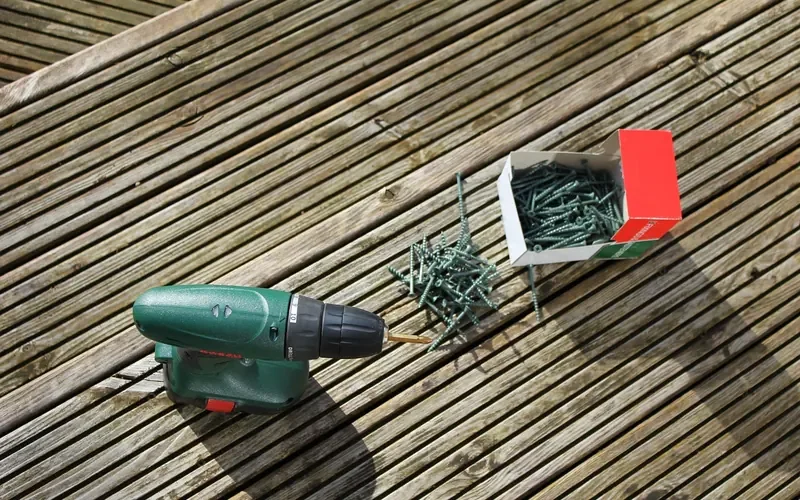
Collect everything before you start so the posts and rails go up in one session. Rent the heavier items if you only need them once.
- Measuring tape and speed square: for layout and square cuts.
- Circular saw or miter saw: a miter saw gives cleaner baluster ends.
- Drill/driver and 1/2-inch drill bit: pilot holes for screws and the through-bolt holes in posts and framing.
- Socket wrench: for the through-bolts, nuts and washers.
- 4-foot level and clamps: to hold posts plumb while you fasten them.
- Spacer block: a scrap cut slightly under 4 inches so every baluster gap matches.
- Safety glasses and work gloves.
How to Build a Wood Deck Railing, Step by Step
Build in this order because each step sets up the next. Do the code and permit check first, since it changes the height and post spacing you cut to.
- Check code and permit: Ask your building department which code edition applies, the required guard height, and whether the railing needs a permit and inspection.
- Lay out the posts: Mark a post at every corner and on each side of any stair opening, with spacing no wider than your local maximum.
- Block and attach the posts: Add 2x blocking behind each post location, then fasten each 4×4 with through-bolts and a hold-down, with no notching.
- Set the height: Measure up from the deck surface, not from the joists, and mark the top of every post so the guard is at least 36 inches tall or your local minimum.
- Fasten the rails: Attach the top rail and bottom rail between the posts with screws or brackets sized for the 200-pound top-rail load.
- Install the balusters: Space them with the spacer block, then test every gap, including the one under the bottom rail, with a 4-inch ball.
- Push-test and finish: Shove the top rail hard at each post, tighten anything that moves, then seal cut ends and recoat per the finish label.
How many balusters fit between posts
A baluster count has to produce a gap under 4 inches, not a gap that is close to 4 inches. This table assumes 3.5-inch actual 4×4 posts and 1.5-inch actual 2×2 balusters, with posts measured center to center. The last column adds one baluster for margin because treated lumber moves as it dries.
| Post spacing (center to center) | Clear span between posts | Fewest 2×2 balusters | Gap with that count | Gap with one extra |
|---|---|---|---|---|
| 48 in (4 ft) | 44.5 in | 8 | 3.61 in | 9 balusters: 3.10 in |
| 60 in (5 ft) | 56.5 in | 10 | 3.77 in | 11 balusters: 3.33 in |
| 72 in (6 ft) | 68.5 in | 12 | 3.88 in | 13 balusters: 3.50 in |
The formula is gap = (clear span – 1.5 x count) / (count + 1). Use it for any bay length, and re-measure the real clear span before you cut a single baluster.
DIY Wood Deck Railing Ideas and Designs
Want to see these styles in photos before you commit to one? Our deck wood railing ideas guide breaks down five popular looks side by side, including wood choices for each. The table below covers what each style asks of a DIY builder.
| Design style | Typical materials | Difficulty | Code watch-out |
|---|---|---|---|
| Classic vertical baluster | PT posts, 2×4 rails, 2×2 balusters | Beginner | Gap rule applies under the bottom rail too |
| Horizontal board rail | 1×6 or 5/4 boards between posts | Beginner | Every board gap must still fail the 4-inch ball test |
| Cable rail with wood posts | 4×4 posts and stainless cable kit | Intermediate | Follow the cable maker for connections and tension; keep spacing under 4 inches per local code |
| Lattice panel infill | 4×4 posts, framed lattice panel | Beginner | Check lattice openings with the 4-inch ball before you commit |
| Picture frame panels | 4×4 posts, routed frames, wood panels | Intermediate | Solid panels pass the ball test but the posts still need a code-level connection |
Deck Railing Code Requirements: IRC R312 Check Table
Most US jurisdictions build on the International Residential Code, but each adopts its own edition and amendments. The figures below come from the 2021 IRC section R312 and its published commentary, plus the sources linked in this guide. Treat them as a checklist to compare against your local rules, not as a substitute for them.
| Item | IRC R312 (2021 edition) | What to verify locally |
|---|---|---|
| When a guard is required | Open-sided walking surface more than 30 in above the floor or grade below, at any point within 36 in horizontally of the edge | Local amendments for lower drops or hillside lots |
| Guard height | 36 in minimum, measured vertically above the adjacent walking surface | Some jurisdictions require 42 in; a Mammoth Lakes, CA detail sheet calls for 42 in on decks over 30 in above grade |
| Openings in a level guard | No opening from the walking surface up to the guard height may pass a 4 in sphere | Same rule applies under the bottom rail |
| Stair guard exceptions | 4-3/8 in sphere on the open side of stair guards; 6 in sphere for the triangular gap at the stair bottom rail; 34 in minimum guard height at stair nosings | Stair handrail height and grip rules are separate |
| Top rail load | 200 lb concentrated load, any direction, any point on the top rail or post top (design load is in R301.5) | Inspectors look at the post connection, not the rail lumber |
| Insect screening | Never counts as a guard | Screened porches still need a real guard above 30 in |
Check local code, get a permit if your jurisdiction requires one, and ask for the inspection. The dimensions here are sourced, but your building department decides which edition and amendments apply to your deck.
The stair rows above are a different topic from a flat deck guard. For stair rails and graspable handrails, see our guide to building wood deck handrails safely.
Data point: the 4-inch opening rule was chosen from the head size and chest depth of a child who has not yet learned to crawl, according to the ICC commentary on R312.1.3. Load and spacing rules above are summarized by Building Advisor.
Which Wood to Use for Railing Posts, Rails and Balusters
Use pressure-treated lumber for posts and for any rail or blocking that stays wet, and use cedar or another naturally durable wood for the parts people see and touch. Check the treatment tag against our ground contact treatment chart if any part of the railing will sit near soil or splash zones. End grain is where rot starts, so seal every cut end before assembly, a habit covered in our guide to keeping wood posts from rotting.
Shopping for lumber and hardware? Our Home Depot wood deck railing guide covers what the big box stores stock.
Frequently Asked Questions
What is the easiest deck railing to build for a beginner?
A standard post, rail and vertical baluster railing is the easiest for a beginner. It uses straight cuts and a spacer block, and the only hard part is the post connection, which you should treat as the main job.
How high does a deck railing need to be?
The 2021 IRC requires guards at least 36 inches high, measured above the deck surface, wherever the drop is more than 30 inches. Some local codes require 42 inches, so check with your building department before you cut posts.
How far apart can balusters be?
Balusters must be spaced so a 4-inch sphere cannot pass between them, including the gap under the bottom rail. Stair guards allow a 4-3/8 inch sphere on the open side and a 6-inch sphere for the triangular gap at the bottom rail.
How do you attach railing posts to a deck?
Bolt a 4×4 post, with no notch, to solid framing at least 2×8, add blocking, and use a hold-down or tension tie. Simpson says bolts alone through the rim do not meet code, and 42-inch guards need a heavier hold-down.
Do I need a permit to build a deck railing?
Requirements vary by jurisdiction, so ask your building department before you build. Many departments review the guard as part of a deck permit, and an inspector will usually test the posts by pushing on them.
Can I build a deck railing on an existing deck?
Yes, if the deck frame is sound. The posts need solid joists or rim framing at least 2×8, with blocking added where needed. If the old framing is rotted or too thin, repair it before you attach any guard posts.
Before you buy lumber, call your building department and ask three questions: which code edition applies, what guard height and post spacing they require, and whether they inspect the railing connection.
Sponsored / affiliate links. As an Amazon Associate I earn from qualifying purchases. I may earn additional commission from eligible campaigns.