T-111 Cedar Plywood Siding: Installation, Cost And Review
T-111 cedar plywood siding is a textured wood panel used for exterior walls. It offers a rustic look and can be a cost-effective option. This article explores its installation, pricing, pros, cons, and common user experiences.
What Is T-111 Cedar Plywood Siding?
T-111 siding is a type of plywood. It’s made for outside walls of homes. The name T-111 comes from its original product number.
It’s known for its grooved surface. These grooves run vertically down the panels. They give it a look like wood planks.
People often think of it as a rustic style. But it’s not just one look. It can be painted or stained.
This lets you change how it looks. The wood used can vary. For T-111 cedar plywood, the face veneer is cedar.
Cedar wood is good for siding. It’s naturally tough. It can fight off bugs and rot.
This makes it last longer outdoors. The plywood itself is strong. It’s made of layers of wood glued together.
This makes it stable. It doesn’t warp or twist much.
The panels are usually large. This means fewer seams on your house. This can make installation quicker.
It also means fewer places for water to get in. This is a big plus for any siding. The grooves are not just for looks.
They add a shadow line. This can make the siding look like real wood boards. It’s a popular choice for cabins or country homes.
But many people use it on regular houses too. It’s a way to get a wood look without the high cost of solid wood planks. You get the feel of wood.
You get some of its natural benefits. All in a strong plywood sheet.
Understanding Plywood Construction
Plywood is made from thin layers of wood veneer. These layers are glued together. The grain of each layer runs in a different direction.
This makes plywood very strong. It’s stronger than solid wood of the same thickness. For T-111, the outer layer is often cedar.
The inner layers can be other types of wood. This mix makes it durable for walls.
The thickness of T-111 panels matters. It affects strength and how it looks. Common thicknesses are 3/8 inch or 5/8 inch.
Thicker panels are more durable. They also give a deeper groove look. When you buy T-111 cedar plywood siding, you’re getting a panel that’s ready to go.
It’s pre-primed or already has a finish. This saves time on the job. It means less work for you or your builder.
The panels come in standard sizes. The most common size is 4 feet wide by 8 feet long. Sometimes you can find longer ones.
The surface texture is important. T-111 cedar plywood typically has a rough, textured surface. This texture is designed to hold paint or stain well.
It also hides minor imperfections. This is helpful when the wood expands or shrinks a bit. It’s a practical material.
It’s made to stand up to the weather. It’s also made to look good on your home. It bridges the gap between price and appearance.
It’s a choice many homeowners consider when updating their homes.
The Charm of Cedar: Why Choose It?
Cedar wood is special for siding. It’s not just any wood. It has natural defenses.
Bugs like termites and carpenter ants don’t like cedar. This is because of oils in the wood. These oils act like a natural bug repellent.
Cedar also resists rot and decay. This is very important for outdoor building materials. Moisture is the enemy of wood.
Cedar handles moisture better than many other woods. It doesn’t soak up water as easily. It also dries out faster.
This means it’s less likely to get mold or mildew.
Another great thing about cedar is its look. It has a beautiful natural color. It can be reddish-brown or a lighter tan.
It also has a nice wood grain pattern. When you stain cedar, its natural beauty shines through. If you paint it, it provides a smooth surface.
Cedar also smells good! That’s the natural oils at work. It’s a pleasant, earthy scent.
This smell is stronger when the wood is new or wet.
Cedar’s Natural Benefits
- Insect Resistance: Cedar oils naturally repel many common wood-boring insects.
- Rot and Decay Resistance: It withstands moisture better than many other woods.
- Beautiful Appearance: Natural colors and grain patterns are highly attractive.
- Lightweight: Easier to handle and install compared to heavier materials.
- Aromatic: Pleasant, natural scent.
When you get T-111 cedar plywood, you get these cedar benefits. The face of the panel is cedar. This means you get the good looks and some of the protection from cedar.
The core layers are usually made from other woods. These are chosen for strength and stability. So, you have the best of both worlds.
The attractive, weather-resistant cedar on the outside. The strong, stable plywood structure holding it all together.
Compared to other wood sidings, cedar T-111 can be a good value. Solid cedar planks are beautiful but very expensive. They also require more careful installation.
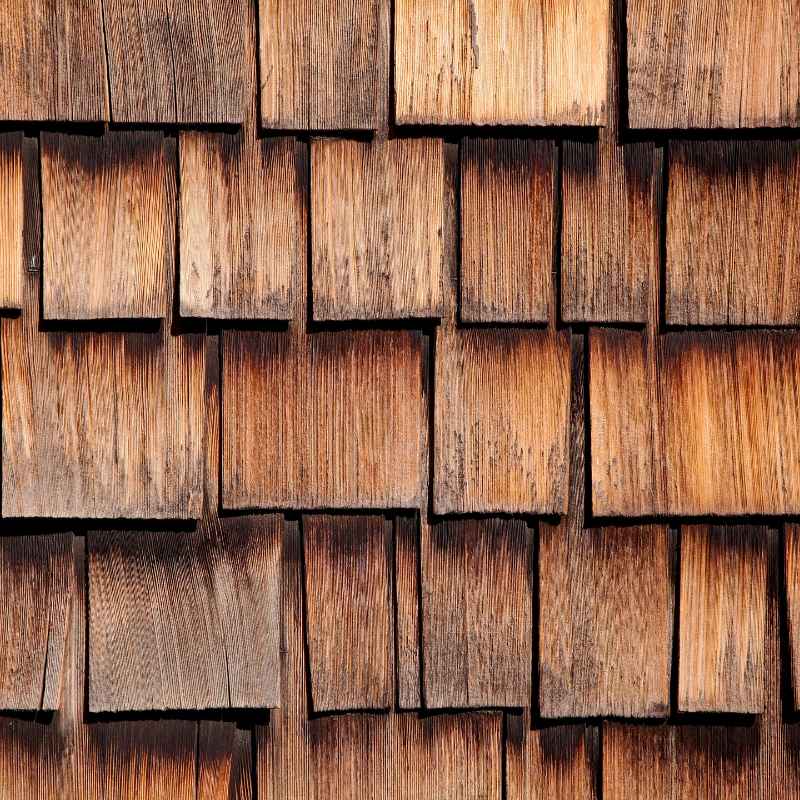
Cedar shingles are another option. They also cost more than T-111 plywood. T-111 cedar plywood offers a way to get that cedar look.
It’s more affordable. It’s easier to work with. It’s a practical choice for many budgets.
It brings a touch of natural beauty to a home. It also brings some of the natural durability of cedar.
My Own T-111 Cedar Plywood Experience
I remember working on a cabin a few years back. The owner wanted a rustic feel. They didn’t have a huge budget.
We looked at a lot of options. Solid wood was too pricey. Vinyl just didn’t fit the cabin vibe.
That’s when we landed on T-111 cedar plywood. I had used it before on sheds. But this was for a whole house.
The builder was a bit hesitant. He was used to vinyl or Hardie board. He thought plywood siding might not last.
I could see his concern. It felt different from the typical siding.
We got the 5/8 inch thick panels. They had a nice, deep groove. The cedar face looked good even before any paint.
It had those natural reddish tones. As we started installing, I was surprised. The panels were big, which meant faster coverage.
But they were also heavy. You need a couple of people to move them easily. We found that using a good siding nailer was key.
It drove the nails in cleanly. It didn’t split the wood. We made sure to follow the manufacturer’s instructions.
This included leaving small gaps at the bottom. It was for drainage. We also used a good quality exterior caulk.
We sealed every seam and around every window and door. The smell of the cedar was noticeable during installation. It was a nice, clean wood smell.
The real test came when we painted it. The textured surface took the paint well. The grooves created nice shadows.
It looked like it had been there for years. It had that authentic, weathered wood look. The owner was thrilled.
It was far more affordable than solid cedar. It looked much better than vinyl. Over the years, I’ve driven past that cabin.
It still looks great. We had one spot where some leaves collected. I went back to check it.
There was no rot or mold starting. That old concern of the builder seemed unfounded. It showed me that when installed right, T-111 cedar plywood can be a really solid choice.
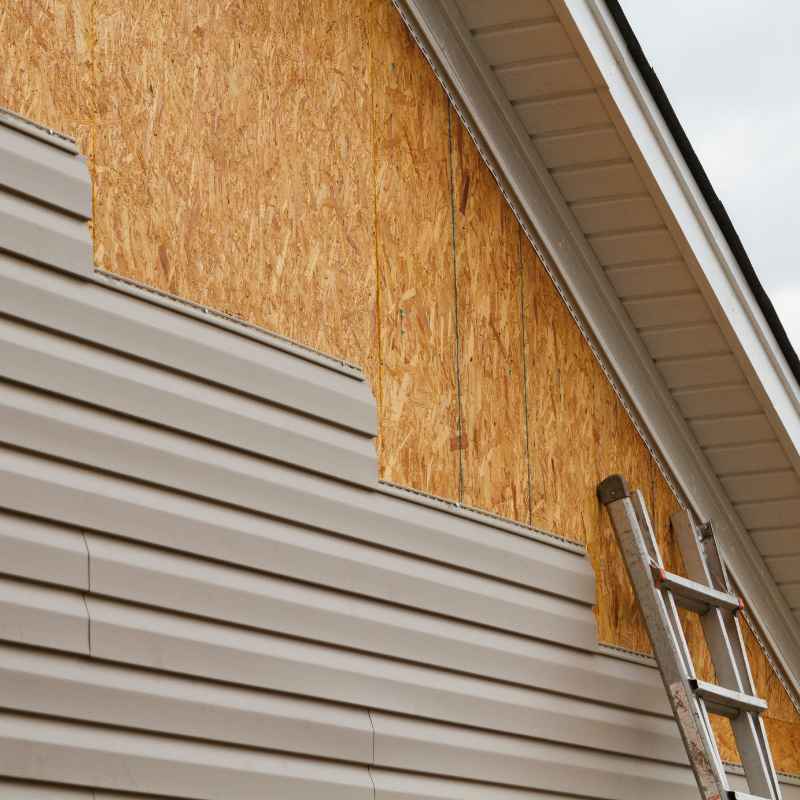
Installation: What You Need to Know
Putting up T-111 cedar plywood siding isn’t super hard. But there are key steps. Getting these right means the siding will last.
And it will look good. First, you need to prepare the wall. Make sure the house wrap is in good shape.
This is the first layer of defense against water. It should be applied smoothly. Any tears need to be fixed.
Next, you’ll need tools. A good circular saw is a must. You’ll need one with a sharp blade.
This is for cutting the panels to size. You’ll also need a siding nailer. This is a pneumatic tool that shoots nails.
It’s much faster than hammering. Make sure it’s set to the right depth. You don’t want to over-drive the nails.
This can damage the wood. You’ll also need a measuring tape, level, and chalk line. Safety gear is important too.
Gloves, eye protection, and hearing protection are a must.
Essential Installation Tools
- Circular Saw (with sharp blade)
- Siding Nailer (pneumatic)
- Measuring Tape
- Level
- Chalk Line
- Hammer (for adjustments)
- Utility Knife
- Safety Glasses
- Gloves
- Hearing Protection
How you attach the panels is crucial. You need to nail them to the studs. The studs are the wooden supports inside the wall.
You should hit a stud with every nail. The nails should go into the wood panel and the stud. The spacing of the nails is important.
Follow the manufacturer’s guide. Usually, nails are spaced about 6 inches apart on edges. And maybe 12 inches apart in the field of the panel.
Proper fastening is critical for T-111 cedar plywood siding. This ensures the panels stay put. It prevents them from rattling.
It also helps keep water out. Don’t nail too close to the edges. This can cause the wood to split.
Leave a small gap between panels. This is called an expansion gap. It allows the wood to move.
It doesn’t cause buckling. The amount of gap needed is usually about 1/8 inch. Check the product instructions.
You might need to cover these gaps. Use battens or trim pieces.
Water management is key. The bottom edge of the siding should not sit directly on the foundation or deck. There needs to be space.
This allows water to drain away. It stops the wood from wicking up moisture. This can lead to rot.
Corner trim is also important. It covers the edges of the panels. It gives a clean finish.
It also seals the corners. Always use nails that are suitable for exterior use. Stainless steel or hot-dipped galvanized nails are best.
When cutting panels, do it on the ground if possible. This makes it safer and easier. Cut with the good side facing up.
This helps prevent chipping. If you have to cut on the wall, be careful. Clean up all sawdust.
Sawdust left on the wall can hold moisture. It can lead to problems later. Proper installation means your siding will perform well.
It will also last a long time. It’s worth taking the time to do it right. This is where the real value of T-111 cedar plywood siding shines.
Expansion Gaps Are Your Friend
Wood moves. It expands when it’s wet. It shrinks when it’s dry.
T-111 cedar plywood is no different. Leaving a small gap between panels allows this movement. It prevents stress on the fasteners.
It stops the siding from buckling or cracking. This is a simple step that saves a lot of trouble later.
Cost of T-111 Cedar Plywood Siding
When you think about siding costs, T-111 cedar plywood can be a good option. It’s usually less expensive than solid cedar. It’s also often cheaper than other premium wood sidings.
The price can vary a bit. It depends on the thickness of the panel. It also depends on the quality of the cedar veneer.
And where you buy it matters too. Big box stores might have different prices than local lumber yards.
As a general idea, you might pay between $30 and $60 per 4×8 panel. This is for the material itself. So, a panel covers 32 square feet.
This makes the material cost roughly $1 to $2 per square foot. This is just for the panels. You need to add the cost of other things.
These include trim, caulk, primer, and paint or stain. You also need to pay for fasteners like nails.
T-111 Cedar Plywood Siding: Price Range (Material Only)
- Per Panel (4×8): $30 – $60
- Per Square Foot: $1.00 – $2.00
The installation cost is another big factor. If you’re doing it yourself, you’re saving money. But you’re spending your time.
If you hire a professional, their labor costs will add to the total. This can add another $3 to $7 per square foot or more. This depends on your local labor rates.
It also depends on the complexity of your house. Steep roofs or lots of windows mean more work. This increases the cost.
So, a rough total cost for T-111 cedar plywood siding could be anywhere from $4 to $9 per square foot. This includes materials and professional installation. Compare this to other siding types.
Vinyl siding might be $3 to $6 per square foot. Fiber cement siding could be $5 to $10 per square foot. Natural wood clapboard could be $8 to $15 per square foot or higher.
T-111 cedar plywood sits in a mid-range price point. It offers a wood look at a more accessible price. It’s a way to get some of the benefits of cedar without the high cost of solid cedar.
Remember that prices can change. Always get quotes from several suppliers. Also, consider the long-term value.
A well-installed and maintained siding will last. It will save you money in repairs over time. The beauty of T-111 cedar plywood siding is its balance of cost and appeal.
Pros and Cons: Is It the Right Choice for You?
Like any building material, T-111 cedar plywood siding has its good points and bad points. Knowing these will help you decide if it’s right for your home. Let’s break them down.
The Good Stuff (Pros)
- Cost-Effective: It’s much cheaper than solid cedar or other premium wood sidings.
- Aesthetic Appeal: The grooved pattern and cedar face offer a nice, rustic wood look.
- Cedar Benefits: It has some of the natural resistance to insects and rot that cedar is known for.
- Ease of Installation: The large panels cover walls quickly. It’s easier to work with than individual planks for some DIYers.
- Paint/Stain Friendly: The textured surface takes finishes well, allowing for customization.
- Durability: When properly installed and maintained, it can last for many years.
- Structural Strength: Plywood is a strong material, adding some rigidity to the walls.
Quick Look: T-111 Cedar Plywood Pros
Value: Good wood look for the price.
Looks: Rustic charm.
Protection: Some natural cedar resistance.
Speed: Faster install than planks.
The Not-So-Good Stuff (Cons)
- Maintenance: It still requires regular maintenance. This includes painting or staining every few years.
- Moisture Sensitivity: While cedar resists rot, the plywood core can be damaged by prolonged moisture. Proper installation is vital.
- Durability Compared to Others: It’s not as impact-resistant as some materials like fiber cement. It can be dented or scratched.
- Termite Risk: While cedar repels some insects, termites can still attack the non-cedar core if exposed.
- Potential for Warping: If not installed correctly or if exposed to extreme moisture, some warping can occur over time.
- Requires Finishing: Most T-111 panels come primed, but they need a final coat of paint or stain for full protection and appearance.
Quick Look: T-111 Cedar Plywood Cons
Work: Needs regular painting/staining.
Water Risk: Can have issues if not installed right.
Toughness: Not as strong against impacts.
Finishing: Needs a top coat for best results.
So, who is T-111 cedar plywood siding best for? It’s a great choice for homeowners looking for a wood aesthetic on a budget. It’s ideal for cabins, garages, or homes where a rustic look is desired.
It’s also good for DIYers who are comfortable with basic carpentry skills. If you’re willing to do the upfront work of proper installation and then follow up with regular maintenance, it can be a very rewarding choice.
However, if you want a siding that’s virtually maintenance-free, or if you live in an area with extreme weather or high pest activity, you might want to consider other options. Also, if you need siding that can withstand constant hard knocks, T-111 cedar plywood might not be the toughest choice. It’s all about matching the material to your needs, your budget, and your willingness to maintain it.
For many, the balance of beauty, cost, and reasonable durability makes T-111 cedar plywood siding a winner.
Real-World Context and Scenarios
T-111 cedar plywood siding pops up in many different kinds of places. You’ll see it on older homes. Many houses built in the 70s and 80s used it.
It was a popular, modern choice then. It offered a good look for the money. You’ll also find it on new constructions.
Especially for homes that want a country or rustic feel. Think of garages and workshops. These often get T-111 siding.
It’s tough enough for these uses. And it’s more affordable than siding a whole house.
Cabins and vacation homes are prime spots. The natural wood look fits right in with forests and mountains. It doesn’t need to look perfectly polished.
The rustic charm is part of the appeal. Even in suburban neighborhoods, you might see it. Sometimes people use it on accent walls.
Or on the back of the house. Maybe they mix it with brick or stone. It adds a warm, natural element.
It breaks up the monotony of other materials.
Where You See T-111 Cedar Plywood
- Older Homes: Common from the 1970s-1980s.
- New Builds: For rustic or country styles.
- Garages & Workshops: Durable and budget-friendly.
- Cabins & Vacation Homes: Fits natural settings.
- Accent Walls: Mixed with other materials for visual interest.
The climate plays a role too. In drier climates, T-111 cedar plywood can last a very long time. The cedar’s natural oils help it resist drying out.
In very humid or wet climates, maintenance becomes even more critical. You have to be extra careful about moisture. Proper flashing around windows and doors is a must.
Good paint or stain coats are essential. This stops water from soaking into the wood. The U.S.
climate varies greatly. In the Pacific Northwest, where cedar grows, it’s common. In the Southwest, its dryness helps it last.
In the humid South, careful upkeep is paramount.
User habits also influence how well T-111 siding performs. Homeowners who keep up with painting are rewarded. Their siding looks good for decades.
Those who let it go might see problems. Peeling paint, mildew, or even rot can start. The design of the home matters.
Homes with deep overhangs are better. These overhangs protect the siding from rain and sun. Homes with simple wall shapes are easier to side.
Complex designs mean more cuts and more seams. More seams can mean more places for water to find its way in.
Consider the common user mistake. Many people don’t realize how much care T-111 needs. They might think it’s like vinyl.
Install it and forget it. That’s not the case. It’s a wood product.
It needs protection. That protection comes from paint or stain. And it needs to be reapplied.
This happens every 5-10 years, depending on the climate and the quality of the finish. So, the real-world context is this: T-111 cedar plywood is a beautiful, affordable wood siding. But it’s not a set-it-and-forget-it material.
It’s a material that rewards your attention. It gives you a classic wood look in return.
What This Means for You: When to Worry and When It’s Okay
So, you’re thinking about using T-111 cedar plywood siding. Or maybe you already have it. What should you look for?
When is it totally normal, and when should you be concerned?
Normal and Okay
- Slight Color Fading: Over time, the paint or stain might fade a bit. This is normal weathering. A fresh coat will fix it.
- Small Gaps in Texture: The rough texture can sometimes have minor variations. This is part of the wood’s natural look.
- Occasional Insect Finding a Way: Cedar is resistant, not impossible to penetrate. You might see a single bug on the siding. This doesn’t mean the whole house is at risk.
- Sound of Wood Moving: On very hot or cold days, wood expands or contracts. You might hear tiny creaks or pops. This is normal.
- Having to Repaint: As mentioned, this is a sign you’re maintaining it. It’s not a sign of failure.
T-111 Cedar Siding: All Good Signs
Faded Paint: Needs recoating soon.
Wood Texture: Natural variations are fine.
One Bug: Usually not a problem.
Tiny Noises: Wood expanding/contracting.
When to Worry (Red Flags)
- Peeling or Chipped Paint in Large Areas: This means the finish is failing. Water can get into the wood.
- Soft or Spongy Spots: If you can push a screwdriver into the wood easily, it’s likely rotten. This is a serious problem.
- Mold or Mildew Growth: Dark patches indicate excess moisture. This can damage the wood over time.
- Visible Gaps Where Water Can Enter: Look at corners, around windows, and where panels meet the foundation. If there are large cracks, water can get behind the siding.
- Warping or Buckling Panels: This suggests moisture is trapped. Or the panels were not installed with enough expansion space.
- Evidence of Termite or Carpenter Ant Activity: Look for small holes, sawdust-like frass, or actual insects.
Simple Checks You Can Do:
- The Finger Test: Gently press your finger into the siding, especially near the bottom or corners. If it feels soft, investigate further.
- Visual Inspection: Walk around your house. Look for any of the “red flag” signs listed above. Pay close attention to areas that get a lot of rain or shade.
- Check the Base: Make sure there’s a gap between the siding and the ground or foundation.
If you see any major red flags, it’s time to call a professional. A qualified siding contractor can assess the damage. They can tell you if repairs are needed.
Sometimes, it’s a simple fix like caulking. Other times, a damaged panel might need replacing. This is especially true if rot has set in.
Ignoring these signs can lead to bigger problems. Water damage can spread to the wall structure itself. That’s a much more expensive repair.
Most of the time, T-111 cedar plywood siding is a perfectly fine choice. It’s beautiful. It’s affordable.
It offers a classic look. The key is understanding what it is. And what it needs.
Regular checks and timely maintenance will keep your siding looking good. And it will protect your home for years to come. You’re not looking for a siding that’s invisible.
You’re looking for one that performs and looks good. For many, T-111 cedar plywood siding fits that bill.
Quick Fixes and Tips for T-111 Cedar Plywood Siding
Keeping your T-111 cedar plywood siding in top shape doesn’t have to be a huge chore. A few smart moves can make a big difference. Here are some tips to help you out.
Keep it Clean
Regular cleaning is vital. Use a soft brush or a power washer on a low setting. Gently wash away dirt, cobwebs, and any mildew.
Avoid high pressure. This can damage the wood or drive water into seams.
Seal the Deal
Caulk is your friend. Keep all the seams, corners, and around windows and doors well-caulked. Use a high-quality exterior caulk.
It needs to be paintable. This is a primary defense against water. Reapply caulk as needed, usually every few years.
Touch-Up Time
Got a small scratch or chip? Touch it up with paint or stain right away. Don’t wait.
Small damage can let moisture in. It can lead to bigger issues.
T-111 Siding Quick Tips
Clean Gently: Use low pressure.
Caulk Gaps: Keep water out.
Fix Scratches: Touch up small damage.
Trim Overhangs: Protect walls.
Check Gutters: Prevent water buildup.
Overhangs and Gutters Matter
Make sure your roof overhangs are in good shape. They shield the siding from direct rain. Clean your gutters often.
Clogged gutters cause water to spill over. This can soak the siding below.
Paint or Stain Smartly
When it’s time to repaint or restain, choose quality products. Use exterior-grade paint or stain. Apply it evenly.
Make sure to cover all surfaces. Don’t forget the bottom edges of the panels if they are visible.
These tips are not hard fixes. They are part of good home care. Taking these small steps will help your T-111 cedar plywood siding look better.
It will also help it last much longer. It’s about being proactive. It’s about protecting your investment.
Frequent Questions About T-111 Cedar Plywood Siding
What is the lifespan of T-111 cedar plywood siding?
With proper installation and regular maintenance, T-111 cedar plywood siding can last 20 to 30 years. Factors like climate, exposure to sun and rain, and how often it’s repainted or restained will affect its lifespan. Neglect can significantly shorten it.
Can T-111 cedar plywood siding be used in very wet climates?
Yes, but it requires extra care. In very wet climates, you must ensure meticulous installation. This includes proper house wrap, flashing, and generous expansion gaps.
Regular inspection and prompt recoating of paint or stain are crucial to prevent moisture intrusion and rot.
How often does T-111 cedar plywood siding need to be repainted or restained?
Generally, T-111 cedar plywood siding should be repainted or restained every 5 to 10 years. This depends on the climate and the quality of the previous finish. In harsh sun or heavy rain, you might need to do it sooner.
Inspect the siding annually for signs of wear.
Is T-111 cedar plywood siding a good choice for DIY installation?
Yes, many DIYers find T-111 cedar plywood siding manageable. The large panels cover walls quickly. However, it requires careful measuring, cutting, and fastening to the studs.
Proper installation techniques, especially regarding water management and expansion gaps, are critical. If you’re not comfortable with these aspects, hiring a professional is recommended.
What is the difference between T-111 cedar and T-111 fir or pine siding?
The main difference is the type of wood used for the face veneer. Cedar is naturally more resistant to insects and rot due to its oils. Fir and pine are generally less expensive but may require more maintenance to achieve similar protection against the elements.
Cedar often has a more attractive, rich grain.
Can I pressure wash T-111 cedar plywood siding?
You can, but with extreme caution. Use a low-pressure setting and a wide fan tip. Hold the nozzle at a distance and wash with the grain.
High pressure can damage the wood fibers, force water into seams, and lift the grain, leading to premature failure of the finish.
Conclusion: A Beautiful and Practical Choice
T-111 cedar plywood siding offers a compelling blend of natural beauty and practicality. It brings the charm of wood to your home at a more accessible price point. Understanding its installation needs and committing to regular maintenance are key.
When done right, it’s a durable and attractive siding option. It stands the test of time. It continues to be a popular choice for many homeowners.