What Grit Sandpaper For Primer: Essential Guide
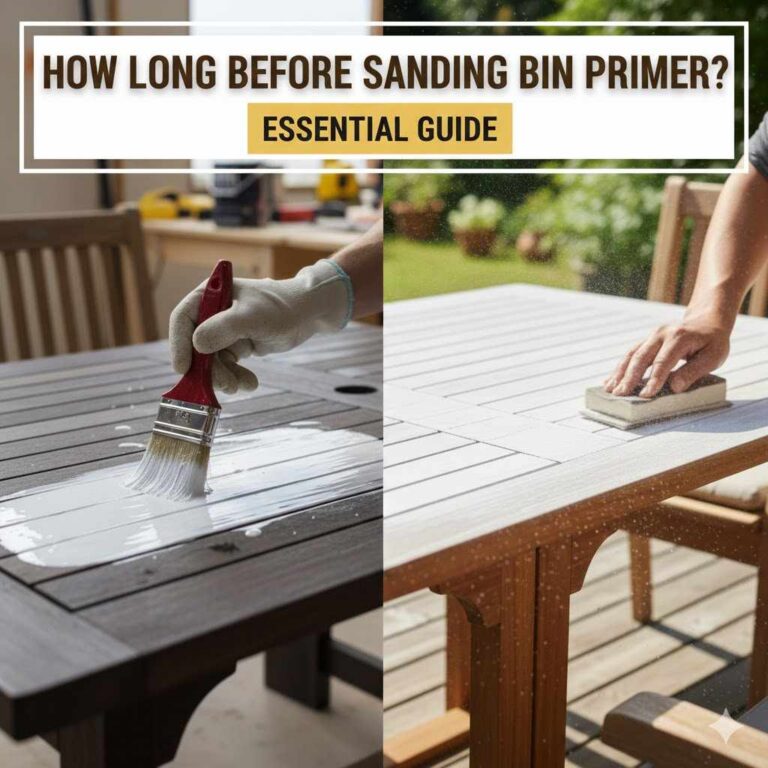
What grit sandpaper for primer? For most topcoats, you should use 220-grit sandpaper after the first primer coat and potentially switch to 320-grit for the final light scuffing before painting. This creates the perfect smooth surface without damaging the primer adhesion.
Welcome to the workshop! If you’ve ever painted wood, you know that getting that smooth, professional finish relies on a secret weapon: proper sanding. It often feels confusing, though. Which sandpaper grit is right for primer? Do you use the same grit for the first coat as the second? Don’t worry, friend. Many hobbyists get stuck right here.
Choosing the wrong grit can lead to deep scratches or poor paint adhesion. That’s frustrating when you want your project to look sharp! I’m here to clear up the dust. We will walk through exactly what sandpaper to grab for every stage of priming. Get ready to build confidence as we master the perfect prep!
The Essential Guide: Choosing the Right Sandpaper Grit for Primer
When preparing a surface for paint, sanding is not just about making things look smooth; it’s about creating the best possible grip—or “tooth”—for the next layer. Primer is designed to stick tight to the surface and provide a uniform base for your topcoat. If you sand too aggressively (too low a grit number), you might tear through the primer layer, exposing the bare wood or previous coating. If you don’t sand enough, your topcoat will look bumpy and uneven.
Mastering the grit level for primer saves time, paint, and heartache. Let’s break down why grit matters and what numbers you absolutely need in your toolkit.

Understanding Sandpaper Grit: A Beginner’s Overview
Grit numbers tell us how coarse or fine an abrasive material is. This might seem backward at first glance, but it’s simple:
- Lower Numbers (e.g., 60, 80, 100): These are coarse. They remove material fast. You use these for shaping wood or stripping old finishes, not for sanding primer.
- Medium Numbers (e.g., 120, 150): Good for general wood shaping or rough prep before sealing.
- Higher Numbers (e.g., 180, 220, 320): These are fine. They smooth surfaces gently and are perfect for intermediate and final sanding steps on coatings like primer.
When working with primer, we are focused on the fine range (180 grit and up). Our goal is refinement, not removal.
Step 1: Sanding Raw Wood (Before Primer)
Before you even open that can of primer, you need to prepare the bare wood surface. This initial sanding creates a clean slate and opens the pores of the wood so the primer can soak in effectively. Proper adhesion starts here!
Recommended Grit for Bare Wood
- Start (If needed): If the wood is rough from the mill or has visible deep scratches, start with 120-grit paper to level the surface quickly.
- The Standard Prep: For most DIY projects, sanding with 150-grit or 180-grit is perfect for smoothing the wood surface after the initial heavy cuts are done.
- Final Raw Wood Sanding: Right before applying the first coat of primer, you should move up to 180-grit or 220-grit. This ensures a very smooth base that the primer will stick to beautifully.
Mentor Tip: Always sand “with the grain” of the wood. Sanding across the grain leaves tiny scratches (called cross-grain scratches) that primer and paint will highlight once they are applied.
Step 2: What Grit Sandpaper for the First Coat of Primer?
This is where most beginners get tripped up. Primer, especially thicker, high-build automotive or sealing primers, often goes on a bit rougher than your final paint coat. It might have slight texture or “nibs” (small imperfections) left by the application process.
We need to sand this first coat to knock down those high spots and level the surface, but gently enough so we don’t sand all the way down to the bare wood beneath.
The Golden Rule for First Primer Coat Sanding
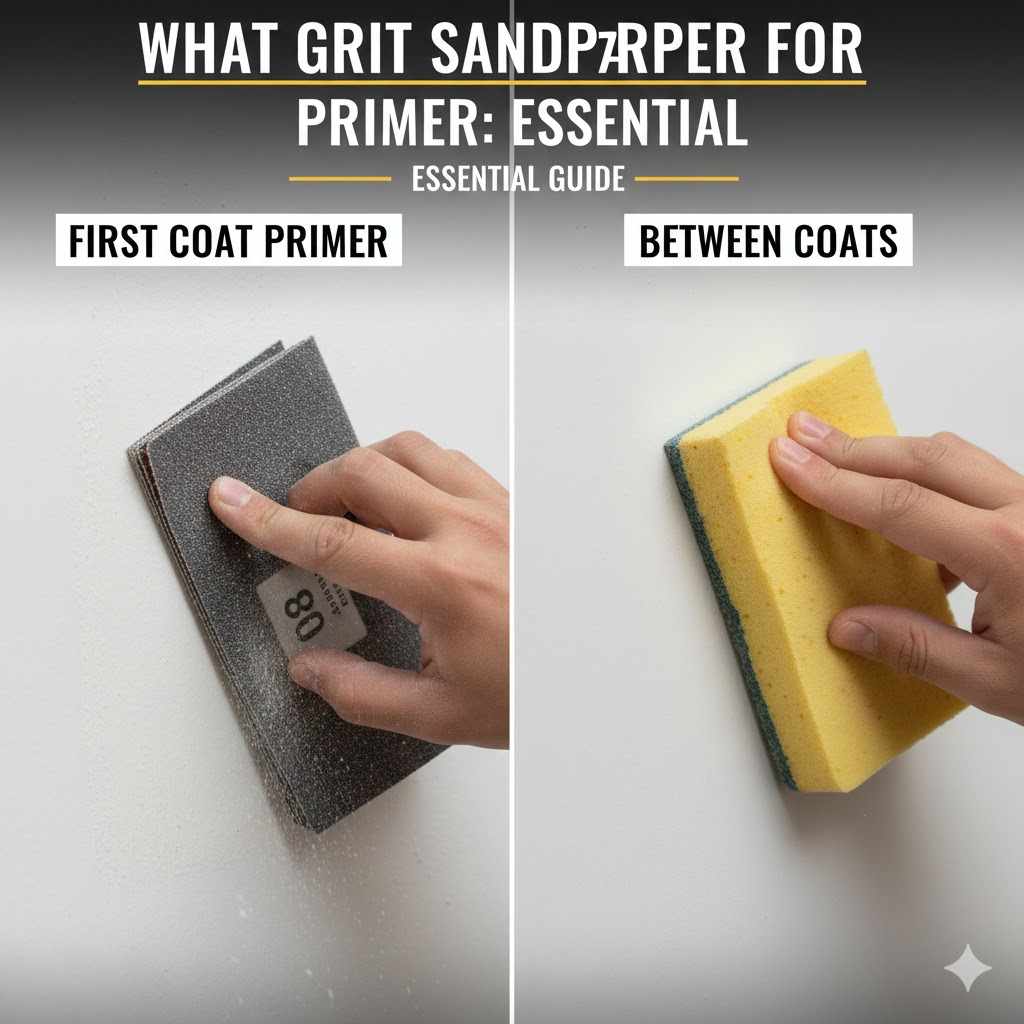
The most commonly recommended and safest grit sandpaper to use after applying your first full coat of primer is 220-grit.
Why 220-grit? It strikes the perfect balance:
- It’s fine enough not to leave deep, visible scratches that show through the topcoat.
- It’s coarse enough to quickly knock down any imperfections, drips, or texture left by the primer application.
If you are using an oil-based or shellac-based primer—which tend to be very hard and sometimes rougher—220-grit is definitely the place to start.
Technique for Sanding Primer Coat 1
Use a sanding block or an orbital sander set on low speed. You are not trying to remove a lot of material; you are just smoothing the surface. Run your hand over the primed surface afterward. If it feels uniform and smooth, you’re ready for the next step!
Step 3: Sanding Between Subsequent Coats (The Sanding Progression)
What if your primer requires multiple coats? This often happens with porous woods or when covering dark colors with light paint. For the second (and any subsequent) coat of primer, you should step up the fineness of your paper.
For example, if you used 220-grit on the first sanded coat, you would typically move to 320-grit for the second coat sanding.
This progressive change in grit is crucial for achieving that glass-smooth final result. Each subsequent sanding refines the surface the previous grit prepared.
Step 4: The Final Sanding Before Topcoat Application
This is your last chance to perfect the surface before the color goes on. Whether you applied one coat of primer or four, the sanding grit right before the topcoat should be very fine.
What Grit for Final Primer Scuff Sand?
The recommended grit for a final “scuff sand” before applying paint (latex, lacquer, or enamel) is usually between 320-grit and 400-grit.
- 320-Grit: Excellent for general scuffing and ensuring adhesion for standard interior latex or acrylic paints.
- 400-Grit: Ideal if you are using high-gloss topcoats, automotive finishes, or fine furniture lacquers where any remaining sanding mark will be highly visible.
The purpose of this final light sanding is strictly to create mechanical adhesion—tiny scratches for the paint to grab onto. It should take almost no effort; you are simply ensuring the entire primed surface is dull, not shiny, across the entire area.
This preparation step is critical, especially when working with finishes where longevity and appearance are important. You can learn more about surface preparation standards by reviewing guides from the National Park Service technical notes on protective coating applications, which emphasize the importance of proper surface texture.
Quick Grit Guide Table for Priming
To keep things clear, here is a quick reference chart summarizing where each grit number fits in the priming process:
| Stage | Recommended Grit Range | Why This Grit? |
|---|---|---|
| Raw Wood (Initial Leveling) | 120 – 150 | Removes imperfections and mill marks quickly. |
| Raw Wood (Final Prep before Primer) | 180 – 220 | Ensures a smooth, slightly open grain for primer adhesion. |
| Sanding First Primer Coat | 220-Grit (The Sweet Spot) | Removes texture/nibs without cutting through to the wood. |
| Sanding Subsequent Primer Coats | 320-Grit | Further refines the surface smoothness incrementally. |
| Final Scuff Sand Before Paint | 320 – 400 Grit | Creates a dull surface (tooth) for maximum paint bonding. |
Choosing the Right Type of Sandpaper
Grit is just half the story! The material the abrasive grit is attached to—the sandpaper itself—also matters hugely, especially when dealing with softer materials like primer.
Aluminum Oxide vs. Garnet
For sanding dried primer and paint, the most common and durable abrasive to look for is Aluminum Oxide. It self-sharpens as you sand, meaning it lasts longer and resists “clogging up” when sanding softer coatings.
Garnet sandpaper, while great for bare wood, tends to break down too fast when used on cured primer.
The Importance of Closed Coat vs. Open Coat
When sanding dried primer, you will encounter sanding dust sticking to the abrasive material. This is called “clogging.”
- Closed Coat: The abrasive grains cover 100% of the backing paper. This is better for very hard finishes but clogs quickly on soft primer.
- Open Coat: There is space between the grains (usually 50-70% coverage). Open coat sandpaper is generally better for sanding primer and paint. The wider spacing allows dust and dried primer to fall away rather than grinding into the paper, keeping your sandpaper effective longer.
When you purchase your 220-grit or 320-grit paper for priming, look specifically for an Aluminum Oxide, Open Coat design for the best performance on primers.
Key Mistakes to Avoid When Sanding Primer
Learning what not to do is just as important as knowing what to do. Here are a few common pitfalls to sidestep:
- Using Too Coarse a Grit: Never jump straight to 120-grit or 150-grit on cured primer. This will leave visible deep scratches that you will have to painstakingly sand out later, often removing the primer entirely.
- Sanding Wet Primer: Always let the primer dry completely until it is fully cured (check the can for recoat times). Sanding wet primer pulls it off the surface in gummy clumps, causing swirls and tears.
- Not Cleaning Dust: After sanding primer, dust is sticky and everywhere. You MUST remove this dust before painting. Wiping surfaces down with a tack cloth or a lint-free rag dampened with mineral spirits (for oil-based primers) or water (for water-based primers) is non-negotiable. Dust acts like sandpaper under your final coat, ruining the smoothness.
- Using Worn-Out Paper: Old, rounded sandpaper particles won’t cut effectively. If your paper feels dull or stops removing material quickly, switch it out. Fresh sandpaper is cheap insurance for a beautiful finish.
Manual vs. Power Sanding on Primer
Your tool choice can affect how you approach sanding primer. For beginners, a balance of control and speed is usually best.
Hand Sanding (Using a Sanding Block)
Hand sanding, using a hard rubber or foam sanding block, gives you the ultimate control. You can feel exactly where you are applying pressure.
- Best for: Corners, edges, small projects, and very careful touch-ups.
- Tip: Use 220-grit in this manner for controlled leveling.
Random Orbit Sander (ROS)
The ROS is a fantastic tool for achieving flatness over large, flat surfaces quickly. Because the sanding motion is random (not just back and forth in a straight line), it is much less likely to leave swirl marks.
- Best for: Cabinet doors, tabletops, large flat panels.
- Tip: Keep the ROS moving at all times. Do not let it dwell in one spot, especially when sanding primer, or you risk burning through the coat quickly.
For durable priming jobs, like on outdoor furniture or high-traffic trim, you may also benefit from checking surface prep guides from organizations like the American Society for Testing and Materials (ASTM), which detail industry standards for coating adhesion based on surface profile.
Troubleshooting Common Primer Sanding Issues
Even with the right grit, things can go slightly awry. Here are quick fixes when you are deep into your project:
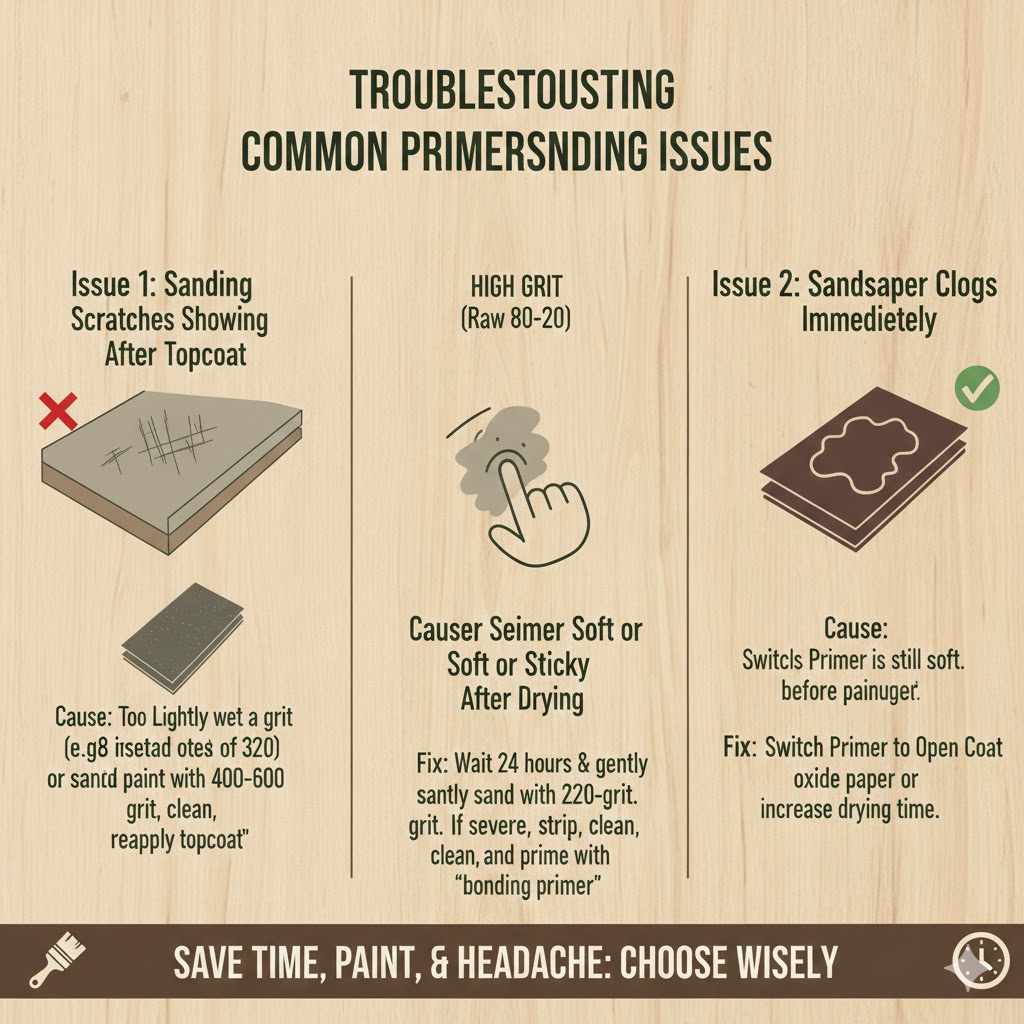
Issue 1: Sanding Scratches are Showing After Topcoat
This almost always means you used too low a grit number for your final primer sanding step (you likely used 180-grit when you needed 320-grit). Alternatively, you sanded with the grain during your final primer scuff.
Fix: If the paint is already applied, you must sand the cured paint lightly with 400 or 600 grit (wet sanding is often best here), clean it thoroughly, and apply another topcoat.
Issue 2: The Primer Seems Soft or Sticky After Drying
This is an adhesion failure due to insufficient curing time or improper type of primer used over a specific substrate (like glossy factory paint or oily wood).
Fix: If it’s only slightly soft, wait 24 hours longer and try sanding with 220-grit very gently. If it smears severely, you may need to strip it off, clean the area, and re-prime, making sure to use a “bonding primer” formulated for difficult surfaces.
Issue 3: Sandpaper Clogs Immediately
This means your primer might still be slightly soft, or you need better paper.
Fix: Switch to an Open Coat aluminum oxide paper, as mentioned earlier. If that fails, increase the drying time before sanding.
Frequently Asked Questions (FAQ) About Sandpaper and Primer
Q1: Can I skip sanding the primer completely?
A: Generally, no. Skipping sanding leaves a texture (called “orange peel” or nibs) that ruins the smooth look of the topcoat. Even if your primer says “sanding optional,” a quick scuff with 320-grit dramatically improves the final result and adhesion.
Q2: What if I use a spray primer (aerosol)? Do I need to change the grit?
A: Aerosol primers are usually thinner and lay down smoother. For spray primer, you can usually start sanding the first coat with 320-grit instead of 220-grit, as there are fewer heavy imperfections to knock down.
Q3: Is it bad to use 150-grit sandpaper on my primer?
A: Yes, it’s usually too aggressive for standard primer. 150-grit can leave scratches that you will see through a thin coat of topcoat, especially light-colored paint. Reserve 150-grit for the bare wood prep phase.
Q4: Should I use wet sanding or dry sanding on primer?
A: For the initial smoothing (220-grit), always use dry sanding. For the very final light scuff before paint (320 to 400-grit), light wet sanding can help keep dust down and achieve an ultra-smooth matte finish, provided your primer is fully cured and compatible with water.
Q5: How do I know if my primer is completely dry enough to sand?
A: Check the instructions on the primer can! Do not guess. Typically, a water-based primer needs 1–2 hours, while oil-based primer needs 12–24 hours. The surface should feel rock hard, not cool or pliable to the touch.
Q6: What if I accidentally sanded too far and see the raw wood through the primer?
A: Don’t panic! That’s an easy fix. Just clean the area well, and apply a spot coat of primer only to that bare patch. Let that spot dry completely, and then gently sand the new patch flush with the rest of the surface using the grit level you were using for that coat (likely 220 or 320-grit).
Maintaining Your Grip on Good Craftsmanship
Choosing the right sandpaper grit for sanding primer is less about guesswork and more about following a logical progression. You are gently refining a surface rather than attacking it aggressively. Remember that every single layer of finish—the bare wood prep, the primer, and the topcoat—requires a dedicated sanding step that gets progressively finer.
By sticking to 220-grit to knock down the initial texture on your first primer coat and stepping up to 320 or 400-grit for the final scuff, you are ensuring superior paint adhesion and the beautiful, level finish you envision for your project. Safety first, work smart, and always trust your senses—if it doesn’t feel smooth, it’s not ready! You’ve got this!