Are Black Walnut Edible? Proven Essential Facts
Yes, black walnuts are edible, but they require significant processing to remove the extremely bitter hull and shell before you can safely eat the kernel. They offer a strong, earthy flavor superior to common English walnuts when properly prepared.
When you look at that beautiful, hard-shelled nut sitting beneath a magnificent Black Walnut tree, you might wonder: can I actually eat this? It’s a common question, especially for DIYers and homeowners who love harvesting nature’s bounty. Many folks get turned off immediately because of the thick, green outer husk—it looks messy and intimidating! Don’t worry. As your woodworking mentor, I can tell you that unlocking the treasure inside this tough exterior is worth the effort because black walnuts taste incredible. We will break down exactly what makes them safe, how to harvest them without making a huge mess, and transform them from a lawn nuisance into a delicious workshop snack. Let’s get cracking!
Understanding the Black Walnut: Beyond Just Wood
Black Walnut (Juglans nigra) is famous in the workshop for its rich, dark color and straight grain—it’s the king of fine furniture lumber. But before it becomes your next cutting board, it’s a tree that produces food. It’s crucial to know that while the inner nut meat is edible, the surrounding parts require careful handling.
The Three Layers of a Black Walnut
To successfully eat a black walnut, you must understand the three distinct parts you encounter:
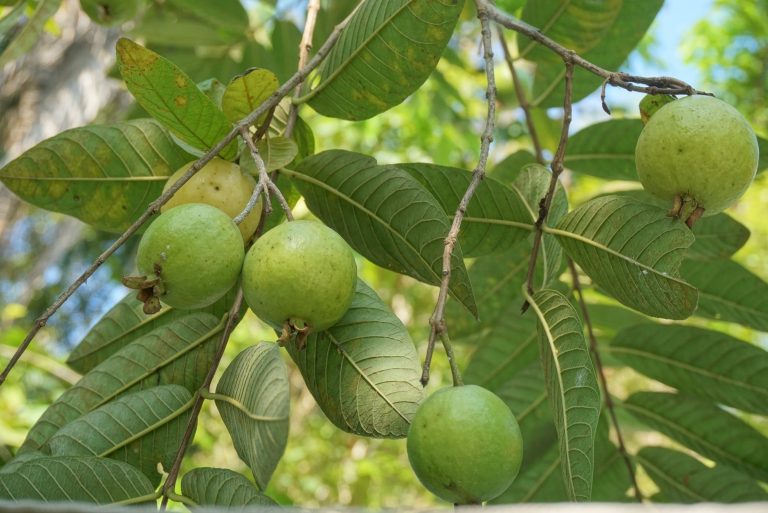
- The Husk (Outer Layer): This is green when fresh and turns black as it matures. It contains juglone, a compound that stains everything it touches dark brown or black—this is where the “black” in the name comes from. While not toxic in small amounts, it can cause skin irritation and is incredibly messy.
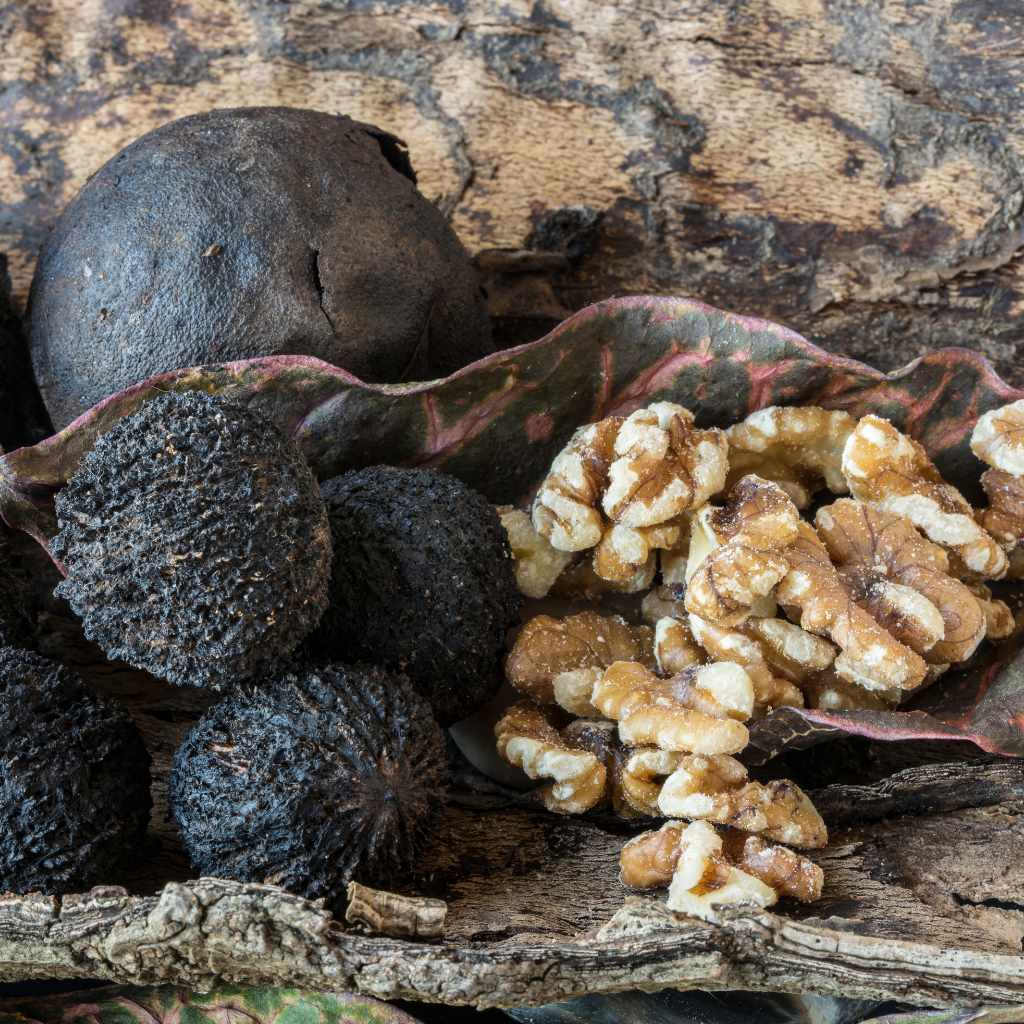
- The Shell (Middle Layer): This shell is notoriously hard, much thicker and more spherical than the smoother English walnut shell. It must be cracked open to reach the prize.
- The Kernel (Inner Nut Meat): This is the edible part. When properly dried and processed, black walnut kernels offer an intense, earthy, slightly spicy flavor—often preferred by culinary experts over the milder English walnut.
Safety First: Identifying Edible vs. Toxic Look-alikes
When foraging, safety is always our number one priority, just like when handling power tools. You must be 100% certain you have a Black Walnut and not a related, toxic species. In North America, the primary risk is confusing it with other trees.
Here is a quick comparison to ensure you are harvesting the right nut:
| Feature | Black Walnut (Edible Kernel) | Butternut (White Walnut) (Edible Kernel) | Tupelo or Buckeye Nut (Poisonous) |
|---|---|---|---|
| Shell Shape | Almost perfectly round, very thick | Ovoid or elongated, thinner shell | Spiny husks (Buckeye) or smooth, pointed hull (Tupelo) |
| Husk Color (Mature) | Turns black/dark brown and mushy | Light yellowish-green, sticky | Varies, often green with prickles or smooth |
| Flavor (Kernel) | Intense, earthy, robust | Milder, slightly sweet | Bitter, causes stomach upset/vomiting |
Crucial Note: Never consume any wild nut unless you are absolutely certain of its identity. If you are harvesting from your own yard, you are generally safe, but confirming the tree species is essential for beginners.
The Process: Step-by-Step Guide to Processing Black Walnuts
Harvesting and preparing black walnuts is a labor of love, much like carefully tuning a tricky table saw. It requires patience, the right tools, and a willingness to get a little messy first. Here is the proven, beginner-friendly process.
Step 1: Harvesting at the Right Time
You can’t rush maturity. Black walnuts are typically ready for harvest in late September or October, depending on your region. You’ll know they are ready when:
- The husks begin to crack open naturally.
- The husks turn dark brown or black and start falling from the tree, often after a hard frost.
- They drop readily when shaken gently.
Step 2: De-Hulling (The Messy Part)
This is the step where you deal with the staining juglone. You can do this outside or in an area you don’t mind staining permanently. Safety gear is non-negotiable here!
Essential De-Hulling Gear:
-
- Heavy-duty rubber gloves (wear these! Juglone stains skin badly).
- Safety glasses.
- Old clothes you don’t care about.
De-Hulling Methods:
You need to peel or scrape the husk away from the hard shell underneath. Choose the method that suits your harvest volume:
-
-
- The Simple Stomp Method (For Small Batches): Lay down an old tarp or a piece of scrap plywood. Place a few nuts on the tarp. Use your boot heel to roll or stomp firmly until the husk splits and separates from the shell. This is effective but requires good balance!
- The Hand Tool Method (For Medium Batches): Use a heavy glove and grip the nut firmly. Use a stiff putty knife or a dull screwdriver to pry the husk away from the shell seams. Work slowly under running water if possible to wash away the residue immediately.
- The Tumbler Method (For Large Volumes): If you have a large harvest, some experienced foragers use an old cement mixer or a heavy-duty metal bucket with some abrasive materials (like gravel) to gently tumble the nuts for a few minutes. This wears the husk away. (Note: Ensure the tumbler is thoroughly cleaned afterward if you reuse it for other purposes.)
-
Step 3: Thorough Washing and Drying the Shells
Once the husks are removed, the shells are covered in black residue. This must be completely washed off before drying, or mold can form, ruining the kernel inside.
-
-
- Rinse the shells multiple times in a bucket of water. You will notice the water turning black immediately. Keep rinsing until the water remains relatively clear.
- Scrub stubborn residue with a stiff brush if necessary.
- Spread the cleaned shells out on wire racks, old screens, or concrete patios in a dry, well-ventilated area. Allow them to dry completely for at least two to three weeks. Proper drying prevents mold and makes cracking slightly easier later.
-
Expert Tip on Drying: Look for resources from agricultural extensions, such as those offered by Land-Grant Universities, which often provide region-specific advice on nut curing. For instance, the University of Missouri Extension provides guidance on safe storage practices for harvested nuts.
Step 4: Cracking the Invincible Shell
This is where many beginners give up. Black walnut shells are famously tough. A standard novelty nutcracker often won’t work here. You need serious leverage. Safety glasses are vital during this step, as shell shards can fly.
Tools for Cracking Black Walnuts:
-
-
- Bench Vise: This is often the most reliable tool. Clamp the nut gently near one of its seams (natural weak points) and slowly increase pressure until it cracks cleanly.
- Nut Cracker Designed for Black Walnuts: These are heavy-duty, specialized crackers that usually have a long handle for maximum leverage.
- Hammer and Anvil (Use Extreme Caution): For very small batches, a heavy hammer can be used on a solid block of steel (an anvil or heavy steel plate). Tap gently but firmly directly on the equator of the nut. You want to crack it, not pulverize it.
-
Once cracked, carefully pick out the kernel pieces. They often cling tightly to the shell walls, so patience is key.
Step 5: Rinsing the Kernels (The Secret to Better Flavor)
Even after cracking, the kernel meats themselves carry traces of the hull residue or tannins that can make them taste overly astringent or bitter. This final rinse elevates the flavor significantly.
-
-
- Place the extracted kernels into a fine-mesh sieve or colander.
- Rinse them thoroughly under cool running water for several minutes.
- After rinsing, you must dry them again. Spread the kernels in a thin layer on a baking sheet lined with parchment paper.
- Place them in a conventional oven set to the lowest possible temperature (ideally 170°F or lower) or a dehydrator for several hours until they are completely dry and crisp. This drying process is critical for long-term storage and optimal flavor.
-
Why Go Through All This Trouble? The Black Walnut Advantage
If English walnuts (the ones you typically buy at the grocery store) are easier, why bother with the black walnut? The answer lies in flavor and nutrition.
Flavor Profile: Intense and Earthy
Black walnuts possess a flavor profile that is far more complex than their common cousins. They are:
-
-
- Richer and more robust.
- Possessing notes that experts describe as slightly smoky or tannic.
- Excellent for baked goods where you want the nut flavor to stand out against sugar, like in fudge, brownies, or homemade ice cream.
-
Nutritional Comparison Table
While both are highly nutritious, black walnuts often boast a higher concentration of beneficial compounds.
| Nutrient (per similar serving size) | Black Walnut | English Walnut |
|---|---|---|
| Antioxidants | Significantly higher | High |
| Omega-3 Fatty Acids (ALA) | Very high concentration | High concentration |
| Protein | Slightly higher | Lower |
| Fiber | Higher | Lower |
The high antioxidant levels often cited in studies suggest that incorporating naturally processed black walnuts into your diet can be a fantastic addition to a healthy lifestyle. These fatty acids are also what give the nut its signature rich mouthfeel.
Storage and Usage: Keeping Your Harvest Fresh
Once you have successfully cracked and thoroughly dried your kernels, treating them properly ensures they last a long time, just like properly finished woodwork resists the elements.
How to Store Dried Black Walnuts
Because of their high oil content, black walnuts can go rancid if stored incorrectly. Rancid nuts taste sharply bitter and should be discarded.
-
-
- Airtight Containers: Always store nuts in glass jars with tight lids or heavy-duty freezer bags from which you have pushed out as much air as possible.
- Cool, Dark Place: For short-term storage (up to one month), a cool pantry is fine.
- Refrigeration: For storage up to six months, keep them in the refrigerator.
- Freezing (Best Practice): For long-term storage (one year or more), place the airtight containers in the freezer. Freezing dramatically slows down the oxidation process that causes rancidity.
-
Beginner Project Ideas for Using Your Harvest
Now that you have these flavorful nuts, it’s time to put them to good use! Start simple to build confidence.
-
-
- Simple Snack: Toss the dried, rinsed kernels with a pinch of sea salt and roast lightly (300°F for 8 minutes) for an instantly delicious snack.
- Black Walnut Oil Vinaigrette: If you pressed some oil (a more advanced step), or if you use store-bought black walnut oil, mix it with balsamic vinegar, Dijon mustard, and a touch of maple syrup.
- Baking Booster: Substitute them 1:1 for English walnuts in your favorite cookie, banana bread, or muffin recipes. Their powerful flavor shines through!
- Black Walnut Taffy or Candy: This is a traditional way to use them, often involving boiling sugar and corn syrup until reaching the hard-ball stage before mixing in the nuts.
-
Troubleshooting Common Black Walnut Problems
Every DIY project has hiccups. Here are the most common frustrations when dealing with black walnuts and how to solve them in your workshop (or yard).
Problem 1: The Husks Won’t Come Off Easily
Solution: They aren’t ripe enough, or they need moisture. If they are still clinging tightly and are bright green, leave them on the ground for another week or two. If they are black but stubborn, soak them in water for 24 hours; this often softens the material enough to help the hull separate.
Problem 2: My Hands Are Permanently Stained Dark Brown!
Solution: Juglone stains are notoriously difficult. The best solution is prevention (gloves!). If stained, try soaking your hands in a paste of baking soda and lemon juice, scrubbing vigorously. For deep stains on tools or concrete, specialized oxalic acid cleaners or a high-powered pressure washer are often required.
Problem 3: The Nuts Taste Bitter, Even After Cracking
Solution: This is almost always due to incomplete rinsing or insufficient drying after hull removal. The tannin residue leaches onto the kernel. The long rinse (Step 5) and subsequent complete drying are essential countermeasures. If they are already dry and still bitter, they may have been cracked too early or stored poorly.
Problem 4: I Can’t Crack Them Without Smashing the Kernel
Solution: You are using too much pressure too fast, or your tool isn’t applying pressure evenly. Slowly increasing the force on a bench vise is always superior to a sudden smash with a hammer. Try holding the nut so the crack runs along its natural seams, not across the middle.
Frequently Asked Questions (FAQ) for Beginners
Q1: Is the outer green husk of the Black Walnut poisonous to touch?
A: The husk itself isn’t acutely toxic in small contacts, but the juglone in it acts as a powerful natural herbicide and strong skin dye. It can cause allergic reactions or severe staining on skin, so wear gloves.
Q2: How long does it take for Black Walnuts to dry properly after washing?
A: If you spread them thinly in a dry, warm, well-ventilated area, it takes about two to three weeks for the shells to cure fully. The inner kernels must be completely dried afterward, which takes several hours in low heat or a dehydrator.
Q3: Can I eat black walnuts raw immediately after harvesting?
A: No. You must remove the outer husk, crack the hard shell, and ideally, rinse and dry the kernel meat to remove astringent residues for the best and safest eating experience.
Q4: Are Black Walnuts harder to crack than standard store-bought walnuts?
A: Yes, significantly. Black walnut shells are much thicker, denser, and more spherical than the flatter English walnuts you usually find shelled in the market. You will need a specialized tool or a bench vise.
Q5: How do I know if my dried black walnuts have gone bad or rancid?
A: Rancid nuts smell sharp, like old paint or putty, and taste overwhelmingly bitter. Fresh, properly processed nuts should smell sweetly earthy and taste rich.
Q6: Where can I find reliable information on safety regarding wild foraging?
A: Always check with your local agricultural extension office (often linked to a state university) or consult field guides specific to your region before consuming any foraged item. This mirrors checking your safety guidelines before firing up a new power tool.
Conclusion: From Tree to Table (The Rewarding Finish)
If you came here wondering whether those messy nuts falling from your tree are edible, I hope you now feel confident in the answer: absolutely yes! Processing black walnuts takes dedication—it’s a multistep harvest that requires patience, proper protection from the staining husk, and the right leverage to crack them open. It’s a true testament to craftsmanship; the harder the shell, the more rewarding the kernel inside feels when properly prepared.
By following these proven steps—from stomping off the stains to the final, essential drying rinse—you unlock a flavor profile that dedicated bakers and chefs highly prize. Treat your harvest with respect, use those gloves, and store your finished product airtight. Enjoy savoring the rich, earthy taste of your own labor. Next time you look at that massive Black Walnut tree, you won’t just see beautiful lumber; you’ll see delicious, hard-earned rewards waiting for the patient craftsman.