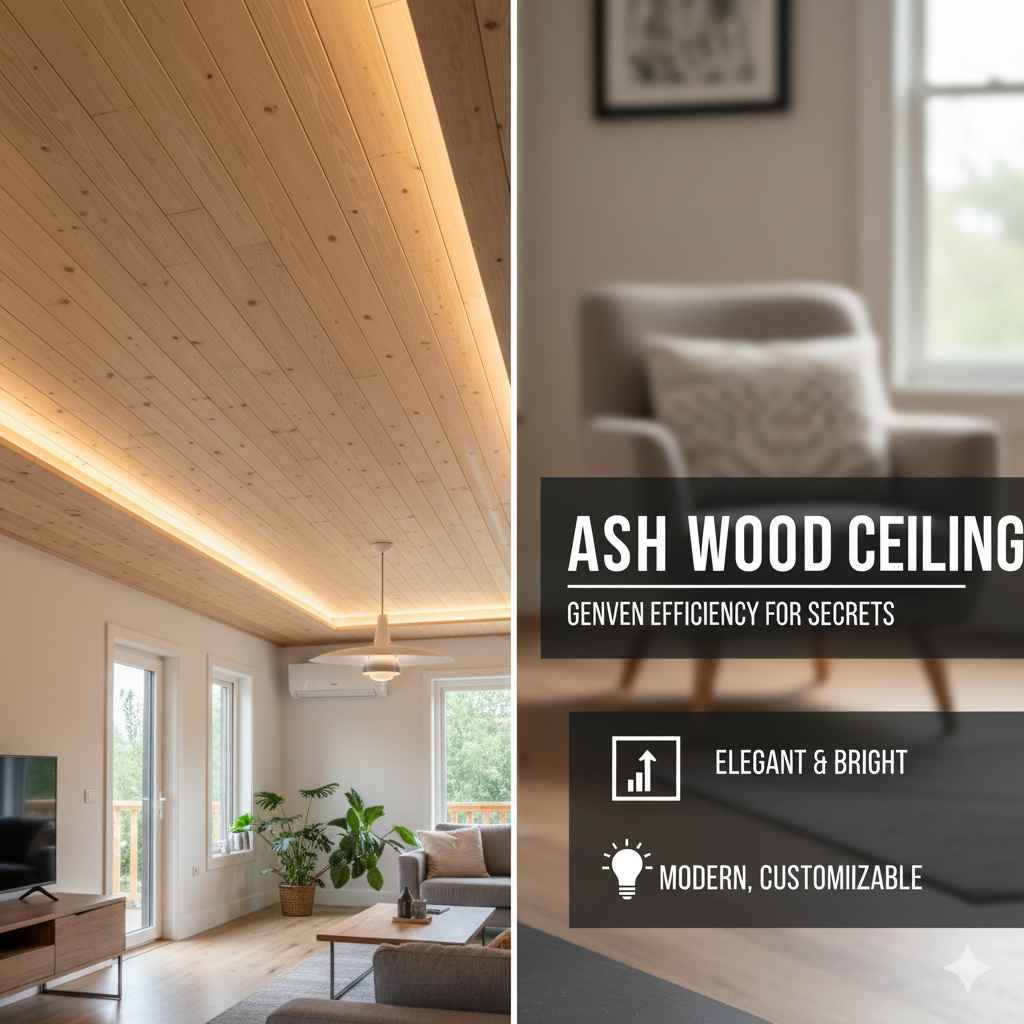
Ash Wood Ceiling: Genius Design Secrets
Transform your space with an ash wood ceiling! Discover simple secrets to add warmth, style, and value. This guide breaks down everything beginners need to know for a stunning, durable ash ceiling.
Ever dreamed of a ceiling that brings the beauty of nature indoors? An ash wood ceiling can do just that! It’s a fantastic choice for adding warmth and unique character to any room. Many homeowners hesitate, thinking it’s too complicated or expensive. But I’m here to show you that with a little know-how, creating a gorgeous ash wood ceiling is absolutely achievable, even for beginners. We’ll explore why ash is a great wood for ceilings, how to choose the right style, and the simple steps to bring this dream to life in your home. Get ready to discover some genius design secrets that will make your ash wood ceiling the star of your space!
Why Choose an Ash Wood Ceiling? The Smart Beginner’s Choice
Picking the right material for a ceiling project can feel overwhelming, but let me tell you, ash wood is a standout for several reasons, especially for those just starting out. It combines beauty with practicality, making it a truly smart choice. Let’s dive into what makes ash wood so special for ceilings.
The Beauty of Ash: A Natural Aesthetic
Ash wood boasts a beautiful, natural look that can instantly elevate a room. Its grain pattern is often straight and uniform, but it can also feature lovely waves and curls, giving it a dynamic and interesting appearance. The color typically ranges from creamy white to light brown, with sometimes a pinkish or grayish hue. This neutral palette makes it incredibly versatile, fitting seamlessly into various design styles, from modern and minimalist to rustic and traditional.
Durability and Strength: Built to Last
When it comes to ceilings, durability is key. Ash is a hardwood known for its excellent strength and resilience. It’s tough enough to withstand everyday wear and tear, and it’s less prone to denting or scratching compared to softer woods. This means your ash wood ceiling will maintain its beauty for years to come, offering a long-term investment in your home’s aesthetic and value.
Cost-Effectiveness: Quality Without Breaking the Bank
Compared to some other premium hardwoods, ash wood is often more budget-friendly. This makes it an accessible option for homeowners looking to add a touch of natural luxury without a prohibitive cost. You get the look and feel of a high-end material at a more manageable price point, which is always a win for DIYers and budget-conscious remodelers.
Ease of Working With: Beginner-Friendly Machining
For those of us who love to get our hands dirty, ash wood is generally easy to work with. It machines well, glues effectively, and finishes beautifully. This means that cutting, fitting, and installing your ash wood ceiling panels or planks will be a smoother process, leading to more satisfying results for beginners. Safety first, always, but the ease of working with ash adds to its beginner appeal.
Ash Wood Ceiling Styles: Finding Your Perfect Fit
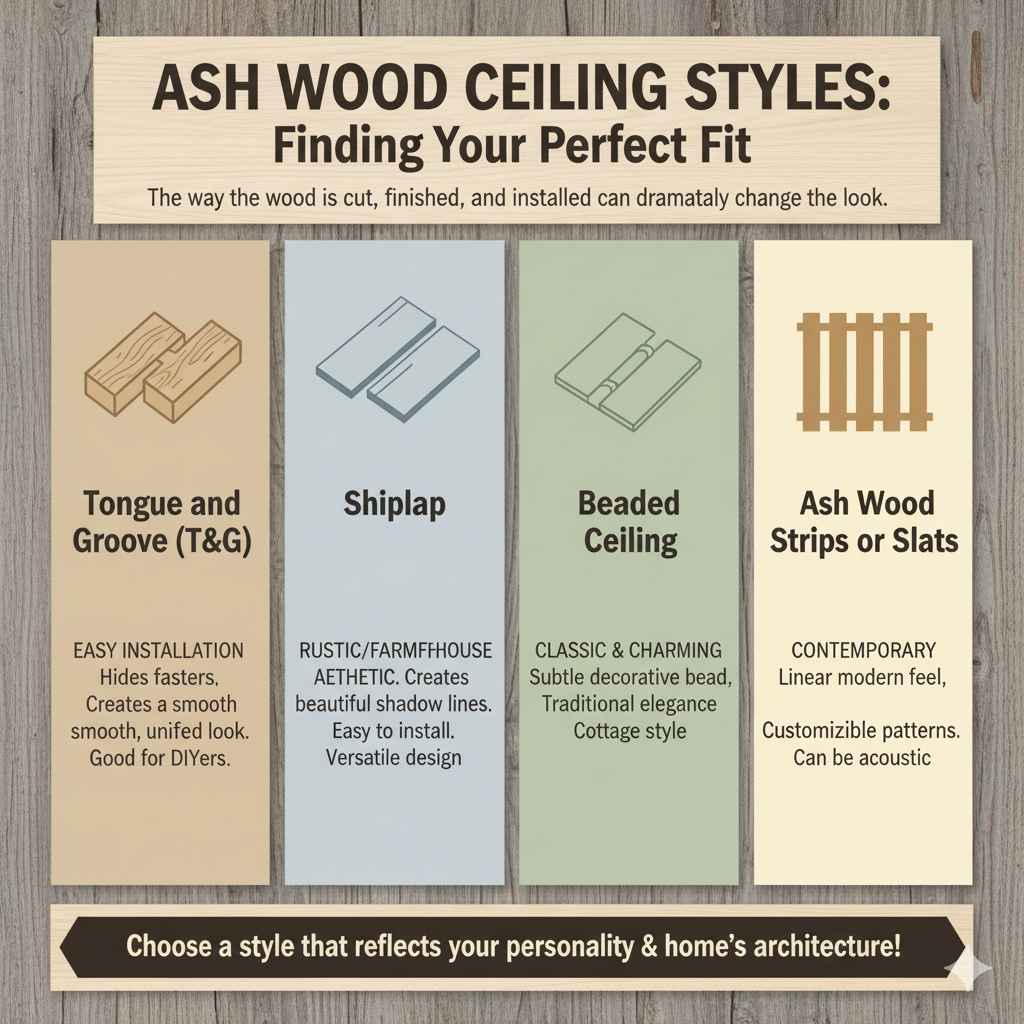
One of the most exciting parts of planning an ash wood ceiling is choosing the style. The way the wood is cut, finished, and installed can dramatically change the look and feel of your room. Here are some popular styles to consider:
Tongue and Groove (T&G) Ash Ceiling
This is perhaps the most popular and beginner-friendly option. Tongue and groove refers to the interlocking edges of wood planks. One edge has a protruding “tongue,” and the other has a groove that the tongue fits into. This system creates a tight, seamless fit, hiding the fasteners and giving a clean, polished look. It’s also quite forgiving during installation, as the interlocking nature helps keep the planks aligned.
- Pros: Easy installation, hides fasteners, creates a smooth, unified look, good for DIYers.
- Cons: Can be slightly more expensive than other options due to milling.
Shiplap Ash Ceiling
Shiplap is another fantastic choice for an authentic, rustic, or farmhouse look. Like tongue and groove, shiplap planks overlap at the edges. However, instead of a tongue-and-groove joint, there’s a distinct rabbet (a recessed groove) on each edge that allows the planks to overlap. This overlap creates a charming shadow line between boards, giving a distinctive visual texture.
- Pros: Creates a beautiful shadow line aesthetic, relatively easy to install, versatile for different design styles.
- Cons: The overlap might collect dust over time, though this is rarely an issue on a ceiling.
Beaded Ceiling
Beaded ceilings offer a classic, charming look with a subtle decorative groove, or “bead,” running along one edge of the plank. This bead sits in the groove of the adjacent plank, creating a pleasant visual detail and a slight separation between boards. It’s a step up in decorative detail from T&G and shiplap, adding a touch of traditional elegance.
- Pros: Adds a decorative touch, classic appeal, good for historical or cottage styles.
- Cons: The bead can be more prominent and might influence the overall style.
Ash Wood Strips or Slats
For a more contemporary or minimalist look, consider using ash wood strips or slats. These can be installed with consistent gaps between them, or in patterns, creating a linear and modern feel. This approach can also be combined with acoustic backing for sound dampening. It requires more precision in spacing but offers a very clean, architectural aesthetic.
- Pros: Modern and sleek appearance, can be very customizable with spacing and patterns.
- Cons: Requires more meticulous installation regarding alignment and spacing.
Planning Your Ash Wood Ceiling Project: Essential Steps
Before you even pick up a piece of wood, careful planning is crucial for a successful and stress-free project. As your woodworking mentor, I always emphasize that a little preparation goes a long way, especially for DIY projects. Let’s walk through the key planning steps.
1. Measure Your Space Accurately
You’ll need the exact dimensions of your room to calculate how much wood you need. Measure the length and width of the ceiling to get the total square footage. Don’t forget to account for any angles, soffits, or complex shapes. It’s always better to have a little extra material than to run short. A good rule of thumb is to add 10-15% for cuts, mistakes, and future repairs.
Pro Tip: Use a reliable measuring tape and make sure your measurements are precise. Double-check them!
2. Choose Your Ash Wood Finish
Ash wood can be finished in many ways, and the finish you choose will significantly impact the final look and its durability. Consider these options:
- Natural/Clear Coat: This preserves the wood’s natural color and grain. A clear polyurethane or varnish will protect it from moisture and wear.
- Stain: If you want to darken the wood or give it a different hue (like a rich walnut or a light grey), stain is the way to go. Always test stains on scrap pieces first!
- Paint/Whitewash: While less common if you want to showcase the ash grain, you can paint or whitewash ash wood for a specific look.
3. Select Your Installation Method
How will you attach the ash wood planks to your ceiling? This depends on your ceiling structure and the type of ash wood you choose. Common methods include:
- Nail Gun (or Hammer & Nails): For wood planks, especially tongue and groove, a pneumatic nail gun is efficient. You can toe-nail (drive nails at an angle) through the tongue or face-nail through the wood.
- Screws: Screws offer a stronger hold and are often preferred for structural integrity. You can use them for face-nailing or pilot holes for a cleaner look.
- Wood Glue: Always use wood glue in conjunction with mechanical fasteners for extra strength.
- Adhesive: In some cases, especially with very light paneling, a strong construction adhesive can be used in addition to fastening.
Important Safety Note: When working overhead, always wear safety glasses to protect your eyes from falling debris and dust. Consider a dust mask, especially when cutting or sanding.
4. Gather Your Tools and Materials
Having all your tools and materials ready before you start will save time and prevent frustration. Here’s a basic list:
- Ash wood planks (T&G, shiplap, etc.)
- Measuring tape
- Pencil
- Safety glasses
- Dust mask
- Work gloves
- Chop saw or miter saw for precise cuts
- Jigsaw for cuts around obstacles
- Pneumatic nail gun or drill/driver
- Appropriate nails or screws
- Wood glue
- Level
- Stud finder (if attaching to joists)
- Ladder or scaffolding
- Wood finish (stain, poly, etc.) and applicators
- Caulk (paintable) for gaps
5. Understand Your Substrate
What is your current ceiling made of? Is it drywall, plaster, or an existing wood ceiling? You need to know what you’re attaching the ash wood to. If it’s drywall, you’ll ideally want to find ceiling joists to securely fasten your wood planks. A stud finder is essential for this. If your ceiling structure is solid wood, fastening will be easier. Always consult local building codes if you are unsure about structural requirements. Materials in construction often need to meet specific standards, which can be found on resources like the Building Science Corporation.
Installation: Step-by-Step Guide to Your Ash Wood Ceiling
Now for the exciting part – bringing your ash wood ceiling to life! I’ll guide you through the process with clear, actionable steps. Remember to prioritize safety and work at a comfortable pace. This is designed to be beginner-friendly, so don’t hesitate to take your time.
Step 1: Prepare the Ceiling Surface
Ensure your existing ceiling is clean, dry, and structurally sound. If you have popcorn ceilings or uneven plaster, you might need to scrape it smooth or install a new layer of drywall or plywood as a stable substrate. If you’re attaching directly to joists, locate them using a stud finder and mark their positions. This is where you’ll anchor your new ceiling.
Step 2: Start Your First Row
Begin in a corner of the room, usually the one furthest from the main entrance, as this will be less visible during installation. If using tongue and groove, you’ll typically want the tongue facing away from the wall you’re starting at for the first board. You might need to rip (cut lengthwise) the first board to fit snugly against the wall. Use your choice of fasteners (nails or screws) to secure the board to the joists or substrate. If face-nailing, ensure your nails are straight and at a consistent distance.
Step 3: Install Subsequent Boards
Work your way across the room, installing each new ash wood board. For tongue and groove, slide the tongue of the new board into the groove of the previous one. For shiplap, overlap the boards according to their design. Secure each board firmly with your chosen fasteners, ideally angling them through the tongue (toe-nailing) for T&G to hide the nails. If face-nailing, try to place nails in aesthetically pleasing spots, or plan to fill them later if needed. Remember to glue the joints for added strength.
Step 4: Cut Around Obstacles
As you progress, you’ll encounter light fixtures, vents, or other ceiling features. Measure these carefully and use a jigsaw to cut the ash wood planks to fit around them. Precision here makes a big difference for the final look. Dry-fit your pieces before permanently attaching them to ensure a perfect fit.
Step 5: The Final Row and Finishing Touches
The last row of boards might need to be ripped lengthwise to fit the remaining space. Measure precisely, cut your boards, and carefully install them. Once all your boards are in place, inspect the ceiling. You will likely have small gaps along the walls due to imperfections in the ceiling or wall lines. Use a paintable caulk or wood filler to fill these gaps for a seamless look.
Step 6: Apply Your Finish
If you’re applying a finish, now is the time. Sand any rough spots lightly. If you’re staining, apply stain evenly according to the product instructions, wiping off excess. Once the stain is dry, apply your protective clear coat (polyurethane, varnish, etc.) in thin, even layers, allowing adequate drying time between coats. For a natural look, simply apply several coats of clear finish directly to the wood.
Ash Wood Ceiling: Pros and Cons
Like any building material, ash wood ceilings have their good points and things to consider. Understanding these will help you make the best decision for your home and your project. Here’s a breakdown:
| Pros of Ash Wood Ceilings | Cons of Ash Wood Ceilings |
|---|---|
| Beautiful natural grain pattern and color variations. | Can be prone to moisture damage if not properly sealed (like most woods). |
| Durable and strong hardwood. | Can be more expensive than some composite or MDF options. |
| Relatively easy to work with for DIYers. | Requires careful installation to avoid bowing or warping if not properly acclimated. |
| Versatile for various design styles. | Lighter colors can show dirt more easily if not maintained. |
| Good value for a hardwood ceiling option. | Availability can sometimes vary by region. |
| Adds warmth and character to a room. | Requires some basic woodworking tools and skills for installation. |
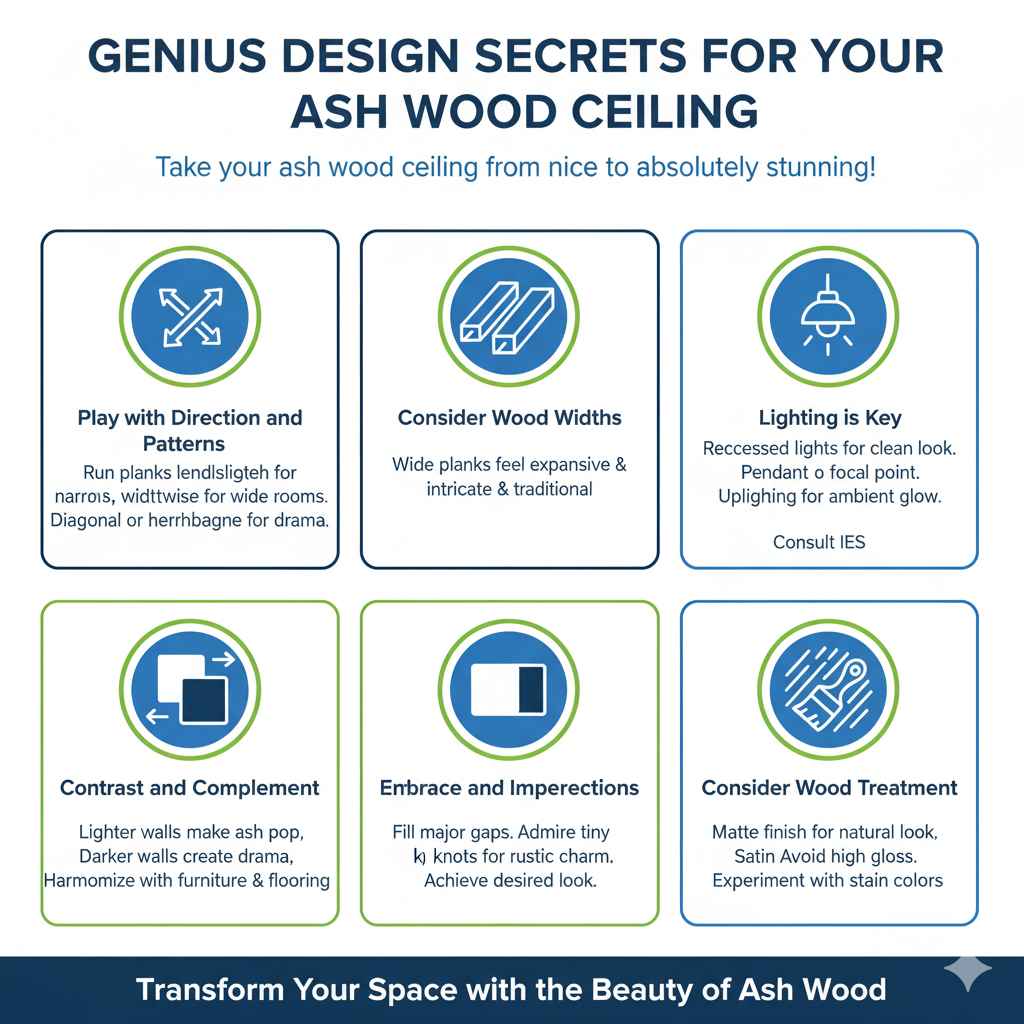
Genius Design Secrets for Your Ash Wood Ceiling
Want to take your ash wood ceiling from nice to absolutely stunning? Here are some tried-and-true design secrets that can make a real impact:
1. Play with Direction and Patterns
Who says wood planks have to go straight across? Running your ash wood planks lengthwise in a long, narrow room can make it feel wider. Conversely, running them widthwise can make a wide room feel cozier. For a dramatic effect, consider installing them diagonally or even in a herringbone pattern (though this is more advanced!).
2. Consider Wood Widths
Most ash wood ceiling planks come in standard widths, but don’t be afraid to mix and match if possible or use wider boards for a bolder statement. Wider planks can make a room feel more expansive and contemporary. Narrower planks tend to create a more intricate and traditional look.
3. Lighting is Key
The way you light your room can dramatically affect how your ash wood ceiling looks.
- Recessed Lighting: Placed strategically, recessed lights provide a clean, modern look and distribute light evenly without cluttering the ceiling.
- Pendant Lights or Chandeliers: A beautiful fixture can become a focal point, drawing the eye upwards and complementing the wood.
- Uplighting: Aiming lights towards the ceiling can highlight the texture and grain of the ash wood, creating a warm, ambient glow.
For lighting advice, consider resources from the Illuminating Engineering Society (IES), a trusted authority on lighting design and practice.
4. Contrast and Complement
Think about how your ash wood ceiling will interact with the rest of your room.
- Wall Color: Lighter wall colors will make the ash ceiling pop, while darker walls can create a more dramatic, enveloping feel.
- Furniture and Decor: Coordinate or contrast your ash wood with your furniture. For example, if your ash has reddish undertones, you might bring in accents in similar warm tones.
- Flooring: Ensure your floor and ceiling wood tones complement each other. You don’t need an exact match, but they should harmonize rather than clash.
5. Embrace Imperfections (When to Fill, When to Admire)
Natural wood has character, and sometimes minor imperfections are part of its charm. Tiny knots or subtle grain variations can add to the rustic appeal. However, significant gaps or cracks should be addressed. Caulk or wood filler can seamlessly blend lines, while leaving tiny natural checks visible can enhance a rustic aesthetic. It’s about achieving the look you desire!
6. Consider Wood Treatment for Different Moods
Beyond stain colors, the finish itself can change everything. A matte finish will offer a very natural, understated look. A satin finish provides a bit more sheen and dimension. High gloss is usually not recommended for entire ceilings unless you’re going for a very specific, high-impact modern look, as it can highlight imperfections. A Danish oil finish can give a naturally oiled look while offering good protection.
Frequently Asked Questions About Ash Wood Ceilings
Q1: Is ash wood good for ceilings?
Yes, ash wood is an excellent choice for ceilings. It’s a durable hardwood with a beautiful grain pattern that adds warmth and character.