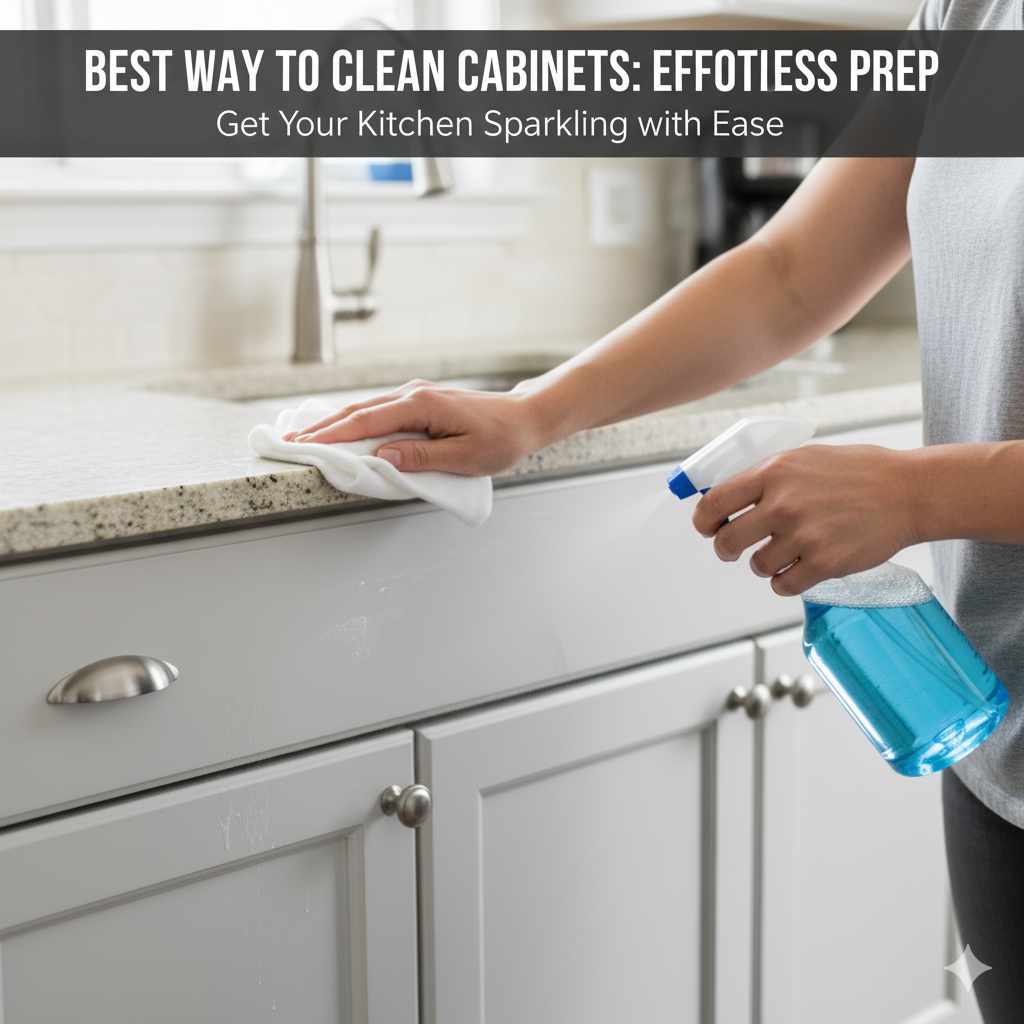
Best Way To Clean Cabinets: Effortless Prep
The best way to clean cabinets before painting involves gathering your supplies, decluttering, and then gently wiping down all surfaces with a mild degreaser solution. This effortless prep ensures a smooth, durable finish by removing dust, grease, and grime, setting the stage for beautiful, long-lasting results.
Cabinets can get surprisingly grubby! Over time, cooking splatters, fingerprints, and dust build up, creating a dull layer that paint just won’t stick to properly. It’s easy to get overwhelmed by that greasy film or sticky residue, making you hesitate before starting that cabinet makeover. But don’t worry! With a little know-how, cleaning your cabinets to prepare them for paint is a simple, rewarding task. We’ll break it down step-by-step, making it feel less like a chore and more like the exciting first step toward a stunning new look for your kitchen or bathroom. Get ready for that satisfying shine – it’s closer than you think!
Why Effortless Prep Matters for Cabinet Painting
Think of cleaning your cabinets as laying down a perfect foundation for a beautiful painting. If you skip this crucial step, you might end up with paint that peels, bubbles, or has a bumpy texture. Grease, grime, and dust are the arch-nemesis of good paint adhesion. They create a barrier that paint can’t grip onto, no matter how carefully you apply it. Getting this prep right means your paint job will look professional, feel smooth to the touch, and last for years to come. It’s the secret ingredient to a truly amazing transformation, turning dull, dirty cabinets into a polished, like-new feature in your home. And the best part? It doesn’t require any fancy tools or complicated techniques.
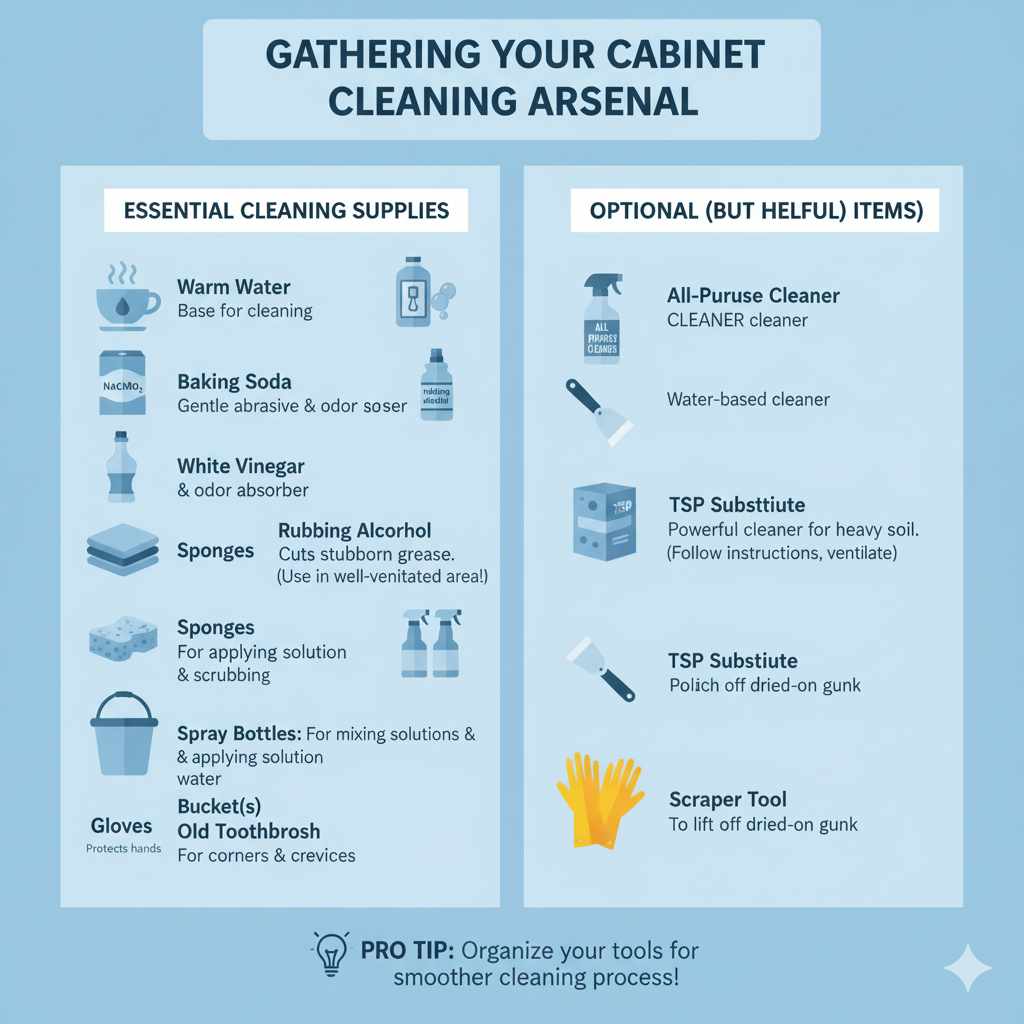
Gathering Your Cabinet Cleaning Arsenal
Before you dive in, having the right tools makes all the difference. It’s like having a perfectly organized toolbox; everything works better when it’s ready to go. For cleaning cabinets before painting, you don’t need anything too exotic. Most of these items you probably already have around the house!
Essential Cleaning Supplies
- Warm Water: The base for most cleaning solutions.
- Mild Dish Soap: A fantastic degreaser that’s gentle on most cabinet finishes.
- Baking Soda: A gentle abrasive and odor absorber, great for tougher spots.
- White Vinegar: Another natural degreaser and cleaner.
- Rubbing Alcohol (Isopropyl Alcohol): Excellent for cutting through stubborn grease and sticky residues. (Use in a well-ventilated area!)
- Soft Cloths or Microfiber Towels: You’ll need plenty for washing, rinsing, and drying. Microfiber is excellent because it traps dirt and grime effectively without scratching.
- Sponges: For applying the cleaning solution and scrubbing gently.
- Spray Bottles: For mixing and applying your cleaning solutions.
- Bucket(s): To hold your cleaning solutions and rinse water.
- Gloves: To protect your hands from cleaning solutions and keep cabinets free of fingerprints during the process.
- Old Toothbrush or Small Detail Brush: Perfect for getting into corners, crevices, and around hardware.
Optional (But Helpful) Items
- All-Purpose Cleaner: A good quality, water-based cleaner can also work.
- TSP Substitute (Trisodium Phosphate Substitute): For heavily soiled cabinets, a TSP substitute is a powerful cleaner. Always follow the manufacturer’s instructions carefully and ensure good ventilation, as recommended by the Environmental Protection Agency (EPA) for safer cleaning practices.
- Scraper Tool (Plastic or Putty Knife): To gently lift off any dried-on gunk.
Step-by-Step Guide: The Effortless Prep Process
Now that you have your supplies, let’s get those cabinets sparkling. We’ll go from simple dusting to tackling tough grime. Remember, patience here pays off big time with a better paint finish!
Step 1: Declutter and Remove Hardware
Before you even think about cleaning, clear everything out of your cabinets. This is a good opportunity to declutter anyway! Then, remove all cabinet doors and drawers. This makes it much easier to clean thoroughly and gives you access to every surface. Don’t forget to remove all knobs, handles, and hinges. Keep them all together in a bag or container so you don’t lose any small parts. It’s also a good idea to label each door and drawer with a number or letter and mark the corresponding hinge locations so you can put them back exactly where they belong. This might seem like a small detail, but it saves a lot of frustration later!
Step 2: Dust Everything Thoroughly
Start with a good old-fashioned dusting. Use a dry microfiber cloth or a soft-bristled brush to wipe away all loose dust, cobwebs, and debris from the cabinet surfaces, inside and out. Pay attention to the grooves, edges, and undersides of shelves. This initial dusting prevents you from just smearing dust around with your cleaning solution later.
Step 3: Prepare Your Cleaning Solution
You have a few great options for cleaning solutions, depending on how dirty your cabinets are. Always test your chosen solution on an inconspicuous area first to make sure it doesn’t damage the finish.
Option 1: The Gentle Degreaser (For lightly to moderately dirty cabinets)
This is usually all you need for everyday grease and grime.
- Fill a bucket with warm water.
- Add a few drops of mild dish soap. You don’t need a lot – too much soap can leave a residue.
- Stir gently to create suds.
Option 2: The Vinegar Powerhouse (For slightly tougher grease)
Vinegar is a natural disinfectant and degreaser.
- Mix equal parts warm water and white vinegar in a spray bottle.
- Shake gently to combine.
Option 3: The Baking Soda Paste (For stubborn spots)
This is great for dried-on food splatters or sticky patches.
- In a small bowl, mix baking soda with a little water to form a paste.
- It should be thick enough to stick to the grime but not so thick that it’s hard to spread.
Option 4: The TSP Substitute (For heavily soiled cabinets)
This is a heavy-duty cleaner for cabinets that haven’t been cleaned in years.
- Follow the package directions precisely.
- Mix the TSP substitute with warm water in a bucket.
- Wear gloves and ensure excellent ventilation.
Step 4: Start Wiping Down the Cabinets
Now for the actual cleaning! Work in small sections. Dip a clean cloth or sponge into your chosen cleaning solution. Wring it out so it’s damp, not soaking wet. You want the cloth to be moist enough to clean, but not so wet that it’s dripping. Dripping water can seep into wood joints and cause damage.
Gently wipe down the cabinet surfaces. For tough spots, apply a little more pressure or use the baking soda paste. For really caked-on gunk, you might need to let the paste sit for a few minutes, then gently scrape with a plastic scraper before wiping. Use your old toothbrush or detail brush for those hard-to-reach corners, carved details, and around hardware holes.
Step 5: Rinse Thoroughly
This is a critical step that many people skip. You must rinse away all the cleaning solution residue. If you don’t, the leftover soap or cleaner can interfere with paint adhesion and leave a dull finish.
- Fill a clean bucket with fresh, cool water.
- Dip a clean cloth into the water and wring it out thoroughly.
- Wipe down the surfaces you just cleaned, rinsing your cloth frequently in the clean water.
- Repeat this rinsing process until you’re sure all the cleaning solution is gone. You can run your hand over the surface; it should feel smooth and not at all soapy or sticky.
Step 6: Dry Everything Completely
Moisture is the enemy of a good paint job. After rinsing, use a clean, dry microfiber cloth to dry all the surfaces completely. Make sure to get into all the nooks and crannies. If possible, let the cabinets air dry for a few more hours, or even overnight, in a well-ventilated area before moving to the next step (sanding, if necessary). You can even use a small fan to speed up the drying process. Proper drying prevents moisture from getting trapped, which can lead to mold or paint issues down the line. A dry surface is essential for good paint adhesion.
Step 7: Inspect and Repeat if Necessary
Once everything is dry, take a good look. Run your hand over the cabinets. Do you feel any remaining grease, sticky spots, or rough patches? If so, don’t hesitate to go back and re-clean those specific areas. It’s better to put in a little extra cleaning effort now than to discover a problem after you’ve painted. Sometimes, especially with cabinets that haven’t been cleaned in a long time, a second pass might be needed for stubborn areas.
Choosing the Right Cleaning Solution: A Quick Comparison
Here’s a simple breakdown to help you decide which cleaner is best for your job. Remember to always start with the mildest option and work your way up if needed.
| Cleaning Solution | Best For | Pros | Cons | Safety Considerations |
|---|---|---|---|---|
| Mild Dish Soap & Water | Light to moderate grease, general grime, fingerprints. | Gentle, readily available, inexpensive, effective. | May require more scrubbing for heavy grease. | Generally safe. Rinse well to avoid residue. |
| Vinegar & Water | Moderate grease, sticky residue, general cleaning. | Natural degreaser, disinfectant properties, inexpensive. | Can etch some finishes if used undiluted; smell dissipates. | Use in a well-ventilated area. Avoid prolonged contact with metal. |
| Baking Soda Paste | Stubborn spots, dried-on food, stuck-on grime. | Gentle abrasive, effective for targeted spots. | Requires mixing, can be messy. Risk of scratching if used too aggressively. | Safe when mixed with water. |
| TSP Substitute | Heavy grease buildup, tough grime, neglected cabinets. | Very powerful cleaner, highly effective. | Can be harsh, requires careful handling and strict adherence to instructions. | Always wear gloves, eye protection, and ensure very good ventilation. Can irritate skin and eyes. Follow local health department guidelines regarding chemical use and disposal. |
| Rubbing Alcohol (Isopropyl Alcohol) | Sticky residues (like sticker glue), final degreasing wipe. | Quickly cuts through grease and adhesive. Evaporates fast. | Can be drying to skin. Flammable. Strong fumes. | Use in a well-ventilated area. Keep away from open flames or heat sources. Wear gloves. |
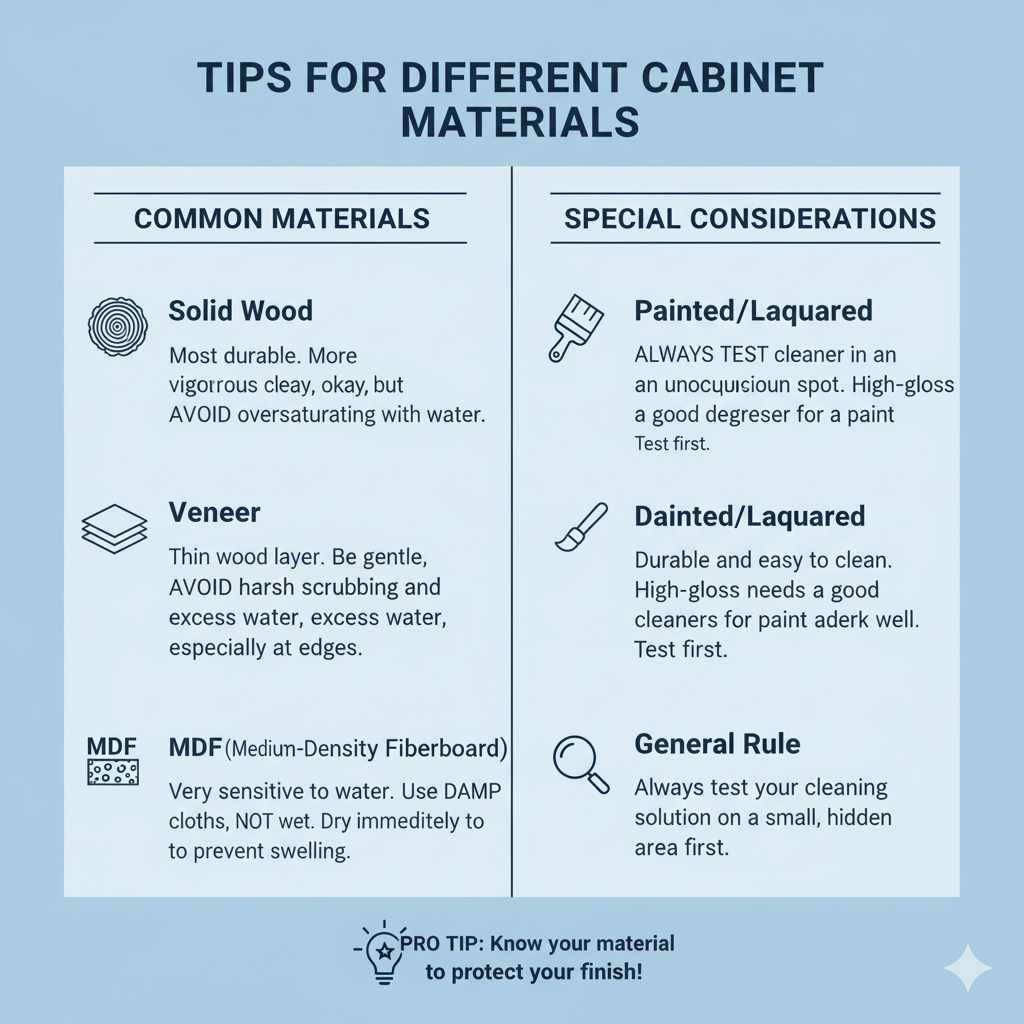
Tips for Different Cabinet Materials
Most cabinets in homes are made from wood, veneer, or MDF. The cleaning methods described above are generally safe for these materials, but it’s always wise to be mindful of the specific type.
- Solid Wood: These are generally the most durable. You can be a bit more vigorous with cleaning, but still avoid oversaturating the wood.
- Veneered Cabinets: These have a thin layer of real wood glued onto a substrate. Be gentler, as the veneer can sometimes lift or peel if it gets too wet, especially at the edges. Avoid harsh scrubbing.
- MDF (Medium-Density Fiberboard): MDF is very susceptible to water damage. It can swell and disintegrate if it gets too wet. Use damp cloths, not wet ones, and dry off immediately.
- Laminate/Melamine: These are very durable and easy to clean. Most standard cleaners work well, but it’s still good practice to test.
If you have painted or heavily lacquered cabinets, test your cleaner in an inconspicuous spot first to ensure it doesn’t lift the existing finish. If they have a high-gloss finish, a good degreaser is essential to ensure paint adhesion.
Frequently Asked Questions (FAQs)
Here are some common questions beginners have about cleaning cabinets before painting.
1. Can I just wipe my cabinets with sugar soap?
Sugar soap (which is a type of TSP) is a very effective cleaner for cabinets. However, it can be quite harsh. A TSP substitute is often recommended as a safer alternative, and for most jobs, a good dish soap or vinegar solution is usually sufficient. Always follow the instructions for any cleaning product you use, and ensure good ventilation.
2. How long do I need to let cabinets dry after cleaning?
After cleaning and rinsing, you should let the cabinets air dry completely. This usually means at least a few hours, but overnight is even better, especially for wood or MDF. Ensure the area is well-ventilated. Moisture trapped under paint is a recipe for disaster.
3. What’s the best way to clean greasy kitchen cabinets?
For greasy kitchen cabinets, start with a solution of warm water and a few drops of dish soap. If that’s not enough, try a mixture of equal parts white vinegar and water. For very heavy grease, a TSP substitute or rubbing alcohol diluted with water might be necessary, used with caution and good ventilation.
4. Do I need to sand after cleaning?
While this article focuses on the cleaning prep, yes, sanding is often the next crucial step after cleaning and drying! Cleaning removes the grime, and light sanding with fine-grit sandpaper (like 150-220 grit) creates a slightly roughened surface – a “tooth” – that allows the new paint to adhere much better. Always clean off sanding dust thoroughly after sanding. You can find more detailed guides on sanding techniques from resources like woodworkingtrade.com.
5. Can I use a power washer on my cabinets?
Absolutely not! Power washers use high pressure that will likely damage your cabinet material, especially if it’s wood, veneer, or MDF. Stick to gentle wiping and hand scrubbing for the best results and to protect your cabinets.
6. What if my cabinets have a very glossy finish?
Glossy finishes can be challenging for paint adhesion. After cleaning thoroughly with a good degreaser, you’ll definitely want to lightly sand the surface to create some ‘tooth’ for the paint to grip. Be sure to clean off all the sanding dust meticulously before painting.
7. Should I clean the inside of cabinets too?
Yes! While the exterior is what guests (and you!) see most, cleaning the inside ensures a truly fresh start. Dust and any residue inside won’t affect the paint, but it’s good practice for a complete renovation. If you’re planning to paint the insides, thorough cleaning is essential.
Conclusion
Making sure your cabinets are impeccably clean before you start painting is the most impactful step you can take for a professional-looking, long-lasting finish. By taking the time to declutter, dust, choose the right gentle cleaning solution, and rinse and dry thoroughly, you’re building the perfect foundation for success. It’s a straightforward process that doesn’t require fancy tools but demands attention to detail. This effortless prep transforms what could be a frustrating job into a satisfying stage of your cabinet transformation. With clean, smooth surfaces, your new paint will adhere beautifully, giving you cabinets you’ll be proud of for years to come. You’ve got this!