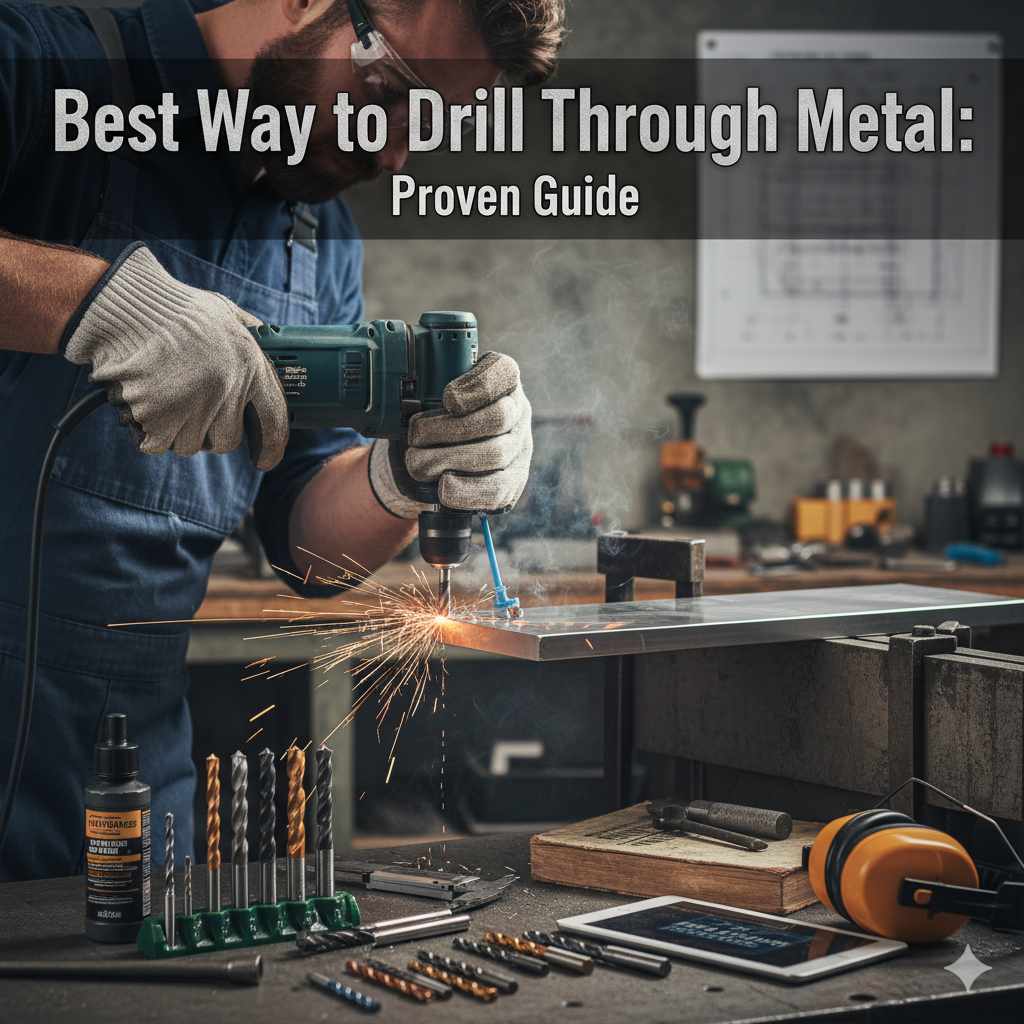
Best Way to Drill Through Metal: Proven Guide
Drilling through metal can seem daunting, but with the right approach and tools, it’s entirely manageable for any DIYer. This guide will walk you through the simplest, safest, and most effective methods to achieve clean, precise holes in metal, ensuring your projects turn out beautifully and durably, no matter your experience level.
Welcome to the workshop, friend! Tackling metal with your drill might feel a little intimidating at first. Will the bit slip? Will it break? Will the metal just chew up my drill? These are all common worries, but I promise you, with a few simple tricks and the right setup, drilling through metal can be as straightforward as drilling through wood. I’ve spent countless hours with my drill press and hand drill making holes in all sorts of metal, from thin aluminum sheeting to sturdy steel beams, and I’ve learned a few key things that make the job easier and keep you safe.
This guide is all about sharing those proven techniques with you. We’ll cover the essential tools, the step-by-step process, and some handy tips to ensure you get perfect results every time, building your confidence with every hole you make.
The Essential Tools for Drilling Metal
Before we even think about picking up a drill, let’s make sure we have the right gear. Using the wrong tools can lead to frustration, broken bits, and even injuries, and that’s not what we’re about here. We want reliable, durable results, and that starts with the right equipment.
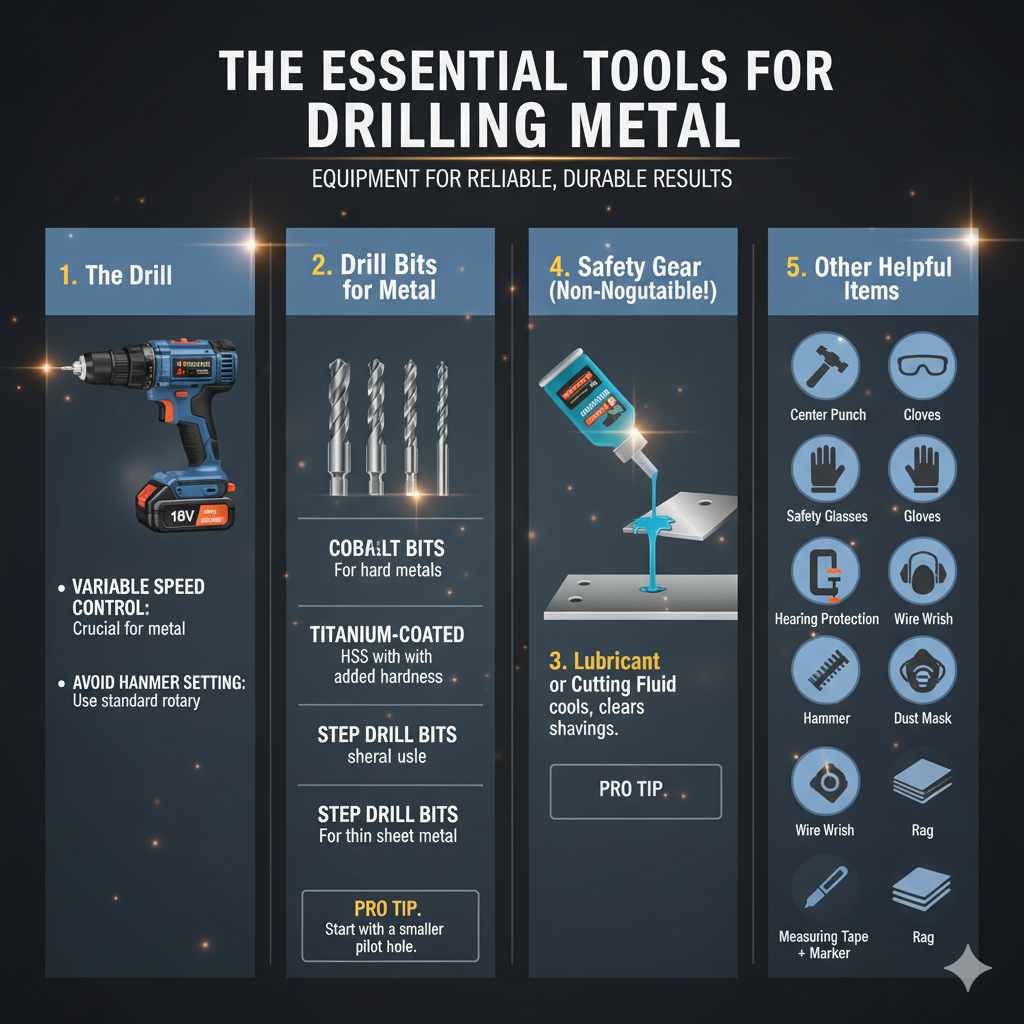
1. The Drill
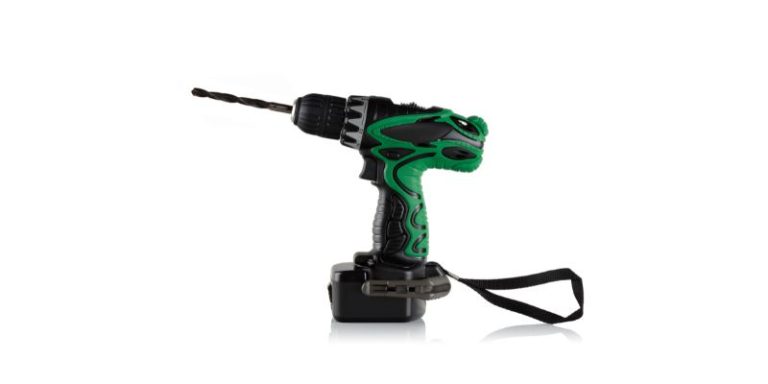
You can use either a corded or cordless drill for drilling through metal. For most household tasks and DIY projects, a good quality cordless drill with plenty of power (18V or higher is generally recommended) will do the trick. If you’re planning on drilling through thicker or tougher metals regularly, a corded drill often provides more consistent power.
Variable Speed Control: This is crucial. Metal requires slower drill speeds than wood. Being able to precisely control the speed prevents overheating and bit damage.
Hammer Drill Setting (and when to avoid it): Most modern drills have a hammer setting. While useful for concrete, you will NOT want to use this when drilling metal. The rapid hammering action can damage your metal and your drill bit. Only use the standard rotary drilling function.
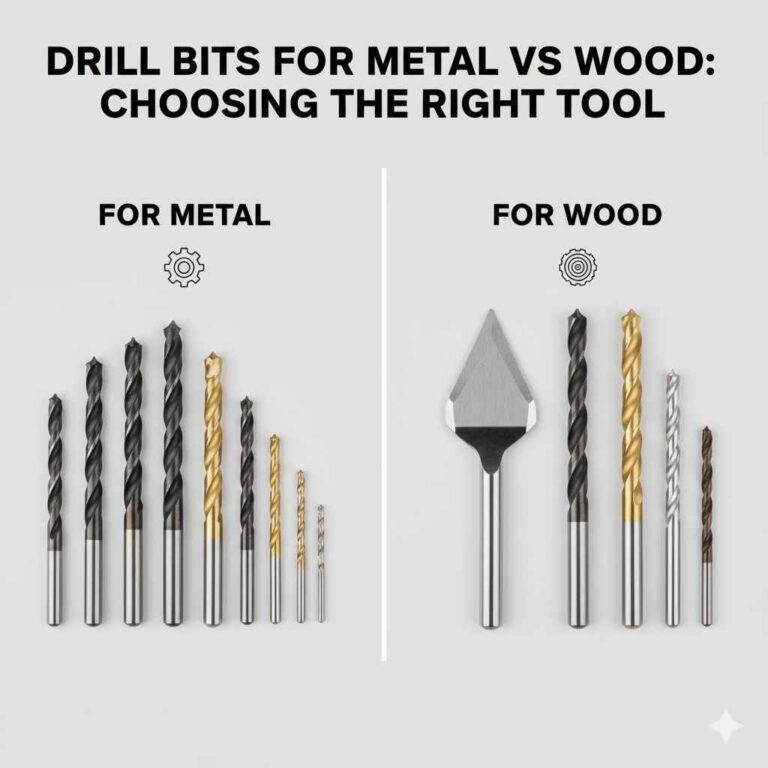
2. Drill Bits for Metal
This is arguably the most important part. Wood drill bits are simply not designed for metal. They’ll get dull instantly, melt, or fracture. You need specialized bits.
High-Speed Steel (HSS) Bits: These are the most common and a good starting point for DIYers. They are durable and can handle moderate drilling tasks.
Cobalt Drill Bits: For harder metals like stainless steel or cast iron, cobalt bits are superior. They are more heat-resistant and harder than HSS, meaning they’ll last much longer in tough materials.
Titanium-Coated HSS Bits: These are HSS bits with a titanium coating, which adds hardness and reduces friction. They’re a good step up from basic HSS bits and are suitable for a range of metals.
Step Drill Bits: These are fantastic for thin sheet metal. Instead of multiple bits, one bit creates a range of hole sizes by drilling progressively larger steps. They create clean, burr-free holes without the need for punching or nibbling.
Pro Tip: Always start with a smaller pilot hole, especially for thicker metals, and then enlarge it with a larger bit. This makes the job easier and more accurate.
3. Lubricant or Cutting Fluid
Drilling metal creates friction, and friction generates heat. Too much heat can dull your drill bit quickly and even melt the metal, creating a messy, unsafe situation. A lubricant, often called cutting fluid or coolant, is essential.
Purpose: Reduces friction, cools the bit and the metal, and helps clear away metal shavings.
Types: You can buy specialized cutting fluids from hardware stores. For lighter jobs or softer metals, even common household items like motor oil or a bit of WD-40 can work in a pinch, though dedicated fluids are best.
4. Safety Gear (Non-Negotiable!)
Working with metal and rotating tools demands respect. Safety is paramount.
Safety Glasses or Face Shield: Absolutely essential. Metal shavings, called swarf, are sharp and can fly at high speeds.
Gloves: Wear sturdy work gloves to protect your hands from sharp edges and hot metal.
Hearing Protection: While not as loud as some woodworking tools, a drill can still be noisy, especially for extended periods.
Dust Mask: Metal dust, though less common than wood dust, can still be an irritant.
5. Other Helpful Items
Center Punch: Helps create a small indentation in the metal to guide your drill bit and prevent it from wandering when you start.
Clamps: Essential for securing the metal workpiece firmly to your workbench. Loose metal is dangerous and leads to poor results.
Hammer: For striking the center punch.
Wire Brush: To clean away metal shavings and coolant.
Measuring Tape and Marker: For accurate hole placement.
Rag or Paper Towels: For wiping away coolant and shavings.
Step-by-Step: The Best Way to Drill Through Metal
Now that we’ve got our tools ready, let’s get to the core of it. Follow these steps for a successful metal drilling experience. Remember, patience is key!
Step 1: Plan and Mark Your Hole
Measure Twice, Drill Once: Use your measuring tape and marker to precisely mark the spot where you want the hole. If accuracy is critical, use a sharp scribe for a more permanent mark.
Use a Center Punch: This is a crucial step, especially for preventing the drill bit from skittering across the smooth metal surface as you begin. Hold the center punch exactly on your mark and give it a firm tap with a hammer. This creates a small dimple that will perfectly guide the tip of your drill bit.
Step 2: Secure Your Workpiece
No Loose Metal! This is a safety and quality control step. Use sturdy clamps to firmly attach your metal piece to a stable workbench. Ensure the area directly beneath where you’ll be drilling is clear and supported. A vise is excellent for smaller pieces. If drilling through thin metal, you might want to sandwich it between two scraps of wood for extra support and to prevent distortion.
Step 3: Select the Right Drill Bit and Speed
Choose Wisely: Based on the metal type and thickness, select your HSS, cobalt, or titanium-coated bit. For thicker metals, start with a small pilot bit (e.g., 1/8″ or 3mm).
Set the Speed: This is vital. Metal requires slow drilling speeds.
Hardened steel: 200-300 RPM
Aluminum, brass, copper: 600-1000 RPM
Mild steel: 300-600 RPM
Thin sheet metal: Can often use faster speeds, but stay on the lower end of your drill’s capability.
If your drill doesn’t have a digital RPM display, err on the side of slower. It’s always better to drill too slowly than too fast.
Step 4: Apply Lubricant
Cool Down: Before you start drilling, apply a generous amount of cutting fluid or your chosen lubricant to the spot you’re about to drill. Keep it handy to reapply as needed during the drilling process.
Step 5: Start Drilling
Pilot Hole (If Applicable): If you’re drilling a larger hole or through thick metal, start with your small pilot bit. Place the tip of the bit into the center punch dimple.
Maintain Control: Hold the drill perpendicular to the metal surface. Start the drill at a slow speed, applying steady, even pressure. Let the drill bit do the work; don’t force it.
Relief Strokes: Periodically lift the drill bit slightly (every few seconds) while it’s still spinning. This helps clear away the metal shavings (swarf) from the hole and allows the lubricant to reach the cutting edge. Continue applying lubricant as you drill.
Step 6: Enlarge the Hole (If Necessary)
Step Up: If you started with a pilot hole, once it’s complete, switch to your larger drill bit. Again, apply lubricant and drill at a slow speed, using steady pressure and relief strokes.
Progression: For very large holes, you might need to step up through several bit sizes. A step drill bit can simplify this process for thinner materials.
Step 7: Finish and Clean Up
Complete the Hole: Apply a little extra pressure as you feel the bit begin to break through the other side. This helps create a cleaner exit.
Cool Down Period: Once the hole is drilled, let your bit and the metal cool down.
Deburr: The edges of the hole will likely be sharp and have burrs (small, rough metal shavings). Use a deburring tool, a file, or even the edge of a larger drill bit spun manually to smooth these down. You can also use a slightly larger drill bit spun by hand to clean up the edges. A wire brush is excellent for removing residual swarf and lubricant.
Clean Up: Wipe down the metal and surrounding area to remove any metal shavings and lubricant. Dispose of metal shavings properly; they are sharp!
Table: Drill Bit Selection Guide for Common Metals
| Metal Type | Recommended Drill Bit Material | Drill Speed (RPM) | Lubricant | Notes |
|---|---|---|---|---|
| Aluminum | HSS (Titanium-coated optional) | 600 – 1000 | Light oil, WD-40 | Drills easily, but sticky; use plenty of lubricant. |
| Mild Steel | HSS (Cobalt recommended for thicker) | 300 – 600 | Cutting fluid, motor oil | Standard metal, drills well with proper speed. |
| Stainless Steel | Cobalt | 200 – 300 | Tapping fluid, heavy-duty cutting fluid | Hard, generates heat; use slow speeds and good cooling. |
| Brass | HSS | 600 – 1000 | Light oil, WD-40 | Similar to aluminum, can be brittle. |
| Copper | HSS | 600 – 1000 | Light oil, WD-40 | Soft, drills easily, but can clog bits. |
| Cast Iron | Cobalt | 200 – 300 | Dry or minimal lubricant | Brittle, can chip; maintain steady pressure. |
| Sheet Metal (Thin) | HSS, Step Bits | 600 – 1200+ | Light oil or dry | Use support; step bits are ideal for clean holes. |
Types of Drills Suitable for Metalwork
While your standard corded or cordless drill can handle many tasks, understanding different drill types can help you choose the best tool for the job and ensure you’re not over or under-equipped.
Cordless Drills/Drivers:
Pros: Portable, convenient, no tripping hazards. Good for general-purpose drilling at home.
Cons: Power can be less consistent than corded drills, batteries need charging.
Best For: Light to medium-duty metal drilling, occasional use.
Corded Drills:
Pros: Consistent power output, generally more powerful than cordless models, don’t rely on battery life.
Cons: Requires access to a power outlet, cord can be a nuisance.
Best For: Frequent drilling, thicker metals, jobs requiring sustained power.
Drill Presses:
Pros: Unmatched precision and control, consistent perpendicular holes, holds the workpiece securely with fence or vise, can handle larger bits and tougher metals with ease.
Cons: Not portable, requires a dedicated space, higher upfront cost.
Best For: Accurate, repeatable hole placement, drilling multiple holes, working with tougher or thicker metals frequently. For a serious DIYer tackling metalwork, a drill press is a game-changer. You can learn more about the benefits and capabilities of drill presses from resources like Woodworking Network.
Advanced Tips for Cleaner Holes and Longer Bit Life
We’ve covered the basics, but as you get more comfortable, a few extra tips can really elevate your metal drilling game.
The Importance of “Pecking”: This is what we call the “relief stroke” technique. It means drilling for a few seconds, then pulling the bit out partially (or fully) while it’s still spinning, allowing swarf to escape and lubricant to enter. This prevents the bit from binding and overheating.
Slow and Steady Wins the Race: I can’t stress this enough. Speed is the enemy of precisely drilled metal holes. A slow, controlled speed is always better.
Pressure Control: Apply firm, consistent pressure, but don’t lean into the drill too hard. Let the sharpness of the bit do the cutting. Forcing it can break the bit or create a ragged hole.
Cooling is Key: If you’re drilling for an extended period or through a lot of material, you might need to pause even more frequently to let everything cool down. Touching the metal with your gloved hand will let you know if it’s getting too hot to comfortably touch – that’s your cue to stop and cool.
Sharpening Bits (for HSS): While cobalt bits are harder and less likely to be sharpened by the average DIYer, HSS bits can be sharpened if they become dull. However, for the relatively low cost of HSS bits intended for metal, it’s often more practical for beginners to simply replace a dulled bit. For more involved sharpening, you can consult resources from organizations like Wood Magazine, which often covers metal bit sharpening techniques useful for DIYers.
Using Larger Bits: When moving from a pilot hole to a larger one, don’t jump too many sizes at once. If you drill a 1/8″ hole, go to 3/16″, then 1/4″, and so on. Each step removes material and makes drilling the next size easier and cleaner.
Clear Your Swarf: Metal shavings left in the hole can create friction and impede drilling. Always use those relief strokes to clear them out. A little blast of compressed air can also be very effective if you have it.
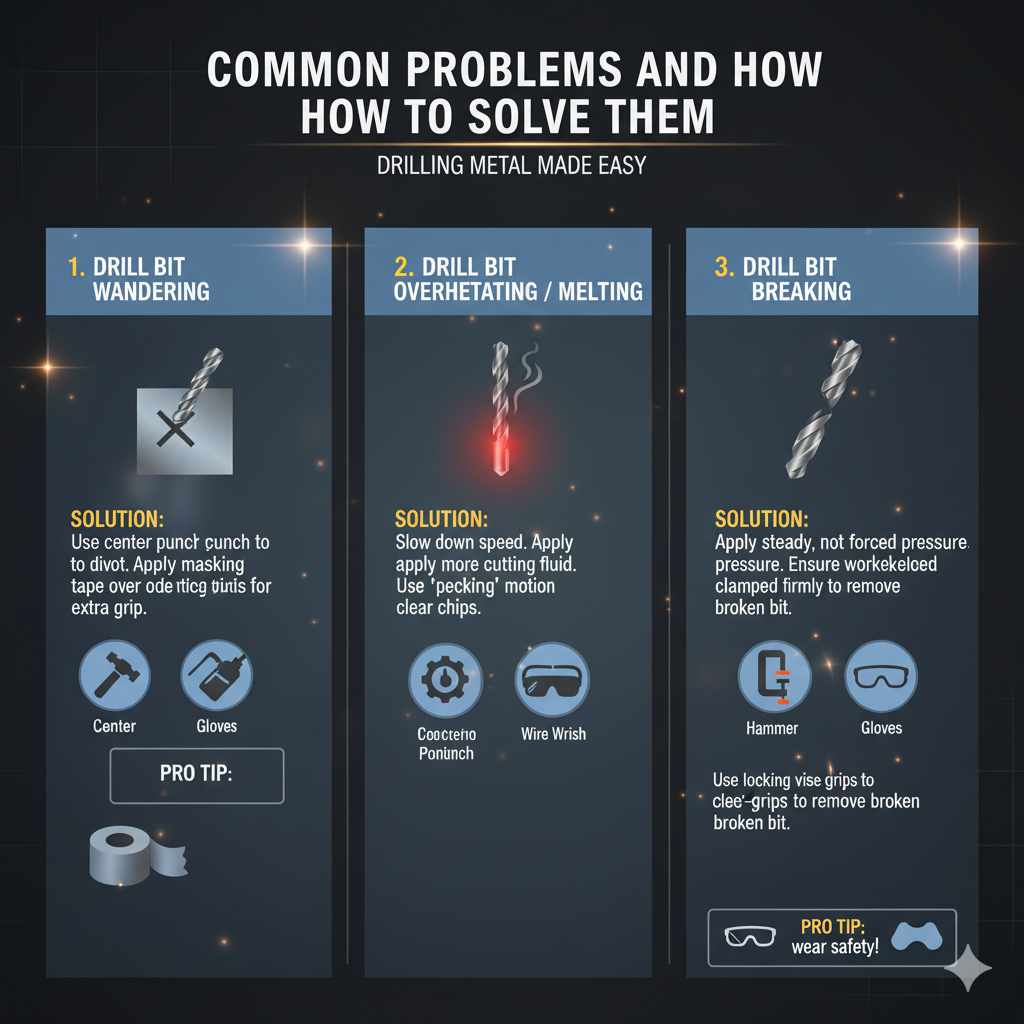
Common Problems and How to Solve Them
Even with the best preparation, you might run into a snag now and then. Here are a few common issues and how to get past them.
Problem: Drill Bit Wandering / Not Starting on Mark
Solution: This is where your center punch is your best friend! Ensure you’ve made a good, solid dimple. If it’s still wandering, you can create a small “X” with your marker and try to line up the tip of the bit with the intersection of the X. For very smooth surfaces, you can also use a piece of masking tape over the mark to give the bit a little more grip to start.
Problem: Drill Bit Overheating / Melting
Solution: You’re drilling too fast or not using enough lubricant. Slow down your drill speed significantly and apply more cutting fluid to keep things cool. Take more frequent “pecking” breaks.
Problem: Drill Bit Breaking
Solution: This usually happens from forcing the bit, drilling too fast, or the bit binding in the hole. Always apply steady pressure, but let the bit cut. Ensure your workpiece is securely clamped. If the bit snaps off inside the workpiece, it can be a real challenge to remove. Sometimes, you can grip the remnants with a locking vise-grip and try to unscrew it.
Frequently Asked Questions (FAQ)
Q1: Can I use a wood drill bit to drill through metal?
No, it’s strongly advised against. Wood drill bits are made of softer metal alloys and have sharper points designed for splintering wood fibers. They’ll quickly dull, overheat, break, or melt when used on metal, and won’t produce a clean hole.
Q2: What is the best beginner-friendly drill bit for metal?
High-Speed Steel (HSS) drill bits are the best starting point for beginners. They are affordable, readily available, and suitable for most common metals like aluminum, mild steel, and brass. As you gain experience or need to drill harder metals, consider titanium-coated HSS or cobalt bits.
Q3: How slow should I set my drill speed for metal?
Generally, metal requires much slower speeds than wood. For harder metals like steel, aim for speeds between 200-600 RPM. Softer metals like aluminum and brass can tolerate faster speeds, typically between 600-1000 RPM. If your drill has a variable speed setting, start slow and adjust as needed.
Q4: Do I really need cutting fluid? What if I don’t have any?
While specialized cutting fluid is ideal, for lighter tasks or softer metals, you can often get by with light machine oil, motor oil, or even WD-40. The key is to reduce friction and heat. Without any lubricant, your drill bit will overheat rapidly, dulling it and potentially damaging the metal.