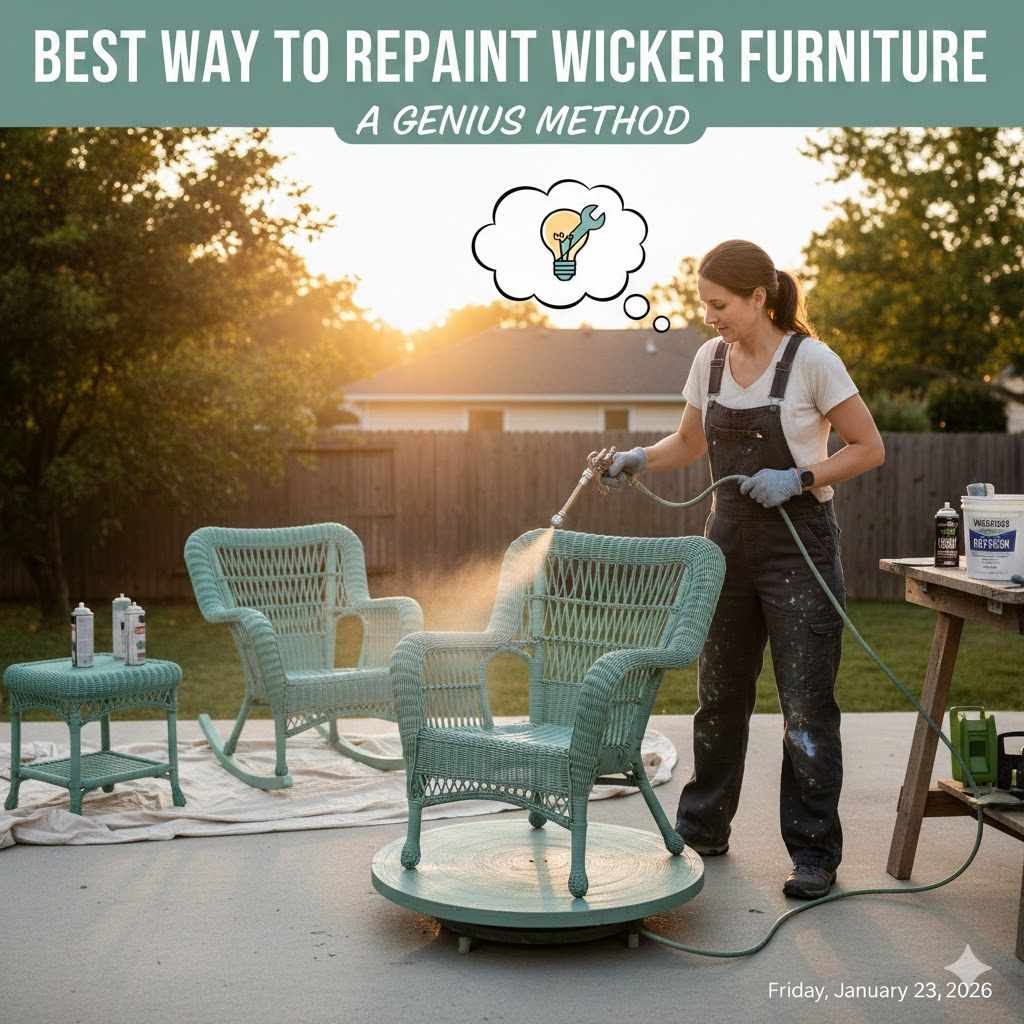
Best Way To Repaint Wicker Furniture: A Genius Method
The best way to repaint wicker furniture is to use a spray painter or high-quality spray paint. This method ensures an even, professional finish by easily reaching into the tight weaves and crevices where a brush would cause drips and uneven coats. Proper cleaning and a spray primer are essential for a durable, long-lasting result.
Have you ever looked at a faded wicker chair and thought about throwing it out? Wicker furniture can look old and tired very quickly. The thought of painting all those tiny, woven gaps with a brush is enough to make anyone give up. It seems messy, slow, and nearly impossible to get right.
But don’t worry, I have a solution that works beautifully. It’s a method that I use in my own workshop to bring wicker pieces back to life. It’s fast, simple, and gives you a finish so smooth your friends will think it’s brand new. In this guide, I’ll walk you through every step of this genius method. Let’s get that furniture looking great again!
Why a Fresh Coat of Paint Matters for Wicker
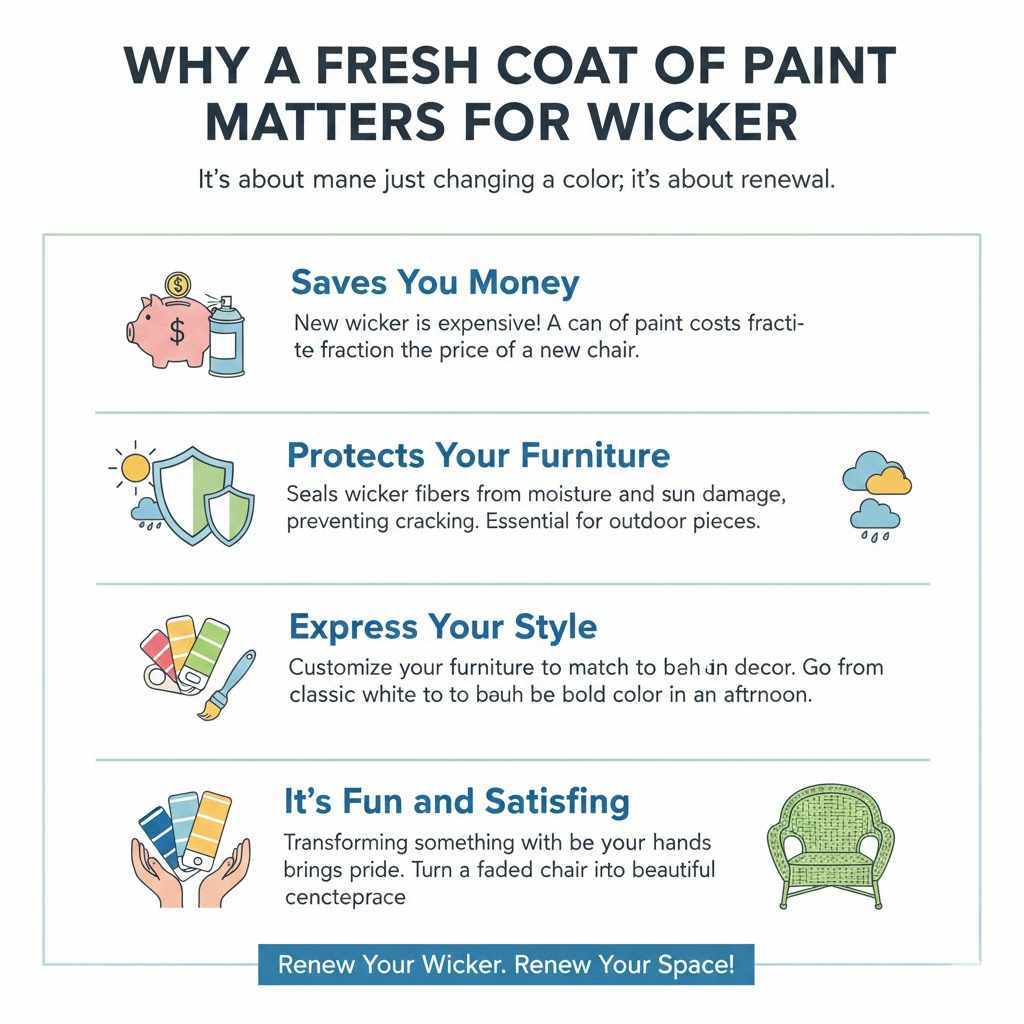
Giving your wicker furniture a makeover is one of the most rewarding DIY projects you can do. It’s about more than just changing a color; it’s about renewal. Wicker, whether it’s natural rattan or synthetic resin, can get brittle and dull over time, especially if it sits outside. A new coat of paint is like a protective shield.
Here are a few reasons why this project is so worthwhile:
- Saves You Money: New wicker furniture is expensive! A can of spray paint costs a fraction of the price of a new chair or table. You get a fresh look without the high cost.
- Protects Your Furniture: Paint isn’t just for looks. It seals the wicker fibers from moisture and sun damage. This prevents cracking and helps your furniture last for years longer. For outdoor pieces, this is a must.
- Express Your Style: Tired of that old beige? Want a pop of color on your patio? Repainting lets you customize your furniture to perfectly match your home’s decor. You can go from classic white to a bold, modern color in a single afternoon.
- It’s Fun and Satisfying: There’s a special kind of pride that comes from transforming something with your own hands. Seeing your faded, forgotten wicker chair become a beautiful centerpiece is incredibly satisfying.
The “Genius Method”: Why Spray Painting is the Only Way to Go
You might be tempted to grab a paintbrush and a can of latex paint. Please don’t! I’ve seen it tried many times, and the results are almost always disappointing. Brushing wicker is a recipe for frustration. The paint clumps in the weave, drips down the legs, and you can never quite cover every little spot.
The real secret, the “genius method,” is using spray paint. Here’s why it works so well for wicker:
- Flawless Coverage: A fine mist of spray paint can get into every nook and cranny of the wicker weave. It covers the surface evenly without you having to dab a brush into a thousand tiny holes.
- No Brush Marks or Drips: Because you aren’t using a brush, you won’t have any ugly brush strokes. And if you use the right technique (which I’ll show you), you’ll have zero drips. The finish is smooth and professional.
- Incredibly Fast: You can paint an entire wicker chair in about 10-15 minutes per coat. With a brush, that same chair could take you an hour or more, and the result wouldn’t be as good.
- Beginner-Friendly: Spray painting might seem intimidating, but it’s actually very easy to learn. With a little practice, anyone can achieve a fantastic finish.
Brushing vs. Spraying: A Quick Comparison
To really show you the difference, let’s look at a simple comparison.
| Feature | Painting with a Brush | Painting with Spray Paint |
|---|---|---|
| Speed | Very slow; can take hours per piece. | Very fast; a coat takes only minutes. |
| Coverage | Difficult to get into weaves; often uneven. | Excellent; fine mist reaches every spot. |
| Finish Quality | Prone to drips, clumps, and brush marks. | Smooth, even, and professional-looking. |
| Effort Required | High; physically tiring and tedious. | Low; requires a steady hand but is easy. |
As you can see, spraying is the clear winner for wicker. It’s the method professionals use, and it’s the one I recommend for every home DIYer.
Your Supply List: Gathering Your Tools and Materials
Before we start, let’s get everything you’ll need in one place. Having your supplies ready makes the whole process smooth and enjoyable. You can find most of these items at your local hardware store.
For Cleaning and Prep:
- Stiff-bristled brush: For scrubbing away dirt. A dish brush works well.
- Vacuum cleaner with a brush attachment: To remove dust and cobwebs.
- Mild soap or detergent: A simple dish soap is perfect.
- Bucket and sponge: For your soapy water solution.
- Garden hose with a spray nozzle (optional): For easy rinsing.
- Old towels or rags: For drying.
- Fine-grit sandpaper (220-grit): Just for smoothing any rough or flaking spots.
- Painter’s tape: If there are any parts of the furniture you don’t want to paint.
- Drop cloths or old sheets: To protect your work area.
For Painting:
- Spray Primer: This is a crucial step! Choose a “bonding” primer designed for tricky surfaces.
- High-Quality Spray Paint: Choose a paint made for indoor/outdoor use. A “paint + primer” combo works, but I still recommend a separate coat of primer for the best results. You’ll likely need 2-3 cans per chair.
- Clear Sealer (Top Coat): A spray can of clear enamel or polyurethane. Choose a matte, satin, or gloss finish depending on your preference. This is especially important for outdoor furniture.
For Your Safety:
- Respirator mask: To protect you from paint fumes. A simple dust mask is not enough.
- Safety glasses or goggles: To protect your eyes from paint spray.
- Gloves: To keep your hands clean.
Safety First: A Quick but Critical Checklist
Working with spray paint is perfectly safe as long as you take a few simple precautions. The fumes from spray paint contain chemicals called VOCs (Volatile Organic Compounds), and you want to avoid breathing them in. The U.S. Environmental Protection Agency (EPA) highlights the importance of good ventilation when using products that release VOCs.
Here’s your safety checklist:
- Work Outdoors or in a Well-Ventilated Area: The best place to spray paint is outside on a calm, non-windy day. If you must work indoors (like in a garage), open all windows and doors to create a strong cross-breeze.
- Wear Your Respirator: Always wear a respirator mask rated for paint fumes. It’s the single most important piece of safety gear you’ll use.
- Protect Your Eyes: Wear safety glasses to shield your eyes from any overspray.
- Cover Up: Wear old clothes that cover your arms and legs to keep paint off your skin.
Step-by-Step Guide: How to Repaint Wicker Flawlessly
Alright, let’s get to the fun part! Follow these steps carefully, and I promise you’ll be thrilled with the results. Don’t rush—good prep work is the foundation of a great paint job.
Step 1: Clean Your Wicker Like a Pro
You cannot paint over dirt. The paint simply won’t stick, and it will start to peel within weeks. A deep clean is your first and most important task.
Vacuum First: Use your vacuum’s brush attachment to get into all the nooks and crannies. Remove all the loose dust, cobwebs, and debris.
Scrub It Down: Mix some mild soap with warm water in a bucket. Dip your stiff-bristled brush in the soapy water and give the entire piece of furniture a good scrub. Pay extra attention to any stained or grimy areas.
Rinse Thoroughly: Rinse all the soap off with clean water. A garden hose on a gentle setting works great. If you’re inside, use a clean, wet sponge. You don’t want any soap residue left behind.
Let It Dry Completely: This is critical. Let your wicker furniture dry in the sun for at least 24-48 hours. It must be bone-dry before you move on. If you paint on damp wicker, the moisture will get trapped and cause the paint to bubble and peel.
Step 2: Set Up Your Workspace
Now that your furniture is clean and dry, it’s time to set up your painting station. Choose a spot outside in the shade or in a well-ventilated garage. Direct sunlight can make the paint dry too fast, which can cause problems.
Lay down your drop cloths to protect the ground or floor from overspray. It’s helpful to place the chair on a small block of wood or a plastic tub to lift it off the ground. This makes it easier to spray the legs and bottom edges.
Step 3: Light Sanding and Quick Repairs
Look over your wicker piece. Do you see any areas where old paint is flaking or peeling? Are there any rough or fuzzy spots on the natural fibers?
If so, take your 220-grit sandpaper and gently sand those spots until they are smooth. You don’t need to sand the entire piece—just the problem areas. After sanding, wipe away the dust with a clean, dry cloth.
Step 4: Priming – Your Secret Weapon for Durability
Do not skip the priming step! Primer is designed to stick to difficult surfaces like wicker. It creates a perfect base for your paint to grab onto. It also helps block stains and ensures your final color looks rich and even.
Use a high-quality spray primer. Shake the can well for about a minute. Hold the can about 8-10 inches away from the surface and apply a light, even coat. Don’t try to cover it completely on the first pass. A light, misty coat is better. Let the primer dry completely according to the instructions on the can (usually about an hour).
Step 5: Master the Art of Spray Painting
This is where the magic happens. The key to a beautiful spray paint finish is applying several thin coats instead of one thick one. A thick coat will lead to runs and drips.
- Shake the Can: Just like with the primer, shake your color spray paint can vigorously for at least a minute. You should hear the little ball rattling inside.
- Keep Your Distance: Hold the can about 8-12 inches away from the furniture. If you’re too close, the paint will be too heavy and will run. If you’re too far, the paint will dry in the air and create a dusty texture.
- Use a Sweeping Motion: Start spraying just off the edge of the furniture, move across the piece in a smooth, steady motion, and stop spraying just past the other edge. Overlap each pass by about 50%. This technique prevents thick spots and lines.
- Apply a Light First Coat: Your first coat should be very light—almost transparent. Don’t worry if you can still see the primer underneath. This is called a “tack coat.”
- Wait Between Coats: Let the first coat dry for about 10-15 minutes, or whatever the can recommends. Then, apply a second light coat. Repeat this process until you have full, even coverage. Most projects will require 2-4 light coats.
To get the best coverage, try turning the furniture piece. For a chair, I often paint it upright first, then turn it upside down to spray the underside and legs.
Step 6: Protect Your Work with a Clear Top Coat
Once your final color coat is completely dry (wait at least a few hours), it’s time to add a layer of protection. A clear top coat will guard your new paint job against scratches, chips, and (for outdoor furniture) fading from the sun.
Apply the clear sealer using the exact same spray painting technique: light, even coats with a sweeping motion. One or two coats is usually enough. Choose a finish that you like—matte for a modern, flat look, satin for a gentle sheen, or gloss for a shiny, reflective finish.
Step 7: Let It Cure, Not Just Dry
Paint has two stages of hardening: drying and curing. “Drying” means it’s dry to the touch, which can happen in as little as an hour. “Curing” is when the paint has fully hardened all the way through. This process can take several days to a week, depending on the paint, temperature, and humidity. According to guides from paint experts like Sherwin-Williams, rushing the curing process is a common mistake that can compromise the paint’s durability.
Be patient! Let your newly painted wicker furniture sit in a protected area for at least 3-5 days before you use it. This will ensure the finish is hard and durable enough to withstand daily life.
Choosing the Right Paint and Primer
Walking down the paint aisle can be overwhelming. Let’s simplify it. For wicker, you need paint that is flexible and durable. Here’s a table to help you choose the best products for your project.
| Product Type | Best For | Key Features | My Pro Tip |
|---|---|---|---|
| Bonding Spray Primer | All wicker, especially plastic/resin or previously painted surfaces. | Designed to stick to slick surfaces. Provides an excellent base for paint. | Don’t skip this! This is the most important step for long-lasting results. |
| Paint + Primer Spray Paint | Quick updates on clean, natural wicker. Indoor furniture. | Saves a step, but adhesion isn’t as strong as a separate primer. | A good option, but for the very best durability, use a separate bonding primer first. |
| Indoor/Outdoor Enamel Spray Paint | Both indoor and outdoor furniture. The workhorse of spray paints. | Durable, resistant to chipping, and available in many colors and finishes. | This is my go-to choice for most wicker projects. Look for brands like Rust-Oleum or Krylon. |
| Clear Protective Sealer (Top Coat) | All repainted wicker, especially pieces that will be outdoors or used often. | Adds a layer of protection against scratches, moisture, and UV rays. | Always use a top coat on outdoor furniture to prevent the color from fading in the sun. |
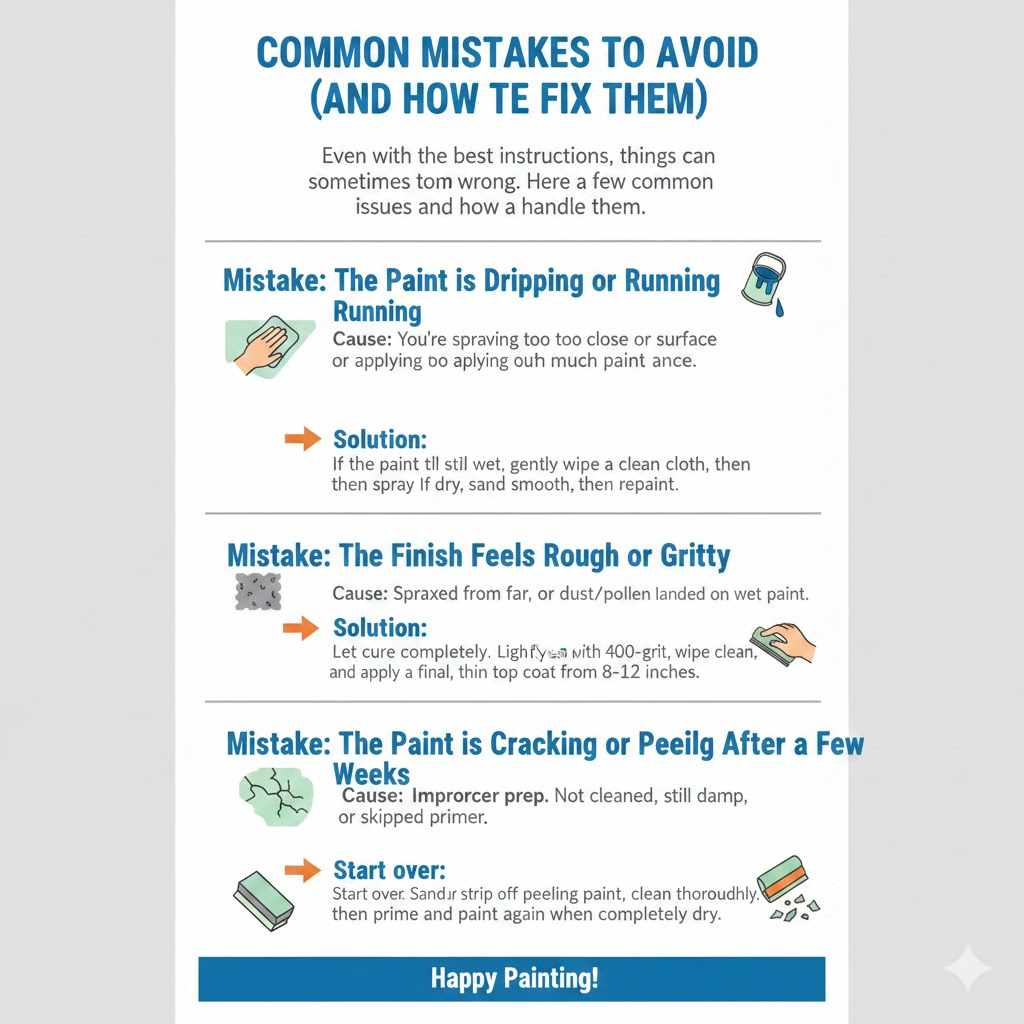
Common Mistakes to Avoid (And How to Fix Them)
Even with the best instructions, things can sometimes go wrong. Here are a few common issues and how to handle them.
- Mistake: The Paint is Dripping or Running.
Cause: You’re spraying too close to the surface or applying too much paint at once.Solution: If the paint is still wet, you can gently wipe the drip away with a clean cloth, then spray a light coat over the area to blend it. If it’s dry, you’ll have to wait for it to cure, then lightly sand the drip smooth and repaint that section.
- Mistake: The Finish Feels Rough or Gritty.
Cause: You sprayed from too far away, and the paint particles dried slightly before hitting the surface. It could also be dust or pollen landing on the wet paint.Solution: Let the paint cure completely. Then, lightly sand the surface with very fine (400-grit) sandpaper until it’s smooth, wipe it clean, and apply one final, thin top coat from the correct distance (8-12 inches).
- Mistake: The Paint is Cracking or Peeling After a Few Weeks.
Cause: This is almost always due to improper prep. The furniture was likely not cleaned well enough, or it was still damp when you painted it. It can also happen if you skipped the primer.Solution: Unfortunately, the only real fix here is to start over. You’ll need to sand or strip off the peeling paint, clean the wicker thoroughly, and then prime and paint it again, making sure it is completely dry first.
Frequently Asked Questions (FAQ)
Can I use a regular brush to paint wicker furniture?
While you can, I strongly advise against it. Using a brush on wicker is extremely time-consuming and almost always results in a blotchy finish with drips and missed spots. The woven texture makes it nearly impossible for a brush to provide an even coat. The spray paint method is much faster and gives a far superior, professional-looking result.
Do I really need to use a primer?
Yes, absolutely! A primer is the key to a durable, long-lasting paint job. Wicker, whether it’s natural or synthetic, can be a tricky surface for paint to stick to. A bonding primer creates the perfect foundation for the paint to adhere to, preventing chips and peeling down the road. It’s an extra step that is 100% worth the effort.
How many cans of spray paint do I need for a wicker chair?
As a general rule, plan for about one can of primer and two to three cans of color paint for an average-sized wicker armchair. It’s always better to buy a little more than you think you’ll need. You don’t want to run out of paint halfway through your final coat! Any leftover paint can be used for future touch-ups.
What’s the difference between natural wicker and resin (plastic) wicker? Can I paint both?
Natural wicker is made from plant materials like rattan, reed, or willow. Resin wicker is a synthetic plastic material designed to look like natural wicker and is very common in outdoor furniture. The great news is that you can paint both using the exact same method described in this guide. The key for resin wicker is to use a good bonding primer designed for plastics.
How long does it take for the paint to dry?
The paint will usually be dry to the touch in about an hour, but this can vary based on temperature and humidity. However, being “dry to the touch” is different from being fully “cured.” A full cure, where the paint reaches maximum hardness, can take anywhere from 3 to 7 days. It’s best to wait at least a few days before using the furniture heavily.
What should I do if my wicker is broken or unraveling?
Before you start cleaning, you can make small repairs. If a piece of wicker has come loose, you can often use a strong wood glue or a clear, two-part epoxy to secure it back in place. Use painter’s tape to hold the piece firmly while the glue dries. For more significant damage, you may need to consult a furniture repair specialist.
Can I do this project indoors?
It is highly recommended to spray paint outdoors. The fumes can be very strong and harmful to breathe in an enclosed space. If you absolutely must work inside a garage, you must ensure you have excellent ventilation. This means opening the main garage door as well as any windows and doors to create a constant flow of fresh air. Always wear a respirator mask rated for paint fumes.
Conclusion: Enjoy Your “New” Wicker Furniture!
And there you have it! By following these simple steps, you’ve transformed a piece of old, tired wicker into something beautiful and vibrant. You didn’t just add a coat of paint; you gave your furniture a new life, saved money, and added your own personal touch to your home or garden.
Remember, the secrets to success are all in the preparation: a thorough cleaning, a light sanding where needed, and that all-important coat of primer. Once you master the smooth, sweeping motion of spray painting, you’ll be looking for other things to refresh. It’s an easy, affordable, and incredibly satisfying project that any beginner can tackle with confidence.
So go ahead, grab that old wicker chair from the corner of the patio. With this genius method, you have the skill to make it look brand new. Happy painting!