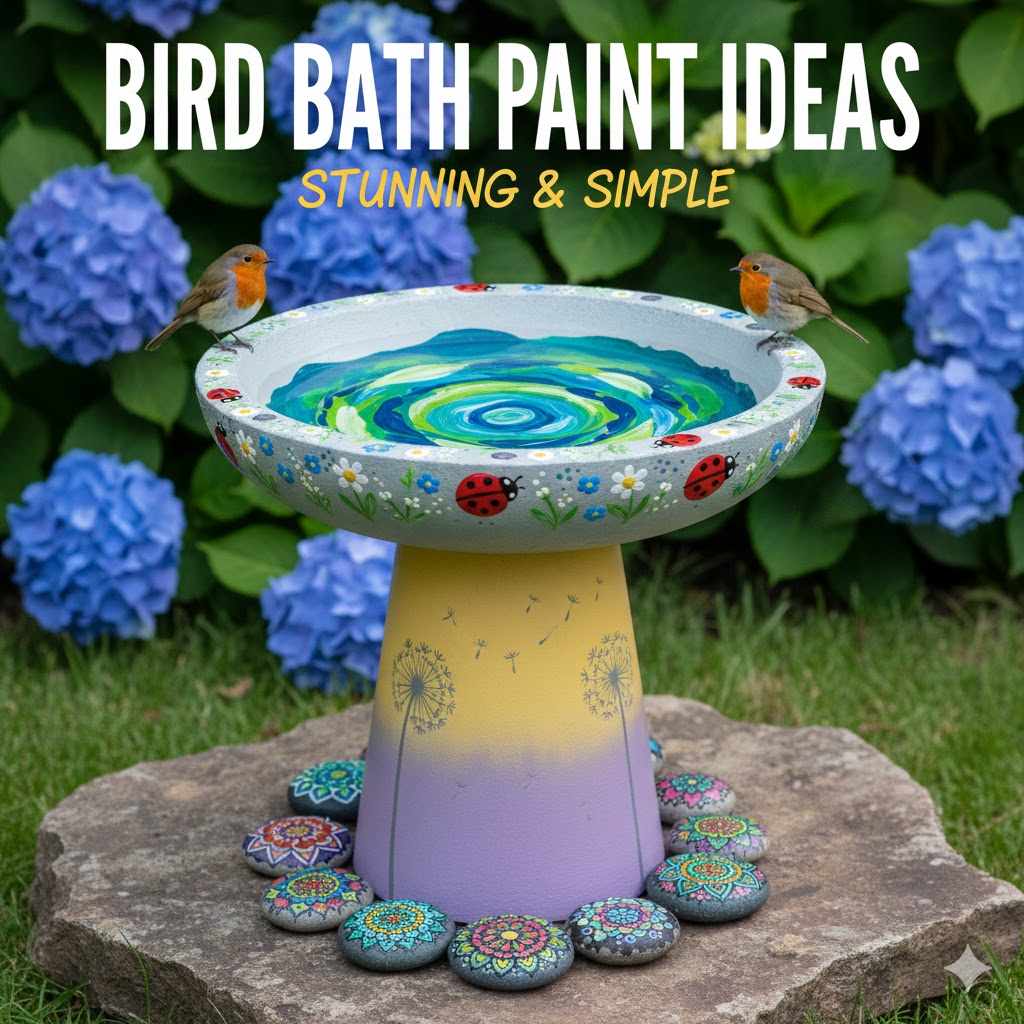
Bird Bath Paint Ideas: Stunning & Simple
To paint a bird bath, start by thoroughly cleaning and sanding the surface. Use a bird-safe, non-toxic primer and paint, focusing creative designs on the exterior. The most important step is to seal the water basin with a clear, non-toxic, waterproof sealant and let it fully cure for several days before adding water.
Hello, friend! Md Meraj here. If you’re looking at that plain or peeling bird bath in your yard, you might be thinking it could use a little love. A splash of color can turn it from a simple object into a true garden centerpiece. But the big question is, how do you do it safely for your feathered visitors?
It can feel a bit daunting. You want it to look beautiful, but bird safety is the top priority. Don’t you worry. We’re going to walk through this together. I’ll show you how to choose the right materials and give you some simple, beautiful bird bath paint ideas. By the time we’re done, you’ll have the confidence to create a stunning piece that both you and the birds will adore.
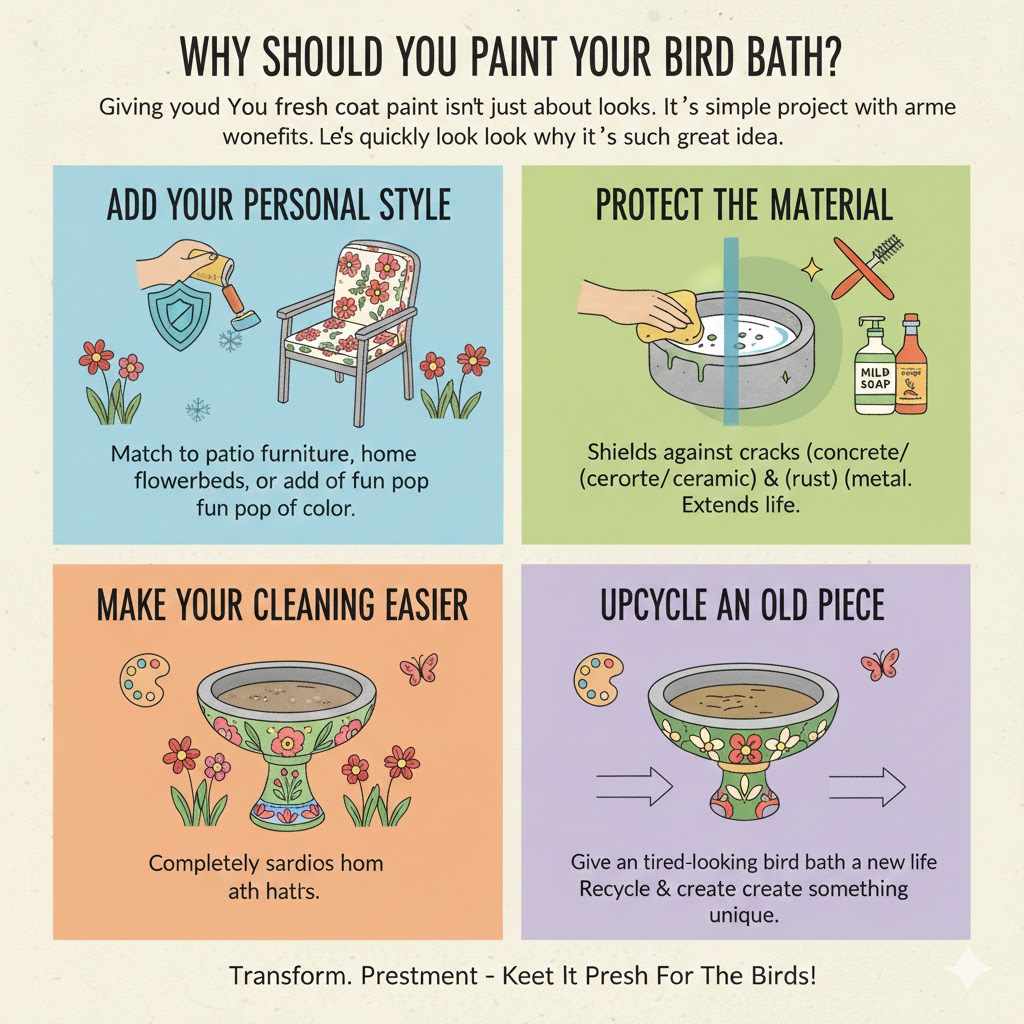
Why Should You Paint Your Bird Bath?
Giving your bird bath a fresh coat of paint isn’t just about looks. It’s a simple project with some wonderful benefits. Let’s quickly look at why it’s such a great idea.
- Add Your Personal Style: Your garden is an extension of your home. Painting your bird bath lets you match it to your patio furniture, your flowerbeds, or just add a fun pop of color that makes you smile.
- Protect the Material: A good coat of paint and sealant acts like a shield. For concrete or ceramic bird baths, it helps protect against cracks from weather. For metal ones, it can prevent rust. It’s a little work now for a longer life later.
- Make Cleaning Easier: A smooth, sealed surface is much easier to wipe clean than a rough, porous one. This helps you keep the water fresh and healthy for the birds with less scrubbing.
- Upcycle an Old Piece: Found a tired-looking bird bath at a yard sale or hiding in your shed? A paint job can give it a brand-new life. It’s a wonderful way to recycle and create something unique.
The Most Important Step: Choosing Bird-Safe Paint
Before we even think about colors, we have to talk about safety. This is the part that truly matters. The chemicals in regular paint can be harmful to birds if they leach into the water. The good news is, finding safe paint is easy when you know what to look for.
Always remember this rule: The inside basin where the water sits must be 100% non-toxic and waterproof. For this reason, many people choose to only paint the outside (the pedestal and the exterior of the bowl) and then seal the inside with a clear, bird-safe sealer.
What Makes Paint “Bird-Safe”?
Here are the key things to look for on the paint can label. Think of this as your safety checklist.
- Zero-VOC or Low-VOC: VOCs (Volatile Organic Compounds) are chemicals that can be released into the air and water. Look for paints labeled as “Zero-VOC” or “Low-VOC.”
- Non-Toxic: The label should clearly state “non-toxic.” This means it’s free from harmful chemicals like lead, chromium, and other heavy metals.
- Water-Based: Water-based paints (like acrylics and latex) are generally safer and easier to clean up than oil-based paints.
- Weather-Resistant: Choose a paint designed for outdoor use. This will ensure your beautiful work doesn’t peel or chip away after a few rainstorms.
For sealing the inside of the bowl, you need something extra tough and completely waterproof. Look for a sealant that is labeled “food-safe,” “pond-safe,” or “safe for potable water.” These are designed to not leach any chemicals into the water once fully cured.
Paint & Sealer Comparison for Your Project
To make it even easier, here’s a simple table to help you choose the right products for the job.
| Product Type | Best For | Key Safety Feature | Beginner Friendliness |
|---|---|---|---|
| Water-Based Acrylic Craft Paint | Exterior designs and details | Look for “Non-Toxic” label | Very High |
| Exterior Latex Paint | Solid colors on the exterior | Look for “Zero-VOC” or “Low-VOC” | High |
| Spray Paint (for plastic/metal) | Exterior of plastic or metal baths | Ensure it’s labeled for outdoor use and apply in a well-ventilated area | Medium (requires careful application) |
| Clear Waterproof Sealer | Sealing the interior water basin | Must be “Pond-Safe” or “Food-Grade” | Essential (Non-negotiable step) |
Your Step-by-Step Guide to a Beautifully Painted Bird Bath
Ready to get started? Great! Let’s break this down into simple, manageable steps. Just follow along, and you’ll have a fantastic result. Remember, good preparation is the key to a long-lasting finish.
Step 1: Gather Your Supplies
Having everything ready before you start makes the whole process smoother and more enjoyable. You won’t have to stop and search for a tool mid-project.
- Stiff-bristled brush
- Soap or vinegar and water
- Gloves and safety glasses
- Sandpaper (medium-grit, around 120)
- Painter’s tape
- Bird-safe outdoor primer (optional, but recommended for bare concrete)
- Your chosen bird-safe paints
- Paintbrushes of various sizes
- Clear, non-toxic, waterproof sealant (pond-safe is best)
- Clean cloths or rags
Step 2: Clean, Clean, Clean!
You can’t paint over dirt and expect it to stick. Your bird bath needs to be perfectly clean.
- Empty any old water from the bath.
- Put on your gloves and glasses.
- Use a stiff brush and a solution of soapy water or one part vinegar to nine parts water to scrub every surface. Get into all the little crevices.
- Rinse it thoroughly with a hose until no soap or residue is left.
- Let it dry completely in the sun. This might take a full day or two for concrete. It must be bone dry before you move on.
Step 3: Sand and Prepare the Surface
This step helps the paint grip the surface for a durable finish. If your bird bath already has old, flaking paint, you need to remove as much of it as possible.
Wearing your safety glasses, use your medium-grit sandpaper to lightly scuff up the entire surface you plan to paint. This creates a slightly rough texture for the paint to grab onto. If there’s old paint, focus on sanding those areas until they are smooth. Once you’re done, wipe away all the dust with a clean, damp cloth and let it dry again.
Step 4: Apply a Primer (Optional but Smart)
A primer is like a base coat that helps your paint adhere better and makes the color look more vibrant. It’s especially important if you’re painting on porous material like bare concrete or terra cotta.
Apply a thin, even coat of bird-safe outdoor primer to the areas you plan to paint. Follow the directions on the can for drying times. Usually, you’ll need to wait a few hours before you can start painting.
Step 5: Let’s Paint! This is the Fun Part
Now your creativity comes to life! Whether you’re going with a solid color or an intricate design, take your time and have fun.
- Apply your paint in thin, even coats. Two thin coats are always better than one thick, gloppy coat.
- Let the first coat dry completely before adding the second. Check the paint can for recommended drying times between coats.
- If you’re only painting the exterior, use painter’s tape to create a clean line around the rim of the basin.
Step 6: Seal for Safety and Durability
This is the most critical step for the birds’ well-being. No matter what, you must seal the inside of the bowl where the water will be. Even if you didn’t paint the inside, sealing it makes it waterproof and easier to clean.
Using a clean brush, apply your clear, non-toxic, pond-safe sealant to the entire interior of the basin. You can also apply it over your painted exterior to give it extra protection from the weather. Apply at least two coats, letting each coat dry according to the manufacturer’s instructions.
Step 7: Let It Cure Completely
Patience is key here. “Dry” is not the same as “cured.” A sealant is dry to the touch within hours, but it takes much longer to fully harden and become completely inert (meaning no more chemicals will be released).
Place your newly painted and sealed bird bath in a sheltered spot, like a garage or covered porch, for at least 3 to 7 days. The curing time depends on the sealant product, temperature, and humidity. Always read the instructions on the can. It is better to wait longer than necessary to be absolutely sure it is safe for the birds. Creating a safe environment is part of what makes a garden bird-friendly, a principle championed by organizations like the National Audubon Society.
Stunning & Simple Bird Bath Paint Ideas for Beginners
You don’t need to be an artist to create a beautiful bird bath. Here are a few simple ideas that deliver stunning results. Pick one that inspires you!
Classic Solid Color
Sometimes, simple is best. A single, bold color can make a huge statement. Think about a deep navy blue, a cheerful canary yellow, or a soothing terracotta orange. A solid color ties the bird bath into your garden’s color scheme and always looks elegant.
Two-Tone Sophistication
This is an easy way to add a custom look. Paint the pedestal one color and the bowl another. Classic combinations like white and gray or cream and green look fantastic. You can also paint the underside of the bowl a different color from the top rim and pedestal for a surprising touch of detail.
Natural Stone Look (Faux Finish)
Want the look of stone without the weight? You can easily create a faux granite or stone look. Start with a base coat of light gray paint. While it’s still slightly wet, use a sea sponge to lightly dab on darker gray, white, and black paint. Gently blend the colors until you have a speckled, stone-like appearance. It’s very forgiving and looks incredibly natural.
Easy Stenciled Patterns
Stencils are a beginner’s best friend! You can find them at any craft store in countless designs: leaves, flowers, geometric shapes, or even bird silhouettes. Simply tape the stencil to the outside of your bird bath and use a sponge or brush to dab paint over it. It’s a foolproof way to get a clean, professional-looking design.
| Pattern Idea | Color Suggestion | Difficulty Level |
|---|---|---|
| Ivy Vine climbing the pedestal | Shades of green on a white or cream base | Easy |
| Geometric triangles around the rim | Gold or silver on a dark blue or black base | Easy |
| Simple daisy flowers | White and yellow on a light blue base | Easy |
Gentle Ombre or Gradient
An ombre effect, where one color gradually fades into another, looks very high-end but is surprisingly easy to do. Choose two colors (like light blue and dark blue). Paint the top of the pedestal the lighter color and the bottom the darker color. Where they meet in the middle, use a clean, dry brush to gently blend the two colors together while they are still wet.
Playful Polka Dots
For a whimsical and fun look, add polka dots! You can use the round foam “pouncers” from a craft store for perfectly uniform dots, or use the back of a pencil eraser dipped in paint for smaller dots. Scatter them randomly or create a neat pattern. This is a great project to do with kids.
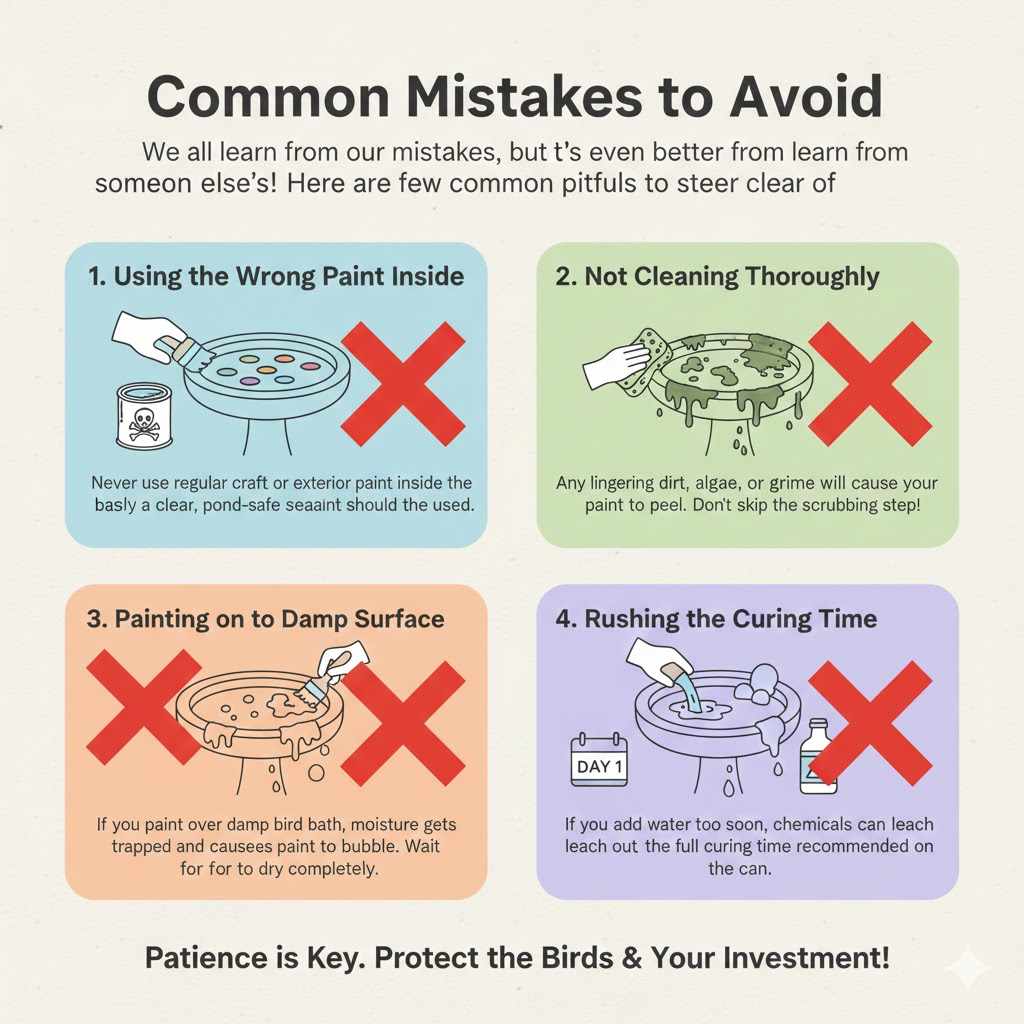
Common Mistakes to Avoid
We all learn from our mistakes, but it’s even better to learn from someone else’s! Here are a few common pitfalls to steer clear of.
- Using the Wrong Paint Inside: Never use regular craft or exterior paint inside the basin. Only a clear, pond-safe, non-toxic sealant should be the final layer that touches the water.
- Not Cleaning Thoroughly: Any lingering dirt, algae, or grime will cause your paint to peel off quickly. Don’t skip the scrubbing step!
- Painting on a Damp Surface: If you paint over a damp bird bath (especially concrete), the moisture gets trapped and will cause the paint to bubble and fail. Be patient and wait for it to dry completely.
- Rushing the Curing Time: This is a big one for safety. If you add water before the sealant has fully cured, chemicals can still leach out. Give it the full time recommended on the can, plus an extra day or two just to be safe.
Frequently Asked Questions (FAQ)
1. What kind of paint is safe for the inside of a bird bath?
You should not use colored paint on the inside of a bird bath basin. Instead, paint your designs on the outside and then seal the inside (the water-holding part) with a clear, non-toxic, waterproof sealant. Look for products labeled “pond-safe,” “marine-grade,” or “safe for drinking water” to ensure they won’t harm the birds.
2. Can I paint a concrete bird bath?
Absolutely! Concrete is a great surface for painting. Just make sure it is completely clean and dry before you begin. Using a primer designed for masonry or concrete will give you the best, longest-lasting results.
3. How do I paint a plastic or resin bird bath?
Yes, you can paint plastic or resin. The key is to use a spray paint that is specifically made to bond to plastic. Clean and lightly sand the surface first, then apply a plastic-friendly spray primer, followed by your color. Remember to work in a well-ventilated area and seal the inside basin with a bird-safe brush-on sealer.
4. Do I need to sand the bird bath before painting?
Yes, it’s a very good idea. A light sanding (or scuffing) of the surface creates tiny grooves for the paint to grip onto, leading to a much more durable finish. It helps prevent chipping and peeling down the road.
5. How long does bird bath paint need to cure before adding water?
This is crucial. The sealant in the basin needs to fully cure, not just be dry to the touch. This process can take anywhere from 3 to 7 days, depending on the product, temperature, and humidity. Always read and follow the sealant manufacturer’s instructions carefully. It’s always better to wait an extra day to be safe.
6. What colors attract birds to a bird bath?
Birds are attracted to colors that mimic nature. Earthy tones like gray (like stone), brown (like soil), and leafy greens are excellent choices. Blue is also a great color, as it imitates the look of clean, fresh water.
7. How often will I need to repaint my bird bath?
If you prepare the surface well and use high-quality outdoor paint and sealant, your paint job should last for several years. You may need to do a light touch-up or apply a fresh coat of sealant every 2-3 years to keep it looking fresh and well-protected.
Your Beautiful, Bird-Safe Creation
There you have it! Transforming your bird bath is a simple, rewarding project that adds so much charm to your garden. By focusing on good preparation and choosing the right bird-safe materials, you can create a beautiful piece you can be proud of.
The most wonderful part is yet to come: that quiet morning moment when you look out your window and see colorful birds splashing happily in the beautiful bath you created for them. It’s a small effort for a huge reward. So go ahead, pick out your colors, and have fun with it. You’ve got this!