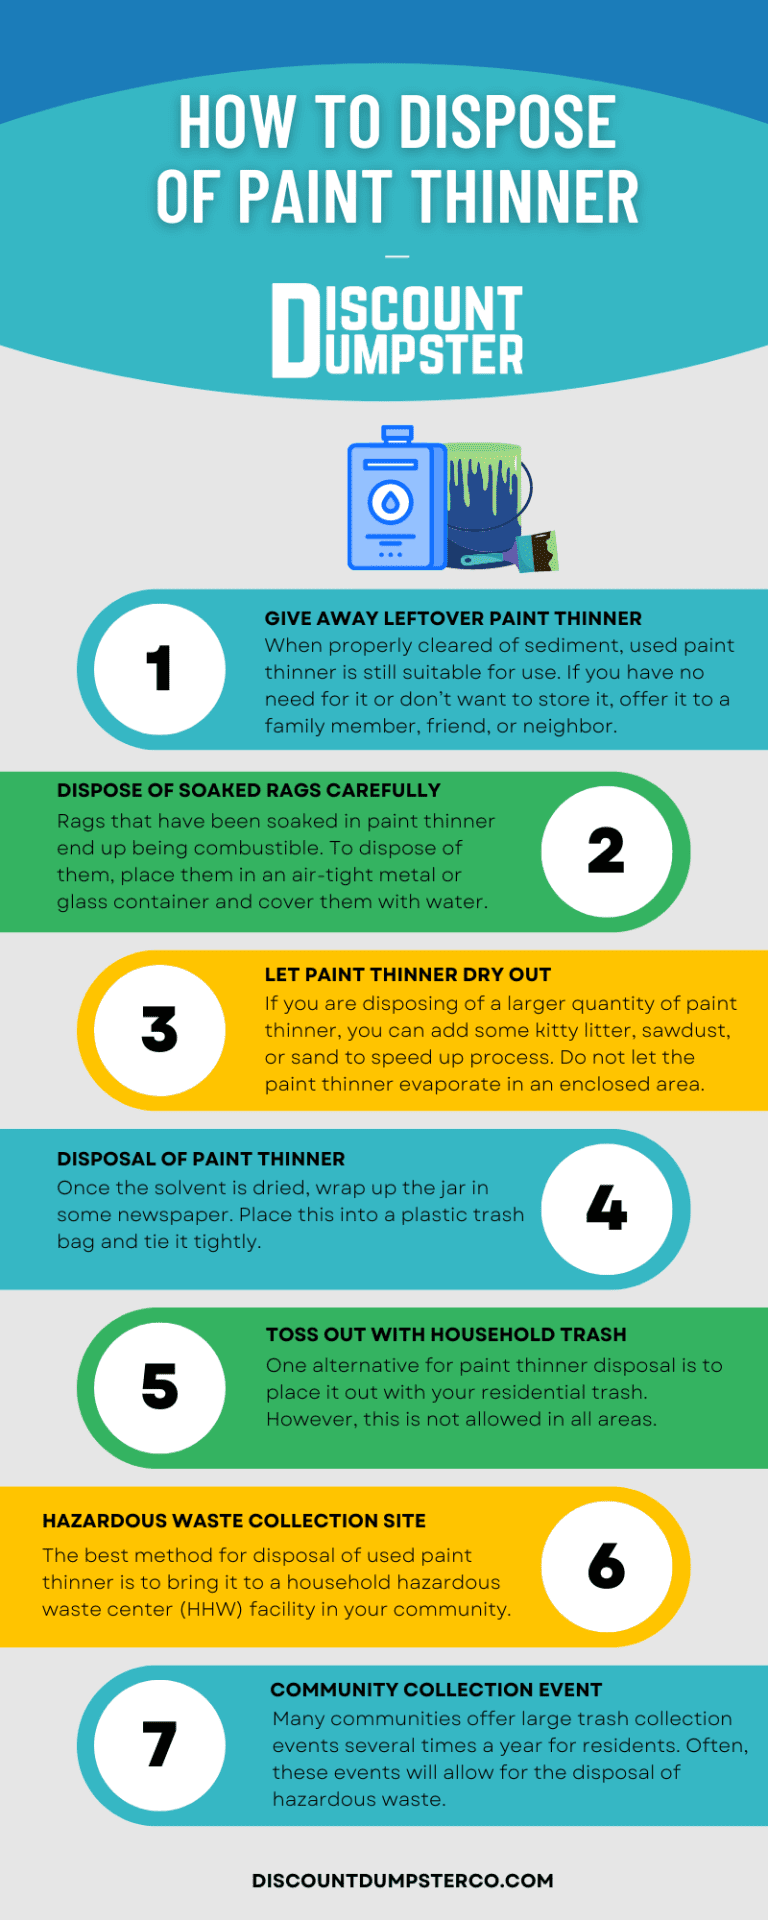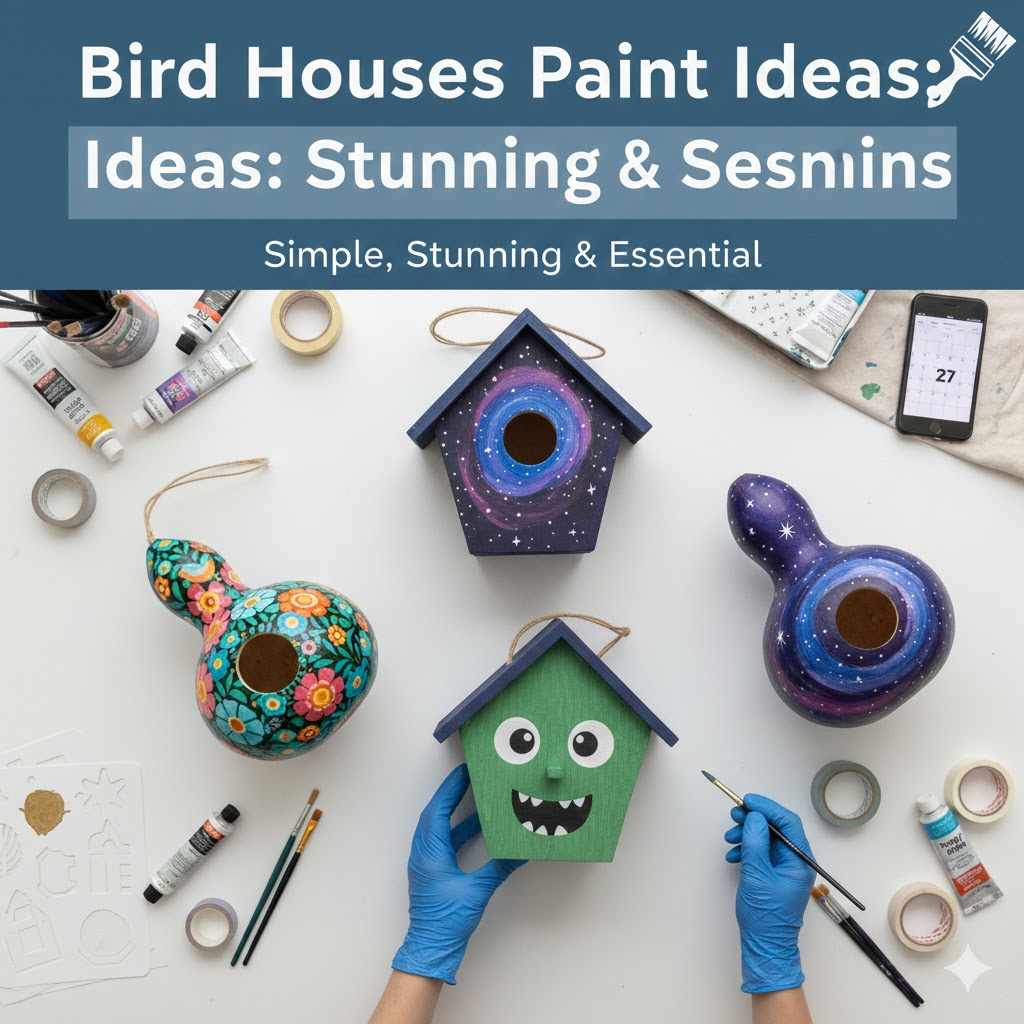
Bird Houses Paint Ideas: Stunning & Essential Designs
The best bird house paint ideas prioritize bird safety with non-toxic, water-based latex or acrylic paint in natural, earthy colors like gray, tan, or muted green. These tones blend with the environment, protect birds from predators, keep the house cool, and add a beautiful, classic look to your garden while keeping feathered friends safe.
Hello there, fellow maker! Md Meraj here. If you’ve just built a brand-new birdhouse, congratulations! That’s a wonderful project. Now comes the fun part: giving it some personality. But you might be wondering, “What colors are best? And more importantly, what’s safe for the birds?”
It’s a common question, and getting it right is crucial. The wrong paint can harm birds or make their new home a target for predators. But don’t worry. We’re going to walk through this together. In this guide, I’ll show you simple, stunning, and safe paint ideas that will make your birdhouse a beautiful and welcoming home. Let’s get painting!
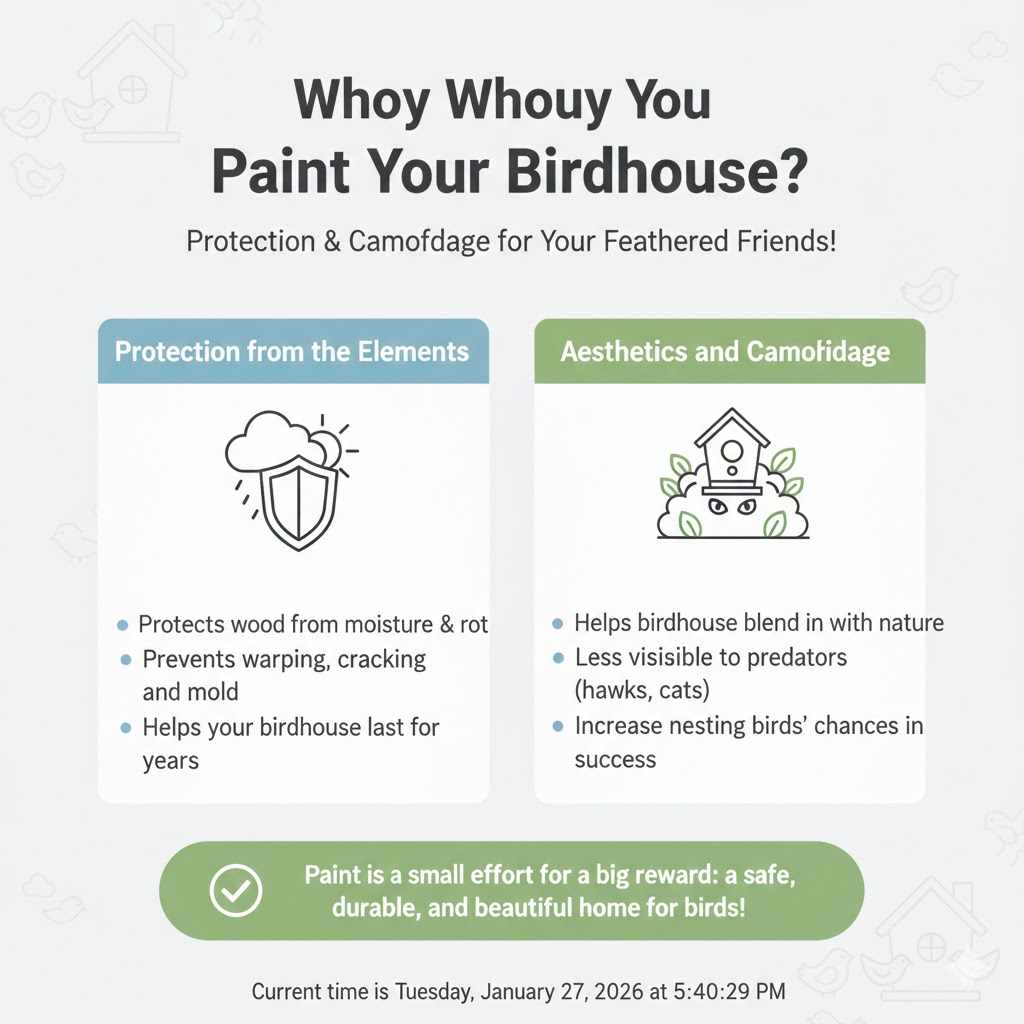
Why Should You Paint Your Birdhouse?
You might think leaving the wood natural is the best option. While raw wood has its charm, a good coat of paint does two very important jobs: protection and camouflage.
- Protection from the Elements: Your birdhouse will be out in the sun, rain, and wind. A quality exterior paint creates a barrier that protects the wood from moisture and rot. This helps your handcrafted project last for many seasons, providing a reliable home for bird families year after year. It prevents the wood from warping, cracking, and growing mold.
- Aesthetics and Camouflage: Painting your birdhouse helps it blend into your garden and the natural landscape. This is more than just about looks; it’s a safety feature! A camouflaged birdhouse is less visible to predators like hawks, cats, and raccoons, giving the nesting birds a much better chance of raising their young successfully.
The Golden Rule: Bird Safety Comes First
Before we dive into beautiful designs, let’s cover the most important rule of all: the health and safety of your feathered guests. Birds, especially nestlings, are very sensitive to chemicals and fumes.
Never, Ever Paint the Inside
This is non-negotiable. The inside of the birdhouse, including the entrance hole, must be left as bare, unpainted wood. Here’s why:
- Toxic Fumes: Paint can release volatile organic compounds (VOCs) as it cures. In a small, enclosed space like a birdhouse, these fumes can be toxic and even fatal to delicate baby birds.
- Slippery Surfaces: Parent birds and fledglings need to grip the interior walls. A smooth, painted surface makes it difficult for them to climb out, potentially trapping them inside.
- Chipping Paint: As paint ages, it can chip. Nestlings might accidentally ingest these flakes, which can be harmful.
Always remember: the interior should provide a natural, safe, and rough surface, just like the inside of a tree cavity.
Choosing the Right Bird-Safe Paint
Walking into a paint store can be overwhelming. Let’s simplify it. For birdhouses, you want a paint that is durable, non-toxic, and lets the wood breathe a little.
The best choices are water-based latex or acrylic paints. Look for labels that say “non-toxic” or “zero-VOC.” These paints are safe for the environment and for wildlife once they have fully dried and cured.
The U.S. Environmental Protection Agency (EPA) explains that VOCs can have adverse health effects, which is why choosing zero-VOC paints is a smart move for both you and the birds.
Paint Types: Safe vs. Unsafe
Here’s a simple table to help you choose the right can of paint and know what to avoid.
| Safe Paint Types (For Exterior Only) | Unsafe Paint Types (Avoid These) |
|---|---|
| Water-Based Latex Paint (Zero-VOC) | Oil-Based Paints |
| Water-Based Acrylic Paint (Zero-VOC) | Paints with Pesticides or Fungicides |
| Natural Milk Paint (with a non-toxic sealer) | Spray Paints (Aerosols contain harmful propellants) |
| Exterior Water-Based Stain (non-toxic) | High-Gloss Paints (Can trap heat and moisture) |
The Best Colors for Bird Houses (and Why They Matter)
When it comes to color, think like a bird. What would make them feel safe? Bright, flashy colors might look fun to us, but to a bird, they scream, “Predators, look over here!”
Natural, earthy tones are always the best choice. These colors mimic the bird’s natural habitat, offering camouflage and a sense of security.
- Good Colors: Tan, light brown, gray, olive green, and muted blues or reds.
- Colors to Avoid: Bright white, black, neon colors, and metallics. Bright white can be too conspicuous, while dark colors like black can absorb too much sun, causing the birdhouse to overheat, which is dangerous for the eggs and chicks inside.
Matching Colors to Your Environment
Choosing a color that matches your backyard can give birds an extra layer of protection.
| Your Backyard Environment | Recommended Birdhouse Colors |
|---|---|
| Woodland or Forested Area | Browns, dark greens, deep grays |
| Open Garden with Shrubs | Leafy greens, muted tans, sky blues |
| Urban or Suburban Setting | Clay, stone gray, muted brick red |
| Near a Water Source (Pond, Lake) | Light grays, pale blues, driftwood tans |
As the Cornell Lab of Ornithology suggests, a well-placed and appropriately colored birdhouse is far more likely to attract occupants.
Stunning & Simple Bird House Paint Ideas
Ready for some inspiration? Here are some beautiful and bird-friendly design ideas that anyone can do. Remember to use only bird-safe paints for the exterior!
1. The Natural Camouflage
This design is all about blending in. It’s perfect for wooded yards where you want the birdhouse to feel like a part of the forest.
- How to do it: Use a base color of earthy brown or olive green. You can use a natural sponge or a dry brush to dab on splotches of other natural colors like tan, dark gray, or a deeper green. You don’t have to be perfect—the more irregular it looks, the more natural it will seem.
- Why it works: This design offers maximum protection from predators by making the birdhouse nearly invisible against a backdrop of trees and leaves.
2. The Classic White Farmhouse
This timeless look is clean, simple, and charming. It works wonderfully in open, sunny gardens.
- How to do it: Paint the main body of the birdhouse an off-white or a very light beige (avoid brilliant white to reduce visibility). You can paint the roof a contrasting color like a medium gray or a dull, barn-red. A matte finish looks best for this style.
- Why it works: Light colors help reflect heat, keeping the nest box cool in the summer sun. It’s a classic aesthetic that never goes out of style.
3. The Rustic Log Cabin
Create the feel of a cozy cabin in the woods. This is a great way to use natural colors in a structured design.
- How to do it: Use a water-based, non-toxic wood stain in a warm brown for the body. This allows the wood grain to show through. For the roof, use a darker brown or gray paint to simulate a wooden or stone roof.
- Why it works: The stain protects the wood while maintaining a very natural appearance. It’s perfect for attracting birds that nest in tree cavities, like chickadees and nuthatches.
4. The Seaside Cottage
If you live near the coast or just love a beachy vibe, this design is for you. Think sun-faded colors and salty air.
- How to do it: Paint the body a pale, sky blue or a light seafoam green. For the roof and trim, use a sandy beige or a soft gray. You can lightly sand the edges after painting to give it a weathered, distressed look.
- Why it works: These muted colors are still natural enough to provide camouflage against a bright sky, and they look beautiful in a garden with coastal plants.
5. The Modern Minimalist
For those with a modern home and garden, a sleek, minimalist birdhouse can be a stunning architectural accent.
- How to do it: Choose one single, solid color. A slate gray, a muted olive, or a deep taupe works beautifully. Use a satin or matte finish for a clean, sophisticated look. The focus here is on the shape of the birdhouse and the simplicity of the color.
- Why it works: It’s understated, elegant, and the solid, earthy color provides excellent camouflage while complementing modern landscaping.
Your Step-by-Step Guide to Painting a Birdhouse
Alright, let’s grab our supplies and get this done! Following these steps will ensure a beautiful finish that’s safe for the birds.
Step 1: Gather Your Supplies
Before you start, make sure you have everything you need. It’s no fun stopping mid-project to find a brush!
-
- Bird-safe, zero-VOC exterior latex or acrylic paint
- Sandpaper (150-grit is good for a smooth finish)
- A clean, dry cloth
- Paintbrushes (a 1-inch flat brush for the body and a smaller artist’s brush for details)
- Painter’s tape (optional, for crisp lines)
A well-ventilated workspace (outdoors on a calm day is perfect)
Step 2: Prepare the Surface
Proper prep work is the secret to a professional-looking paint job. Take your time here. Lightly sand all exterior surfaces of the birdhouse. This helps the paint adhere better and gives you a smoother finish. After sanding, wipe away all the dust with a clean, dry cloth. Make sure the wood is completely dry before you move on.
Step 3: Apply a Bird-Safe Primer (Optional but Recommended)
A coat of water-based, non-toxic primer will help seal the wood and make your final color look more even. It also adds an extra layer of protection against the weather. Apply one thin coat to the exterior and let it dry completely according to the manufacturer’s instructions.
Step 4: Paint the Exterior
Now for the main event! Stir your paint well. Apply a thin, even coat of your base color to the birdhouse exterior. Remember to keep the inside and the entrance hole completely free of paint. Let the first coat dry thoroughly. It’s better to apply two thin coats than one thick, gloppy one. A second coat will give you better coverage and durability.
Step 5: Add Your Design Details
Once your base coats are dry, you can add your creative touches. Use painter’s tape to create sharp lines for a roof color, or use a small brush to add details. Just be sure every paint you use is bird-safe.
Step 6: Let It Cure Completely
This is a critical safety step. Dry to the touch” is not the same as “fully cured.” Paint needs time for all the fumes to disappear. Let your birdhouse sit in a well-ventilated area, like a garage or shed with the door open, for at least 3 to 7 days before you hang it outside. This ensures it’s completely safe for the birds.
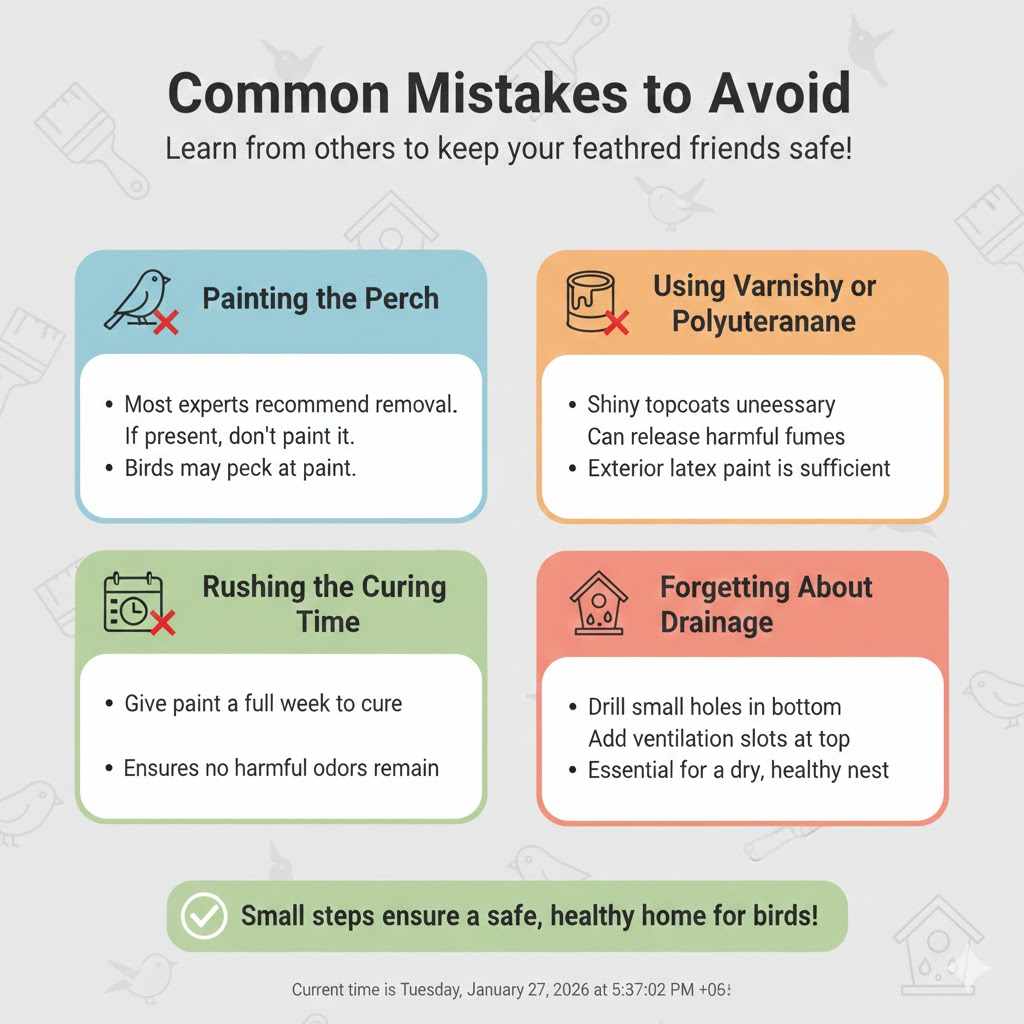
Common Mistakes to Avoid
We all make mistakes, but when it comes to wildlife, it’s best to learn from others! Here are a few common pitfalls to steer clear of:
- Painting the Perch: Most experts recommend not adding a perch to a birdhouse, as it can help predators get access. If your birdhouse has one, don’t paint it, as birds may peck at it. Better yet, remove it.
- Using Varnish or Polyurethane: These shiny topcoats are not necessary and can release harmful fumes. A good quality exterior latex paint provides all the protection you need.
- Rushing the Curing Time: It’s tempting to hang your beautiful birdhouse right away, but patience is key. Give the paint a full week to cure to ensure no harmful odors remain.
- Forgetting About Drainage: Before you even start painting, make sure your birdhouse has small drainage holes in the bottom and ventilation slots at the top. This is essential for keeping the nest dry and the birds healthy.
Frequently Asked Questions (FAQ)
Is it better to paint or stain a birdhouse?
Both are good options as long as you choose a non-toxic product. A high-quality exterior latex paint offers more protection from sun and rain. A non-toxic, water-based stain provides a more natural look and also protects the wood. The choice comes down to aesthetics, but both can be safe if chosen carefully.
What colors attract birds to a birdhouse?
This is a common misconception! Birds are not attracted to a birdhouse by its color. They are looking for a safe, well-built structure in a suitable location. The best colors are ones that help the birdhouse blend into the environment (green, brown, gray), which makes the nesting birds feel safer from predators.
Can I use leftover house paint on my birdhouse?
You can, but only if it meets the safety criteria. It must be water-based latex or acrylic paint. Check the label for “zero-VOC” or “low-VOC.” If it’s an old can of oil-based paint or you’re unsure of its contents, it’s safer to buy a small new container of non-toxic paint.
Should I paint the inside of a birdhouse?
Absolutely not. The inside of a birdhouse must always be left as bare, natural wood. Paint fumes can be toxic to baby birds in an enclosed space, and a painted surface can be too slippery for them to climb out when it’s time to fledge.
How often should I repaint my birdhouse?
This depends on your climate and the paint’s durability. Generally, a good quality exterior paint job will last for several years. Inspect the birdhouse each year during its annual cleaning (after nesting season is over). If you see peeling or chipping paint, it’s time for a touch-up.
How long should paint dry before putting a birdhouse outside?
Let the birdhouse cure for at least 3 to 7 days after the final coat of paint. It may feel dry to the touch in a few hours, but it takes several days for all the chemical solvents to evaporate fully. This curing period is essential for the birds’ safety.
Is spray paint safe for bird houses?
No, it is not recommended to use spray paint. Aerosol paints contain chemical propellants and solvents that are harmful to birds. Stick to water-based latex or acrylic paint that you apply with a brush.
Your Birdhouse is Ready for Its First Family
There you have it! You’re now equipped with everything you need to paint a birdhouse that is not only beautiful but also a safe and inviting haven for your local birds. By choosing the right paint, the right colors, and following a few simple steps, you’ve created something truly special.
Woodworking and DIY projects are about more than just building things; they’re about creating with purpose and care. Your newly painted birdhouse is a perfect example of that. It’s a small act of kindness for your backyard wildlife and a project you can be proud of for years to come. Now, hang it up in a good spot, sit back, and wait for your new neighbors to move in. Happy building!