How to Keep Wood Posts from Rotting in the Ground (7 Steps)
Wood posts rot at the soil line, where moisture, oxygen and fungi meet, so the fix is to keep that zone dry and chemically protected: buy UC4A ground-contact lumber, brush every cut end with copper naphthenate, and give water a way out of the hole. Even treated posts fail when water pools at the bottom. This guide covers a 7-step checklist, gravel versus concrete, depth rules, post bases, and rot-resistant species.
The 7-Step Checklist to Keep Wood Posts from Rotting
Best Cut-End Preservative Pick | |
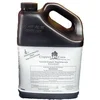 |
Tenino Copper Naphthenate 17% (2% as Metal), 1 Gallon: $66.94 The listing says it meets the AWPA M4 standard that IRC R317.1.1 points to for field-cut treated lumber, which is the brush-on step in the checklist below.
|
| View Our Pick on Amazon | |
As an Amazon Associate we earn from qualifying purchases.
- Buy ground-contact lumber: look for a UC4A tag for fence and deck posts, or UC4B for severe, wet or critical use.
- Treat every cut: brush copper naphthenate on field-cut ends, notches and drilled holes, as IRC R317.1.1 requires.
- Protect the soil-line zone: soak the bottom 12 to 18 inches in preservative or fit a heat-shrink sleeve.
- Dig deep enough: at least 2 feet for line posts, and below your local frost depth where the ground freezes.
- Give water a way out: set the post on 6 inches of crushed gravel, and keep any concrete around the sides only.
- Grade and clear: slope soil and concrete away from the post and keep mulch and plants off the wood.
- Probe it yearly: push a screwdriver into the wood at the soil line and replace or repair soft spots early.
Causes Of Wood Rot
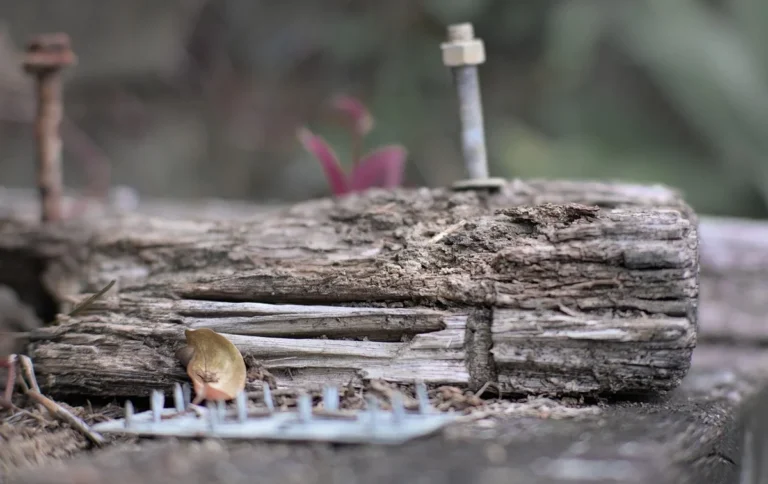
Wood rot is fungal decay, and fungi need three things: moisture, oxygen and wood to eat. Posts have all three at the soil line, because the ground supplies moisture, the air supplies oxygen, and the post itself is the food, as Hansen Buildings explains in its post-protection guide. Remove any one of the three and decay stops, which is why every fix below is really about moisture or about making the wood unappetizing to fungi.
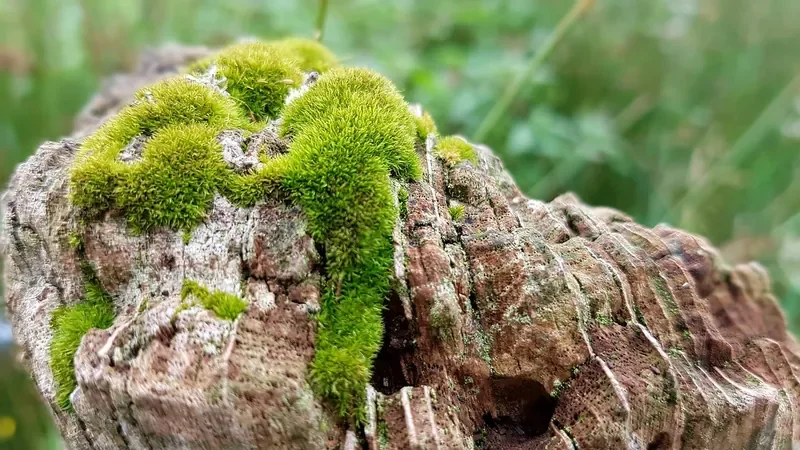
Poor drainage makes it worse, because water standing in the hole keeps the wood wet. For test numbers on how fast buried wood fails, see our guide on how long it takes wood to decompose underground.
Choosing The Right Wood
Both the species and the treatment decide how long a post lasts. Pressure-treated pine is the default, but a few naturally durable woods work if you use only the heartwood. The table compares them. Retention numbers are the AWPA values our ground contact lumber guide tabulates from the Western Wood Preservers Institute; decay ratings come from the Wood Database.
| Option | Decay resistance | Ground-contact verdict |
|---|---|---|
| Pressure treated, UC4A | Retention 0.40 pcf ACQ or 0.15 pcf copper azole | Standard choice for fence and deck posts |
| Pressure treated, UC4B | Retention 0.60 pcf ACQ or 0.31 pcf copper azole | Severe, wet or critical use such as permanent wood foundations |
| Black locust heartwood | Rated very durable; 1,700 lbf Janka | Excellent natural post, very hard to drive fasteners into |
| Eastern red cedar heartwood | Excellent decay and insect resistance; 900 lbf | Long used for fence posts; sapwood is much weaker |
| Western red cedar heartwood | Durable to very durable; 350 lbf | Resists rot but is soft, so it dents easily |
| White oak | Rated very durable; 1,350 lbf | Tyloses in the pores help it resist water |
| Red oak | Non-durable to perishable; 1,220 lbf | Do not bury it |
Two cautions from that table. First, the old advice that “oak lasts” only holds for white oak; red oak rots quickly in soil. Second, naturally durable species protect only through their heartwood, so a cedar post with a wide band of pale sapwood below grade is far less durable than the species rating suggests. Our guides on preventing cedar rot and on treated lumber sizes from 4×4 to 6×6 cover each choice in more depth.
Most modern treated lumber uses copper-based preservatives such as ACQ (alkaline copper quaternary) or micronized copper azole (MCA). Wear gloves when handling treated wood.
Proper Installation Techniques
Depth comes first. University of Georgia Extension says wooden line posts should be set at least 2 feet deep, preferably deeper. A widely repeated contractor rule buries one-third of the post’s length, and where the ground freezes the bottom of the hole should sit below the local frost depth. We could not confirm the one-third rule in a code or extension source, so treat it as a rule of thumb and ask your building department for your frost depth.
Next, give water an exit. Spread about 6 inches of crushed gravel in the bottom of the hole and set the post on it. Tamp the backfill in layers, or pour concrete around the sides only, never under the post end.
Concrete or gravel: what the sources actually say
This is a genuine debate, so here are both sides rather than a verdict.
- Gravel camp: fence contractors and Mr. Handyman argue that gravel drains water away from the post, while a concrete collar can trap water against the wood.
- Concrete camp: Hansen Buildings quotes a European study of concrete, gravel and dirt fill that found concrete gave the best longevity, with proper pressure treatment still key. This is a secondhand report of the study; we did not read the study itself.
- The preservative twist: Hansen’s summary of recent research says cement exposure had no effect on copper azole (CA-C) lumber, improved decay resistance of ACQ-D lumber, and reduced the fungal efficacy of micronized copper azole (MCA), so Hansen now recommends a moisture-impervious barrier from the splash plank down to 14 to 18 inches below grade (see Hansen Buildings on concrete and treated posts).
Where the sources overlap: keep the post end out of a water-filled concrete cup, and slope the concrete top away from the post. For the full digging walkthrough, see our guide to installing wood fence posts. Where a post lands on a slab or footing instead, see what to put between concrete and wood.
Waterproofing the Below-Ground Section
The most vulnerable part of any wood post is the section that sits below ground , specifically the few inches right at the soil line where moisture, oxygen, and fungi all meet. Treating this zone before installation dramatically extends post life.
Pre-installation soak: Pour copper naphthenate or a bituminous wood preservative into a bucket deep enough to submerge the bottom 12 to 18 inches of the post. Let the post soak overnight. The preservative penetrates wood fibers and creates a chemical barrier against rot and insect damage , the same principle used on railway ties and utility poles.
Postsaver sleeve: Slide a Postsaver sleeve over the post end before setting. The sleeve has a bituminous inner liner inside a thermoplastic outer shell. When heated with a heat gun, it shrinks and bonds to the wood, creating an airtight waterproof seal around the most rot-prone zone.
Critical mistake to avoid: Never pour concrete directly beneath the post end. This traps moisture against the wood and accelerates rot at the ground line. Instead, set the post on 6 to 10 inches of crushed gravel for drainage, pour concrete only around the sides, and slope or dome the concrete surface away from the post so water runs outward.
Treat every cut, notch and drilled hole. The cut ends of treated lumber are not fully protected by the factory treatment. IRC R317.1.1 requires field-cut ends, notches and drilled holes to be treated in the field per AWPA M4, and the American Wood Council notes that the copper naphthenate specified there contains 2% copper. Brush it on before the cut end goes in the soil. Our page on the cut-end code rule explains what is code, what is warranty and what is just good practice.
Effective Moisture Control
Water should leave the area, not collect in it. Grade the soil so it slopes away from the post, keep the gravel layer free of silt, and clear mulch, soil and plant growth that pile up against the wood, because anything that holds water against the post extends the time it stays wet.

Tar paper or plastic around the buried section blocks soil moisture, but a loose wrap can funnel water down and hold it there, so seal the top edge.
Use a standoff base when the post meets concrete. Simpson Strong-Tie’s standoff post bases hold the post end 1 inch above the concrete so it can drain and dry. Code follows the same logic: R317.1, as published in the 2023 Florida Building Code, Residential, requires wood columns on basement slabs to sit on piers or metal pedestals projecting at least 1 inch above the slab, and calls for durable or treated wood within 8 inches of exposed ground.
Regular Maintenance Practices
Once a year, push a screwdriver or awl into the post at the soil line. Wood that is soft, stringy or crumbly means decay has started. Fill cracks and holes that let water in, and brush copper naphthenate on any fresh cuts or drill holes. Re-grade any soil that settles into a bowl around the post.
Above ground, a water-repellent finish slows weathering and cracking. Our guide to the best wood sealer compares exterior options. Treat sealer as protection for the above-ground part, not a substitute for the preservative and drainage below it.
Innovative Preservation Methods
Heat-shrink sleeves are the main modern add-on. The Postsaver Pro-Wrap listing describes a dual-layer sleeve with a bituminous inner layer that heat-shrinks around the soil-line zone of 3×3 to 4×4 posts, can be used with fence post concrete, and carries a 20-year manufacturer guarantee on UC4 timber when applied correctly. That is a manufacturer claim, not independent test data.
For new builds, a metal post base keeps the wood off the ground altogether. For natural options, see how to make a cedar post last longer.
How to Repair Wood Rot on a Post
If your post already shows signs of rot, you may be able to repair it rather than replace it , as long as less than one-third of the post is affected. Here’s how to do it step by step.
Step 1: Assess the Damage
Push a screwdriver or awl firmly into the post. If the wood is soft and gives way easily, rot is present. If more than one-third of the post cross-section is soft or hollow, replacement is safer than repair. For surface or partial rot, proceed with the steps below.
Step 2: Remove All Decayed Wood
Use a chisel, sturdy knife, or wire brush to scrape out all soft, discolored, or crumbly wood. Keep removing material until you reach firm, solid wood. Do not leave any soft wood behind , remaining rot will continue spreading.
Step 3: Apply a Wood Hardener
Saturate the exposed area with a liquid wood hardener. This consolidant penetrates the remaining wood fibers, kills residual fungi, and hardens the surface so it can hold filler. Let it dry completely , typically 4 to 6 hours.
Step 4: Fill the Void
Mix and apply a two-part epoxy wood filler to the cleaned cavity. Work it firmly into the space and shape it to match the post profile. Epoxy filler is waterproof, won’t shrink, and sands/paints just like wood once cured (usually 24 hours).
Step 5: Seal and Protect
Once the filler is fully cured, coat the repaired area , and ideally the entire exposed section of the post , with a waterproofing wood sealant or preservative. For below-grade sections, copper naphthenate penetrating preservative is the most effective option.
| Damage Level | Action |
|---|---|
| Surface soft spots only | Harden + fill + seal |
| Less than 1/3 of post affected | Remove decay + epoxy repair + seal |
| More than 1/3 affected | Replace the post entirely |
| Rot at ground level only | Sister post method, or a fence repair spur |
Frequently Asked Questions
How To Stop Wooden Posts From Rotting In The Ground?
Start with lumber rated UC4A or higher, brush copper naphthenate on every cut end, and protect the soil-line zone with a sleeve or a preservative soak. Set the post on gravel, slope the soil and any concrete away from it, and probe it yearly.
How Long Will A 4×4 Post Last In The Ground?
No one can promise a number, because soil, climate, species and treatment level all change the result. For scale, a University of Georgia Extension table lists treated pine posts at 25 to 30 years of life expectancy in farm fences. Treat any figure as an estimate, not a warranty.
What To Put On Post To Keep From Rotting?
Brush or soak the bottom 12 to 18 inches of the post in copper naphthenate, or slide a heat-shrink sleeve over the soil-line zone. On pressure-treated posts, also brush copper naphthenate on every field cut, notch and drilled hole before the post goes in the ground.
How To Keep Pressure Treated Wood From Rotting In The Ground?
Buy lumber labeled for ground contact (UC4A, or UC4B for wet or critical uses), brush copper naphthenate on all field cuts as IRC R317.1.1 requires, and stop water collecting at the base with gravel and sloped soil. Treated wood is not rot-proof once the preservative is cut through.
How Deep Should A Wood Post Be Buried?
At least 2 feet for line posts, according to University of Georgia Extension, and deeper where the ground freezes. A common contractor rule buries one-third of the post’s length, below the local frost depth.
Is It Better To Set Wood Posts In Concrete Or Gravel?
The sources disagree. Contractors often prefer gravel for drainage, while a European study cited by Hansen Buildings found concrete fill gave the longest post life. Either way, keep the concrete top above grade and sloped away, and never leave the post end in a water-filled cup.
Conclusion
A wood post rots when moisture, oxygen and fungi meet at the soil line, so the fix is layered: ground-contact lumber, treated cuts, gravel drainage and sloping soil. Check the post yearly and repair soft spots early.
Sponsored / affiliate links. As an Amazon Associate I earn from qualifying purchases. I may earn additional commission from eligible campaigns.