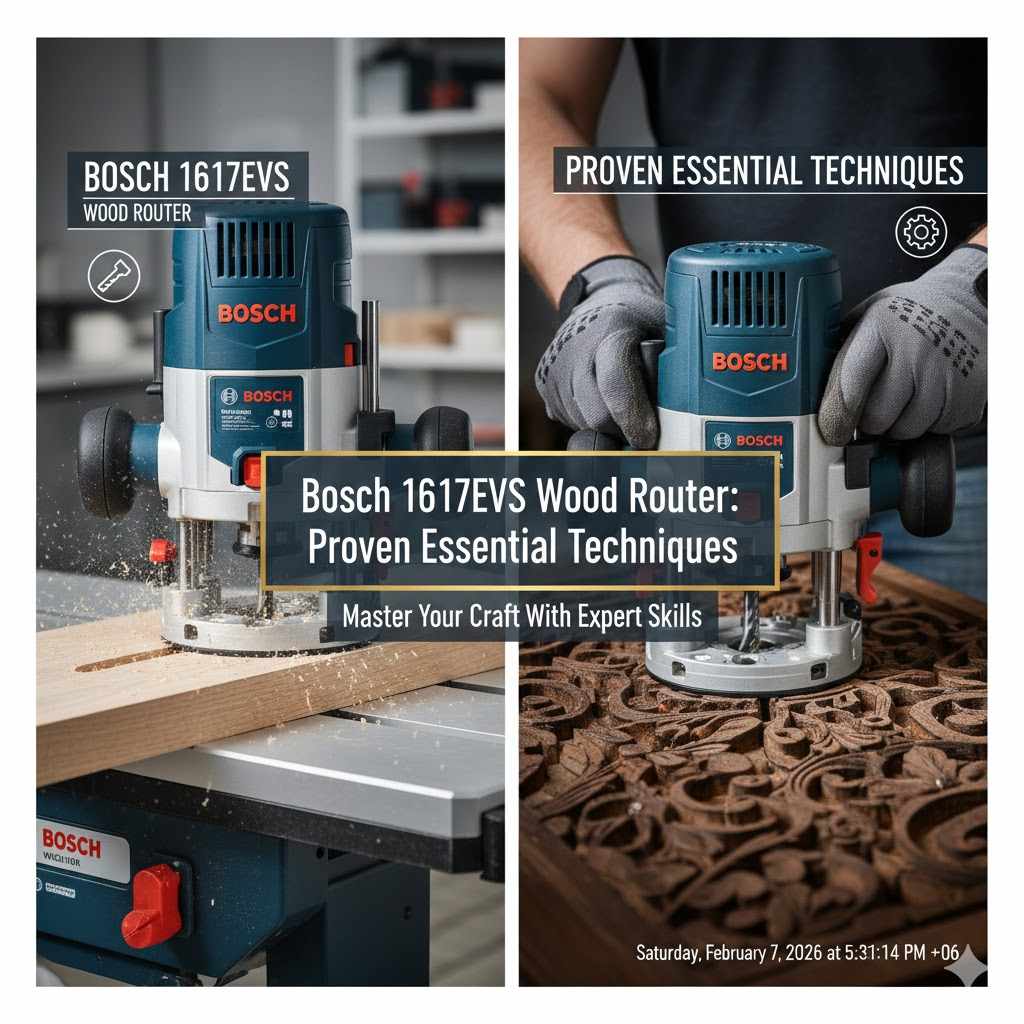
Bosch 1617evs Wood Router: Proven Essential Techniques
Mastering the Bosch 1617EVS wood router comes down to a few core skills. Focus on learning to properly install router bits, accurately set the cutting depth for both the fixed and plunge bases, and always move the router in the correct direction against the bit’s rotation. These proven techniques are your foundation for safe, clean, and precise results.
A wood router is one of the most versatile tools you can own. But for many new woodworkers, it can also feel a bit intimidating. That powerful motor and sharp spinning bit can make anyone nervous! If you’ve just unboxed your shiny new Bosch 1617EVS, you might be wondering where to even begin. You’re not alone in feeling that way.
The good news is that this router is a fantastic choice for beginners. It’s powerful, reliable, and surprisingly easy to handle once you know the basics. In this guide, I’m going to walk you through the essential techniques you need to get started. We’ll skip the confusing jargon and focus on simple, step-by-step actions that will build your confidence and have you making beautiful cuts in no time.
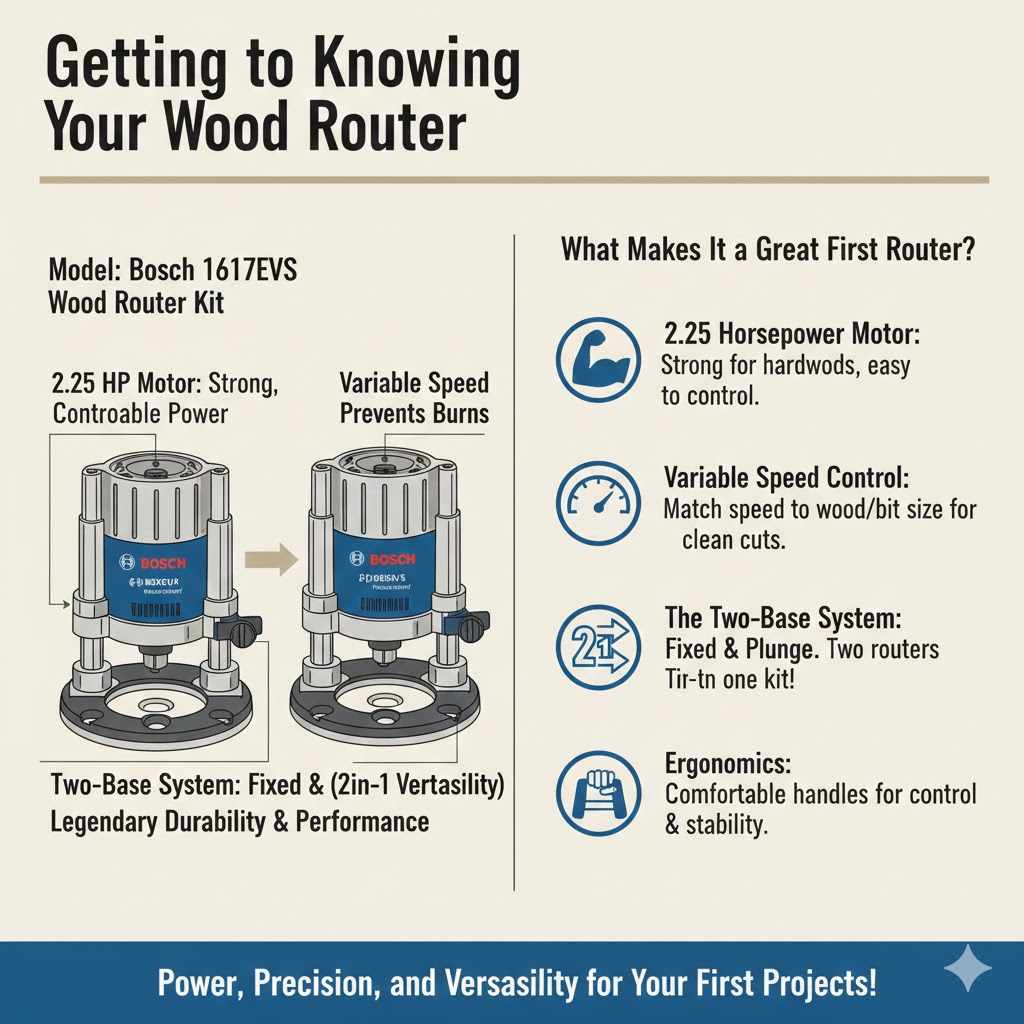
Getting to Know Your Bosch 1617EVS Wood Router
Before we make any sawdust, let’s take a moment to appreciate why this specific model is so loved in the woodworking community. The “EVS” in its name stands for Electronic Variable Speed, and the “1617” series is a legend for its durability and performance. It comes in a kit that gives you everything you need to tackle a huge range of projects right out of the box.
What Makes It a Great First Router?
- 2.25 Horsepower Motor: This motor is the sweet spot. It’s strong enough to cut through hardwoods like oak and maple without bogging down, but it’s not so overwhelmingly powerful that it feels hard to control.
- Variable Speed Control: The speed dial lets you match the bit’s rotation speed to the type of wood and the size of the router bit. This is key for preventing burn marks and getting the cleanest possible cut.
- The Two-Base System: This is the biggest feature. The kit includes both a fixed base and a plunge base. You can quickly and easily move the motor from one base to the other, essentially giving you two routers in one. We’ll explore this more next.
- Ergonomics: The handles are comfortable and designed to give you excellent control and stability, which is crucial for safety and accuracy.
Fixed Base vs. Plunge Base: What’s the Difference?
Understanding these two bases is the first major step to unlocking your router’s potential. They are designed for different types of tasks, and knowing when to use each one will make your work much easier.
The Fixed Base
Think of the fixed base as your go-to for edge work. With this base, you set the depth of the router bit and lock it in place. The bit stays at that fixed depth for the entire cut. It’s simple, stable, and perfect for tasks where the cut starts from the edge of the wood.
Use the fixed base for:
- Rounding over or decorating the edges of a tabletop.
- Cutting rabbets (L-shaped grooves) for joinery.
- Creating chamfers (beveled edges).
- Using it in a router table (the fixed base is designed for this).
The Plunge Base
The plunge base is for starting a cut in the middle of a piece of wood. It has springs that allow you to “plunge” the spinning bit down into the material. You can set a specific depth, and the router will stop precisely where you want it to. This opens up a whole new world of creative possibilities.
Use the plunge base for:
- Cutting grooves, dadoes, or flutes that don’t go to the edge.
- Making mortises for mortise-and-tenon joints.
- Inlay work or carving out letters and signs.
- Stopped cuts, where the groove ends before the edge of the board.
Here’s a simple table to help you remember the difference:
| Feature | Fixed Base | Plunge Base |
|---|---|---|
| Primary Use | Edge-shaping and router table work | Cuts in the middle of a workpiece |
| Bit Position | Locked at a set depth | Can be lowered (plunged) into the wood |
| Best For | Round-overs, chamfers, rabbets | Mortises, dadoes, inlay, fluting |
| Complexity | Simpler to set up and use | Slightly more complex due to plunge mechanism |
Safety First: The Golden Rules of Router Use
A router is a safe tool when used correctly. Before you ever plug it in, you must commit these safety rules to memory. There are no shortcuts when it comes to your well-being in the workshop.
- Eye and Ear Protection: This is non-negotiable. Wood chips fly everywhere, and routers are loud. Wear safety glasses or a face shield and hearing protection every single time.
- Unplug Before Adjusting: Always disconnect the power cord from the wall outlet before you change a router bit or make any major adjustments. This simple habit prevents accidental startups.
- Secure Your Workpiece: Never try to hold a piece of wood with one hand while routing with the other. Clamp your project securely to a workbench. This frees both of your hands to control the router.
- Inspect Your Router Bit: Before installing a bit, check it for damage, rust, or excess pitch (wood resin). A clean, sharp bit is safer and cuts better.
- Two Hands on the Router: Always keep both hands firmly on the router handles when it is on. This gives you maximum control.
- Feed Direction Matters: We will cover this in detail, but you must always move the router against the direction the bit is spinning. For more information on woodworking machine safety, check out these guidelines from the Occupational Safety and Health Administration (OSHA).
Technique #1: How to Install and Change Router Bits
Changing a router bit is one of the first skills you need to learn. The Bosch 1617EVS makes this process easy with a shaft lock and two wrenches. Let’s walk through it.
- Disconnect Power: The first and most important step. Make sure the router is unplugged.
- Choose Your Collet: Your router comes with two collets: a 1/4-inch and a 1/2-inch. The collet is the sleeve that grips the bit. Match the collet size to the shank (the solid shaft part) of your router bit. The 1/2-inch shank is generally better as it provides more stability and less vibration.
- Insert the Collet: Unscrew the collet nut. Drop the correct collet into the router’s shaft, then loosely thread the collet nut back on.
- Insert the Bit: Slide the router bit’s shank into the collet. A critical rule here is to not let it bottom out. Insert it almost all the way, then pull it back out about 1/8 of an inch. This prevents the bit from getting stuck after use.
- Tighten the Nut: The 1617EVS has a spindle lock button. Press and hold it to keep the shaft from spinning. Use the included wrench to tighten the collet nut. It should be snug and secure—you don’t need to use extreme force, just a firm turn of the wrench.
- To Remove a Bit: Simply reverse the process. Unplug the router, press the spindle lock, and use the wrench to loosen the collet nut.
Technique #2: Setting the Cutting Depth on the Fixed Base
Accurate depth setting is what separates sloppy work from professional results. The fixed base on the Bosch has a fantastic system for both big and tiny adjustments.
Steps for Setting the Depth:
- Start with a Loose Base: Make sure the router motor is unplugged. Place the router on a flat, scrap piece of wood (the same thickness as your project). Unlock the clamp lever on the fixed base. The motor should now slide up and down freely.
- Make Contact with the Wood: Push the motor down until the tip of the router bit just touches the surface of the wood. Hold it there firmly.
- Lock the Base: While holding the motor down, press the clamp lever to lock the motor in place. The bit is now at “zero.”
- Set Your Coarse Depth: Now you can adjust the depth. The depth adjustment ring is on the top of the base. For larger changes, you push a release button and can turn the entire motor housing. Let’s say you want a 1/4-inch deep groove. You would adjust it down until the scale reads 1/4 inch.
- Fine-Tune with the Micro-Adjustment Dial: This is where the magic happens. After locking the coarse adjustment, you can use the small red dial on top for incredibly precise changes. Each click on this dial moves the bit a tiny fraction of an inch, allowing you to sneak up on the perfect depth.
Technique #3: Setting the Cutting Depth on the Plunge Base
The plunge base works differently. Instead of locking the bit at one position, you set a maximum plunge depth. This is perfect for making deep cuts in several shallow passes, which is safer and gives a cleaner finish.
Steps for Plunging:
- Position the Router: Place the plunge base flat on your workpiece, exactly where you want the cut to begin. The bit will be raised up, not touching the wood.
- Set the Zero Point: Unlock the plunge mechanism and gently lower the router until the bit just touches the wood’s surface. Now, lock the plunge lever.
- Adjust the Depth Rod: Find the depth stop rod. Push it down until it touches the adjustable turret stop at the bottom of the base. Lock the depth stop rod in place. This has now “zeroed” the router.
- Set the Final Depth: To set your desired cutting depth, you’ll need a setup block, a small ruler, or just use the scale on the rod. Loosen the depth stop rod again and raise it by the amount you want to cut. For example, to make a 1/2-inch deep cut, raise the rod by 1/2 inch and lock it.
- Use the Turret for Multiple Passes: The turret stop at the bottom looks like a staircase with several steps. By starting on the highest “step,” you can make a shallow first pass. Then, for the next pass, you rotate the turret to a lower step. This allows you to make deep cuts safely and cleanly in multiple increments without ever changing your main depth setting.
Technique #4: Making a Perfectly Straight Cut with the Edge Guide
One of the most common tasks for a router is cutting a groove or shaping an edge that is perfectly parallel to the side of a board. Your router kit comes with an edge guide for exactly this purpose.
- Attach the Rods: Screw the two long metal rods into the holes on your router base (either fixed or plunge).
- Slide on the Guide: Slide the edge guide assembly onto the two rods.
- Position the Router: Place the router on your workpiece so the bit is at the desired distance from the edge. For example, if you want a groove 1 inch from the edge, position the bit 1 inch from the edge.
- Set and Lock the Guide: Slide the edge guide fence until it is flush against the edge of the board. Tighten the knobs on the guide to lock it in that position.
- Make the Cut: As you push the router forward, keep the edge guide fence pressed firmly against the edge of your workpiece. This will guarantee your cut remains perfectly straight and parallel.
Technique #5: Making Your First Cut (Direction and Speed)
Now we finally get to make some sawdust! This is where we put it all together. The most crucial concept to understand here is the feed direction.
The Rule of Feed Direction
To get a clean, controllable cut, you must always move the router against the rotation of the bit. If you move with the rotation (called “climb cutting”), the router will try to pull itself along the wood, which can be dangerous and result in a messy cut.
Here is an easy way to remember it:
- On the outside edge of a board: Move the router from left to right (counter-clockwise around the workpiece).
- On the inside edge (like the inside of a picture frame): Move the router from right to left (clockwise around the opening).
Think of it this way: keep the router between yourself and the edge you are cutting. As the bit spins clockwise, moving left-to-right on an outer edge means the cutting edge is biting into new wood.
Speed and Control
Don’t be in a rush. A steady, consistent feed rate is what you’re aiming for.
- Too fast: You’ll get a choppy, rough cut, and it can be hard on the router motor.
- Too slow: You’ll create too much friction, which can leave burn marks on the wood.
Listen to the router. You will hear it straining if you push too fast. You will hear a high-pitched whine and smell burning if you go too slow. With a little practice on scrap wood, you’ll quickly get a feel for that “just right” speed.
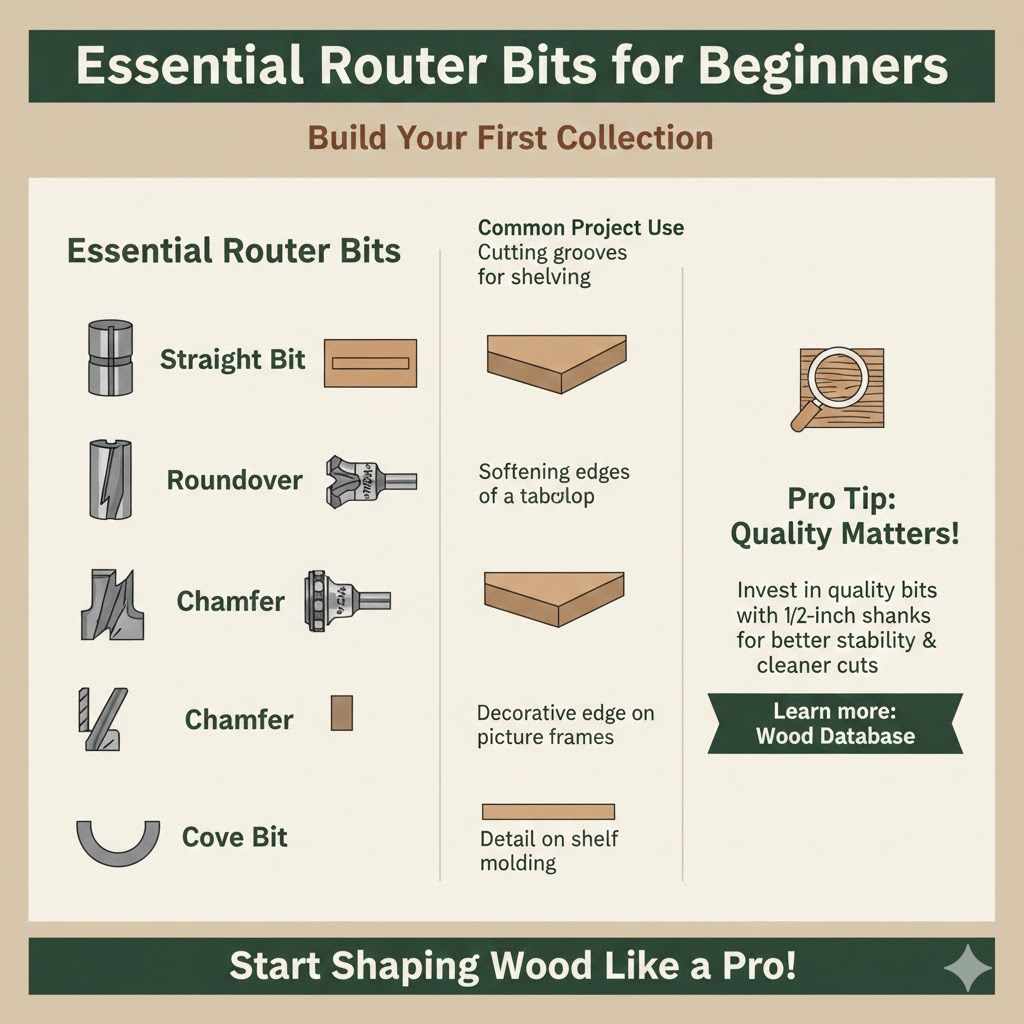
Essential Router Bits for Beginners
The world of router bits is huge, but you only need a few to get started. Here are four essential bits and what they do. I recommend buying a quality set with 1/2-inch shanks for the best results.
| Router Bit | What It Does | Common Project Use |
|---|---|---|
| Straight Bit | Cuts straight-walled grooves, dadoes, and rabbets. The workhorse of router bits. | Cutting grooves for shelving in a bookcase. |
| Roundover Bit | Creates a rounded edge. The size of the radius is determined by the bit. | Softening the edges of a cutting board or tabletop for a comfortable feel. |
| Chamfer Bit | Cuts a 45-degree bevel on an edge, giving a clean, modern look. | Creating decorative edges on picture frames or a box lid. |
| Cove Bit | Cuts a concave, quarter-circle profile. The opposite of a roundover. | Adding a decorative detail to the bottom of a shelf or a piece of molding. |
For more detailed information on different wood types and their properties, the Wood Database is an excellent resource that can help you choose the right material for your projects.
Conclusion: You’re Ready to Route!
The Bosch 1617EVS wood router is an amazing tool that can truly elevate your woodworking. It might have seemed complicated at first, but now you understand the key concepts: the difference between the two bases, the importance of safety, and the proven techniques for installing bits, setting depth, and making a controlled cut.
The best thing you can do now is grab some scrap wood and practice. Try setting the depth on the fixed base. Make a few passes with the plunge base. Use the edge guide to cut a perfectly straight groove. Don’t worry about making mistakes—every woodworker has a scrap pile full of “learning experiences.”
The more you use your router, the more comfortable and confident you will become. You now have the foundational knowledge to start building beautiful, well-crafted projects with clean edges and precise joinery. So get into your workshop, stay safe, and have fun!
Frequently Asked Questions (FAQ)
1. What’s the difference between 1/4-inch and 1/2-inch shank router bits?
The shank is the solid, cylindrical part of the bit that goes into the router. A 1/2-inch shank is thicker and more massive. This makes it much more stable, reducing vibration (or “chatter”), which leads to a smoother cut. It’s also stronger and less likely to break under stress. While 1/4-inch bits are fine for very light-duty work, it’s always better to use a 1/2-inch shank bit when you can.
2. Can I use the Bosch 1617EVS in a router table?
Absolutely! The fixed base of the 1617EVS is designed specifically for this. It has threaded holes in the bottom that match up with most standard router table mounting plates. Using it in a table is a great way to handle small pieces of wood or create complex molding profiles safely.
3. How do I prevent burn marks on my wood?
Burn marks are usually caused by three things: a dull router bit, moving the router too slowly, or trying to remove too much material in one pass. To fix this, make sure your bit is clean and sharp, maintain a steady feed rate (not too slow), and for deep cuts, always make multiple shallow passes instead of one deep one.
4. What speed should I set the router to?
A good rule of thumb is: the larger the diameter of the router bit, the slower the speed. For small bits (1-inch diameter or less), you can run the router at a high speed. For large panel-raising or molding bits, you should dial the speed down to the lower half of the range. The router’s manual has a chart with specific recommendations, but starting around medium speed and adjusting from there is a safe bet.
5. What is a good first project for a router?
A simple handmade cutting board is a perfect first project. It allows you to practice several key skills. You can use the router with a straight bit and a straightedge to perfectly flatten the board, then use a roundover bit with the fixed base to soften all the edges. It’s a small, satisfying project that will help you build confidence quickly.
6. How do I know I’ve tightened the collet enough?
You want it to be “wrench tight” but not overly forced. Tighten it by hand until it stops, then use the wrench to give it about a quarter-turn more. The goal is to ensure the bit is securely gripped and won’t slip, but you don’t need to apply so much force that it becomes difficult to loosen later. A firm, snug fit is what you’re looking for.
7. Why won’t my router turn on?
Before you panic, check the simple things. First, is it plugged into a working outlet? Second, on the Bosch 1617EVS, the switch can be tricky for new users. Make sure you are pushing it firmly all the way into the “ON” position. Finally, check the motor connections. If you just switched the motor from one base to another, ensure the connection pins are clean and the motor is fully seated and clamped in the new base.