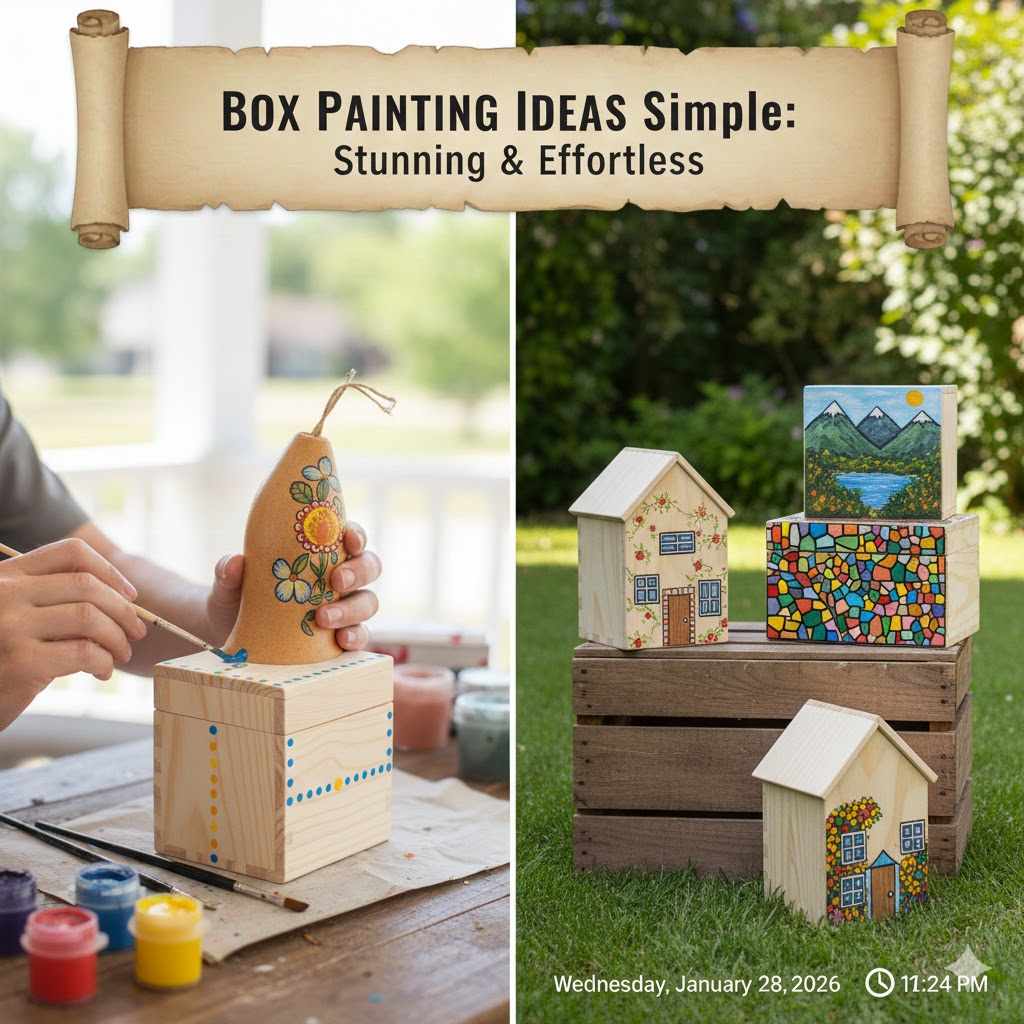
Box Painting Ideas Simple: Stunning & Effortless
Simple box painting ideas include using painter’s tape for clean geometric designs, stencils for elegant patterns, and acrylic pouring for unique abstract art. These methods are beginner-friendly and can transform any plain box into a stunning piece with minimal effort, making them perfect for storage, gifts, or beautiful home decor.
Have you ever looked at a plain wooden or cardboard box and thought it had potential? Maybe you have a few lying around, waiting for a purpose. Turning a simple box into something beautiful can feel like a big project. You might worry about making it look messy or not knowing where to start. It’s a common feeling, but I’m here to tell you that it’s easier than you think.
You don’t need to be an artist to create something you’re proud of. With a little paint and a few simple tricks, you can create stunning designs effortlessly. In this guide, I’ll walk you through some of my favorite simple box painting ideas. We will go step-by-step, making it fun and achievable. Let’s turn those plain boxes into custom treasures together!
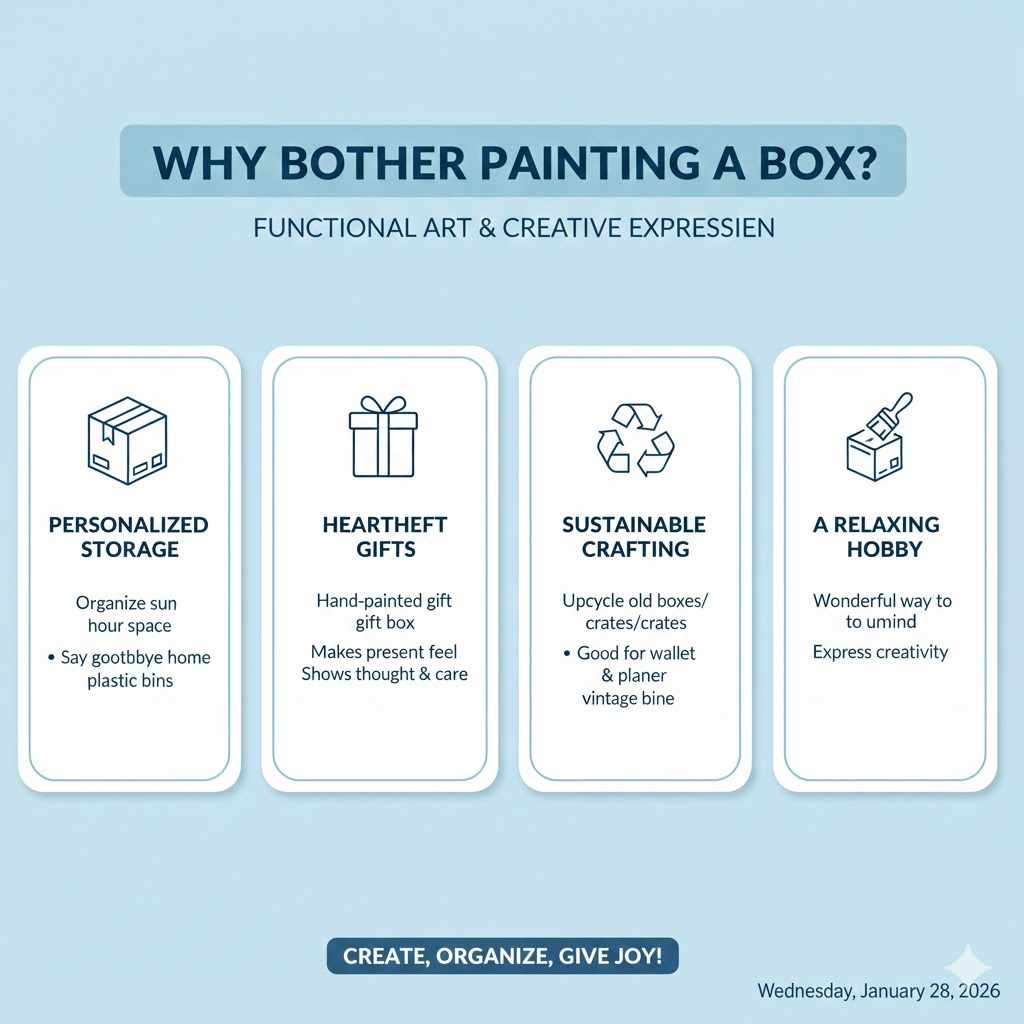
Why Bother Painting a Box?
Before we grab our brushes, let’s talk about why this is such a rewarding project. A painted box is more than just a container; it’s a piece of functional art you created. Here’s why it’s worth your time:
- Personalized Storage: Organize your space with boxes that match your home decor perfectly. Say goodbye to generic plastic bins.
- Heartfelt Gifts: A hand-painted gift box makes any present inside feel extra special. It shows you put thought and care into it.
- Sustainable Crafting: Upcycle old shipping boxes or plain wooden crates instead of buying new ones. It’s good for your wallet and the planet.
- A Relaxing Hobby: The simple act of painting can be very calming. It’s a wonderful way to unwind and express your creativity.
First Things First: Gathering Your Simple Supplies
You don’t need a professional art studio to get started. Most of these items are probably in your home already or are easy to find at a local craft store. Let’s keep it simple.
Essential Toolkit:
- A Box: This can be a wooden craft box, a sturdy cardboard box, or even an old shoebox.
- Paint: Acrylic craft paint is perfect for beginners. It’s water-based, dries quickly, and comes in every color imaginable.
- Brushes: A small set with a few different sizes will do. A flat brush for large areas and a smaller one for details is a great start.
- Primer: A coat of gesso or a spray-on primer helps the paint stick better and makes the colors pop.
- Sealer: A clear acrylic sealer (spray or brush-on) will protect your finished design from scratches and dust.
- Sandpaper (for wooden boxes): A fine-grit piece (around 220-grit) is all you need to smooth the surface.
- Cleaning Supplies: A clean cloth and some soapy water.
- Palette: A simple paper plate or a piece of cardboard works perfectly for mixing colors.
The Foundation: How to Prepare Your Box for Painting
A little prep work goes a long way. This is the secret to a professional-looking finish that lasts. Don’t skip these steps—they only take a few minutes!
- Clean It Up: First, wipe your box down with a damp cloth to remove any dust or dirt. If it’s a bit greasy, use a little mild soap and water, then let it dry completely.
- Smooth It Out (For Wood): If you’re using a wooden box, gently sand the surfaces with fine-grit sandpaper. Always sand in the direction of the wood grain. This gets rid of any splinters and creates a smooth canvas for your paint. Wipe away the sanding dust with a clean cloth.
- Time to Prime: Apply a thin, even coat of primer. This step is a game-changer! Primer stops the wood or cardboard from soaking up all your paint and gives you a bright, even base color to work with. Let the primer dry completely according to the instructions on the can. One coat is usually enough.
Idea #1: Geometric Glamour with Painter’s Tape
This technique looks incredibly detailed and complex, but it’s one of the easiest ways to get a sharp, modern design. The secret weapon? Simple painter’s tape.
What You’ll Need:
- Your primed box
- Two or three colors of acrylic paint that you like together
- Painter’s tape (the blue or green kind)
- Paintbrushes
Step-by-Step Instructions:
- Paint Your Base Coat: Start by painting your entire box with the lightest of your chosen colors. This will be the color of the lines that appear between your shapes. Let it dry completely. This is very important!
- Create Your Pattern: Tear off strips of painter’s tape and press them firmly onto your box to create a pattern of triangles, squares, or random angular shapes. Make sure the edges of the tape are sealed down tight to prevent paint from seeping underneath.
- Add Your Colors: Now, paint inside the taped-off sections with your other colors. You can make a repeating pattern or make each section a different color. Don’t worry about being neat along the tape—that’s what it’s for!
- The Big Reveal: Here’s the most satisfying part. While the paint is still slightly wet, carefully and slowly peel off the painter’s tape. Pull it away at an angle for the cleanest lines.
- Let It Dry & Seal: Allow your masterpiece to dry completely before applying a coat of sealer to protect it.
Idea #2: Effortless Elegance with Stencils
Stencils are a fantastic shortcut to creating beautiful, intricate designs that look like they were done by a pro. You can find stencils in almost any pattern you can imagine, from floral designs to letters.
What You’ll Need:
- Your primed box
- A stencil of your choice
- Acrylic paint in a contrasting color to your base coat
- A stencil brush or a small sponge
- Painter’s tape
Step-by-Step Instructions:
- Paint the Base: Paint your box with your chosen base color and let it dry fully.
- Position Your Stencil: Place your stencil where you want the design to be. Use a few small pieces of painter’s tape to hold it securely in place. This prevents it from sliding around while you paint.
- Apply the Paint: Put a small amount of paint onto your palette. Dip the very tip of your stencil brush or sponge into the paint, then dab most of it off onto a paper towel. You want a “dry” brush. Less is more here!
- Dab, Don’t Brush: Using an up-and-down dabbing motion, apply the paint over the stencil. Brushing side-to-side can cause paint to bleed under the stencil’s edges. Build up the color slowly with light layers.
- Lift Carefully: Once you’ve covered the design, carefully lift the stencil straight up. You’ll be left with a crisp, perfect image. You can reuse the stencil on other sides of the box if you wish.
- Dry and Seal: Let the design dry completely before sealing your box.
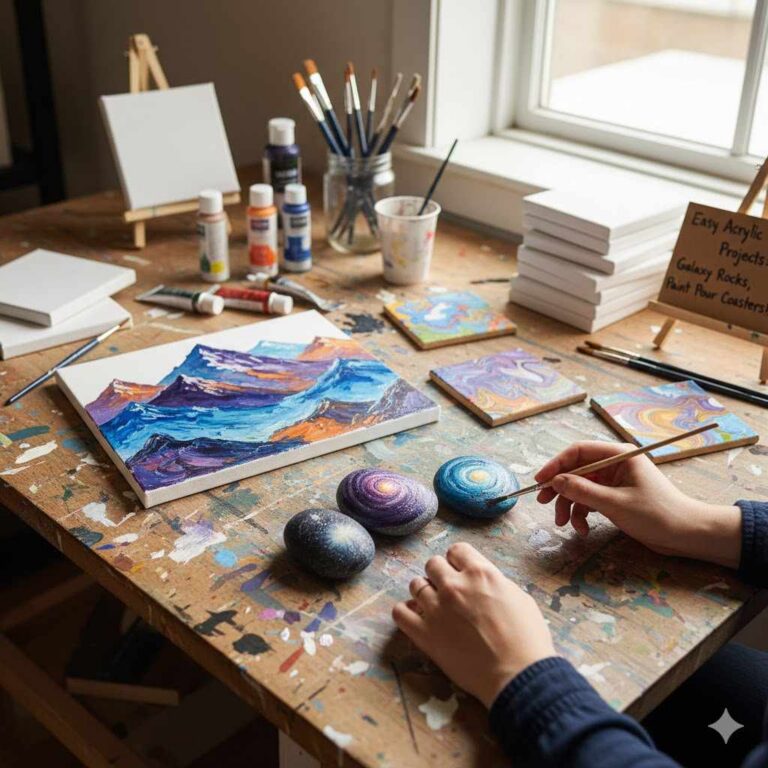
Idea #3: The Magic of Acrylic Pouring
If you love abstract art and want a truly one-of-a-kind design, you have to try acrylic pouring. It looks messy (in a fun way!) and the results are always a beautiful surprise. It’s like a science experiment and an art project in one.
What You’ll Need:
- Your primed box (best for wooden boxes)
- Several colors of fluid acrylic paint
- A pouring medium (like Floetrol or a similar product)
- Small plastic cups (one for each color, plus one larger cup)
- A work surface covered with a plastic sheet (this will get messy!)
- Stir sticks (like popsicle sticks)
Step-by-Step Instructions:
- Prepare Your Paints: In each small cup, mix one paint color with the pouring medium. A good starting ratio is about one part paint to two parts medium, but check your product’s instructions. You want the paint to have the consistency of warm honey.
- Layer the Colors: Take your larger cup and start pouring small amounts of each mixed color into it, one after the other. Don’t stir them together! This is called a “dirty pour.”
- Pour and Tilt: Place your box upside down on a couple of spare cups to elevate it from your work surface. Slowly pour the paint from the large cup onto the center of the box.
- Create the Pattern: Now for the fun part! Gently pick up the box and tilt it in different directions, letting the paint flow over the sides. Keep tilting until the entire surface is covered in a beautiful, marbled pattern.
- Let It Cure: This is the hardest part—waiting! Leave the box to dry for at least 24-48 hours. It needs to be completely cured before you handle it or apply a sealant. Proper disposal of leftover paint is important; check resources from the Environmental Protection Agency for guidance.
Idea #4: Rustic Charm with a Distressed Finish
Love the cozy, weathered look of farmhouse decor? You can create that charming distressed finish yourself with just two colors of paint and a little sandpaper. It’s a wonderful way to give a new box an old soul.
What You’ll Need:
- Your primed wooden box
- Two colors of acrylic or chalk paint (a dark base color and a lighter top color)
- An old candle or some wax
- Fine-grit sandpaper
- Paintbrushes
Step-by-Step Instructions:
- Apply the Dark Base: Paint the entire box with your dark base color (like a dark brown or grey). This color will peek through at the end. Let it dry completely.
- Add Some Wax: Rub the candle wax over the edges and corners of the box—anywhere you want the wood to look naturally worn. The wax will prevent the top coat of paint from sticking in these areas.
- Paint the Top Coat: Now, paint the entire box with your lighter top color (like a creamy white or a soft blue). Apply one or two coats and let it dry completely.
- Reveal the Wear: Once dry, take your sandpaper and gently rub it over the waxed areas. The top layer of paint will easily come off, revealing the dark base color underneath. It creates a beautifully aged effect.
- Wipe and Seal: Wipe away the dust with a cloth and apply a coat of matte or satin sealer to protect your rustic masterpiece.
Let’s compare a few popular paint types to help you choose the best one for your project.
| Paint Type | Best For | Pros | Cons |
|---|---|---|---|
| Acrylic Craft Paint | Almost any surface (wood, cardboard, paper-mache). Perfect for beginners. | Huge color selection, affordable, dries fast, easy to clean up with water. | Can sometimes show brush strokes; may require a primer for best results. |
| Chalk Paint | Creating a matte, vintage, or distressed look on wood. | Requires minimal prep (often no priming or sanding!), adheres well, easy to distress. | More expensive, requires a protective top coat (usually wax or a sealer) to be durable. |
| Spray Paint | Getting a quick, smooth, even coat on larger boxes. Best for solid colors. | Very fast application, no brush marks, durable finish. | Must be used in a well-ventilated area, can be messy, harder to do detailed work. |
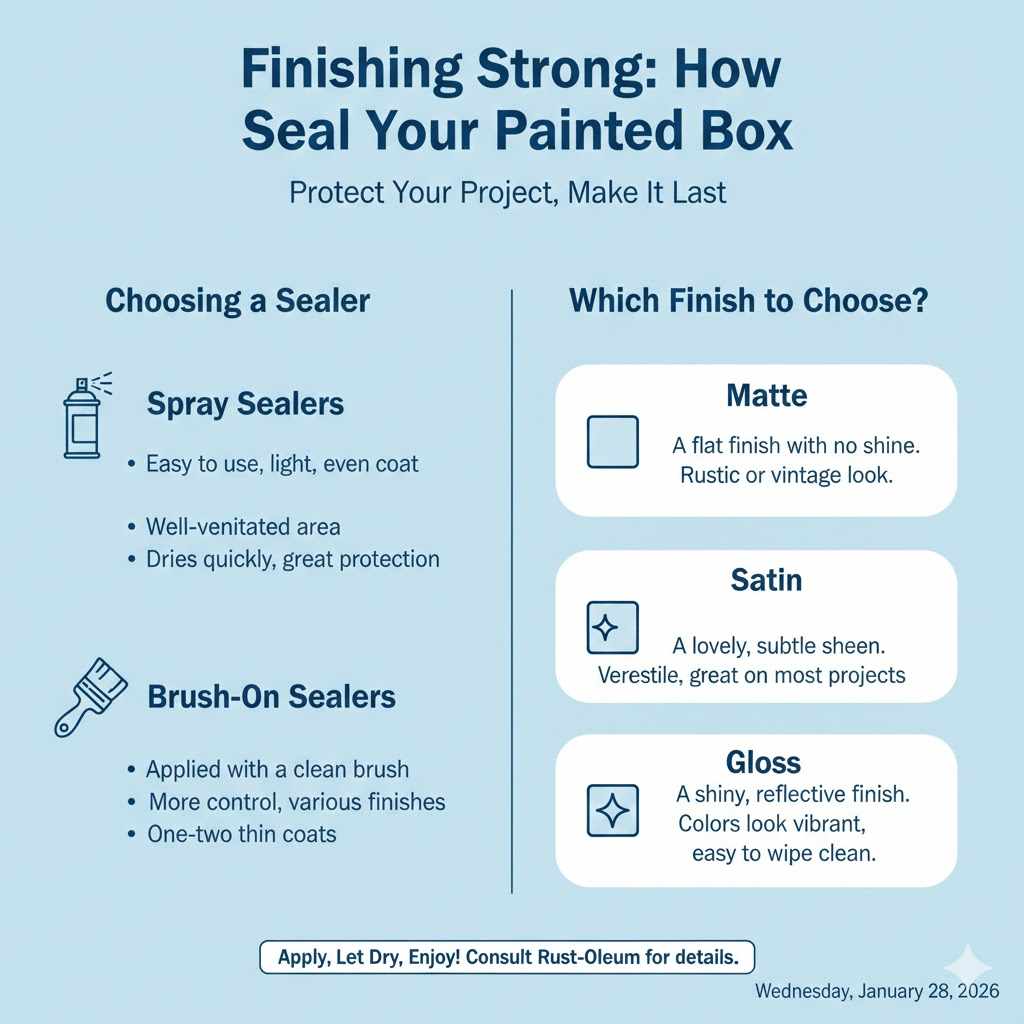
Finishing Strong: How to Seal Your Painted Box
You’ve finished your beautiful design, and it looks amazing! There’s just one final, simple step to make sure it stays that way. Sealing your box protects the paint from chipping, moisture, and fading over time.
Choosing a Sealer:
- Spray Sealers: These are very easy to use. Just spray a light, even coat over your box in a well-ventilated area. They dry quickly and provide great protection.
- Brush-On Sealers: These are applied with a clean brush. They give you a bit more control and come in various finishes.
Which Finish to Choose?
- Matte: A flat finish with no shine. Perfect for a rustic or vintage look.
- Satin: A lovely, subtle sheen. It’s a versatile finish that looks great on most projects.
- Gloss: A shiny, reflective finish. It makes colors look more vibrant and is easy to wipe clean.
To apply, simply follow the directions on the product. Usually, one or two thin coats are all you need. For more detailed information on different finishes, trusted brands like Rust-Oleum offer great resources on their websites. Let the sealer dry completely, and your box is officially ready to be used, displayed, or gifted!
Frequently Asked Questions (FAQ)
What is the best paint for painting a wooden box?
For beginners, acrylic craft paint is the best choice. It’s affordable, comes in countless colors, and is easy to clean up with soap and water. If you want a vintage or distressed look, chalk paint is another fantastic option because it sticks to almost anything without much prep work.
Do I really need to prime the box before painting?
Yes, I highly recommend it! Priming seals the surface of the wood or cardboard. This prevents the material from soaking up your paint, which means you’ll use less paint overall. It also helps your colors look brighter and more true, giving you a much more professional result.
How do I paint on cardboard boxes?
You can absolutely paint cardboard boxes! The process is very similar to wood. Start by making sure the box is clean and dry. Apply a coat of gesso or acrylic primer to prevent the cardboard from getting soggy and to help the paint adhere. Once the primer is dry, you can use acrylic paints just like you would on a wooden box.
How can I get really clean, sharp lines?
The secret to sharp lines is high-quality painter’s tape. After applying your base coat and letting it dry completely, press the tape down firmly along the edges of your design. Then, paint a very thin layer of your base color along the edge of the tape. This seals the edge and any bleed-through will be in the same color. Let that dry, then paint your main color over it. Peel the tape off while the paint is still a bit wet for the best results.
What’s the easiest way to fix a mistake?
Don’t worry, mistakes happen! If the paint is still wet, you can often just wipe it away with a damp cloth or a Q-tip. If the paint is dry, the easiest fix is to let it dry completely, then gently sand the mistake away with fine-grit sandpaper. Wipe away the dust and then simply paint over the area again.
How do I prevent the paint from chipping off?
The key to a durable finish is preparation and protection. Make sure your box is clean, sanded (if wood), and primed before you start. After your design is completely dry, apply one or two thin coats of a clear acrylic sealer. This top coat acts as a protective shield against scratches, dust, and moisture.
You’ve Got This!
There you have it—a handful of simple, stunning, and completely achievable ideas to turn any plain box into a work of art. The most important thing to remember is to have fun with it. This isn’t about perfection; it’s about enjoying the creative process and making something that is uniquely yours.
Pick an idea that excites you, gather your simple supplies, and give it a try. You might be surprised at how easy it is to create something beautiful. Whether you’re making a special gift box, organizing your shelves, or just looking for a relaxing weekend project, painting boxes is a rewarding craft for everyone. Now, go find a box and let your creativity shine!