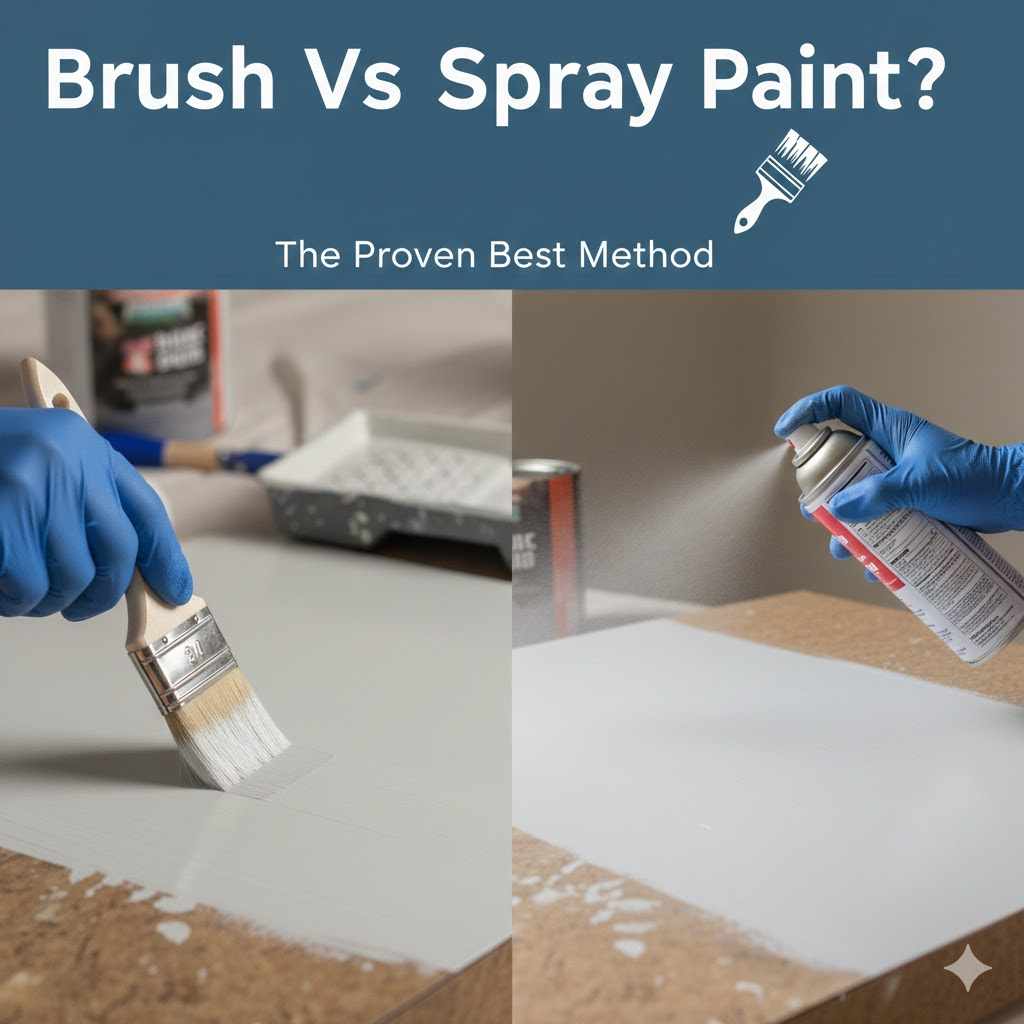
Brush Vs Spray Paint: The Proven Best Method
For a flawless, glass-like finish on furniture or cabinets, spray painting is often superior. For projects requiring precision, durability, and control, like detailed trim work or walls, a brush is the proven best method. Your project’s size, shape, and desired finish will always determine the right tool for the job.
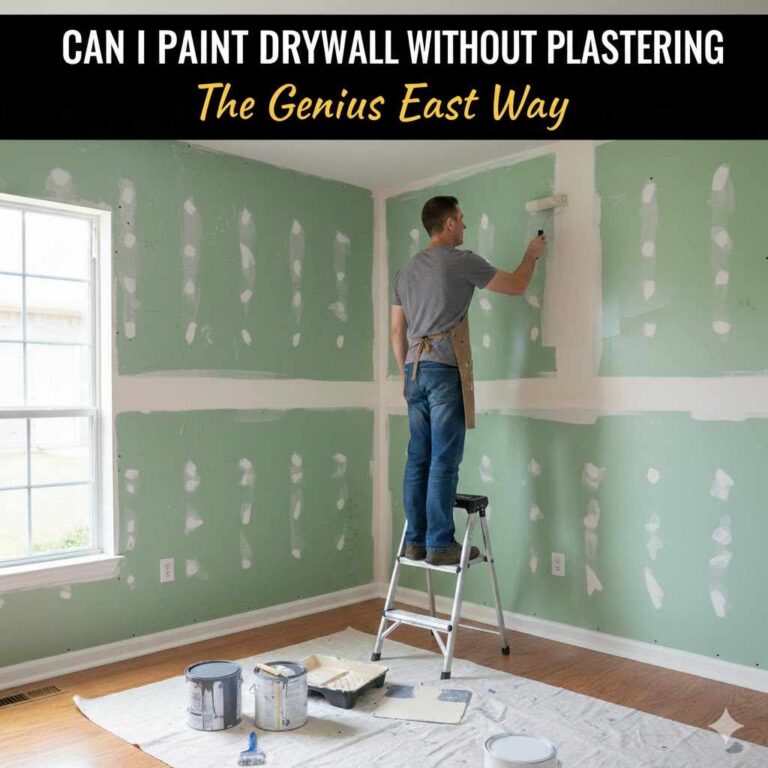
Hello friend! It’s Md Meraj. Stepping into the paint aisle can feel a bit overwhelming, can’t it? You’ve got your beautiful woodworking project ready, but now you face a big choice: do you use a brush or grab a can of spray paint? It’s a question I get all the time. Many beginners worry about making the wrong choice and ending up with a streaky, uneven, or messy finish.
Don’t you worry. Choosing the right paint method is simpler than it looks. There isn’t one “best” way for everything, but there is a best way for your specific project. In this guide, I’ll walk you through everything you need to know about brush and spray painting. We’ll look at the pros and cons of each, when to use them, and I’ll share some simple tips to get you a beautiful, professional-looking result every single time. Let’s get you painting with confidence!
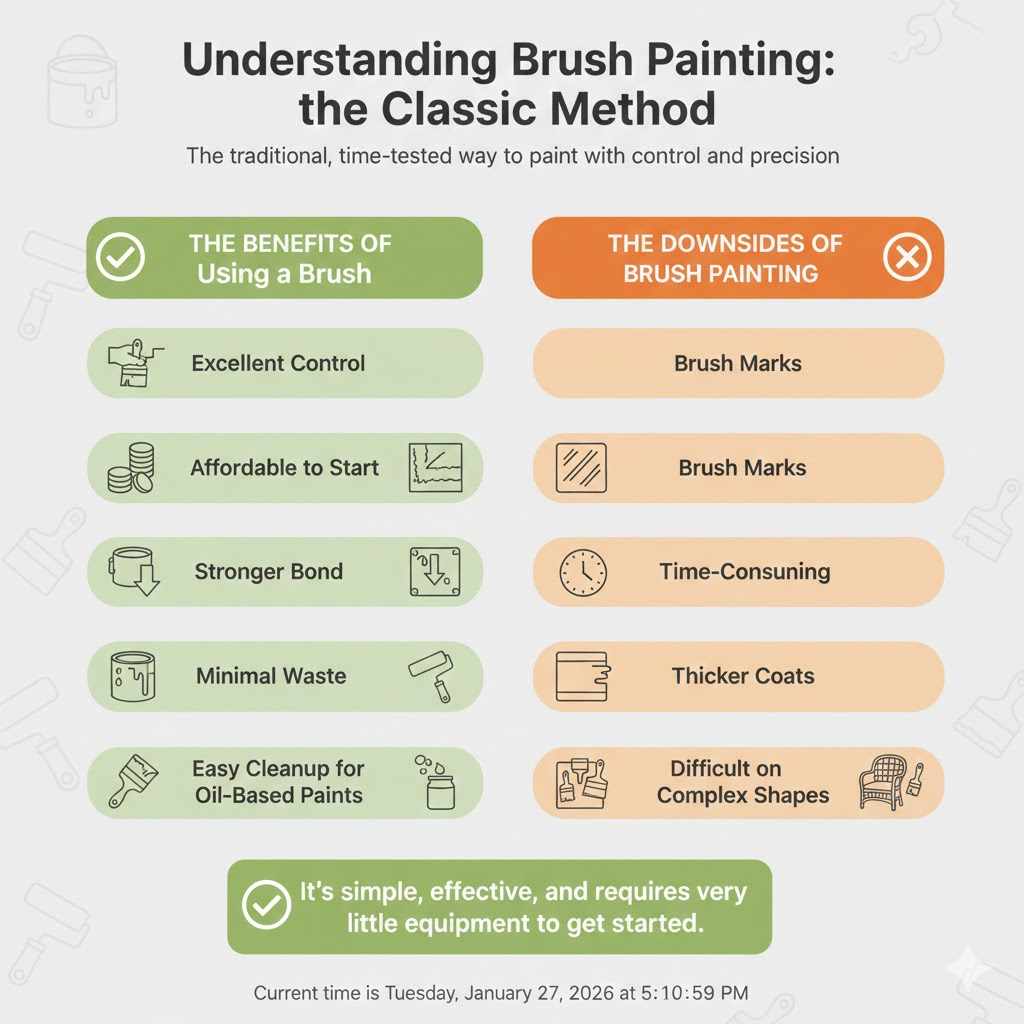
Understanding Brush Painting: The Classic Method
Brush painting is exactly what it sounds like: using a paintbrush to apply paint. It’s the traditional, time-tested method that has been used for centuries. When you paint with a brush, you have a direct, hands-on connection to your project. This control is what makes brush painting so special and reliable for so many jobs.
This method works by dipping the bristles of a brush into paint and then stroking it onto the surface. The brush works the paint into the grain and texture of the wood, creating a strong bond. It’s simple, effective, and requires very little equipment to get started, making it a favorite for DIYers everywhere.
The Benefits of Using a Brush
- Excellent Control: A paintbrush feels like an extension of your arm. It gives you pinpoint accuracy to paint sharp lines, cut in around edges, and carefully cover detailed or intricate areas. If a drip appears, you can fix it instantly.
- Affordable to Start: The entry cost is very low. A couple of high-quality brushes, a paint tray, and a can of paint are all you need. There’s no need for expensive sprayers, compressors, or other complex gear.
- Stronger Bond: The act of brushing physically pushes the paint into the pores and crevices of the surface. This can create a more durable, longer-lasting bond, especially on textured or raw wood.
- Minimal Waste: Nearly all the paint you buy ends up on your project. Unlike spraying, there is very little overspray or paint lost to the air. This makes it a more economical choice in terms of paint usage.
- Thicker Coats: You can apply a thicker, more protective coat of paint with a brush. This is great for hiding minor imperfections on the surface and can sometimes reduce the number of coats you need.
- Easy Cleanup for Oil-Based Paints: While water-based paint cleanup is easy for both methods, cleaning oil-based paint from a brush with mineral spirits is far simpler than cleaning it from a complex spray gun.
The Downsides of Brush Painting
- Brush Marks: The biggest challenge for beginners is avoiding visible brush strokes. It takes practice and good technique to achieve a perfectly smooth, factory-like finish.
- Time-Consuming: Painting large surfaces like a big tabletop, a fence, or an entire wall with a brush can take a lot of time and effort. It is a much slower process compared to spraying.
- Difficult on Complex Shapes: While great for details, painting things with many nooks and crannies, like a wicker chair or detailed spindles, can be slow and tedious with a brush.
Understanding Spray Painting: The Modern Method
Spray painting uses compressed air to atomize paint into a fine mist, which is then directed onto a surface. This can be done with aerosol spray cans, which are perfect for small projects, or with a spray gun system (like an HVLP sprayer) for larger jobs. The goal of spray painting is to apply thin, even coats of paint quickly for a super-smooth finish.
This method is all about speed and finish quality. By applying paint in a fine, uniform mist, you can avoid the brush marks that can sometimes happen with traditional painting. It’s the secret behind that flawless, factory-new look you see on professionally finished furniture and cabinets.
The Benefits of Using Spray Paint
- Incredibly Smooth Finish: When done correctly, spray painting leaves a flawless, glass-like surface. Since there are no bristles touching the project, there is zero chance of brush marks.
- Exceptional Speed: Spraying is significantly faster than brushing, especially on large, open surfaces or items with complex shapes. You can paint a chair with multiple spindles in minutes, a task that might take an hour with a brush.
- Excellent for Irregular Shapes: Spray paint easily gets into tight corners, detailed carvings, and other hard-to-reach areas where a brush would struggle to provide even coverage.
- Consistent Coats: Spraying applies very thin, even layers of paint. This consistency is key to a professional-looking result and helps the paint dry quickly and evenly.
The Downsides of Spray Painting
- Significant Prep Time: Spray painting requires a lot of preparation. You must carefully mask off everything you don’t want painted. Overspray (the fine mist of paint that drifts) can travel and settle on nearby objects, floors, and walls.
- Steeper Learning Curve: Achieving a perfect finish without drips, runs, or uneven patches takes practice. You need to learn the right distance, speed, and overlapping motion to get it right.
- More Paint Waste: A good portion of the paint—sometimes as much as 30%—is lost to overspray. This means you’ll need to buy more paint for your project compared to brushing.
- Requires a Dedicated Space: You need a well-ventilated area, preferably outdoors or in a garage with open doors, to spray safely. You also need to protect the area from overspray. For tips on ventilation safety, the Environmental Protection Agency (EPA) offers great information on dealing with paint fumes.
- Higher Initial Cost: While aerosol cans are cheap for one-off jobs, the cost adds up. For larger projects, investing in a quality spray gun system can be expensive.
Brush vs. Spray Paint: A Head-to-Head Comparison
To make the decision even clearer, let’s put these two methods side-by-side. Seeing the differences in a simple table can help you quickly decide which one is the right fit for your next project.
| Feature | Brush Painting | Spray Painting |
|---|---|---|
| Finish Quality | Good to excellent. Can show subtle brush marks. Gives a handcrafted feel. | Excellent. Produces a very smooth, flawless, factory-like finish. |
| Speed | Slower, methodical process. Best for taking your time on details. | Much faster, especially on large surfaces or complex items. |
| Control & Precision | Superior. Perfect for cutting in, edges, and fine details. | Less precise. Requires extensive masking to control where paint goes. |
| Ease of Use (for a beginner) | Easy to start, but mastering a smooth finish takes practice. | Can be tricky at first to avoid drips, runs, and uneven coats. |
| Prep & Cleanup | Minimal prep. Cleanup is simple: wash the brush and tray. | Extensive prep (masking). Cleanup of a spray gun can be complex. |
| Project Cost | Low initial cost. Less paint waste, making it cheaper for the same coverage area. | Higher cost due to paint waste (overspray) and equipment (sprayers). |
| Best For… | Interior walls, trim, window frames, detailed furniture, small touch-ups. | Cabinet doors, furniture with complex shapes, fences, louvered doors. |
Which Method Is Best for Your Project?
The theory is great, but let’s get practical. Here’s my advice on which method to choose for some common DIY and woodworking projects.
For Large, Flat Surfaces (like Walls or Tabletops)
For interior walls, a brush (for cutting in edges) and a roller (for the main surface) is the winning combination. It’s efficient, clean, and gives great coverage. For a large wooden tabletop you’ve built, spray painting can give you that stunning, perfectly uniform finish that’s hard to get with a brush over a big area. If you want that handcrafted look, however, a brush is still a wonderful choice.
For Intricate Furniture (like Chairs with Spindles or Ornate Pieces)
Winner: Spray Paint. This is where spray painting truly shines. Trying to get a brush into every little corner of a wicker chair or between the spindles of a Windsor chair is a recipe for frustration and a blotchy finish. A sprayer covers all these hard-to-reach spots evenly and in a fraction of the time.
For Kitchen Cabinets
This is a popular project with a split decision. My recommendation is a hybrid approach. Use a high-quality brush for the cabinet frames (the boxes attached to the wall). It gives you control and avoids getting overspray all over your kitchen. Then, take the doors and drawers off and spray paint them in a separate, well-ventilated space. This gives you the best of both worlds: durable, clean frames and perfectly smooth doors.
For Outdoor Projects (like Fences or Decks)
For a picket fence with lots of individual boards, spray painting can be a huge time-saver. For a deck floor, using a stain pad or roller is often more effective and durable. However, for deck railings and balusters, a sprayer can once again save you a lot of time. Always check if your paint or stain is “sprayable” first.
My Pro Tips for a Perfect Finish, Every Time
Whichever method you choose, a great result comes down to good technique. Here are a few of my go-to tips to help you succeed.
If You Choose to Use a Brush:
- Invest in a Good Brush: A cheap brush will shed bristles and leave ugly streaks. For water-based (latex) paints, use a synthetic bristle brush (nylon/polyester). For oil-based paints, a natural bristle brush works best. A quality brush from a trusted brand like Purdy is worth the investment.
- Don’t Overload the Brush: Dip only the first third of the bristles into the paint. Tap it gently against the side of the can; don’t wipe it clean. This loads the brush properly for a smooth release.
- Paint with a Light Touch: Hold the brush like a pencil, not a hammer. Use long, smooth strokes. Let the tips of the bristles do the work for you. Pressing too hard is what causes deep brush marks.
- Always Sand Between Coats: After your first coat is fully dry, lightly sand the entire surface with very fine-grit sandpaper (220-grit is perfect). This knocks down any minor imperfections and gives the next coat a better surface to grip, leading to a much smoother final finish.
If You Choose to Use Spray Paint:
- Safety and Prep Are Everything: Wear a respirator mask designed for paint fumes, not just a dust mask. Work in a space with plenty of airflow. Cover everything you don’t want painted with drop cloths and painter’s tape. This step is non-negotiable!
- Maintain a Consistent Distance: Hold the can or sprayer about 8-12 inches away from the surface. Getting too close will cause drips, and being too far away will result in a dusty, uneven texture.
- Use a Sweeping Motion: Start spraying just off the edge of your project, move across it in a steady, sweeping motion, and stop spraying just after you’ve passed the other edge. This prevents heavy paint buildup at the start and end of each pass.
- Overlap Your Strokes: Overlap each new pass by about 50%. This ensures you get even coverage without visible lines or stripes. Multiple thin coats are always better than one thick one.
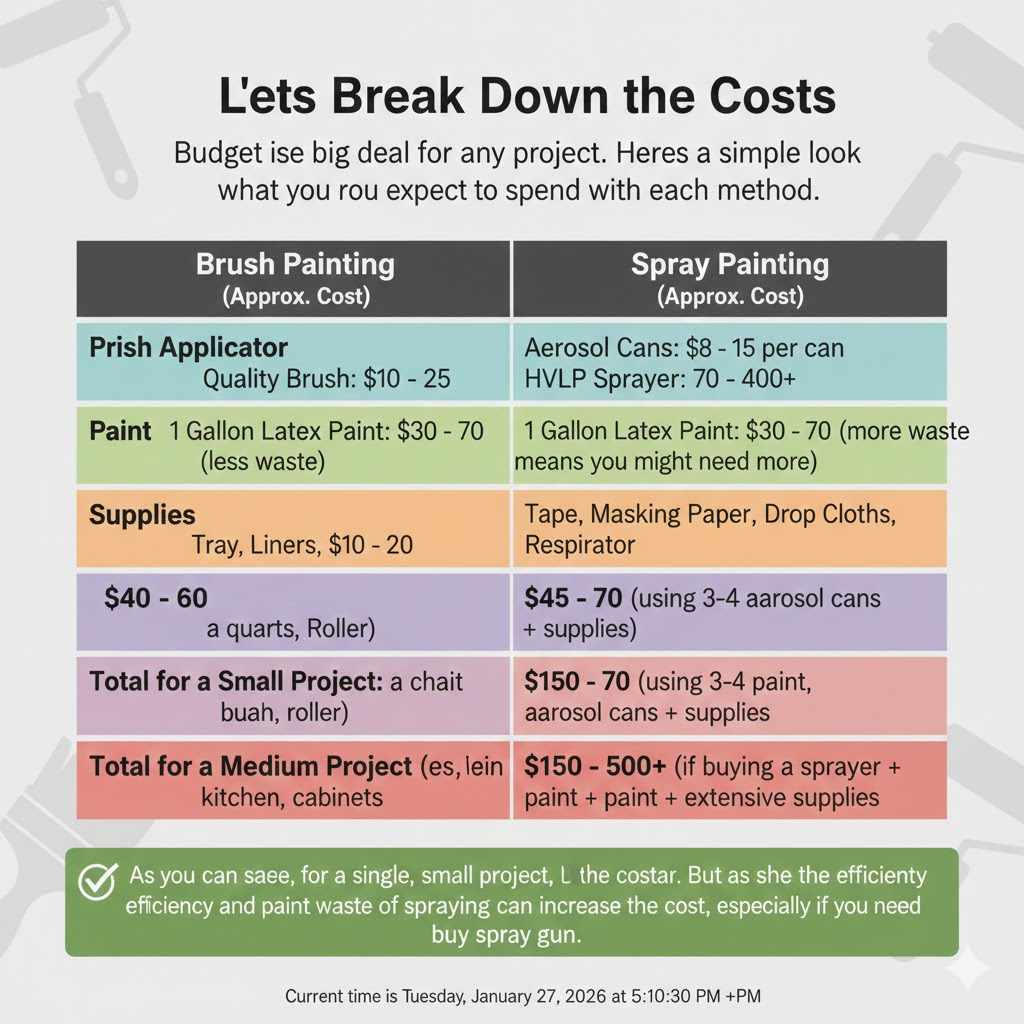
Let’s Break Down the Costs
Budget is a big deal for any project. Here’s a simple look at what you can expect to spend with each method.
| Item | Brush Painting (Approx. Cost) | Spray Painting (Approx. Cost) |
|---|---|---|
| Paint Applicator | Quality Brush: $10 – $25 | Aerosol Cans: $8 – $15 per can HVLP Sprayer: $70 – $400+ |
| Paint | 1 Gallon Latex Paint: $30 – $70 (less waste) | 1 Gallon Latex Paint: $30 – $70 (more waste means you might need more) |
| Supplies | Tray, Liners, Roller: $10 – $20 | Tape, Masking Paper, Drop Cloths, Respirator: $30 – $50 |
| Total for a Small Project (e.g., a chair) | $40 – $60 (using a quart of paint) | $45 – $70 (using 3-4 aerosol cans + supplies) |
| Total for a Medium Project (e.g., kitchen cabinets) | $80 – $150 (gallon of paint, brushes, roller) | $150 – $500+ (if buying a sprayer + paint + extensive supplies) |
As you can see, for a single, small project, the costs can be similar. But as the projects get bigger, the efficiency and paint waste of spraying can increase the cost, especially if you need to buy a spray gun.
Frequently Asked Questions (FAQ)
1. Is spray paint more durable than brush paint?
Not necessarily. Durability is more about the quality of the paint and the prep work (sanding, priming) than the application method. However, a brushed-on paint can sometimes create a thicker, more protective single coat, which some people find more durable for high-traffic surfaces.
2. Can I use a brush to touch up a spray-painted surface?
Yes, but it can be tricky to match the texture. Spray paint has a very smooth, atomized finish. A brush touch-up might be noticeable. For best results, use a very fine artist’s brush and dab the paint on lightly. For a better match, you can spray a little paint into the cap and use that for the touch-up.
3. How do I avoid brush marks when painting?
To avoid brush marks, use a high-quality brush, don’t press too hard, and add a paint conditioner (like Floetrol for latex paint) to your paint. This thins the paint slightly and slows the drying time, allowing the paint to level out and the brush strokes to disappear.
4. Is spray painting hard for a beginner?
It has a steeper learning curve than brushing. The key is to practice on a piece of scrap cardboard first. Learn the right speed and distance before you ever point it at your actual project. Once you get the feel for it, it becomes very easy and satisfying.
5. What is better for kitchen cabinets: brush or spray?
For the absolute smoothest, most professional finish on cabinet doors, spraying is the winner. However, a hybrid approach is often best. Use a brush and roller on the cabinet boxes that are fixed to the wall and spray the removable doors and drawers elsewhere. This minimizes mess in your kitchen and gives you that perfect finish where it counts most.
6. Do I need to use a primer for both methods?
Yes! Primer is crucial for a lasting, professional paint job, no matter how you apply the paint. It ensures the paint sticks properly, covers stains, and helps you achieve a true and even color with fewer top coats. Never skip the primer!
So, What’s the Final Verdict?
After all of this, the proven best method is… the one that’s right for your project! I know, you were hoping for a single answer, but a good woodworker knows that the tool should always match the task.
Think of it this way:
- Choose a brush when you need control, durability, and a low-cost, simple setup. It’s your best friend for cutting in walls, painting trim, or giving a piece of furniture a beautiful, handcrafted finish.
- Choose spray paint when you need speed and a perfectly smooth, modern finish. It’s the champion for covering complex shapes like chairs and railings, or for giving cabinet doors that flawless, factory-new look.
Don’t be afraid to try both! The more you paint, the more you’ll learn which method you prefer for different jobs. The most important thing is to prepare your surface well, take your time, and enjoy the process of transforming something with your own two hands. Now, go make something beautiful!