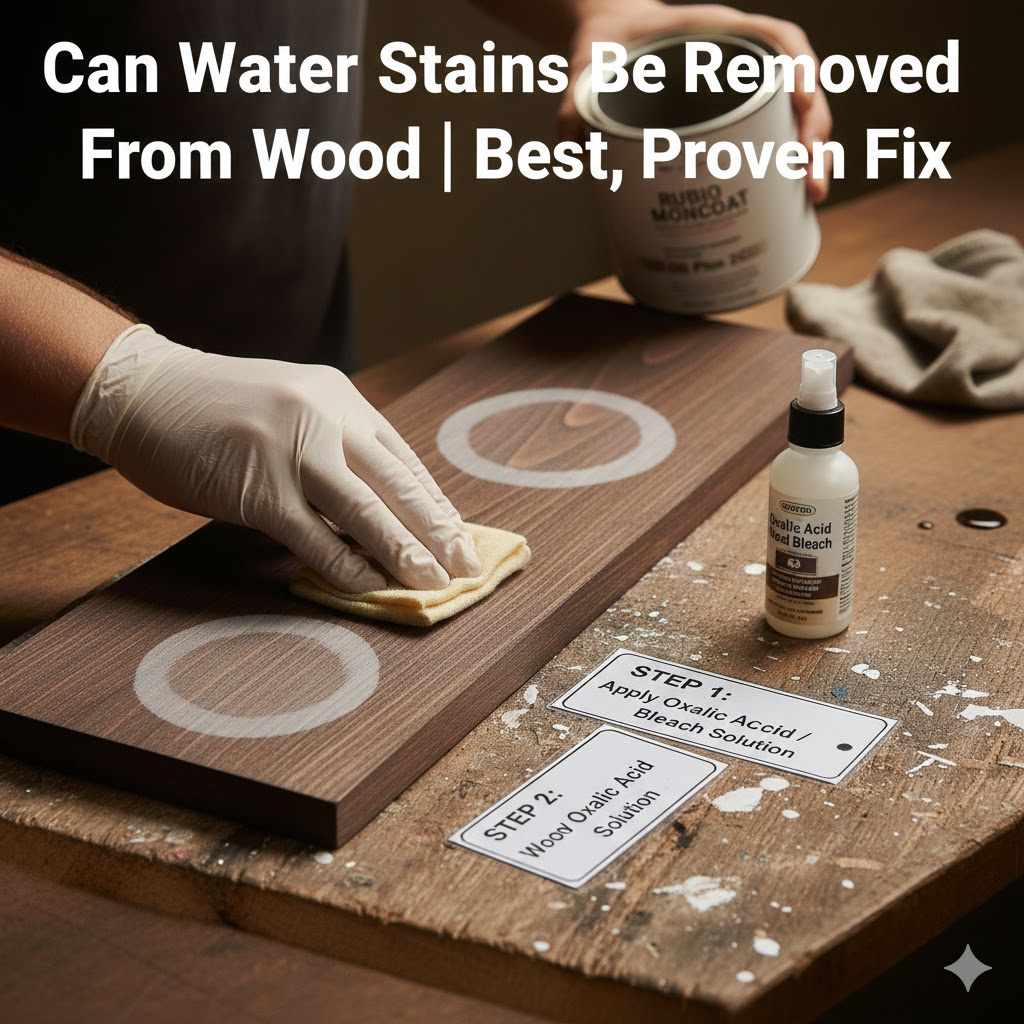
Can Water Stains Be Removed From Wood | Best, Proven Fix
Yes, most water stains can be removed from wood. White, cloudy rings are usually trapped moisture in the top finish and can often be fixed with gentle heat from an iron or common household items. Darker stains have soaked into the wood itself, requiring more effort like wood bleach or sanding, but are still repairable.
Hello there, fellow maker! It’s Md Meraj, and today we’re tackling one of the most common heartbreaks for any wood owner: the dreaded water stain. You know the one. That cloudy white ring left by a sweating glass or the dark, ugly spot from a leaky plant pot. It can make a beautiful piece of furniture look worn and neglected.
But here’s the good news—that mark doesn’t mean your favorite table is ruined. Not at all. Most of the time, you can fix it yourself with just a little know-how and a few simple tools. It’s a much easier task than you might think.
In this guide, I’m going to walk you through the proven, step-by-step methods to remove both light and dark water stains from your wood furniture. We’ll make that eyesore disappear and bring back the beauty of the wood grain. Let’s get started!
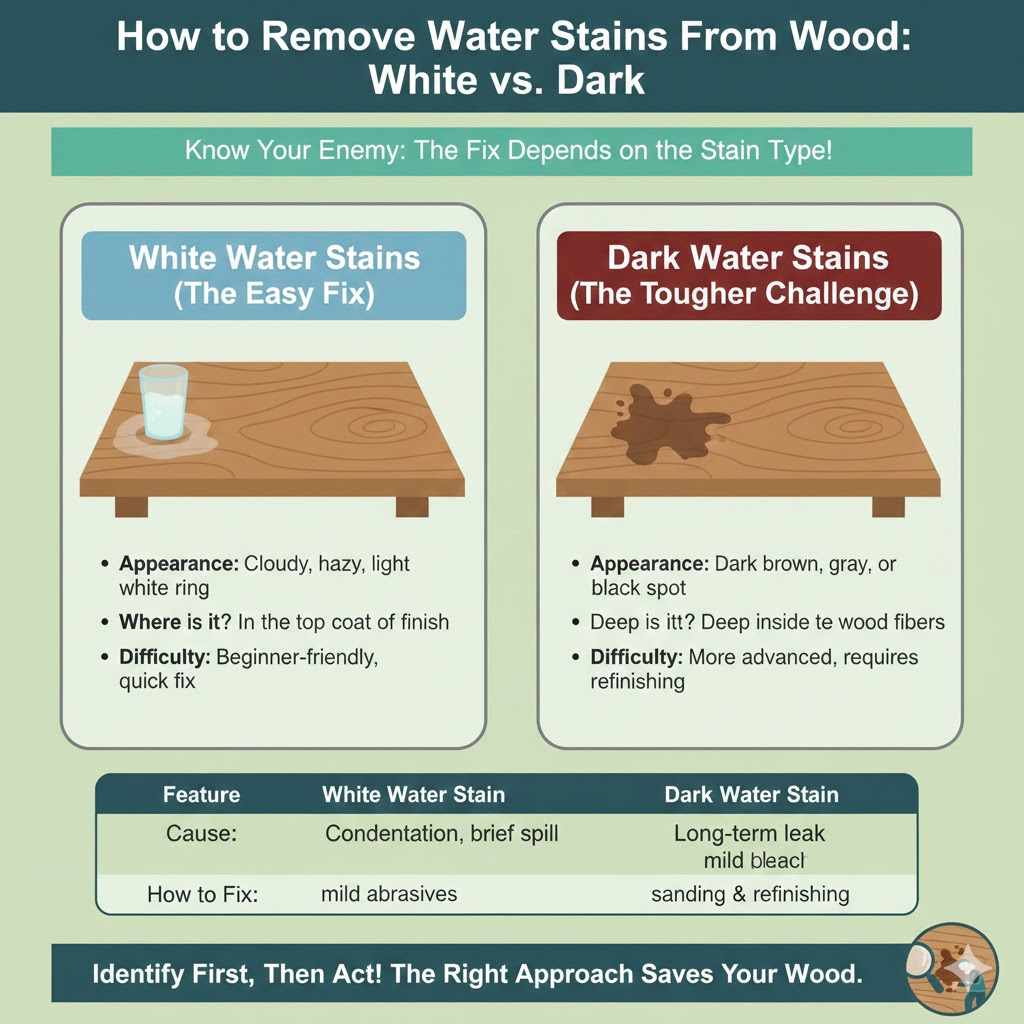
First, Understand Your Enemy: White Stains vs. Dark Stains
Before you grab any tools, the most important step is to identify what kind of stain you have. Water stains on wood come in two main varieties: light (white or cloudy) and dark (black or deep brown). Knowing the difference is key because the fix for one won’t work on the other.
White Water Stains (The Easy Fix)
A white or cloudy ring is actually good news! This type of stain means the moisture is trapped within the top layer of the wood’s finish (like lacquer, shellac, or varnish). It hasn’t soaked into the wood itself. The cloudiness is just moisture that can’t escape. Because it’s a surface-level problem, these are usually much easier to remove.
- Cause: Condensation from a cold glass or a brief spill.
- Location: Trapped in the finish layer.
- Difficulty: Beginner-friendly and often quick to fix.
Dark Water Stains (The Tougher Challenge)
If you see a dark brown or black stain, it means water has soaked past the protective finish and has seeped deep into the actual wood fibers. This often happens from a long-term leak, like a potted plant that has been sitting on the surface for a while. The dark color is a result of a chemical reaction between the water, minerals, and the natural tannins in the wood.
- Cause: A long-term water leak or a spill left for too long.
- Location: Soaked into the wood grain itself.
- Difficulty: More advanced, requiring more steps and patience.
Here’s a quick table to help you tell them apart:
| Feature | White Water Stain | Dark Water Stain |
|---|---|---|
| Appearance | Cloudy, hazy, light white ring | Dark brown, gray, or black spot |
| Where is it? | In the top coat of finish | Deep inside the wood fibers |
| How to Fix | Gentle heat, oils, or mild abrasives | Wood bleach, sanding, and refinishing |
How to Remove White Water Stains: The Easiest Methods
Since white stains are the most common, let’s start there. I’ll show you my go-to methods, starting with the gentlest one first. Always start with the least aggressive method to avoid causing any unnecessary damage to your finish.
Gather Your Tools and Materials
For most white stains, you won’t need anything fancy. You probably have these items at home right now.
- A clean, dry cotton cloth (an old t-shirt works great)
- A clothes iron
- Mayonnaise (full-fat) or petroleum jelly
- White, non-gel toothpaste
- Baking soda
- Furniture polish or wax
Method 1: The Iron and Cloth Trick (My Favorite Fix)
This is my number one recommendation for white stains. The gentle heat from the iron helps the finish expand slightly, allowing the trapped moisture to evaporate. It sounds a little strange, but it works like a charm.
- Prep Your Iron: Empty all the water from your clothes iron. You must use a dry iron. Set it to the lowest heat setting with no steam.
- Place a Barrier: Lay a clean, dry cotton cloth over the water stain. A t-shirt, towel, or pillowcase will do. Do not place the hot iron directly on the wood!
- Apply Gentle Heat: Place the warm iron on the cloth over the stain. Move it around slowly in a circular motion for 15-20 seconds.
- Check Your Progress: Lift the iron and the cloth to check the stain. You should see it starting to fade. If the stain is still there, let the wood cool down for a few minutes and repeat the process.
- Patience is Key: This may take a few tries. It’s better to use low heat several times than to use high heat and risk damaging the finish. Once the stain is gone, let the wood cool completely and apply a little furniture polish.
Method 2: The Mayonnaise or Petroleum Jelly Trick
This one might surprise you, but it’s a classic for a reason. The oil in mayonnaise or petroleum jelly slowly seeps into the finish, displacing the trapped water. This method is incredibly gentle, but it requires patience.
- Apply a Generous Layer: Dab a good amount of full-fat mayonnaise or petroleum jelly directly onto the white stain.
- Let It Sit: Cover the spot with a paper towel and let it sit for at least a few hours, or even overnight for stubborn stains. The oil needs time to work its magic.
- Wipe and Buff: After letting it sit, wipe away the mayonnaise or jelly with a clean, soft cloth. The stain should be gone or significantly lighter. Buff the area with a clean cloth to restore the shine.
Method 3: The Toothpaste and Baking Soda Method
If heat and oil don’t quite get the job done, you can try a very mild abrasive. White, non-gel toothpaste works well because it has fine polishing agents that can gently buff away the stained finish layer.
- Create a Paste: Mix equal parts of white, non-gel toothpaste and baking soda in a small bowl.
- Gently Rub the Stain: Dab a small amount of the paste onto a clean, soft cloth. Gently rub the paste onto the water stain, moving with the direction of the wood grain. Use very light pressure.
- Wipe and Clean: After rubbing for about a minute, use a clean, damp cloth to wipe away all the paste residue. Dry the area immediately with another clean cloth.
- Check and Repeat if Needed: If the stain is still faintly visible, you can try one more time. Once it’s gone, buff the area with a bit of furniture polish to restore its protective coating.
| Method for White Stains | Best For | Time Required | Important Cautions |
|---|---|---|---|
| Iron and Cloth | Most fresh to medium-aged stains | 5-15 minutes | Use lowest heat, no steam, and always use a cloth barrier. |
| Mayonnaise / Jelly | Older or stubborn white stains | 2-12 hours | Very safe, but slow. Works best on durable finishes like polyurethane. |
| Toothpaste / Soda | Small, stubborn stains that other methods didn’t remove | 5-10 minutes | Use a non-gel paste and rub very gently to avoid scratching the finish. |
How to Remove Dark Water Stains: A More Advanced Approach
Okay, it’s time to talk about the tough ones. Dark water stains require a different strategy because you need to treat the wood itself, not just the finish. This process is more involved and requires some careful work, but you can absolutely do it.
A Quick Safety Note: We will be working with stronger materials here. Please make sure you are in a well-ventilated area and wearing safety gear, including gloves and protective eyewear.
Gather Your Advanced Tools and Materials
- Safety gloves and goggles
- Chemical-safe paint stripper (if the piece is heavily finished)
- Scraper or putty knife
- Sandpaper (medium and fine grits, like 120 and 220)
- Oxalic acid (often sold as “wood bleach”)
- A small brush for application
- Baking soda and water for neutralizing
- Clean cloths and sponges
- Wood stain and top coat finish (to match your piece)
The Step-by-Step Guide to Removing Dark Stains
The goal here is to remove the finish, treat the stained wood fibers with wood bleach to remove the discoloration, and then refinish the area to match the rest of the piece.
- Remove the Old Finish: First, you have to get to the bare wood. If the piece has a thick finish like polyurethane, you’ll need to apply a chemical stripper over the stained area according to the product’s directions. For lighter finishes like oil or wax, you can often just sand the finish off. Sand with a medium-grit sandpaper (around 120-grit) until you reach raw wood in the stained area.
- Apply Wood Bleach (Oxalic Acid): Oxalic acid is fantastic for removing iron and water stains from wood. It chemically reverses the staining process. Before you start, please review safety guidelines for handling this chemical, such as those provided by the National Institute for Occupational Safety and Health (NIOSH). Mix the oxalic acid crystals with warm water as directed on the packaging. Use a small brush to apply the solution only to the dark-stained area of the wood. Try to keep it contained to just the spot you’re treating.
- Let It Work and Dry: Let the solution sit on the wood until it dries completely. As it dries, you will see the dark stain begin to lighten and disappear. This can take anywhere from an hour to several hours. For very deep stains, a second application might be necessary.
- Neutralize the Wood: This is a critical step! After the stain is gone and the wood is dry, you must neutralize the acid. Mix a solution of one cup of water with two tablespoons of baking soda. Use a sponge to wipe this solution over the treated area. You might see some light fizzing, which is normal. This stops the bleaching action and prevents any issues with your new finish.
- Final Rinse and Dry: Wipe the area with a clean cloth dampened with plain water to remove any baking soda residue. Then, let the wood dry completely. This can take up to 24 hours. Be patient—you want it bone-dry before moving on.
- Sand and Blend: Once dry, lightly sand the treated area with a fine-grit sandpaper (220-grit) to smooth out the wood grain and create a seamless transition with the surrounding wood. Feather the edges so it blends nicely.
- Refinish to Match: This is where your artistry comes in. Carefully apply a wood stain that matches the original color of your furniture. It may take a couple of coats. Once you’re happy with the color match and the stain is dry, apply a protective top coat (like polyurethane, lacquer, or wax) to seal the wood and match the original sheen.
This process takes time, but by restoring the wood from the inside out, you can make even the ugliest black stain vanish for good.
Frequently Asked Questions (FAQ)
1. What’s the real difference between a white water stain and a black water stain?
Think of it like this: a white stain is moisture stuck in the “raincoat” (the wood’s finish), while a black stain is a mold or mineral reaction that has soaked through the raincoat and into the “shirt” (the wood itself). That’s why one is easy to wipe away, and the other requires deeper cleaning.
2. Can I use a hairdryer instead of an iron to remove white stains?
Yes, you can! A hairdryer on a low to medium heat setting is a great alternative. It’s a bit gentler than an iron. Keep the hairdryer moving a few inches from the surface to distribute the heat evenly and avoid overheating one spot.
3. Will these methods damage my antique furniture?
For valuable or antique pieces, it’s always best to be cautious. Start with the gentlest method first (like mayonnaise or petroleum jelly). If you are nervous about using heat or chemicals, test the method on a hidden spot, like the underside of a table, before working on the visible stain.
4. Why does mayonnaise actually work on wood stains?
It sounds strange, but the science is simple. Mayonnaise is an emulsion of oil and vinegar. The oils slowly penetrate the wood finish, displacing the trapped water molecules. The mild acidity from the vinegar can also help break down the stain. It’s a slow, gentle process that “pushes” the water out.
5. How can I prevent water rings and stains in the future?
Prevention is the best cure! The easiest way is to use coasters for all drinks—hot or cold. Use placemats under vases or potted plants, and consider placing a waterproof tray under any plants on wood surfaces. Most importantly, wipe up any spills immediately with a dry cloth before they have time to soak in.
6. What if none of these methods work on my stain?
If you’ve tried all the methods for a white stain and it won’t budge, it might be a heat stain, which looks similar but is caused by a hot object damaging the finish. For a dark stain that won’t lift with wood bleach, the discoloration may be too deep. In these rare cases, the entire surface may need to be professionally stripped, sanded, and refinished to achieve a perfectly even look.
Conclusion: Your Wood is Worth a Little Love
See? That water stain that caused you so much worry is really just a problem waiting for a solution. Whether it’s a simple white ring or a daunting dark spot, you now have the knowledge and the step-by-step plan to fix it with your own two hands.
Working with wood is about more than just building—it’s also about caring for and restoring the pieces that make our homes beautiful and functional. Taking the time to erase a blemish like a water stain not only brings your furniture back to life but also gives you a wonderful sense of accomplishment.
So take a deep breath, gather your supplies, and give it a try. Be patient, start with the gentlest method, and you’ll be amazed at what you can achieve. Happy fixing!