Can Wood Stain Be Sprayed: Essential Genius Tips
Yes, you can absolutely spray wood stain! Spraying is a fantastic method for achieving a fast, even, and professional-looking finish, especially on large surfaces or projects with intricate details like chairs or cabinets. Using the right sprayer and technique makes the job much easier and gives you beautiful, consistent results every time.
Hello, I’m Md Meraj. In my workshop, I’ve seen many people struggle with applying wood stain. They end up with blotches, streaks, or an uneven color. It can be so frustrating! You spend hours building something beautiful, only to feel disappointed by the final finish. If this sounds familiar, don’t worry. There is a better way.
Spraying wood stain can seem intimidating, but it’s actually a simple technique once you learn the basics. It’s my go-to method for big projects. In this guide, I’ll walk you through everything, step-by-step. We will cover choosing the right sprayer, preparing your wood, and the secrets to a perfect application. Let’s get you staining like a pro!
Why Should You Spray Wood Stain?
You might be wondering if it’s worth getting a sprayer just for staining. For many projects, the answer is a big “yes!” While brushing and wiping stain on by hand is a classic method, spraying offers some amazing advantages that can save you time and improve your results. Let’s look at the benefits.
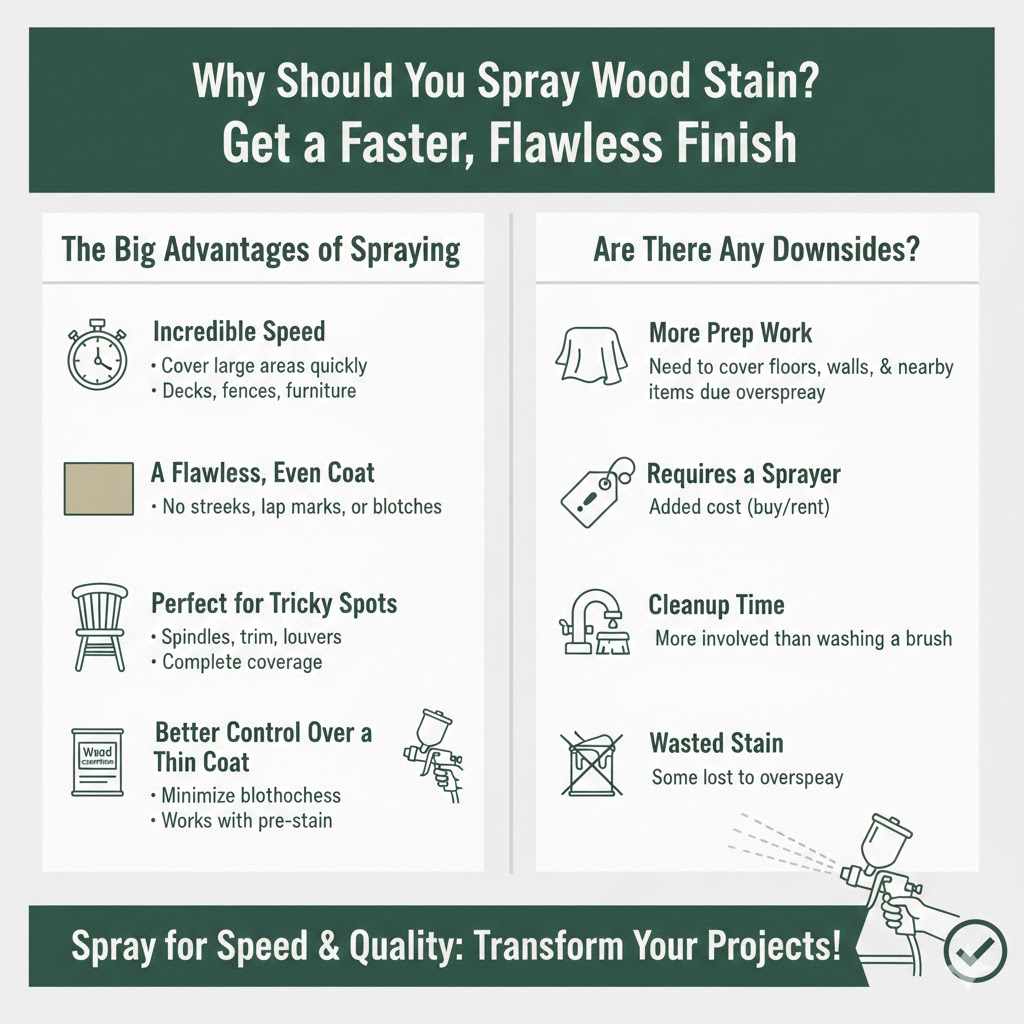
The Big Advantages of Spraying
- Incredible Speed: Spraying is much faster than brushing, especially on large surfaces like decks, fences, or tabletops. You can cover a huge area in a fraction of the time it would take with a brush or rag.
- A Flawless, Even Coat: A sprayer applies a fine, consistent mist of stain. This helps you avoid the streaks, lap marks, and blotches that can happen with brushing. The result is a more professional and uniform color.
- Perfect for Tricky Spots: Think about staining chairs with spindles, detailed trim, or louvered doors. Getting a brush into all those nooks and crannies is tough. A sprayer easily reaches these difficult spots, ensuring complete coverage.
- Better Control Over a Thin Coat: Some woods, like pine or maple, tend to absorb stain unevenly. Applying a very light, even coat with a sprayer can help minimize this blotchiness, especially when paired with a pre-stain wood conditioner.
Are There Any Downsides?
Of course, no method is perfect for every situation. It’s good to know the trade-offs.
- More Prep Work: Spraying creates overspray, which is a fine mist of stain that can get on everything nearby. You need to spend extra time covering floors, walls, and anything else you don’t want to be stained.
- Requires a Sprayer: You’ll need to buy or rent a paint sprayer, which is an added cost if you don’t already own one.
- Cleanup Time: Cleaning a sprayer is more involved than washing a brush. You have to thoroughly clean the gun, nozzle, and hoses right after you’re done to prevent clogs.
- Wasted Stain: Some of the stain is lost to overspray. While modern HVLP sprayers are very efficient, you will still use a bit more stain than you would with the hand-application method.
Choosing the Right Sprayer for Wood Stain
The tool you choose makes a huge difference. Not all sprayers are created equal, and some are much better suited for thin liquids like stain. The key is finding one that gives you control and a fine finish. Here are the most common types that work well for stain.
HVLP (High Volume, Low Pressure) Sprayers
This is my top recommendation for beginners and most DIY projects. HVLP sprayers use a high volume of air at a low pressure to atomize the stain into a fine, soft spray. This means less overspray, less wasted stain, and more control. They are perfect for furniture, cabinets, and other detailed woodworking projects.
Airless Sprayers
Airless sprayers are the powerhouses of the spraying world. They pump stain at very high pressure through a tiny tip. They are incredibly fast and great for huge projects like decks, fences, or house siding. However, they put out a lot of material quickly and create more overspray, so they require a bit more practice to control.
LVLP (Low Volume, Low Pressure) Sprayers
LVLP sprayers are similar to HVLP sprayers but require a smaller air compressor. They are very efficient and produce a great finish with minimal overspray. If you already have a small- to medium-sized air compressor, an LVLP gun is an excellent choice. They offer professional quality and great control.
Choosing Your Sprayer: A Quick Comparison
Here is a simple table to help you decide which sprayer is best for your needs.
| Sprayer Type | Best For | Pros | Cons |
|---|---|---|---|
| HVLP Sprayer | Furniture, cabinets, trim, most DIY projects | Fine finish, less overspray, easy to control | Slower than airless, may need to thin stain |
| Airless Sprayer | Decks, fences, large walls, outdoor projects | Very fast, can spray thicker materials | More overspray, less control for fine work, requires practice |
| LVLP Sprayer | Detailed work, furniture, requires an air compressor | Excellent finish, very little overspray, efficient | Requires a separate air compressor |
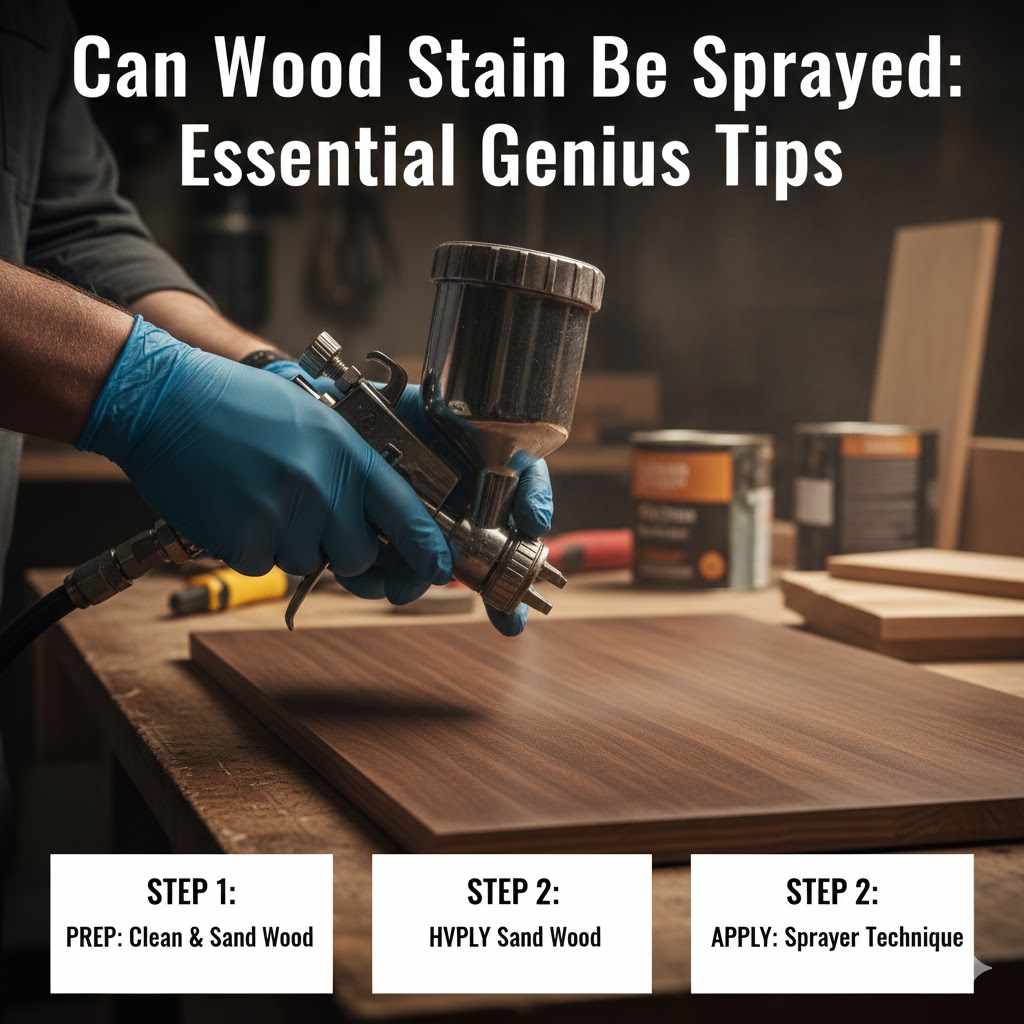
Your Step-by-Step Guide to Spraying Wood Stain
Alright, you’ve chosen your sprayer and you’re ready to go! Let’s walk through the process together. Following these steps will help you get a beautiful, professional finish on your very first try.
Step 1: Prepare Your Workspace (The Most Important Step!)
Overspray is no joke. It can travel farther than you think and settle on everything. Protect your space before you even open a can of stain.
- Ventilation is Key: Work in a well-ventilated area. If you’re indoors, open windows and doors and use fans to create airflow. A garage with the main door open is a great spot. If working outside, avoid windy days. The Occupational Safety and Health Administration (OSHA) has great resources on the importance of proper ventilation.
- Cover Everything: Use plastic sheeting or drop cloths to cover floors, walls, workbenches, tools—anything you don’t want stained. Mask off any areas on your project that you want to keep stain-free using painter’s tape.
- Wear Your Safety Gear: Always wear safety glasses, gloves, and a respirator rated for paint and solvent fumes. Stain contains chemicals you shouldn’t breathe in.
Step 2: Prepare the Wood Surface
The final finish is only as good as the surface underneath it. Proper wood preparation is essential for an even, beautiful stain job.
- Sand Smoothly: Sand your wood with the grain. Start with a medium-grit sandpaper (like 120-grit) and finish with a finer grit (like 180 or 220-grit). The final sanding opens up the wood pores to accept the stain evenly.
- Clean the Surface: After sanding, vacuum all the dust off the wood. Then, wipe it down with a tack cloth or a lint-free rag lightly dampened with mineral spirits (for oil-based stains) or water (for water-based stains). Let it dry completely.
- Use a Pre-Stain Wood Conditioner: This is a genius tip that professionals swear by! Woods like pine, maple, birch, and cherry are known to get blotchy. A pre-stain conditioner helps the wood absorb the stain evenly. Apply it according to the manufacturer’s directions right before you stain.
Step 3: Prepare the Stain and Sprayer
Now it’s time to get your materials ready for spraying.
- Mix the Stain: Stir your stain thoroughly. Don’t shake it! Shaking can create air bubbles that will affect your finish. Stir from the bottom of the can to make sure all the pigments are evenly mixed.
- Thin if Necessary: Most stains are thin enough to spray directly. However, some thicker oil-based stains might need to be thinned slightly to flow through the sprayer smoothly. Check your sprayer’s manual and the stain can for recommendations. If you need to thin it, use the appropriate thinner (mineral spirits for oil-based, water or a specific extender for water-based) and add a little at a time.
- Strain the Stain: This is another pro secret! Pour the stain through a mesh paint strainer into your sprayer’s cup. This will remove any small clumps or impurities that could clog the nozzle.
Step 4: Test Your Sprayer and Technique
Never start on your actual project. Always test your sprayer setup on a piece of scrap wood or cardboard first.
- Adjust the Settings: Set up your sprayer with the right nozzle size for thin materials like stain. Adjust the fluid control knob and the spray pattern (you usually want a vertical or horizontal fan).
- Practice Your Motion: Hold the sprayer about 6 to 10 inches away from the surface. Move your arm smoothly and consistently across the test piece, not just your wrist. Start the spray just off the edge of the board and stop it just past the other edge.
- Check the Pattern: Look at the spray pattern. It should be even and consistent. If you see runs, you are moving too slowly or are too close. If the coverage is too light, you might be moving too fast. Adjust your technique until you get a nice, even coat.
Step 5: Apply the Stain to Your Project
This is the fun part! You’ve done all the prep, and now you get to see the color come to life.
- Work in Sections: Mentally divide your project into manageable sections. For a tabletop, spray the edges first, then the top. For a cabinet, spray the inside edges, then the face frames, then the flat panels.
- Maintain Your Distance and Speed: Keep the sprayer the same distance from the surface at all times. Move at a steady, consistent pace.
- Overlap Your Passes: Overlap each pass by about 50%. This ensures that you don’t have light or dark stripes. The key is a wet, even coat over the entire surface.
- Don’t Try to Cover in One Pass: It’s better to apply two light coats than one heavy coat. A heavy coat will not absorb properly and will look muddy.
Step 6: Wipe Away the Excess Stain
This is the most misunderstood step for beginners. A sprayer is a tool for applying the stain quickly and evenly. It is not meant to be the final step. The wood can only absorb so much stain. The rest needs to be wiped off.
- Let It Penetrate: After spraying a section, let the stain sit for a few minutes. The time depends on the stain—check the can for directions (usually 5 to 15 minutes).
- Wipe Gently: Take a clean, lint-free rag and gently wipe away all the excess stain, moving in the direction of the wood grain. The goal is to leave the color in the wood, not a thick film of stain sitting on top of it.
- Check Your Work: Look at the surface from an angle in good light. Make sure you’ve wiped away all the excess. Any shiny spots are pooled stain that will become sticky and fail to dry properly if left on.
Step 7: Clean Your Sprayer Immediately
Do not wait to do this! Dried stain will ruin your sprayer. Clean it as soon as you are finished.
- Empty the Sprayer: Pour any leftover stain back into its can.
- Flush with Thinner: Fill the sprayer cup with the appropriate cleaning solvent (mineral spirits for oil-based, water for water-based).
- Spray Until Clear: Spray the solvent through the gun into a waste bucket until it runs clear.
- Disassemble and Clean: Take apart the nozzle, cap, and needle and clean them with a small brush and the solvent. Refer to your sprayer’s manual for detailed instructions. A clean tool is a happy tool!
Frequently Asked Questions (FAQ)
1. Do I need to thin wood stain before spraying?
Most water-based and oil-based penetrating stains are thin enough to be sprayed without thinning. However, some thicker stains or older stains may require it. Always check the manufacturer’s recommendations on the stain can and in your sprayer’s manual. If you do need to thin, add a little bit at a time until you get a consistent spray pattern.
2. What is the best type of sprayer for a beginner?
An HVLP (High Volume, Low Pressure) sprayer is the best choice for beginners. They are easy to control, produce a beautiful fine finish, and have minimal overspray, which means less wasted stain and a cleaner workspace. Look for a self-contained unit that doesn’t require a separate air compressor for the easiest setup.
3. Can I spray gel stain?
Generally, gel stain is not recommended for spraying. Gel stains are designed to be very thick so they don’t run or drip, which is the opposite of what you want for a sprayer. They would require significant thinning, which would defeat their purpose. Gel stain is best applied by hand with a rag or foam brush.
4. How do I avoid drips and runs when spraying stain?
Drips and runs are caused by applying too much stain in one spot. To avoid them: keep the sprayer moving at a consistent speed, maintain a constant distance of 6-10 inches from the surface, and don’t linger on any one spot. It’s always better to apply two light coats than one heavy one.
5. Is spraying wood stain better than brushing it?
Neither method is “better”—they are just different. Spraying is better for speed, achieving a perfectly even coat, and getting into detailed areas. Brushing or wiping is better for small projects, offers more hands-on control, and requires less prep and cleanup. The best method depends on your project and your personal preference.
6. Do I still need to wipe the stain after spraying it?
Yes, this is a critical step! Spraying is for application. Penetrating wood stain works by coloring the wood fibers. Once the wood has absorbed all the stain it can hold, the excess needs to be wiped off with a clean rag. If you don’t, the leftover stain will sit on the surface, becoming sticky and preventing the topcoat from adhering properly.
7. What safety gear is most important when spraying stain?
The three most important pieces of safety gear are a respirator, safety glasses, and gloves. A respirator rated for organic vapors will protect your lungs from harmful fumes. Safety glasses will protect your eyes from stray mist. Nitrile gloves will keep the stain off your hands.
Conclusion: Go Ahead and Give It a Try!
So, can wood stain be sprayed? Not only can it be done, but it can completely change the way you finish your woodworking projects. It’s a technique that can elevate your work, giving you faster, more consistent, and more professional-looking results. Yes, there’s a little bit of a learning curve, but by following the steps we’ve covered, you can master it in no time.
Remember, the secrets to success are all in the preparation: preparing your workspace, preparing your wood, and testing your sprayer. Once you get the hang of the motion and remember to wipe away the excess, you’ll wonder why you ever stained by hand. Don’t be afraid to try it on your next big project. You’ll build confidence with every pass, and soon enough, you’ll be achieving that flawless finish you’ve always wanted. Happy woodworking!