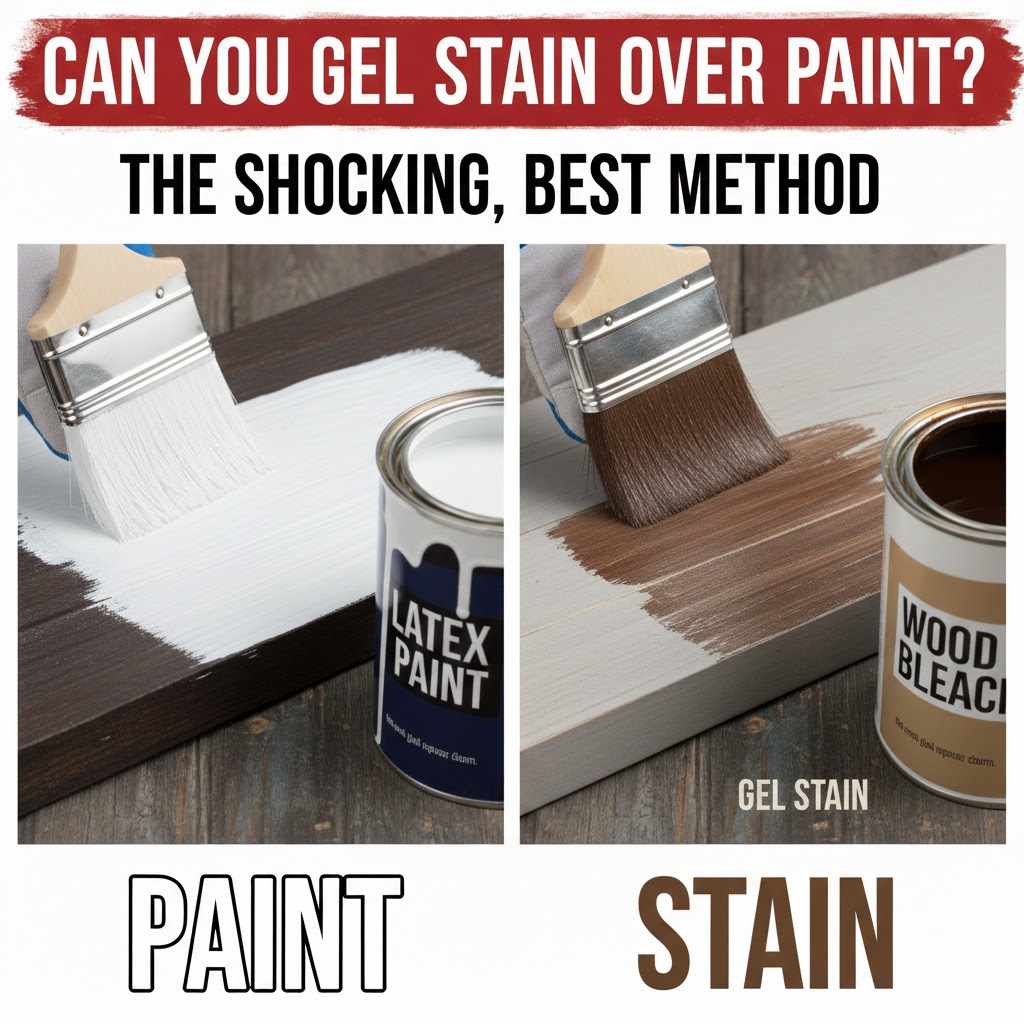
Can You Gel Stain Over Paint? The Proven Best Method
Yes, you absolutely can use gel stain over paint to create a rich, wood-like finish without stripping. The key to a durable, professional result is proper surface preparation. You must clean the painted surface thoroughly, lightly sand it to remove the shine, and then apply a protective top coat after the stain dries.
Hello there, fellow creator! I’m Md Meraj, and in my workshop, I’ve seen countless pieces of old furniture and dated cabinets get a new lease on life. One of the most common questions I hear is about transforming a painted piece. You love the shape, but the color is all wrong. You dream of a warm wood finish, but the thought of stripping all that paint makes you want to give up.
I get it. Stripping paint is a messy, time-consuming job. But what if I told you there’s a much simpler way? Gel stain is the magic solution you’ve been looking for. In this guide, I’ll walk you through everything you need to know, step by step. We’ll turn that painted piece into something you’ll be proud of, together.
First, What Is Gel Stain? And Why Is It Different?
Before we roll up our sleeves, let’s talk about our star player: gel stain. Understanding what makes it special is the first step to getting a great result. Think of traditional liquid stain like watercolor. It’s thin, watery, and designed to soak into raw wood, coloring the wood fibers from within. If you tried to put it on a painted surface, it would just bead up and make a runny mess.
Gel stain, on the other hand, is completely different. It has a thick, pudding-like consistency. It’s more like a translucent paint than a traditional stain. This is its superpower! Instead of soaking in, gel stain sits on top of a surface. This means you can apply it over existing finishes, including paint, to create a beautiful, even layer of color.
- Thick Consistency: It doesn’t run or drip, making it perfect for vertical surfaces like cabinet doors.
- Surface-Level Color: It sits on top of the surface rather than penetrating it.
- Great for Beginners: Its thickness gives you more control and a longer working time before it dries.

The Big Question: Can You Really Put Gel Stain Over Paint?
Yes, and it works wonderfully! The reason it works is that you aren’t trying to stain the paint itself. You are applying a new layer of color on top of the old finish. The painted surface becomes your blank canvas. The trick is making sure that canvas is properly prepared so the gel stain can stick to it permanently.
Imagine you’re painting a wall. You wouldn’t just slap paint onto a greasy, dirty wall, right? You’d clean it and maybe prime it. It’s the same principle here. We need to create a clean, slightly rough surface that the gel stain can grab onto. Without this crucial prep work, the stain could easily scratch or peel off later. So, the answer is a confident “yes,” as long as you follow the right steps.
When Gel Staining Over Paint is a Fantastic Idea
This technique is a game-changer for many DIY projects. Here are a few situations where it truly shines:
- Updating Kitchen Cabinets: Is your kitchen full of perfectly good but dated oak or white cabinets? Gel staining them can give you the look of expensive cherry or espresso cabinets for a fraction of the cost and effort of replacing them.
- Reviving Old Furniture: That thrift store dresser or outdated end table with a solid but boring paint job can be transformed into a classic wood-look piece.
- Transforming Doors and Trim: Give your front door or interior trim a rich, wood-grain look without having to replace them.
- Creating a Faux Wood Finish: You can even use gel stain over a non-wood surface (like laminate or MDF) that has been painted and primed, making it look like real wood.
When to Think Twice Before Using Gel Stain Over Paint
As great as this method is, it isn’t the right choice for every single project. It’s important to know its limits.
- If the Paint is Peeling or Chipping: Gel stain needs a solid foundation. If the paint underneath is failing, the gel stain will fail right along with it. You must fix any damaged paint first by scraping, sanding, and repainting the area before you can stain it.
- For High-Wear, Unprotected Surfaces: For surfaces that will see a lot of wear and tear, like a kitchen table or the top of a dresser, applying a durable top coat over the gel stain is not optional—it’s mandatory. Without it, the stain will scratch off.
- When You Want to See Real Wood Grain: Remember, gel stain sits on top. It will cover up any beautiful natural wood grain underneath the paint. If you want the real grain to show, then you’ll have to take the plunge and strip the paint completely.
The Proven Best Method: Your Step-by-Step Guide
Alright, it’s time to get to work! I’ve broken down the process into simple, easy-to-follow steps. Don’t rush. A little patience here will reward you with a beautiful finish you can be proud of for years to come.
First, Gather Your Tools and Materials
Having everything ready before you start makes the process smooth and enjoyable. Here’s what you’ll need:
- Cleaner: TSP substitute or a good degreasing cleaner.
- Sandpaper: 150-grit or 220-grit sandpaper or a sanding block.
- Tack Cloth or Microfiber Rags: For wiping away dust.
- Painter’s Tape: To protect any areas you don’t want stained.
- Gel Stain: Choose your favorite color!
- Applicators: Old cotton rags (t-shirt material works great), foam brushes, or staining pads.
- Gloves: To keep your hands clean.
- Protective Top Coat: Water-based or oil-based polyurethane.
- High-Quality Brushes: For applying the top coat.
- Good Ventilation: A fan, open windows, or a well-ventilated workspace are a must for safety. Refer to the EPA’s guide on indoor air quality for safety tips.
Step 1: Prep Your Workspace
Find a clean, well-lit, and well-ventilated area to work. Lay down drop cloths to protect your floor from any potential drips. If you’re working on something with hardware, like cabinet doors, remove all the knobs and hinges. This will give you a much cleaner, more professional result.
Step 2: Clean the Surface Thoroughly
This is the most important step! Years of grease, grime, and furniture polish can build up on painted surfaces, especially in a kitchen. The gel stain won’t stick to a dirty surface. Use a good degreaser like a TSP substitute and a scrub sponge. Follow the directions on the cleaner, scrub the entire piece, and then rinse it well with clean water. Let it dry completely.
Step 3: De-gloss and Lightly Sand the Paint
You are not trying to remove the paint! I repeat, do not try to sand down to the bare wood. The goal here is just to scuff up the surface and remove the glossy sheen from the old paint. This gives the gel stain something to grip onto. Use 150-grit or 220-grit sandpaper and lightly sand the entire surface. You’re done when the original shine is gone and the surface feels a little bit rough to the touch. It should look dull or matte.
Step 4: Wipe Away All the Dust
Sanding creates a fine layer of dust. If you stain over this, you’ll get a gritty, uneven finish. Use a vacuum with a brush attachment to remove most of the dust. Then, follow up with a tack cloth or a slightly damp microfiber rag to wipe the surface completely clean. Let it dry for a few minutes before moving on.
Step 5: Apply Your First Coat of Gel Stain
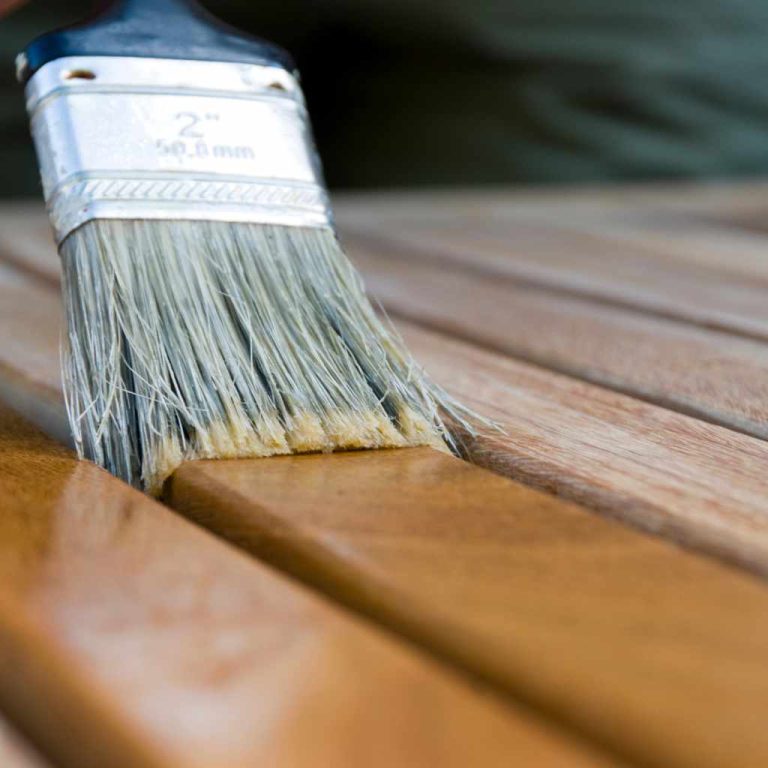
It’s time for the fun part! Stir your gel stain well. Never shake it, as this can create air bubbles. Put on your gloves. Dip your clean cotton rag or foam brush into the stain and apply a thin, even coat. Work in the direction you want the “wood grain” to go.
The technique is simple: wipe it on, then gently wipe off the excess. The more you wipe off, the lighter the color will be. The less you wipe off, the darker and more opaque it will be. I recommend starting with a thinner coat; you can always add more later. Aim for long, smooth strokes. Don’t worry about making it perfect on the first try. The first coat will probably look a little streaky, and that’s completely normal!
Step 6: Let it Dry Completely
Patience is key here. Gel stain takes longer to dry than paint, especially over a sealed surface. Check the instructions on the can, but you should plan to wait at least 24 hours between coats. In humid weather, it might take even longer. If you try to apply the next coat too soon, you will pull off the first one. It needs to be fully dry, not just tacky, to the touch.
Step 7: Apply a Second Coat (If Needed)
Once the first coat is completely dry, you can apply a second one for a darker, richer color. Use the same technique as before: apply a thin coat and gently wipe away the excess. The second coat will even out the color and hide any streaks from the first coat. Most projects look best with two coats, but you can even add a third for a very dark, solid look.
Step 8: Apply a Protective Top Coat
Do not skip this step! Your beautiful gel stain finish needs protection to last. Once the final coat of stain is fully cured (wait at least 48-72 hours), you can apply your top coat. Polyurethane is an excellent choice for durability.
You can choose between oil-based and water-based polyurethane. Oil-based adds a warm, amber glow but takes longer to dry and has a stronger smell. Water-based options dry clear and fast with low odor. Apply 2-3 thin coats with a high-quality brush, letting each coat dry and lightly sanding with 220-grit sandpaper in between coats (but not after the final coat!).
Choosing the Right Tools for the Job
The applicator you choose can have a big impact on your final finish. There’s no single “best” tool—it depends on the project and the look you want.
| Applicator Type | Best For | Pro-Tip |
|---|---|---|
| Cotton Rags (Old T-Shirts) | Large, flat surfaces like tabletops or cabinet doors. Great for a hand-rubbed look. | Use lint-free rags. Fold them into a pad so you don’t have any loose ends that could leave marks. |
| Foam Brushes | Getting into corners, detailed areas, and smaller projects. Very inexpensive. | Don’t press too hard, or the foam can tear. Use a light touch and throw it away when you’re done. |
| Staining Pads | A good all-around option. They hold more stain than a rag and give a smooth finish. | Apply the stain with the pad, then use a clean rag to wipe off the excess for a more uniform look. |
| Wood Graining Tool | Creating a convincing faux wood grain effect. | Apply a thicker coat of gel stain, then gently drag and rock the tool through the wet stain. Practice first! |
My Top Tips for a Flawless, Professional Finish
Over the years, I’ve learned a few little tricks that make a big difference. Keep these in mind as you work:
- Practice First: If you can, practice your technique on a hidden spot first, like the back of a cabinet door or an unseen part of the furniture. This helps you get a feel for the stain and decide how dark you want the color.
- Thin Coats are Your Friend: It’s always better to apply two or three thin coats than one thick, gloppy coat. Thick coats take forever to dry and can look uneven.
- Don’t Overwork It: Apply the stain and wipe off the excess in a few smooth strokes. If you keep fussing with it as it starts to dry, you’ll end up with a gummy, messy finish.
- Watch the Corners: Gel stain loves to build up in corners and crevices. After you apply it to an area, use a clean part of your rag to lightly wipe out any excess from the inside corners to prevent dark blobs.
- Light is Everything: Work in a well-lit area so you can see if your application is even. Check your work from different angles to spot any streaks or heavy spots. For reliable product information, it’s always good to check the manufacturer’s technical data sheets, like those provided by companies like 3M for their abrasives.
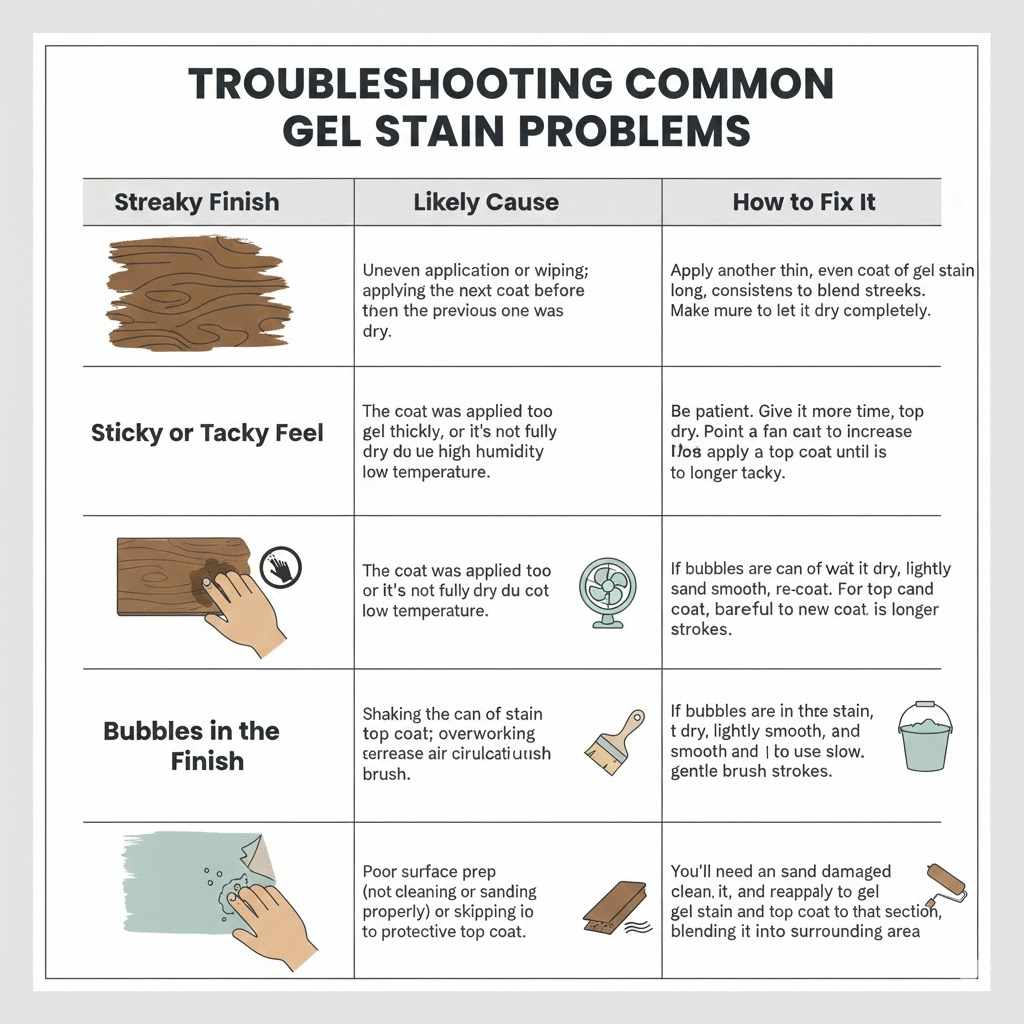
Troubleshooting Common Gel Stain Problems
Even the most careful DIYer can run into issues. Don’t panic! Most problems are easy to fix.
| Problem | Likely Cause | How to Fix It |
|---|---|---|
| Streaky Finish | Uneven application or wiping; applying the next coat before the previous one was dry. | Apply another thin, even coat of gel stain. Use long, consistent strokes to blend the streaks. Make sure to let it dry completely. |
| Stain Feels Sticky or Tacky | The coat was applied too thickly, or it’s not fully dry due to high humidity or low temperature. | Be patient. Give it more time to dry. Point a fan at the piece to increase air circulation. Do not apply a top coat until it is no longer tacky. |
| Bubbles in the Finish | Shaking the can of stain or top coat; overworking the top coat with the brush. | If bubbles are in the stain, wait for it to dry, lightly sand smooth, and re-coat. For top coats, sand smooth and apply a new coat, being careful to use slow, gentle brush strokes. |
| Scratches or Peeling | Poor surface prep (not cleaning or sanding properly) or skipping the protective top coat. | You’ll need to sand the damaged area, clean it, and reapply the gel stain and top coat to that section, blending it into the surrounding area. |
Frequently Asked Questions (FAQ)
What kind of paint can you gel stain over?
You can successfully apply gel stain over most types of paint, including latex (water-based), oil-based, and even chalk paint, as long as the surface is in good condition. The key is that the paint must be fully cured and properly prepared (cleaned and scuffed) so the gel stain can adhere to it.
Do I have to sand all the paint off before using gel stain?
No, and that’s the best part! You do not need to sand off the paint. You only need to do a light “scuff sanding” to remove the shine from the surface. This creates a microscopic texture for the gel stain to grab onto, ensuring a durable bond without the mess of stripping.
How long does gel stain take to dry over paint?
Drying time can vary based on temperature, humidity, and how thickly you apply it. On a non-porous surface like paint, you should plan for at least 24 hours between coats. For the final coat, wait a full 48 to 72 hours before applying a protective top coat to ensure it is fully cured.
What is the best top coat for gel stain over paint?
For high-traffic items like cabinets or tabletops, polyurethane is the best choice for durability. Both oil-based and water-based polyurethanes work well. Oil-based poly adds a warm, amber tone while water-based options dry clear and have a lower odor. For less-used decorative pieces, a wipe-on poly or a durable wax can also work.
Can I use this method on my painted kitchen cabinets?
Absolutely! Gel staining over painted kitchen cabinets is one of the most popular and transformative uses for this technique. Because gel stain is thick and doesn’t drip, it’s perfect for the vertical surfaces of cabinet doors. Just be sure to do a thorough cleaning and degreasing job first, as kitchen surfaces can be greasy.
Is one coat of gel stain enough?
While you can use just one coat for a lighter, more transparent look, most projects will look much better with at least two coats. The first coat acts as a base, and the second coat deepens the color and evens out any imperfections or streaks, creating a richer, more uniform finish.
Will the finish be durable?
Yes, if you do it right! The durability comes from two things: proper prep work and a quality top coat. If you clean and sand the surface correctly, the gel stain will have a strong bond. Applying 2-3 coats of a good polyurethane will protect that stain from scratches, moisture, and daily wear and tear.
Conclusion: Go Create Something Beautiful!
See? Transforming that old painted piece into something that looks like rich, beautiful wood isn’t scary at all. You don’t need a workshop full of expensive tools or years of experience. All you need is a can of gel stain, a little bit of elbow grease, and the confidence that you can do it.
By following these simple steps—clean, scuff, stain, and protect—you are using the proven best method for applying gel stain over paint. It’s a project that is incredibly rewarding, saving you money while letting you put your own personal touch on your home. So pick a project, choose your color, and get started. I promise you’ll be amazed at what you can create.
Happy building!