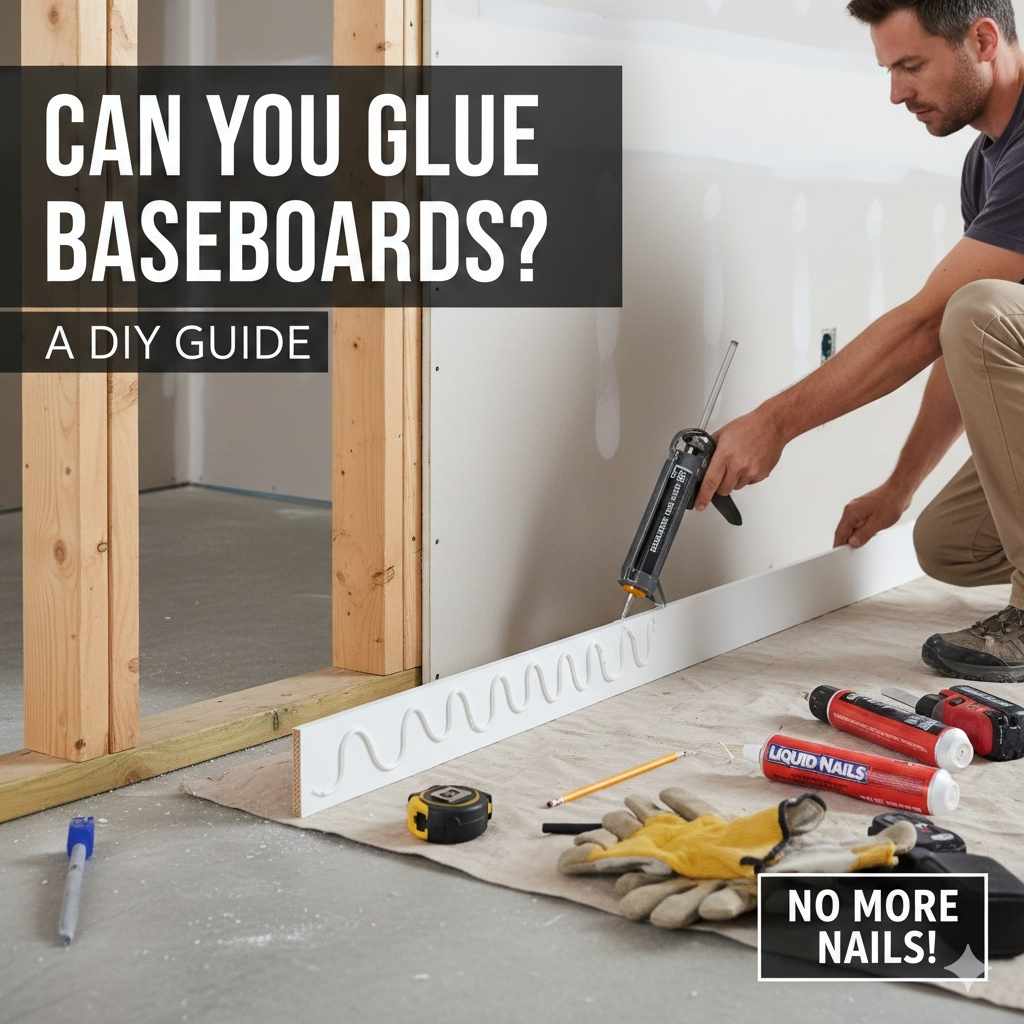
Can You Glue Baseboards Instead of Nailing? A DIY Guide
Thinking about installing baseboards? The question of whether Can You Glue Baseboards Instead of Nailing? is something many beginners ask. It seems easier, right? This guide will show you how to do it simply, breaking down the process step-by-step. Don’t worry if you’re new to this; we’ll cover everything from the best types of glue to the prep work you need to do before starting. Ready to learn?
Choosing the Right Adhesive for Baseboards
Selecting the correct adhesive is the most important step when deciding if you Can You Glue Baseboards Instead of Nailing?. The wrong glue can lead to baseboards that detach, creating gaps and a less-than-professional finish. Consider the materials your baseboards and walls are made of. This will help you select an adhesive that forms a strong, lasting bond.
Types of Adhesive: Exploring Your Choices
Different adhesives work best for different situations. Each offers varying levels of strength, flexibility, and suitability for different materials. Understanding the characteristics of each type is key to making the right choice for your project.
Construction Adhesive: Construction adhesive is known for its high strength and ability to fill gaps. It is excellent for attaching baseboards to drywall, plaster, and concrete. It typically provides a long-lasting bond. However, it can take longer to cure fully, requiring bracing or temporary support.
Construction adhesives offer exceptional bonding capabilities for baseboards. They work well because they can handle minor imperfections on the wall surface. Always ensure proper ventilation when using construction adhesive because it can release strong fumes during the application and curing phases. This adhesive type is a good choice if you’re seeking a solid, long-term solution.
Polyurethane Adhesive: Polyurethane adhesive provides a good balance between strength and flexibility. It creates a strong bond that can withstand minor movements and temperature fluctuations. This makes it a great choice for baseboards in areas where there might be some expansion or contraction, such as near windows or exterior walls.
Polyurethane adhesives are also water-resistant, which is beneficial in areas prone to moisture. Make sure to clean the surfaces before applying this adhesive, ensuring the best possible bond. Polyurethane is a bit more expensive than some other options, but the benefits often outweigh the cost. Always read the manufacturer’s instructions for curing times and usage.
Panel Adhesive: Panel adhesive often comes in tubes and is designed to create strong bonds between various materials. It is a suitable choice for baseboards if you are looking for a reliable and quick-drying solution. It might not be as strong as construction adhesive but can be a good option for DIY projects.
Panel adhesive typically provides a strong grip initially, reducing the need for temporary bracing. Before using panel adhesive, check its compatibility with your baseboard material. Always ensure the surfaces are clean, dry, and free of dust or debris for optimal adhesion. It’s also important to follow the product’s recommended application and drying times for the best results.
Factors Influencing Adhesive Selection
Besides the type of adhesive, several other factors influence your choice. These elements include the materials of your walls and baseboards. Environmental conditions like humidity and temperature also play a role. Carefully assessing each factor will ensure the adhesive you choose will provide a durable and effective bond.
Wall Material: The material of your walls will significantly impact your adhesive choice. Drywall is common, and many construction and panel adhesives work well. For plaster or concrete walls, you might need a stronger adhesive. Always check that the adhesive you pick is suitable for your wall type.
The type of wall material will influence the adhesive’s performance. Drywall is a porous material that bonds easily with construction adhesives. Plaster, due to its smooth surface, might need an adhesive with good gripping ability. Concrete needs an adhesive that offers strength and resistance to moisture.
Baseboard Material: Wood and MDF (Medium Density Fiberboard) baseboards are the most common. Different adhesives may be better suited for each. For example, some adhesives might bond better with the wood’s natural oils. MDF is more uniform and porous, potentially working well with various adhesives.
The baseboard material matters because it impacts the bonding surface. Wood baseboards may have variations in density and moisture content, influencing adhesive effectiveness. MDF is more consistent, making it easier for adhesives to create a solid bond. Always check that the adhesive works with your baseboard material before starting your project.
Environmental Conditions: Humidity and temperature levels also affect the adhesive. High humidity can interfere with drying times, and extreme temperatures can affect adhesive performance. Choose adhesives rated to perform well in the environmental conditions of your space.
The conditions where the baseboards are installed will affect the performance. Areas with high humidity, like bathrooms or basements, may require moisture-resistant adhesives. Extreme temperatures, hot or cold, can alter how an adhesive bonds and sets. Consider these factors when choosing a product to ensure long-term baseboard adhesion.
Preparing Walls and Baseboards for Adhesion
Proper preparation is key. Regardless of if you Can You Glue Baseboards Instead of Nailing?, a well-prepped surface will provide a solid bond. This involves cleaning the walls and baseboards. It also includes measuring, cutting, and ensuring everything fits. A little preparation significantly improves the final look of your baseboards.
Cleaning and Surface Preparation
Dust, dirt, and debris can weaken the bond between the adhesive and the wall or baseboard. It is necessary to clean both surfaces thoroughly. This will help the adhesive to grip. This process is simple but significantly impacts the final quality.
Cleaning the Walls: Use a damp cloth to wipe down the walls. Remove any dust, grease, or loose particles. For stubborn spots, a mild detergent can help. Let the walls dry completely before applying any adhesive.
Clean walls create an optimal surface for bonding. Using a damp cloth with mild soap can remove dirt, dust, and any residues. Make sure to address any grease or oil spots, since these can repel the adhesive. Ensuring the walls are completely dry after cleaning prevents moisture from interfering with the adhesive’s setting process.
Cleaning the Baseboards: Like the walls, baseboards must be cleaned. Remove any dust, dirt, or debris from the baseboard surfaces. If your baseboards are painted, ensure the paint is in good condition. You can sand down any flaking paint to create a better surface for the adhesive to grab onto.
Cleaning the baseboards is equally important for creating a solid bond. Use a brush or cloth to remove dust and dirt. For painted baseboards, check for flaking. Sanding down any areas with loose paint improves the adhesion of the glue. Make sure the surfaces are dry before the next step.
Dealing with Wall Imperfections: Walls are rarely perfectly smooth. Fill in any holes or cracks with spackle and sand them smooth. Uneven surfaces can prevent a strong bond, so addressing them beforehand helps the adhesive work effectively.
Uneven surfaces can affect adhesion. Fill any cracks or holes with spackle. Let it dry, then sand it smooth. Addressing these imperfections ensures a flat surface for the baseboard. This approach maximizes the contact area between the baseboard and the wall, providing a more reliable bond. Also, make sure all sanding dust is removed.
Measuring, Cutting, and Fitting
Accurate measurements and precise cuts are crucial for a professional finish. It can be tempting to skip this step, but taking your time here prevents mistakes. Proper fitting will minimize gaps. It ensures your baseboards look great.
Measuring and Planning: Measure each wall section carefully. Create a plan showing where each baseboard piece will go. This will help you know how many materials you need and where the cuts must be made.
Measuring the walls accurately is the first step. Calculate the length of each section where the baseboards will go. Drawing a quick layout of your room can help visualize the placement of the baseboards. This will let you plan for corners and joints. This way, you can avoid mistakes.
Cutting the Baseboards: Use a saw to cut the baseboards. Make sure your cuts are clean and accurate. Mitre cuts are needed for corners. A mitre saw will help you achieve clean, precise angled cuts.
When cutting baseboards, use a saw to make precise cuts. A mitre saw is helpful for making the angles needed for the corners. Clean cuts will mean you have good joints and a professional look. Always double-check your measurements before making any cuts to prevent waste.
Dry Fitting the Baseboards: Before applying any adhesive, place the baseboards against the wall to check the fit. Make any adjustments needed. Ensure that the corners meet correctly and that there are no gaps.
After cutting, fit the baseboards against the wall to ensure a good fit. Check the corners and joints. Make necessary adjustments before using any adhesive. Correcting issues now saves time. It also prevents problems later. This step ensures everything fits properly before you start gluing.
The Application Process: Gluing Baseboards in Simple Steps
The application of adhesive is a core skill if you’re deciding if Can You Glue Baseboards Instead of Nailing? Following the steps carefully will help you get a solid, lasting bond. From applying the adhesive to securing the baseboards, it’s all about attention to detail. This section breaks down the process in easy steps.
Applying Adhesive to the Baseboards
Knowing how much adhesive to use and how to apply it is important. Proper application ensures the baseboards adhere properly. Too much adhesive might cause a mess. Too little may not provide a strong enough bond.
Choosing the Right Adhesive: Select the appropriate adhesive for your wall and baseboard material. Common choices include construction adhesive, polyurethane adhesive, or panel adhesive. Review the manufacturer’s instructions to ensure proper use.
Choosing the right adhesive is essential for the best results. Select a product suited for your wall and baseboard materials. Look at the instructions from the manufacturer to ensure that you use it correctly. Proper selection and application will improve your project’s longevity.
Applying the Adhesive: Apply the adhesive to the back of the baseboard. Follow the manufacturer’s recommended method. This may include a bead or zig-zag pattern. Make sure the adhesive coverage is uniform to create a strong bond.
Apply the adhesive correctly. Some manufacturers advise using a continuous bead, whereas others suggest a zig-zag pattern. A uniform layer of adhesive will give an even bond. Be careful not to use too much, as excess adhesive can create a mess, and may prevent the baseboard from sitting flush against the wall. Too little adhesive may fail to create the desired grip.
Working in Sections: It is best to work in sections. Apply adhesive to the section you are ready to install. This approach prevents the adhesive from drying before you can attach the baseboard. This will ensure you’re working at a comfortable pace.
Working in sections can improve the process. Apply adhesive to the baseboard section you are immediately installing. This avoids the adhesive drying. Working in a smaller area at a time gives you more control and ensures proper adhesion before the adhesive dries. This reduces mess and makes your project easier to manage.
Securing and Supporting the Baseboards
Once the adhesive is applied, you need to secure the baseboards to the wall. This might involve holding them in place or using temporary supports. This ensures they bond correctly. Patience is key, as the adhesive needs time to cure. Securing the baseboards will also help to prevent movement during the curing process, giving you the best possible bond.
Positioning the Baseboards: Carefully align the baseboards against the wall. Press them firmly into place. Ensure they sit flush against the wall. A level can help you with alignment, assuring that your baseboards appear straight.
Align the baseboard carefully and press it firmly against the wall. A level can ensure that it sits correctly. Make adjustments as you position the baseboard. Correct alignment will avoid gaps and ensure a neat finish. Take your time to get it right. Also, consider the look of your baseboards and how they will fit together.
Using Temporary Supports: Temporary supports can help keep the baseboards in place. You can use painter’s tape, weights, or bracing. These tools will prevent the baseboards from shifting. Use these supports until the adhesive fully cures.
Use temporary supports to keep the baseboards in place until the adhesive dries. Painter’s tape, weights, or bracing are helpful. They will prevent the baseboards from moving. This is especially important for vertical runs or areas where the wall is not perfectly flat. Remove supports after the adhesive is fully dry.
Allowing Curing Time: Give the adhesive enough time to cure. The time will vary. Follow the manufacturer’s instructions. Curing time is crucial to get a solid bond. Avoid disturbing the baseboards during this phase.
Curing time is important. Follow the manufacturer’s recommendations for drying. Avoid touching or moving the baseboards while curing. Patience will help the adhesive bond properly. This ensures a strong hold. Waiting will ensure your baseboards stay firmly in place.
Addressing Corners, Joints, and Imperfections
When you’re trying to figure out if you Can You Glue Baseboards Instead of Nailing?, understanding how to handle corners, joints, and imperfections is crucial for a professional finish. This part provides advice on how to get seamless joints. It also covers how to fix any issues that can appear during installation. It’s the details that make a project look great. Finishing the small details sets your work apart.
Handling Corners and Joints
Corners and joints are often the most challenging parts of installing baseboards. Accurate cuts and secure joints will give a polished look. You may have inside and outside corners. Both need a slightly different approach.
Inside Corners: Cut baseboards at a 45-degree angle. This will create a neat inside corner. Use a mitre saw. Ensure the cuts fit together snugly. If there are slight gaps, fill them with caulk.
For inside corners, cut baseboards with a 45-degree angle. Ensure the cuts fit properly. Use a mitre saw for accuracy. If there are small gaps, apply caulk to create a smooth finish. This technique creates a clean, neat appearance that is free of gaps.
Outside Corners: Make 45-degree cuts on the baseboards for outside corners. Place the edges together to make a 90-degree angle. When you are done, use glue to secure the joints. You can also use a small amount of caulk to fill in any minor imperfections.
For outside corners, make sure the cuts are angled. When the baseboards come together, they should make a 90-degree angle. Use glue to reinforce the bond. Caulk can fix small imperfections. Accurate angles and secure joints create a professional look.
Joints Between Baseboards: If baseboards need to be joined in a straight run, cut them at 45 degrees. Place the ends together. This creates a small gap. The gap can be filled with caulk. Doing this will create a stronger joint and a cleaner look.
When two baseboards must join in a straight line, cut the ends at a 45-degree angle. Join the cut ends together. Fill any slight gaps with caulk. This will provide a solid joint and make it look clean. Proper jointing will help the installation look neat and professional.
Dealing with Imperfections and Gaps
Imperfections and gaps are bound to happen. Knowing how to fix them will improve your project. This section offers strategies to solve common problems. From filling small gaps to concealing imperfections, these solutions can help you accomplish a high-quality finish.
Filling Small Gaps: Use caulk to fill in small gaps. Apply caulk along the top edge of the baseboard, where it meets the wall. Then, apply caulk where two baseboards meet. Select caulk that matches your paint color.
Caulk is useful for filling small gaps. Apply it along the top edge of the baseboards where they meet the wall. Use it where the boards join. Choose a caulk color that matches your paint color. This approach will make your work look professional. It will also help stop moisture and drafts.
Sanding and Touching Up: Sand any rough spots or imperfections on the baseboards. Use fine-grit sandpaper. After sanding, use a paint to touch up any areas. This will create a smooth, even finish.
After your work, sand any rough areas using fine-grit sandpaper. After sanding, use paint to touch up. This process removes imperfections. It ensures a smooth and professional finish. This attention to detail will help your project look its best. Taking the time to touch up small spots creates a nice look.
Checking for Level: Use a level to check for any unevenness. If your baseboards are not level, you can use shims to correct small differences. Place shims behind the baseboard. This will ensure they are flush against the wall.
Check the baseboards with a level. If they are not level, you can use shims. Place them behind the baseboard to level the surface. Addressing unevenness will guarantee a professional-looking installation. This attention to detail makes your baseboards look great.
Alternative Methods and Considerations
When evaluating if Can You Glue Baseboards Instead of Nailing?, it’s helpful to know about alternatives and other aspects that can influence your decision. From combining methods to thinking about durability, this will give you an overview to make informed decisions. These insights will help you adapt your strategy to match your needs.
Combining Gluing with Other Fasteners
Using glue alone may be suitable for some situations, but some people like to use additional methods to reinforce the bond. Combining methods can improve the durability. It also assures the baseboards will stay in place for a long time.
Using Nails or Staples: For a more secure bond, consider using nails or staples along with glue. Place nails or staples at intervals. This holds the baseboards in place. This method is helpful where the walls are uneven, or when you want added durability.
Using nails or staples can make a stronger bond. Place these fasteners at intervals, to hold the baseboards in place. They offer extra support. This is particularly helpful when the walls are not level. This added security can prevent movement. It will also prevent separation over time.
Temporary Fasteners: Use temporary fasteners, like painter’s tape or clamps, while the glue dries. This keeps the baseboards in position. It will provide a flush finish. Once the glue has cured, you can remove the tape or clamps.
Temporary fasteners keep the baseboards in place while the glue dries. Tape and clamps can provide additional support. This ensures a flush and professional finish. Removing these fasteners when the glue is fully cured is key. These temporary fixes improve accuracy and the overall quality of your project.
Consider the Baseboard Material: Certain materials may need nails or staples. For heavy wood baseboards, or where the walls are not ideal, fasteners can offer greater stability. Check manufacturer recommendations for the best combination for the chosen material.
Check the baseboard material. If you use heavy wood, nails or staples may be needed. Fasteners can provide more stability. For specific materials, follow the manufacturer’s suggestions. Making sure that the appropriate method is used will guarantee a long-lasting and durable result.
Durability and Long-Term Performance
The durability of your baseboards depends on several factors. Adhesive choice and proper installation can affect the lifespan of your baseboards. There are also things that can threaten the baseboards, like changes in the environment or movement within the structure. Understanding these aspects will help ensure that your baseboards look good over time.
Adhesive Longevity: Some adhesives last longer than others. High-quality construction adhesives typically offer greater longevity than less expensive options. Your choice of adhesive will affect how long your baseboards last.
Some adhesives are more durable than others. Construction adhesives are known for long-lasting performance. The adhesive type influences the baseboards’ durability. Choosing the right adhesive will make your baseboards look great for years.
Environmental Factors: Extreme temperatures, humidity, and moisture can affect the adhesive bond. In wet areas, like bathrooms, use water-resistant adhesives. In areas with temperature swings, choose adhesives that can adjust to those changes.
Environment is a factor. Water can affect the adhesive bond. For humid areas, select water-resistant adhesives. For areas that have hot and cold, use adhesives that resist extreme temperatures. Considering these elements guarantees that your baseboards endure the test of time.
Structural Movement: Buildings naturally shift over time. This can cause baseboards to move. If the walls expand and contract, the adhesive must be flexible. This ability to stretch and compress is essential for long-term durability.
Buildings move. Changes in temperature and moisture can make walls expand and contract. You need a flexible adhesive to handle that movement. This flexibility assures the baseboards will stay in place. It prevents gaps. Proper material choices improve the durability of baseboards.
When Nailing Might Be Better
While this guide focuses on gluing, there are times when nailing might be better. Knowing when to choose nails will help you make the best decision for your project. This will guarantee a job that holds up well. Understanding the advantages and disadvantages of each technique gives you a broad range of options.
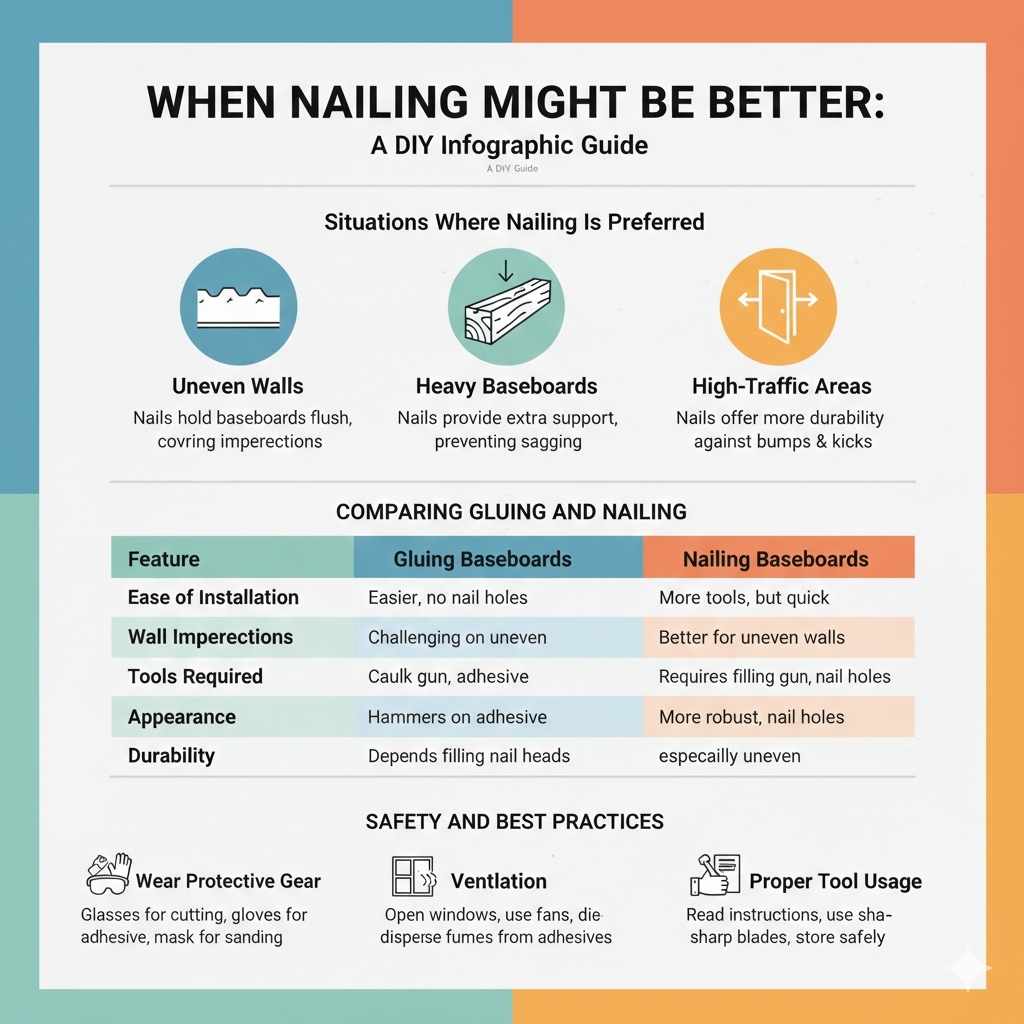
Situations Where Nailing Is Preferred
While gluing offers some advantages, there are some scenarios where nailing is a better option. Knowing when to use nails can help you get the best outcome. This can influence the job’s strength and stability.
Uneven Walls: Nailing is often better for uneven walls. Nails can hold the baseboards flush. They can cover slight imperfections that can challenge adhesives.
Nailing is best if the walls are not perfectly straight. Nails hold the baseboards in place. This will cover any wall imperfections. Nailing is ideal when you can’t guarantee a flat surface. This technique will ensure an even, professional finish.
Heavy Baseboards: Heavy baseboards may need nails. Nails provide additional support to stop them from sagging. Nails will keep the baseboards aligned, making them much more sturdy.
Heavy baseboards often need nails. Nails provide extra strength and prevent them from sagging. They offer more support. They ensure the baseboards stay correctly aligned. This can be critical for the long-term integrity of the installation.
Areas with High Traffic: For areas with high traffic, like hallways or doorways, nails can offer more durability. Nails can stand up to kicks and bumps. They will ensure the baseboards remain in place.
For high-traffic areas, nails can offer added durability. They can withstand frequent contact. Nails guarantee the baseboards remain secure. Nailing can provide added peace of mind in high-use settings.
Comparing Gluing and Nailing
Consider the benefits of each method to make an informed choice. Weigh the pros and cons to see which best fits your project. You can choose the technique that works best to meet your needs and skill level. Weighing the options will guide you to a well-matched solution.
| Feature | Gluing Baseboards | Nailing Baseboards |
|---|---|---|
| Ease of Installation | Potentially easier, no nail holes to fill | Requires more tools, but can be quick |
| Wall Imperfections | Can be challenging with uneven walls | Better for uneven walls |
| Tools Required | Caulk gun, level, adhesive, bracing | Hammer or nail gun, level, wood filler |
| Appearance | Can offer a clean look, no nail heads | Requires filling nail holes |
| Durability | Dependent on adhesive and wall prep | Generally more robust, especially with uneven walls |
The table provides a simple way to look at the differences. Gluing might be preferred because it offers a clean look and is easy to apply. However, it can be challenging with uneven walls. Nailing can handle imperfections better. It is more durable, especially in high-traffic areas. The choice depends on the specific project.
Safety and Best Practices
When working on a baseboard project, consider safety and best practices to ensure a smooth, secure job. The correct tools and techniques will keep you safe. Following safety rules will help create the best results.
Wear Protective Gear: Always wear safety glasses when cutting or working with any tools. Wear gloves to protect your hands from adhesive. Use a dust mask if sanding.
Safety comes first. Wear safety glasses to protect your eyes. Gloves will protect your hands from adhesive and other hazards. Use a dust mask when sanding or working in dusty conditions. Always remember safety when working on baseboards.
Ventilation: Make sure you have good ventilation, especially when using adhesives. Many adhesives release strong fumes. Open windows and use fans.
Always ventilate. This helps disperse fumes. Open windows and use fans to circulate air. Good ventilation will reduce health risks. It can make your working environment more comfortable.
Proper Tool Usage: Use tools carefully. Read the tool instructions and know how to use them. Use sharp blades, and store tools safely when not in use.
Use all your tools carefully. Read the manual for each tool. Use sharp blades for clean cuts. Store tools safely to avoid injury. Proper tool use will assure the job goes smoothly. It will also help improve the quality of your work.

Frequently Asked Questions
Question: What’s the best adhesive for baseboards?
Answer: Construction adhesive is often a great choice due to its strength and ability to fill gaps. However, polyurethane adhesive is also good because it is flexible and water-resistant. The best adhesive depends on your specific needs.
Question: Can I use caulk to hold up baseboards?
Answer: Caulk alone isn’t strong enough. It’s best used to seal gaps after gluing or nailing your baseboards.
Question: How long should I wait for the adhesive to dry?
Answer: Always follow the manufacturer’s instructions, but typically, you should wait at least 24 hours. Some adhesives may need longer to completely cure.
Question: What do I do if my wall isn’t straight?
Answer: Nailing baseboards is generally better for uneven walls because you can adjust the boards to fit. You can also use shims to level the baseboards before gluing.
Question: How do I handle corners when gluing baseboards?
Answer: Cut baseboards at 45-degree angles to create neat corners. Use caulk to fill small gaps for a clean finish.
Final Thoughts
So, Can You Glue Baseboards Instead of Nailing? Absolutely! It can be a great option for many DIY projects. It’s all about choosing the right adhesive, preparing your walls, and making sure everything fits right. Remember to clean the surfaces before you start. Consider the material of your baseboards and walls. Use the right adhesive for the job. Take your time to measure and cut precisely. Then, once the baseboards are glued and secured, give them time to set before moving on. By following these steps and considering alternative methods or situations where nailing is better, you’ll be well on your way to adding a professional touch to your home. Now go forth, get the supplies, and get started on this rewarding home improvement project!