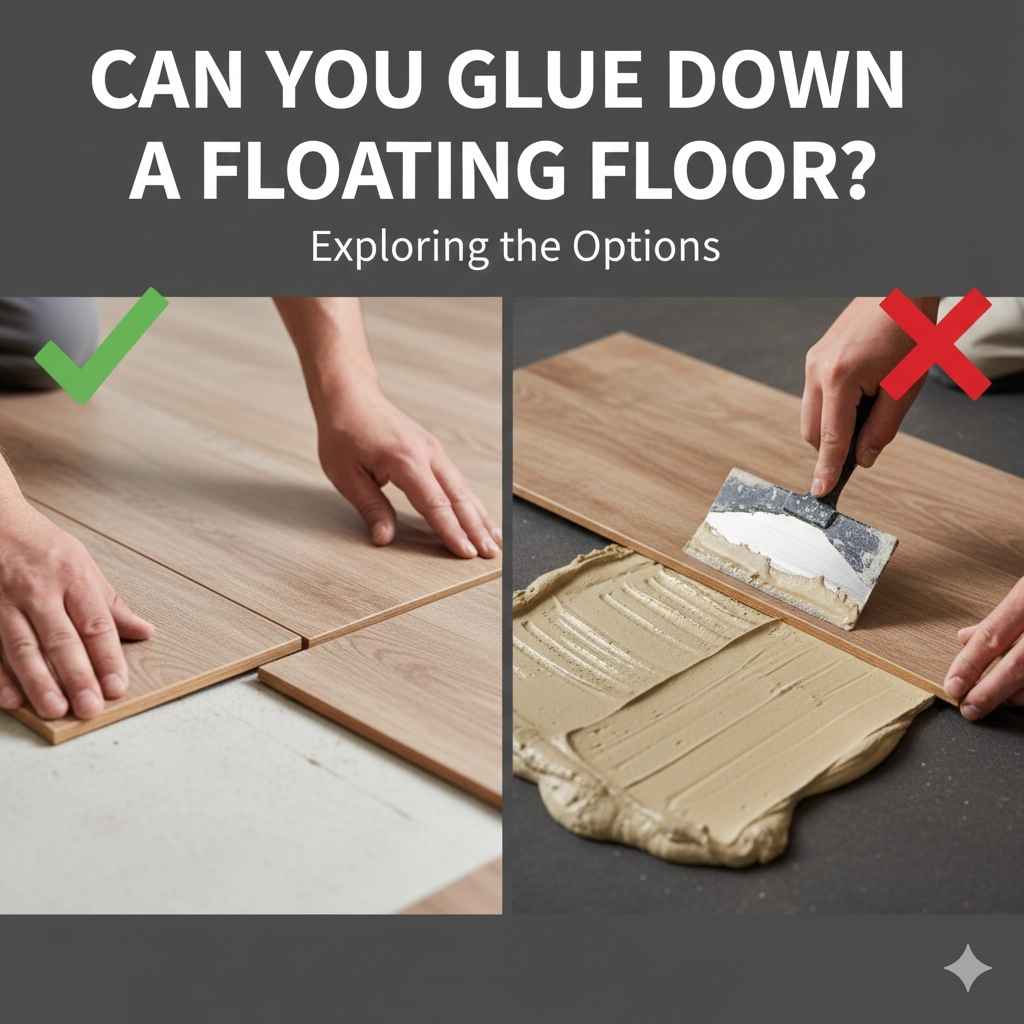
Can You Glue Down a Floating Floor? Exploring the Options
Thinking about a new floor? Maybe you’ve heard about “floating floors.” A common question that pops up, especially for folks new to home improvement, is: Can You Glue Down a Floating Floor? Pros & Cons. It’s a tricky question because the answer isn’t always straightforward! Don’t worry, though. This guide will make it super easy to understand. We’ll explore the pros and cons, the what, the why, and the how, so you can make the best choice for your project. Let’s get started!
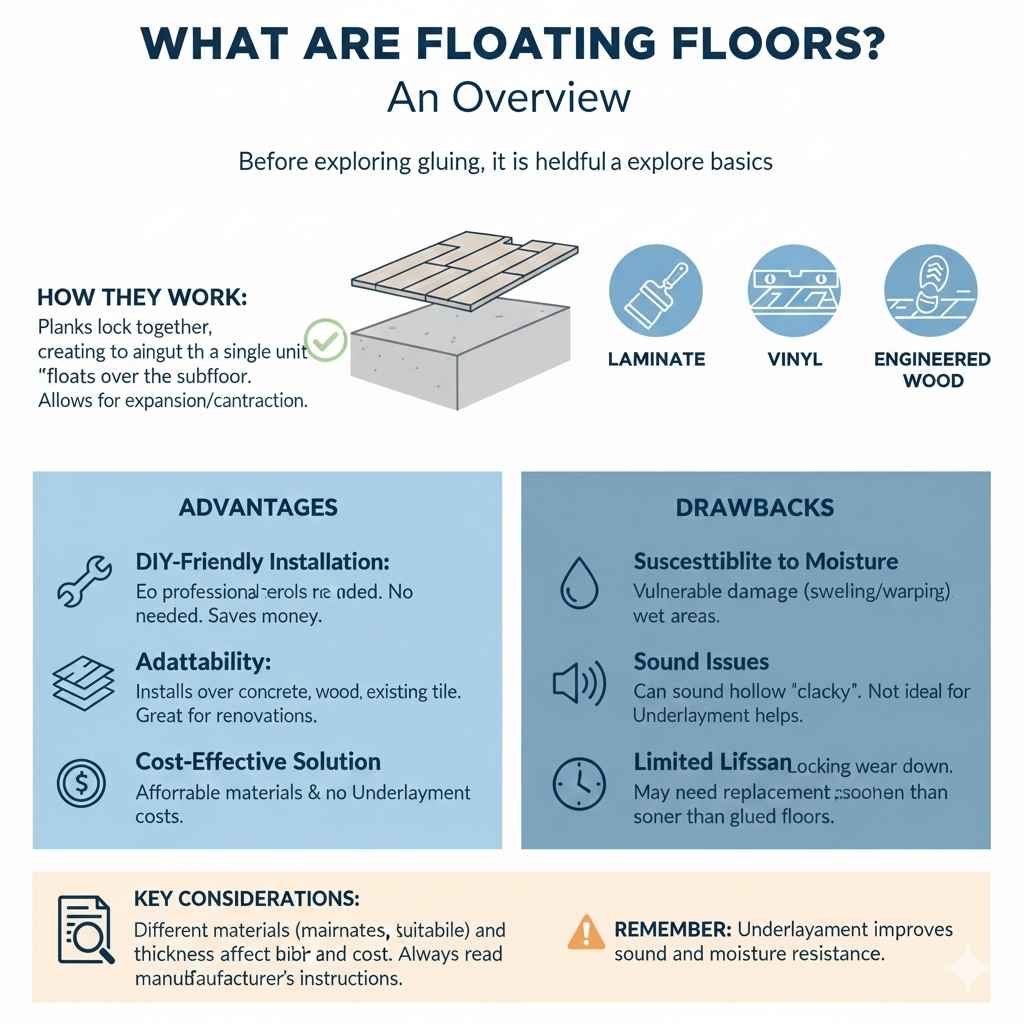
What Are Floating Floors? An Overview
Before exploring gluing, it is helpful to explore the basics. Floating floors are a type of flooring that doesn’t attach directly to the subfloor beneath. Instead, the individual planks or tiles lock together, creating a single unit that “floats” above the subfloor. This design gives the floor the ability to expand and contract with temperature and humidity changes without buckling or separating. Think of it like a puzzle that sits on top of your existing floor. Floating floors are popular because they can be installed on top of existing flooring (like tile or even concrete, if it is level), making them a great option for DIY projects and renovations.
This design makes installation significantly easier than traditional methods like nailing or gluing directly to the subfloor. Because they aren’t glued or nailed down, they are also easier to replace. Different materials are used in these floors, including laminate, vinyl, and engineered wood. Each type has its own characteristics, affecting its appearance, durability, and cost. Understanding these variations is essential when choosing a floating floor for your home. You will also want to know the difference between the thickness of different floating floors, which is often tied to cost and durability.
Advantages of Floating Floors
- DIY-Friendly Installation: Floating floors are famous for their easy installation process. You won’t need professional tools or specific expertise. The planks typically click or lock together, simplifying the process. This ease makes them a favorite for homeowners who enjoy do-it-yourself projects. This also saves the money you would pay a professional.
- Adaptability: These floors are flexible. They can be installed over various subfloors, like concrete, wood, or even existing flooring, as long as the subfloor is level. This adaptability is especially useful in renovations where you want to minimize demolition and cost. This makes them a great option when you aren’t sure what type of subfloor you have.
- Cost-Effective Solution: Due to the ease of installation, floating floors can be more affordable. You can save money on installation costs by doing it yourself. There are also budget-friendly materials. Over the life of your floor, it can save you money.
Drawbacks of Floating Floors
- Susceptibility to Moisture: Floating floors, especially those made from laminate, can be vulnerable to water damage. While some are more water-resistant than others, prolonged exposure to moisture can cause swelling, warping, and damage to the floor. This is something to consider when you are putting a floor in your kitchen or bathroom.
- Sound Issues: Floating floors can sometimes sound hollow. Without a direct connection to the subfloor, they may not absorb sound as effectively, leading to a “hollow” or “clacky” sound when walked on. Using underlayment can help with this issue.
- Limited Lifespan: Compared to floors glued directly to the subfloor, floating floors may have a shorter lifespan. The locking mechanisms can wear down over time, and the floor may need replacement sooner than a glued-down option. This is something to consider if you want a floor that will last decades.
The Question of Glue: Is It an Option?
So, back to the big question: Can You Glue Down a Floating Floor? Pros & Cons? The answer is a bit complicated. Generally, floating floors are not designed to be glued down. The whole point of the floating system is that the floor panels are not directly attached to the subfloor. However, there are some specific situations, and specific floor types, where gluing might be considered. It’s really important to understand the flooring material, the manufacturer’s recommendations, and the potential impact on warranties before you make this decision.
Gluing down a floating floor can affect how the floor functions. It will also affect its ability to handle changes in temperature and humidity. Glued floors don’t move as easily. This means that if they are installed in a situation where expansion and contraction are expected, the floor will crack and break more easily. Always check the manufacturer’s advice, because it could void any warranty you have. It can also create a host of different issues for you down the line.
When Gluing Might Be Considered
- Specific Flooring Types: Some engineered wood or luxury vinyl plank (LVP) floors are designed to be glued, though they are often still considered “floating” in that they are not mechanically fastened to the subfloor. These products will have special instructions for gluing.
- Small Areas: In small spaces like bathrooms or areas with low foot traffic, gluing might be an option if the manufacturer approves it. Gluing might provide a more secure feel. It might also help reduce the chances of moisture getting underneath the floor.
- Enhancing Stability: Some installers might consider gluing the perimeter of the floor (the edges against walls) to provide extra stability, especially in areas with heavy use. This approach should only be done if the manufacturer approves it.
The Risks Involved
- Voiding Warranties: One of the most significant risks of gluing a floating floor is that it will void any existing manufacturer’s warranties. Manufacturers design their floors to be installed a certain way, and altering the installation can negate their guarantee against defects.
- Expansion and Contraction Issues: Gluing down the floor prevents it from expanding and contracting as needed. This can lead to buckling, cupping, or gaps between planks. Changes in temperature and moisture levels can easily damage a glued floor.
- Difficulty of Removal: If you glue a floor down, it becomes difficult or impossible to remove without damaging the subfloor and the flooring itself. This can increase both the time and cost involved in future renovations or repairs.
Step-by-Step Guide: Installation Without Glue
If you’ve decided against gluing (which is often the best choice!), here’s a simple guide to installing a floating floor without glue. This process assumes you’re using a click-lock system, which is the most common for floating floors. Remember to always refer to the manufacturer’s instructions for your specific flooring type, but this offers a general overview to assist you.
Remember that planning is a key part of any DIY project. Make sure you have enough of the materials you need. Also, ensure you have the right tools. If you aren’t prepared, you will only frustrate yourself and make things harder than they need to be.
Preparing the Subfloor
The first step is about setting the stage. Preparing the subfloor is probably the most important part of installing a floating floor. A clean, level, and dry subfloor is the foundation for a successful installation. Any imperfections in the subfloor will show up in the finished floor. This preparation will set the stage for a smooth, great-looking finish.
- Inspection: Examine the subfloor for any issues. Look for unevenness, high spots, or damage. You can use a long level to identify these problem areas.
- Cleaning: Sweep or vacuum the subfloor thoroughly to remove dirt, dust, and debris. Any foreign material can interfere with the flooring installation and possibly ruin the underlayment.
- Leveling: Address any unevenness by leveling the subfloor. You can use self-leveling compounds or patching compounds to fill in low spots or smooth out imperfections.
Installing Underlayment
Underlayment is an important part of the process. It acts as a cushion between the flooring and the subfloor. It helps to reduce sound, provide moisture protection, and improve the comfort of your floor. The right underlayment can improve the longevity and the performance of your new floor. This underlayment is an investment you will be thankful for later.
- Choosing the Right Underlayment: Select an underlayment that is specifically designed for your type of flooring. Consider factors like sound reduction, moisture resistance, and thickness. There are many options, so find the one best suited for your needs.
- Installing the Underlayment: Roll out the underlayment, following the manufacturer’s instructions. Overlap the seams to ensure a seamless barrier and tape the seams together. Some underlayments come with pre-attached adhesive strips or a built-in moisture barrier.
- Moisture Protection: If you live in an area prone to moisture, choose an underlayment with a built-in moisture barrier or use a separate moisture barrier before laying the underlayment. This will help prevent moisture from rising up from the subfloor and damaging your floor.
Laying the First Row of Planks
Now, let’s start actually laying the floor. This step requires precision and a careful approach to ensure that the floor looks great when you are finished. Taking your time will result in a professional-looking installation. Remember to have your tools ready and follow the manufacturer’s guidelines, which will often offer valuable advice.
Planning: Plan the layout of your floor by determining the direction the planks will run. This is often done to maximize the length of the room or to make the room look larger. It’s often best to run planks in the direction of the longest wall.
First Row: Start by laying the first row of planks, making sure to leave an expansion gap of about 1/4 to 3/8 inch (6 to 10 mm) around the perimeter of the room. This gap allows the floor to expand and contract without pressing against the walls. Use spacers to maintain the gap.
Clicking the Planks: Most floating floors use a click-lock system. Align the planks and click them together according to the manufacturer’s instructions. The specific method will vary depending on the product, so read the instructions carefully.
Installing Subsequent Rows
With the first row in place, you can move on to the rest. This part will involve some cutting and fitting, but the main principle remains the same. Make sure that you are keeping the expansion gap and clicking the planks together securely. Accurate measurements will make your installation look much better. You can do this!
Staggering Seams: Stagger the end seams of the planks in subsequent rows to create a more stable and visually appealing floor. This is usually achieved by cutting the first plank in the second row to a shorter length.
Clicking and Locking: Continue clicking and locking the planks together, ensuring that the seams are tight and flush. Use a tapping block and a rubber mallet to gently tap the planks together if needed. This ensures a tight fit.
Cutting Around Obstacles: When you reach obstacles like pipes or door frames, measure and cut the planks carefully to fit around them. Use a jigsaw or a hand saw for these cuts.
Finishing Touches
The final steps involve finishing the edges and adding moldings to complete the look. These small details can make a big difference in the overall appearance of your new floor. Taking the time to do these steps properly can make a great floor look even better. You are almost there!
- Installing Baseboards and Quarter Round: After the floor is installed, install baseboards or quarter-round moldings along the perimeter to cover the expansion gap. This also gives the room a polished look.
- Adding Transition Pieces: Use transition pieces (such as T-moldings) to cover the expansion gaps where the floor meets other flooring surfaces, such as doorways or hallways.
- Inspection: Inspect the finished floor to make sure there are no gaps or any other issues. Sweep or vacuum to remove any debris. Now, enjoy your new floor!
The Impact of Temperature and Humidity
Temperature and humidity greatly impact floating floors. These floors are designed to move and adjust based on changes in their environment. Understanding this is key to a long-lasting and great-looking floor. The most significant thing is to allow for expansion gaps so the floor has room to adjust.
During warm and humid weather, the flooring can expand. In cold and dry weather, it can contract. The expansion gaps around the perimeter are critical because they give the floor space to expand without buckling or lifting. Humidity, especially high humidity, can also cause planks to swell. If there is no space to expand, it can create significant issues.
How Temperature Affects Flooring
- Expansion and Contraction: Temperature fluctuations cause the flooring materials to expand or contract. This is natural for most materials. However, if the floor is glued down, it will not be able to do this properly.
- Heating and Cooling Systems: Direct exposure to heat or cold from heating and cooling vents can affect the planks directly. It is important to avoid letting the air blow directly onto the floor.
- Sunlight Exposure: Direct sunlight can cause fading and potentially damage the floor, especially in areas with large windows. Use curtains or blinds to limit sun exposure.
The Role of Humidity
- Moisture Absorption: High humidity levels cause the flooring materials to absorb moisture, leading to swelling and expansion. This is why you need to have a great underlayment.
- Indoor vs. Outdoor Humidity: Indoor humidity levels should be controlled using a humidifier or dehumidifier, as needed. If you are in a location with high humidity, you will need to take extra steps to protect your floor.
- Avoiding Water Damage: Protect your floor from water damage by cleaning up spills immediately and ensuring that any leaks are promptly addressed. Any standing water is going to ruin your floor, and is something you need to avoid.
The Importance of Expansion Gaps
Expansion gaps are the most important part of the installation process. They’re designed to accommodate expansion and contraction. Without adequate expansion gaps, the floor will buckle or lift. These gaps are always left around the perimeter of the room and around any fixed objects such as pipes or pillars.
- Perimeter Gaps: The perimeter gap is the space left between the floor and the walls. The size of the gap depends on the manufacturer’s instructions. A minimum of 1/4 inch is usually recommended, but some flooring materials may require a larger gap.
- Gaps Around Fixed Objects: Similar expansion gaps are left around fixed objects like door frames, pipes, and other protrusions. This ensures that the floor can move without being restricted.
- Using Spacers: Expansion spacers are helpful tools used to maintain the correct gap size during installation. They are placed around the perimeter of the room and removed once the installation is complete.
Choosing the Right Floor Material
The materials available for floating floors vary considerably. Each one has its own characteristics, benefits, and drawbacks. Consider factors such as durability, water resistance, style, and cost when making your choice. If you want a floor that will last a long time, consider the different factors of each material. This decision will affect the long-term performance and appearance of your floor. The better the material, the longer the floor lasts!
Laminate Flooring
Laminate flooring is a popular choice due to its affordability and wide variety of styles. It’s constructed from multiple layers, including a high-density fiberboard (HDF) core, a design layer that mimics wood, tile, or stone, and a wear layer that protects against scratches and stains. It is a good choice for people who are budget-conscious and want the look of real wood without the cost. The best thing is that you can get a lot of looks from laminate.
- Pros: Affordable, available in many designs, easy to clean, scratch-resistant.
- Cons: Can be susceptible to water damage, may not feel as warm or authentic as real wood, shorter lifespan compared to some other options.
- Cost: Usually less expensive than real wood or engineered wood, making it a good choice for budget projects.
Luxury Vinyl Plank (LVP)
Luxury Vinyl Plank (LVP) is a popular, water-resistant flooring option. It is available in a variety of styles that mimic the appearance of wood or stone. It is constructed from multiple layers of vinyl, providing durability, water resistance, and comfort underfoot. LVP is an excellent option for areas with high moisture or heavy foot traffic. The key thing is that it is water resistant, so you can put it in your bathroom.
- Pros: Highly water-resistant, durable, comfortable underfoot, easy to maintain.
- Cons: Can be more expensive than laminate, may not feel as authentic as real wood.
- Cost: Varies widely, depending on quality and features, but is generally more expensive than laminate.
Engineered Wood Flooring
Engineered wood flooring consists of a real wood veneer bonded to a core of multiple layers of plywood or high-density fiberboard (HDF). This construction provides the look and feel of solid hardwood with increased stability and resistance to moisture. It is a great choice because it offers both beauty and functionality. The fact that it is engineered also helps reduce the costs of the installation.
- Pros: Real wood appearance, stable construction, can often be refinished, adds value to the home.
- Cons: More expensive than laminate or LVP, can be susceptible to water damage if not properly maintained.
- Cost: More expensive than laminate or LVP, but less than solid hardwood. The cost depends on the thickness of the wood veneer and the quality of the core.
| Feature | Laminate | Luxury Vinyl Plank (LVP) | Engineered Wood |
|---|---|---|---|
| Water Resistance | Generally Not Water Resistant | Highly Water Resistant | Moderate |
| Durability | Good | Excellent | Good |
| Authenticity | Mimics Wood Appearance | Mimics Wood or Stone | Real Wood Veneer |
| Cost | Affordable | Mid-Range | Mid-Range to Higher |
Frequently Asked Questions
Question: Can I install a floating floor in my kitchen?
Answer: Yes, you can install floating floors in the kitchen, but it’s important to choose water-resistant materials like luxury vinyl plank (LVP) or waterproof laminate. Ensure the subfloor is level and follow the manufacturer’s installation guidelines.
Question: What’s the best underlayment for a floating floor?
Answer: The best underlayment depends on your needs. For sound reduction, choose a thicker underlayment with high STC (Sound Transmission Class) and IIC (Impact Insulation Class) ratings. For moisture protection, use an underlayment with a built-in moisture barrier. Check the manufacturer’s recommendations for your specific flooring.
Question: Can I put a floating floor over existing ceramic tile?
Answer: Yes, you can usually install a floating floor over existing ceramic tile, provided the tile is level and in good condition. You may need to use a self-leveling compound to smooth out any unevenness. Be sure to check with the flooring manufacturer.
Question: What tools do I need to install a floating floor?
Answer: You’ll need essential tools like a tape measure, utility knife, saw (jigsaw or circular saw), tapping block, rubber mallet, spacers, and safety glasses. A knee pad can make the work much more comfortable, and a pencil to mark the planks. It is a good idea to have a plan as well.
Question: How do I clean and maintain a floating floor?
Answer: Regular cleaning includes sweeping or vacuuming to remove dirt and debris. For spills, wipe them up immediately to prevent water damage. Use a damp mop with a pH-neutral cleaner specifically designed for the floor type. Avoid using abrasive cleaners or excessive water.
Final Thoughts
Can You Glue Down a Floating Floor? Pros & Cons boils down to this: While the idea might seem like a way to add extra stability, gluing is generally not the recommended route for a floating floor. Doing so often voids your warranty, and it can also cause problems with expansion and contraction, leading to buckling or damage down the line.
The process involves some prep work, such as subfloor preparation and underlayment installation, but the results are well worth the effort. By choosing the right materials, such as water-resistant LVP, and following the manufacturer’s instructions, you’ll be well on your way to a great-looking, durable floor. Get ready to enjoy the transformation – your new floor is just a few steps away!