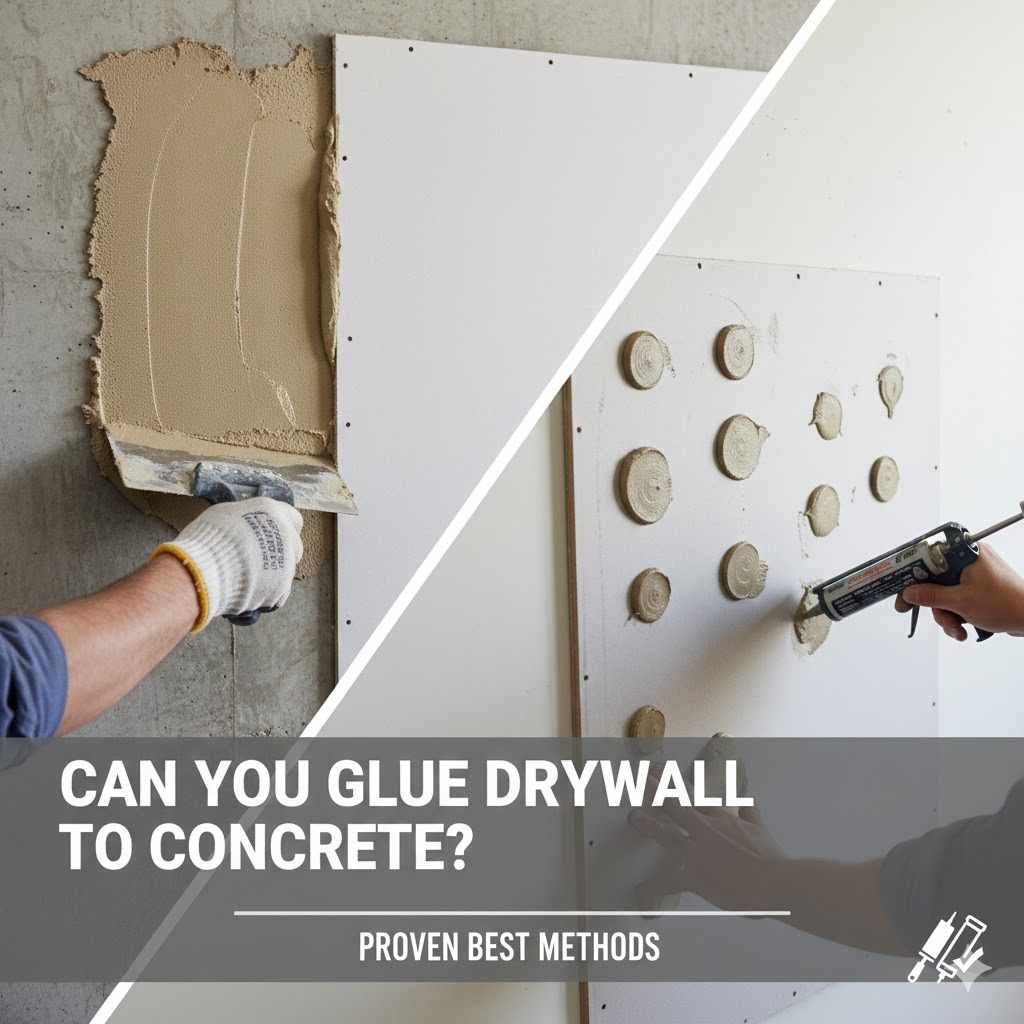
Can You Glue Drywall to Concrete? Proven Best
Yes, you absolutely can glue drywall directly to concrete, and it’s often the fastest and cleanest method for interior finishes. This technique relies heavily on using the right adhesive, proper surface preparation, and following precise curing times to ensure a strong, lasting bond for your new walls.
Hey there! I’m Md Meraj, and I love making big home improvement jobs feel small and totally manageable. Have you ever stood in front of a rough, damp concrete basement wall, wondering how on earth to turn it into a smooth, usable room? It’s a common spot where DIY dreams often stall. Traditional methods involve framing lumber, which is slow, messy, and takes up valuable floor space. But there’s a simpler way! You might be wondering, “Can you glue drywall to concrete?” The short answer is yes, and it’s a fantastic method when done correctly. We’re going to walk through exactly how to pick the right glue and secure that drywall so it stays put for years. Let’s get those walls looking finished!
The Big Question: Can You Glue Drywall to Concrete? The Pros Weigh In
For many years, the go-to method for finishing concrete surfaces involved building a full stud wall, which required cutting lumber, dealing with metal fasteners, and managing insulation between the framing. However, modern construction adhesives have changed the game.
When asking, “can you glue drywall to concrete,” the direct answer from experts is yes, but with very important caveats. You must choose a strong, moisture-resistant adhesive formulated for both gypsum (drywall) and masonry (concrete). This method, often called “direct application,” saves time, material costs, and space.

Why Choose the Adhesive Method Over Traditional Framing?
Before diving into the how-to, let’s look at why gluing your drywall (often called plasterboard in some regions) directly onto concrete block or poured walls makes sense for a beginner DIYer.
Advantages of Gluing Drywall to Concrete
- Saves Space: Framing requires several inches of space between the wall and the framing. Gluing directly leaves you with the maximum possible room size, which is critical in basements or smaller areas.
- Speed: Once the adhesive cures, you move straight to taping and mudding. No hours spent squaring up and fastening every stud.
- Cost-Effective: You save significantly on lumber, insulation placement (though rigid foam insulation is often still needed—we’ll cover that!), and hardware costs.
- Less Mess: Far fewer screws to drill and much less sawdust generated compared to framing.
When NOT to Glue Drywall Directly
While gluing is great, it isn’t always the perfect solution. You should always opt for framing if:
- Severe Wall Unevenness: If your concrete wall is heavily bowed or has variations greater than about 1/2 inch, an adhesive alone cannot bridge the gap evenly. Framing allows you to shim studs perfectly straight.
- High Moisture Issues: If your concrete walls regularly sweat heavily or leak significant water, glue will eventually fail, and moisture trapped behind the board can lead to mold. Address structural moisture issues first.
- Required Insulation R-Value: If local building codes demand a high R-value for insulation that requires thick batting or foam board, framing is necessary to hold that depth.
If your walls are relatively flat and dry, let’s talk about the key ingredient that makes this whole process possible: the adhesive.
Step 1: Selecting the Right Construction Adhesive
This is the most crucial step when tackling, “can you glue drywall to concrete?” Using the wrong glue—like basic wood glue or standard caulking—is a recipe for disaster. You need something industrial, heavy-duty, and moisture-tolerant.
Top Adhesives for Concrete and Drywall Applications
The best products for this job are typically polyurethane-based or advanced hybrid polymers designed specifically for bonding porous materials like masonry to panel products.
| Adhesive Type | Best For | Key Benefit |
|---|---|---|
| High-Grab/Foam Type Construction Adhesive | Flat, minorly textured walls | Creates instant hold, reducing slippage immediately. |
| Subfloor/Sill Sealer Adhesive | High structural demands; good moisture resistance | Excellent long-term bond strength on damp surfaces. |
| DAP Weldbond or PL Premium Equivalent | General purpose, strong bond for typical basements | Versatile, widely available, and user-friendly application. |
Pro Tip from Meraj: When you buy your glue, check the label! Look for terms like “Bonds Masonry to Gypsum,” “High Green Strength,” and verify it resists moisture once cured. Brands like Loctite PL Premium (or their variants) are construction favorites for a reason. Learn more about proper fastener usage from construction standards resources like the International Residential Code (IRC) for best practices regarding wall construction, even when gluing.
Moisture Mitigation: Dealing with Concrete Before Gluing
Concrete is porous. It breathes, and if it’s a basement, it might sweat or wick moisture from the ground. Gluing drywall directly onto wet concrete guarantees failure and potential mold growth. You must control the moisture first.
- Test for Dampness: The simplest test is the plastic sheet test. Tape a 2 ft x 2 ft square of clear plastic sheeting tightly to the concrete wall and seal all four edges with duct tape. Wait 48 to 72 hours. If you see condensation or dampness on the inside of the plastic, you have moisture problems that must be resolved before gluing anything.
- Ensure Ventilation: Make sure any source of bulk water intrusion (leaks) is fixed. Improve airflow; this is especially vital in basements.
- Consider Rigid Foam (Optional but Recommended): Many professionals apply a layer of extruded polystyrene (XPS) rigid foam board (often 1″ thick) directly to the concrete wall first, gluing that down with the same construction adhesive. Then, they glue the drywall to the foam board. This creates an excellent thermal break and prevents drywall paper from contacting cold, potentially damp concrete, significantly reducing condensation risk.
Step 2: Preparing the Concrete Surface for Maximum Adhesion
Think of preparing the concrete like sanding wood before finishing—it’s essential for the glue to bite properly. If the surface is dusty, crumbly, or sealed with paint, your glue won’t grab effectively.
Tools Needed for Surface Prep
- Stiff wire brush or scraper
- Shop vacuum
- Degreaser or concrete cleaner (if surface is oily or contaminated)
- Safety gear: Gloves, dust mask, eye protection
The Surface Preparation Checklist
- Remove Loose Material: Use the wire brush or scraper to chip away any crumbling concrete, old paint, efflorescence (that white, chalky salt deposit), or old adhesive residue. Everything loose must go.
- Clean the Surface: Wash the area if needed, especially if the concrete has been exposed to oils or chemicals. Use a concrete-safe cleaner, rinse thoroughly, and allow the wall to dry completely—this can take several days depending on humidity.
- Achieve Proper Profile: The surface should be clean and relatively flat. For the best possible mechanical bond, slightly roughening glossy or hard-troweled concrete is beneficial, though modern construction adhesives often handle smooth surfaces well if clean.
- Vacuum Thoroughly: After brushing and scraping, vacuum every inch of the wall area where the drywall will touch. Dust is the number one enemy of construction adhesive!
Step 3: The Installation Process – Gluing the Drywall
Now for the satisfying part! Since you cannot rely on screws immediately setting the board in place, timing and method are key to preventing bowed or sagging panels.
Necessary Materials and Tools for Installation
- Drywall sheets (1/2 inch is standard for glued applications)
- High-quality construction adhesive (as selected in Step 1)
- Sturdy caulk gun (rated for heavy loads)
- T-Braces or Heavy-Duty Temporary Supports (e.g., tall clamps or lumber jacks)
- Drywall T-square and level
- Utility knife and measuring tape
Applying Adhesive Like a Pro
Most adhesive manufacturers recommend applying the glue in vertical beads or ribbons rather than a grid pattern. This creates an air cushion that helps outgassing and allows the adhesive to fully contact the concrete surface without gaps.
- Layout Your Panels: Measure and dry-fit your first sheet, planning your seams carefully. Start in a corner.
- Apply the Glue Beads: Cut the tip of the adhesive tube. Apply three to five vertical beads of adhesive along the back of the drywall panel. The beads should run the full length of the panel. If using foam-style adhesive, follow the manufacturer’s recommended pattern (often zig-zag or dotted). If you are bonding drywall over foam board, apply one continuous bead to the foam board instead of the back of the drywall.
- The Immediate Set: This is where a high-grab adhesive shines. As soon as you place the panel, you must press it firmly against the wall, twisting slightly to squish the adhesive.
- Temporary Support is Crucial: Because gravity works against you, you cannot let the panel slump while the glue cures. Place your T-Braces or adjustable supports tightly against the floor and the ceiling, pressing the newly placed panel firmly into place against the concrete. You need firm pressure until the adhesive achieves its initial set—check your product label, usually 30 minutes to a few hours.
- Continue Across the Wall: Install adjacent panels, ensuring seams line up neatly. Keep those supports in place for the required time! Do not remove them early.
Note on Seams and Corners: Even when gluing, try to stagger your seams across different sections of the wall for best visual results. Ensure the final perimeter/corner piece fits snugly but doesn’t require extreme force to slide into place.
Why Temporary Support is Non-Negotiable
When securing drywall via gravity and adhesive alone, those supports (like scaffolding jacks or sturdy props) act as your temporary “screws.” They provide the consistent pressure needed for the chemical bond to form correctly across the entire contact surface. Removing them too soon means the panel could sag over time, creating bumps and waves when you try to tape and mud later. We want beautiful flat walls, right?
Step 4: Fastening for Security and Code Compliance
While the glue does the heavy lifting for surface area coverage, most building practices and professional installations require supplemental mechanical fasteners, even when relying heavily on glue. This dual approach creates an incredibly robust, long-lasting wall system that resists vibration and temperature changes.
The Glue-N-Screw Method
If you skip mechanical fasteners entirely, you rely 100% on the adhesive, which can be risky if you have any localized dips or if the concrete substrate shifts slightly over time. Adding screws (or specialized masonry nails) is cheap insurance.
Here’s a comparison of what fastener approach you might use:
| Application Style | Adhesive Reliance | Mechanical Fastener Needed? | Primary Purpose of Fastener |
|---|---|---|---|
| Adhesive Only (Not Recommended) | 100% | No | N/A |
| Glue and Screw (Standard Best Practice) | 80-90% | Yes | Temporary holding while glue cures; long-term reinforcement at stress points. |
| Adhesive with Foam Board | 70% (Glue adheres board to concrete) | Yes (Screws into studs, not necessary into concrete here) | Securing drywall to the foam/adhered sublayer. |
How to Apply Fasteners Safely
When you screw into concrete, you need different bits than you use for wood studs. You need carbide-tipped masonry drill bits, or better yet, specialized concrete screws.
- Tools Required: Masonry drill bits (if not using specialty screws), power drill or hammer drill, and high-quality drywall screws OR specialized concrete anchors/screws (like Tapcons).
- Placement: Drive screws primarily near the top and bottom edges, and one or two in the center field of the panel. Space them according to your local building code’s recommendation for gypsum board attachment to non-wood framing substitutes.
- Depth Control: When screwing, drive the head of the screw just below the paper surface—this is called dimpling. If you break the paper entirely, the screw will pop loose over time, creating a blemish you’ll have to patch heavily later.
- Removal: If your glue achieves full ‘green strength’ (initial bond) quickly (within 1-2 hours), you might be able to carefully remove the temporary support braces sooner, leaving the screws in place for the long term, or potentially backing them out slightly if you are confident the glue has taken hold structurally across the panel. Most builders leave them in as backup insurance.
For comprehensive fastener depth and spacing guidelines, always refer to the technical data sheets provided by Gypsum Association members or local building department manuals, as requirements can vary based on wall load-bearing status.
Troubleshooting Common Gluing Issues
Even with the best preparation, things can sometimes go sideways. Don’t sweat it! Almost every DIYer faces these issues.
Issue 1: The Drywall Panel is Slipping Down
The Cause: Insufficient grab time, poor adhesive choice, or not using enough temporary support.
The Fix: Immediately reinstall or reinforce your T-Braces/supports. Ensure they are applying serious upward pressure against the ceiling. If the board has significantly sagged, carefully detach it, scrape off the old, uncured adhesive, reapply fresh glue in thick beads, and reinstall immediately with heavy support.
Issue 2: The Adhesive is Squishing Out Everywhere
The Cause: Using too much glue or having a very uneven wall surface.
The Fix: Use a scraper or utility knife to carefully trim the excess adhesive that squishes out along the seams before it fully cures. Clean up small ooze-outs with mineral spirits (if recommended by the adhesive manufacturer for uncured product cleanup). If you are getting major excess due to an uneven wall, you might need to scrape off the panel and apply shims behind the foam board layer, or reconsider switching to framing.
Issue 3: The Wall Feels Hollow or Rattles After Curing
The Cause: Large voids between the concrete and the drywall panel, meaning the glue didn’t bridge the gap, or the temporary supports were removed before the cure was complete.
The Fix: A minor hollow spot can usually be fixed by injecting more adhesive through the sheet using a long, thin injection needle (if your glue is injectable) or by drilling a small pilot hole and forcing a construction adhesive into the void. Follow up by sinking a long masonry screw to pull the board tight to the substrate until the injection cures.
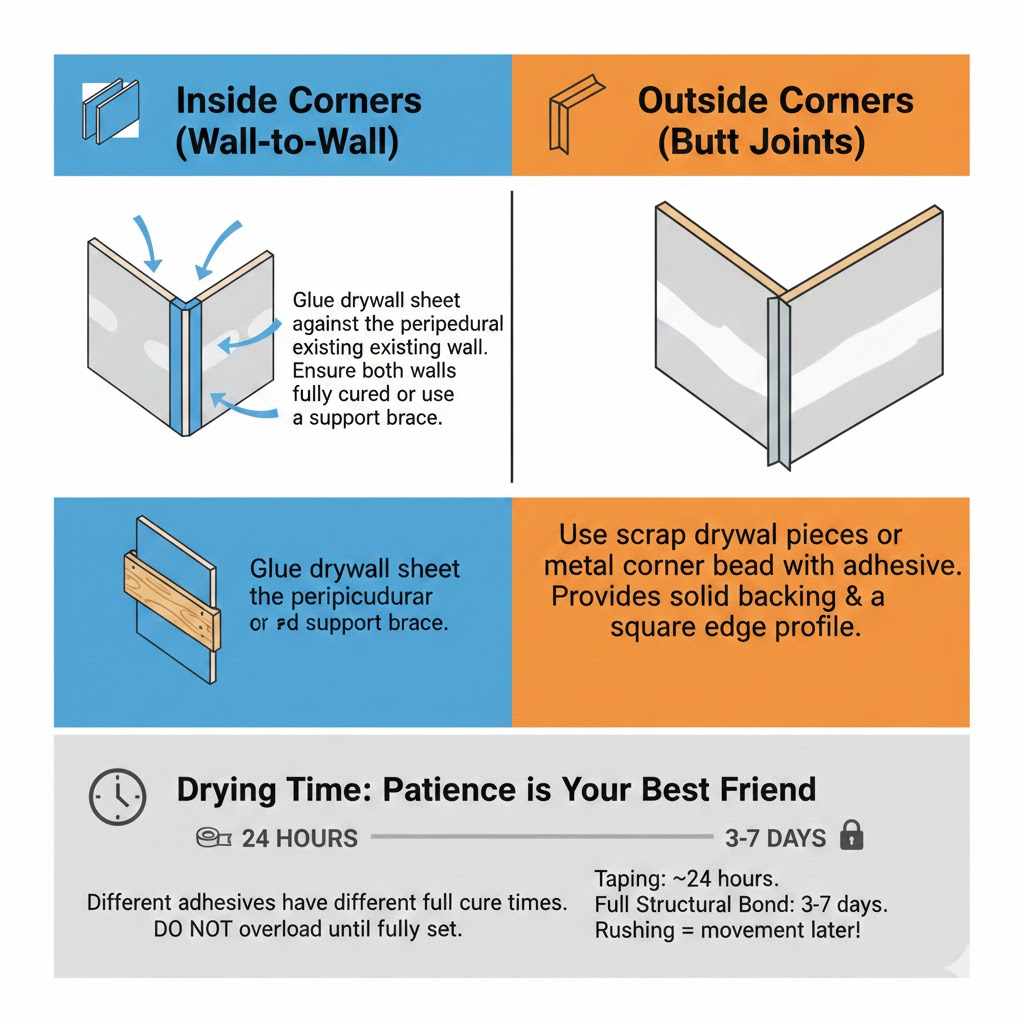
Best Practices for Corner and Edge Work
The perimeter edges and inside/outside corners need special attention to ensure a professional finish where your new drywall wall meets the existing structure.
Inside Corners (Wall-to-Wall)
It is best practice to glue the drywall sheet against the perpendicular existing wall as well, rather than leaving a gap just for joint compound later. Ensure both walls are fully cured or utilize a small perpendicular support brace to hold the corner tight.
Outside Corners (Butt Joints)
For outside corners, use scrap pieces of drywall or metal corner bead placed into the adhesive right as you set the board. This ensures the outside corner has a solid backing to adhere to and gives you a perfectly square edge profile for taping or receiving subsequent drywall sheets.
Drying Time: Patience is Your Best Friend
The “can you glue drywall to concrete” question really hinges on curing time. Different adhesives have different required full cure times. Some might handle taping within 24 hours, but the full structural bond often takes 3 to 7 days. Do not overload the system (like trying to skim-coat the entire room heavily) until you are certain the adhesive has set completely. Rushing this guarantees movement later!
Frequently Asked Questions (FAQ)
- Q: Can I use PL Premium directly on slightly damp concrete?
- A: PL Premium (or similar polyurethane adhesives) are highly water-resistant once cured, but they require a damp, not soaking wet, surface for proper initial bonding. Always test a small area first, and if the wall is sweating heavily, you must stop and resolve the moisture issue first. Addressing moisture, as detailed in Step 1, is vital for long-term success.
- Q: How thick should the layer of adhesive be?
- A: This depends on the roughness of your wall. For flat concrete, use continuous vertical beads about 3/4 inch thick. If the wall is uneven, apply thicker beads or place shims (like thin rigid foam or rigid plastic spacers) at those low spots, but only after confirming the overall concrete flatness first.
- Q: Do I still need joint compound and tape if I glue the drywall?
- A: Yes, absolutely. Gluing adheres the board to the wall; joint compound (mud) and tape finishes the seams between the boards, fills the screw dimples (if you used screws), and creates the final smooth surface ready for paint. The gluing replaces framing, not finishing.
- Q: Can I use liquid nails instead of heavy construction adhesive?
- A: Standard “Liquid Nails” intended for general interior trim or furring strips are generally too weak for the structural demands of holding a heavy drywall panel against a vertical surface without movement. Stick to heavy-duty polyurethane construction adhesives rated for concrete and framing.
- Q: If I use rigid foam board, should I screw through it and the drywall into the concrete?
- A: If you apply foam board, you are creating a composite substrate. You will glue the foam to the concrete, and then glue the drywall to the foam. For high-wind areas or high load needs, some codes require insulation fasteners to anchor the foam to the concrete, but often, the foam and drywall can be secured just to each other via adhesive, relying on the thickness for stability, provided you also add minimal screws where possible.
- Q: Is this method acceptable for exterior wall finishing in new construction?
- A: Typically, no. In new construction where codes demand specific insulation R-values and continuous air/vapor barriers, stick framing is the established method. This gluing technique is primarily favored for non-load-bearing interior renovations, most commonly basement walls.
Conclusion: Finishing Strong with the Right Glue
You’ve learned that the answer to, “can you glue drywall to concrete,” is a resounding and effective yes, provided you treat the surface properly and use the right heavy-duty adhesive. This method is a brilliant time-saver that lets you maximize the space in your project.
Remember the three critical pillars of success: First, prepare that concrete surface impeccably by cleaning away all dust and dealing with moisture threats. Second, invest in a high-grab, masonry-rated construction adhesive—don’t skimp here! Third, be patient and use those temporary braces to apply consistent pressure until the chemical bond fully sets.
By following these steps, you transition from worrying about messy framing to enjoying the satisfying process of attaching solid, stable walls. Go grab your caulk gun with confidence, mentor. You’re ready to tackle those concrete walls and achieve craftsmanship that lasts!