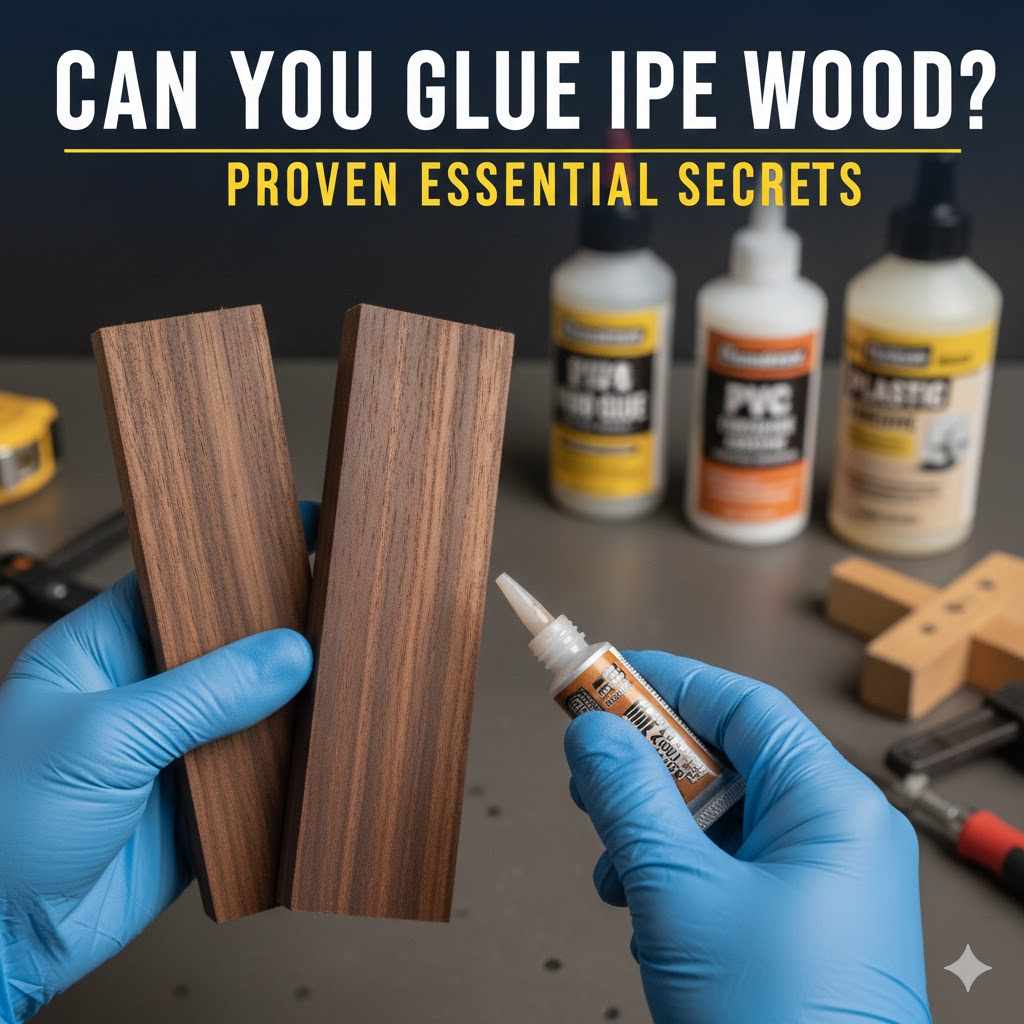
Can You Glue Ipe Wood? Proven Essential Secrets
While Ipe is famous for its natural resistance, which makes gluing difficult, success is possible. You can achieve strong glue bonds on Ipe by thoroughly preparing the oily surface with specialized cleaners and using high-performance structural adhesives like two-part epoxy or polyurethane.
Hello there! I’m Md Meraj, and I know you’ve probably run into a few head-scratchers with Ipe wood. It’s tough, gorgeous, and resists just about everything—which is great for decks, but terrible for woodworking joints that rely on glue. If you’ve tried standard wood glue on Ipe and ended up with a weak, easily separated joint, you are not alone! It’s frustrating when a project falls apart.
Don’t worry. Because Ipe wood has a very dense grain and natural oils that repel liquids, standard techniques just don’t work. But the good news is that with the right approach, surface prep, and glue choice, you absolutely can create lasting, durable glue bonds. We are going to walk through these proven secrets step-by-step, making this beautiful wood work for you!
The Big Question: Can You Glue Ipe Wood Successfully?
The simple answer is yes, but it requires changing how you approach gluing wood. Most exotic hardwoods, like Ipe (often called Brazilian Walnut), have evolved incredible natural defenses. These defenses—primarily the dense nature and the natural surface oils—are fantastic for outdoor durability but disastrous for adhesive adhesion. Adhesives like standard PVA (carpenter’s glue) simply sit on top of these oils, resulting in a “surface bond” that fails quickly under stress or moisture.
To glue Ipe successfully, we must focus on two crucial areas:
- Thoroughly removing or breaking down those natural surface oils.
- Selecting an adhesive that is formulated to bond to tough, non-porous surfaces.
Think of it like trying to paint an oily car without cleaning it first—the paint just peels right off! We need a workshop equivalent of that deep cleaning process.
Why Standard Glue Fails on Ipe: Understanding the Challenge
To fix the problem, we first need to understand exactly what makes Ipe so tricky for glues. It boils down to Ipe’s internal chemistry and structure. Knowing this will boost your confidence when applying the necessary prep steps.
Ipe’s Natural Defenses
- High Density: Ipe is incredibly hard and dense. This means it has very few surface pores for glue to wick into and grab onto. It’s almost like gluing two pieces of polished stone together.
- Natural Oils/Extractives: Ipe is naturally rich in extractives—oily substances within the wood cells. These oils migrate to the surface over time and actively fight adhesion. These oils are why Ipe can last for decades outdoors without chemical treatment.
When you apply common yellow carpenter’s glue (like Titebond Original), the glue sees only oil, not wood fiber. The resulting bond strength is minimal, which is why you often hear people claim you “cannot” glue Ipe.

The Essential Secrets to Gluing Ipe: A Step-by-Step Guide
Mastering Ipe gluing means moving past standard wood glue and embracing industrial-strength preparation methods. Follow these steps precisely, and you will create joints strong enough to rival mechanical fasteners.
Secret 1: Aggressive Surface Cleaning and De-Oiling
This is the single most important step. We must physically remove the surface oils before any adhesive touches the wood. Forget wiping with a damp rag; we need a solvent approach.
Recommended Solvents for De-Oiling:
| Solvent/Cleaner | Pros | Cons & Application Note |
|---|---|---|
| Acetone (Pure) | Excellent oil cutter; evaporates very quickly. | Highly flammable; use in well-ventilated area. |
| Denatured Alcohol | Good general solvent, slightly milder than acetone. | Requires thorough application and multiple wipes. |
| Specialty Wood Degreaser | Formulated specifically for removing extractives in hardwoods. | May be harder to source locally. |
Step-by-Step Cleaning Process:
- Ventilation First: Always work in a very well-ventilated area or outdoors when using strong solvents. Safety glasses and gloves are non-negotiable here.
- Initial Wipe Down: Apply a generous amount of your chosen solvent (Acetone is often the best choice) to a clean, lint-free white rag. Wipe down both surfaces that will meet the joint vigorously. The rag will likely turn brownish or yellowish—that’s the oil coming out!
- Dispose and Re-Wipe: Throw away the contaminated rag (carefully, as it’s flammable) and grab a fresh one with fresh solvent. Repeat the process until the rag comes away clean after wiping the Ipe surface. This might take 2 to 4 passes.
- Flash Off Time: Allow the surfaces to air dry completely for about 10–15 minutes. You need all the solvent to evaporate (flash off) before proceeding.
Secret 2: Creating Surface Profile (Scuffing is Essential)
Even after degreasing, Ipe is too smooth for optimal mechanical locking. We need to scratch the surface just enough to create microscopic valleys for the glue to grab. This is where your sandpaper or abrasive pads come in.
For Ipe, we generally skip very fine grits. We are aiming for surface roughness, not a final smooth finish.
- Use an 80-grit or 100-grit sandpaper, or a rough sanding pad.
- Lightly hand-sand or orbital sand the entire joint surface. The goal isn’t to remove much material, but to create texture. If using an orbital sander, keep the movement quick to prevent burning the dense wood.
- Critical Step: After sanding, vacuum off all dust thoroughly. Then, follow up with one final, quick wipe-down using the solvent (Acetone or Alcohol) again to remove any sanding dust or newly released surface oils.
Secret 3: Choosing the Right Adhesive for Difficult Woods
Standard PVA glue is out. We need a two-part, high-strength adhesive that can bond strongly to surfaces that aren’t very porous. The best choices are 100% solids adhesives that cure chemically, not just through moisture evaporation.
The Top 3 Recommended Adhesives for Ipe
- Two-Part Structural Epoxy: This is my go-to recommendation for critical structural joints. Epoxy doesn’t rely on penetrating the wood grain; instead, it chemically bonds to the surface materials once the oil is removed. Look for epoxies specifically rated for outdoor use or high-stress applications.
- Polyurethane Glue (e.g., Gorilla Glue): While often messier, polyurethane glues cure via a chemical reaction with ambient moisture. Because Ipe has oils that block water, the reaction might be slow or weak if the wood isn’t clean. However, the resulting bond is exceptionally strong and waterproof once cured. Apply it, clamp it firmly, and be prepared for significant squeeze-out.
- Marine-Grade Construction Adhesive (Polymer/MS Polymer based): If you are using Ipe for outdoor decking elements where slight movement might occur (like connecting blocking to joists), these heavy-duty adhesives provide flexibility and immense shear strength.
If you are just gluing small decorative trim, a high-quality construction adhesive (like Liquid Nails Projects or Titebond III for exteriors) might work only if you achieve perfect surface prep using Acetone and 80-grit abrasion.
Secret 4: Proper Application and Clamping
Once the surfaces are clean and profiled, speed is key. Most structural glues, especially epoxies, start setting quickly once mixed (or exposed to moisture, in the case of PU glue).
- Mixing: If using a two-part system (like epoxy), ensure you mix exactly according to the manufacturer’s directions. Incomplete mixing means incomplete curing!
- Application: Apply a liberal, even coat to both mating surfaces. For strong bonds on dense wood, more glue in the joint gap is better than less.
- Clamping Pressure: This is vital. Dense woods like Ipe require very high clamping pressure to force the adhesive deep into the micro-profiled surface. Use high-quality bar clamps or pipe clamps, and ensure they are very tight (without crushing the wood). The pressure squeezes out the excess solvent/oil and maximizes the surface contact between the adhesive and the wood fibers.
For guidance on structural integrity in woodworking, resources like those from the American Wood Council often detail requirements for exterior-grade structural adhesive use, which aligns closely with the standards needed for successful Ipe joints.
Tool and Material Checklist for Ipe Gluing
Keep this handy list near your workbench. Getting the right gear makes the difference between a frustration session and a successful glue-up.
Essential Materials and Tools:
- Safety Gear (Ventilation, Gloves, Eye Protection)
- Pure Acetone or Denatured Alcohol (Must be strong grade)
- Clean, white, lint-free rags
- 80-grit or 100-grit sandpaper
- Electric Random Orbital Sander (Optional, but helpful)
- Shop Vacuum
- Two-Part Structural Epoxy (Recommended) or High-Strength Polyurethane Glue
- Appropriate Clamps (Pipe or Bar Clamps for high pressure)
Dealing with Ipe’s Natural Color Variation Post-Gluing
Ipe wood is prized for its rich, reddish-brown color. When you introduce solvents like Acetone, you might notice that the wood in that small area suddenly looks richer and darker than the rest of your board. This is called “waking up” the color.
Don’t panic! This temporary darkening is a side effect of drawing out the oils.
- Wait it out: Once the solvent evaporates, the wood often returns to its standard weathered or oiled color.
- Plan Ahead: If you are building a piece where the glue joint is exposed and visible (like edge-gluing for a tabletop), make sure all gluing, sanding, and solvent application are completed well before final finishing.
- Sealing: When you eventually finish the Ipe with a UV-blocking oil finish (like Penofin or a deck oil), this finish will fully neutralize the color variation and lock in the deep tone consistently across the entire piece.
Alternative: When Gluing Isn’t the Best Idea
While we have covered how to succeed in gluing Ipe, for projects that need to handle extreme stress or constant exposure to cycles of freezing and thawing, sometimes the best craftsman chooses reinforcement over reliance solely on glue.
Reinforcing Ipe Joints
If your joint is taking a heavy load (like connecting two deck joists end-to-end), you should always mechanically fasten it in addition to gluing. This redundancy is what makes outdoor structures last decades.
For gluing edge joints (like preparing a wider panel), you can utilize techniques developed for hard-to-bond hardwoods:
| Reinforcement Method | Best For | Notes |
|---|---|---|
| Biscuit/Domino Joinery | Edge/Face Glue-ups | Use only for alignment and minimal structural support; glue is still the main component. |
| Splines (Solid Wood or Plywood) | Edge/Mitered Joins | Requires routing a slot; greatly increases glue surface area and alignment stability. |
| Mechanical Screws/Bolts | Butt Joints, High Load Areas | The definitive best practice for Ipe outdoors; glue works as a secondary waterproof barrier. |
For example, when gluing Ipe boards edge-to-edge for a surface, skip biscuits (which don’t handle dense wood well) and opt for a few small dowels or, better yet, use pocket screws or countersunk bronze screws before clamping to pull the edges together tightly while the epoxy cures.
Troubleshooting Common Ipe Gluing Problems
Even when you follow the steps, things can go slightly wrong. Here are quick fixes for common issues that a beginner might encounter when wrestling with this tough lumber.
Problem: The Glue Isn’t Setting (Still Squishy After 24 Hours)
Why: This is usually due to two main culprits:
- Incomplete De-Oiling: Residue oil is blocking the chemical cure of the epoxy or polyurethane.
- Incorrect Mixing Ratio (Epoxy): If you used epoxy and mixed Part A and Part B unevenly, it will never fully cure.
Solution: If it’s polyurethane, you may have to slice out the joint, re-clean the surfaces aggressively with acetone, and re-glue. If it’s epoxy, gently scrape out the soft material, clean thoroughly, and apply fresh, properly mixed epoxy. For external parts, harsh solvents like Acetone are acceptable for re-cleaning an improperly cured joint.
Problem: Glue Joint Separates When Clamps Are Removed
Why: Not enough clamping pressure, or the surface preparation (Secret 1 & 2) was rushed. If the surface isn’t scratched up enough or still oily, the bond relies purely on surface tension, which is easily broken.
Solution: If the separation is clean (no glue stuck to either surface), the entire piece failed to bond. You must disassemble the joint, re-sand and re-clean everything (paying extra attention to the de-oiling phase), and re-glue under high clamping pressure for the full cure time specified by the adhesive maker.
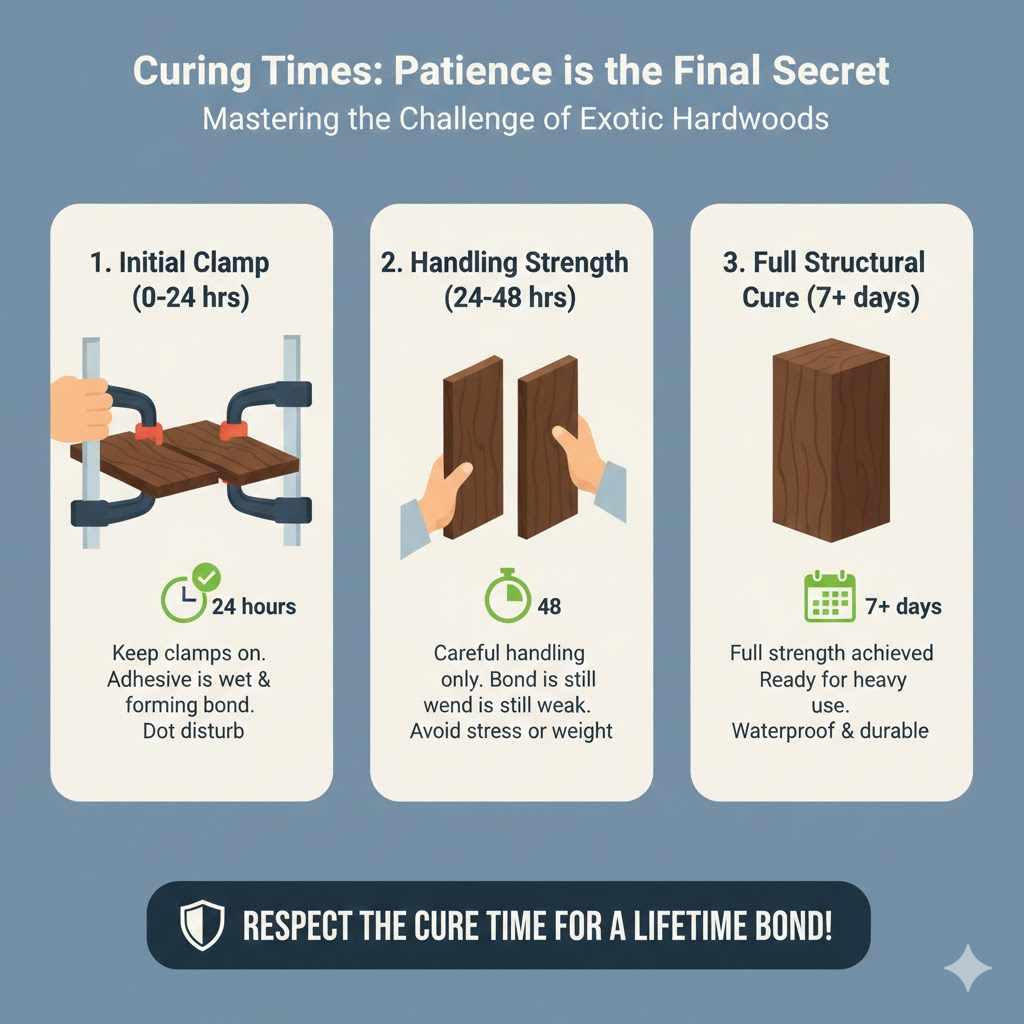
Curing Times: Patience is the Final Secret
Ipe projects demand patience. Since we are using heavy-duty, slow-curing structural adhesives instead of fast-drying wood glues, you must let them work fully.
General Cure Time Guidelines:
- Two-Part Epoxy: Typically 24 hours for handling strength, but often 3–7 days for full structural cure. Do not stress the joint until at least 48 hours have passed.
- Polyurethane Glue: Usually cures to handling strength in about 3–4 hours, but wait a full 24 hours before subjecting it to serious stress.
If you remove clamps too early or test the joint before the specified cure time, you will ruin the bond you worked so hard to establish.
FAQ: Gluing Ipe Wood for Beginners
Q1: Can I use regular Titebond II or III on Ipe wood?
A: No, standard PVA wood glues like Titebond II or III generally fail on Ipe. Their primary mechanism relies on moisture wicking into porous wood fibers, which the dense, oily Ipe resists.
Q2: How long do I need to clamp Ipe boards together?
A: Clamping time depends on the adhesive. For structural epoxies, aim for a minimum of 4–8 hours under high pressure, but let the piece sit undisturbed for 24 hours before moving it significantly.
Q3: Is denatured alcohol or acetone better for cleaning Ipe oil?
A: Pure Acetone is usually more aggressive and effective at cutting through the surface oils quickly. However, ensure excellent ventilation when using Acetone.
Q4: Can I glue Ipe edge-to-edge for a tabletop if I sand it well?
A: Yes, you can, but you must use the structural glue and surface prep detailed above. For reliability, beginners should reinforce the edge glue-up with thin splines or dowels placed in routed channels.
Q5: Will I need to finish my glued Ipe project differently?
A: The finish process itself isn’t changed, but be aware that the solvent prep might temporarily darken the wood around the joints. A high-quality, penetrating exterior wood oil (designed for hardwoods) applied after curing will harmonize the color beautifully.
Q6: What is the biggest mistake beginners make when gluing Ipe?
A: The biggest mistake is skipping the deep de-oiling stage or assuming standard clamping pressure is enough. Ipe demands extreme cleanliness and very high clamping force to overcome its natural slickness.
Conclusion: Building Confidence with Exotic Hardwoods
As your mentor in the workshop, I want you to feel completely capable of tackling Ipe. Yes, it fights back against simple methods, but that fight is predictable! The key takeaway from these proven secrets is this: success in gluing Ipe is 90% surface preparation and 10% selecting the right, tough adhesive.
If you meticulously clean off those natural oils using a solvent like Acetone, mechanically scuff the surface texture, and then commit to using a structural epoxy or polyurethane, you will create joints that last as long as the wood itself. Don’t be afraid of this fantastic material; respect its toughness, prepare it thoroughly, and you’ll soon be crafting beautiful, rock-solid projects with confidence. Happy building!