Can You Paint MDF Wood: Proven Essential Guide
Yes, you can absolutely paint MDF wood! With proper preparation, including sealing and priming, MDF takes paint beautifully, offering a smooth, professional finish for furniture, cabinets, and decorative projects. This guide shows you exactly how.
Have you ever looked at a piece of MDF wood – maybe a cabinet door, a shelf, or even a pre-made furniture kit – and wondered if it’s ready for a splash of color? That smooth, consistent surface feels like it should be paintable, but you might hesitate, worried about how it will turn out. Will the paint soak in unevenly? Will the edges look fuzzy? Will it just end up looking… well, unfinished? It’s a common question for DIYers and homeowners, and thankfully, the answer is a resounding yes!
Painting MDF wood is not only possible, but it can lead to stunning results that rival professionally finished pieces. You just need to know a few simple tricks. This guide is designed to walk you through every step, making it easy and confidence-building. Let’s unlock the potential of your MDF projects!
Why Painting MDF Wood Is a Great Idea
MDF, or Medium-Density Fibreboard, is a fantastic material for many DIY projects. It’s cost-effective, incredibly stable (it won’t warp like solid wood), and has a super smooth surface that’s perfect for painting. Unlike real wood, which has grain that can sometimes show through paint or require special handling, MDF provides a uniform canvas. This makes it ideal for achieving those sleek, modern finishes you see in furniture stores or for giving old furniture a vibrant new look. When painted correctly, MDF can look just as good, if not better, than painted solid wood, offering a durable and attractive surface for years to come.
What You’ll Need: Your MDF Painting Toolkit
Gathering the right supplies is the first step to a successful painting project. Don’t worry, you likely have some of these items already! Here’s a list of what you’ll need:
- MDF material: The item you plan to paint.
- Sandpaper: Medium-grit (around 120-150) for initial sanding, and fine-grit (220-320) for smoothing.
- Tack cloth or damp cloth: For wiping away dust.
- Primer: A good quality primer specifically designed for wood or composite materials is essential. Look for oil-based or shellac-based primers for the best sealing.
- Paint: Your choice of paint! Latex (water-based) or oil-based enamel paints are excellent for MDF.
- Paint brushes: High-quality synthetic brushes for water-based paints, and natural bristles for oil-based paints.
- Paint rollers: Small foam rollers or short-nap microfiber rollers work best for smooth finishes.
- Paint tray.
- Putty knife or wood filler: For filling any imperfections.
- Safety gear: Gloves, eye protection, and a dust mask (especially when sanding).
- Optional: A paint sprayer for an extra-smooth, professional finish.

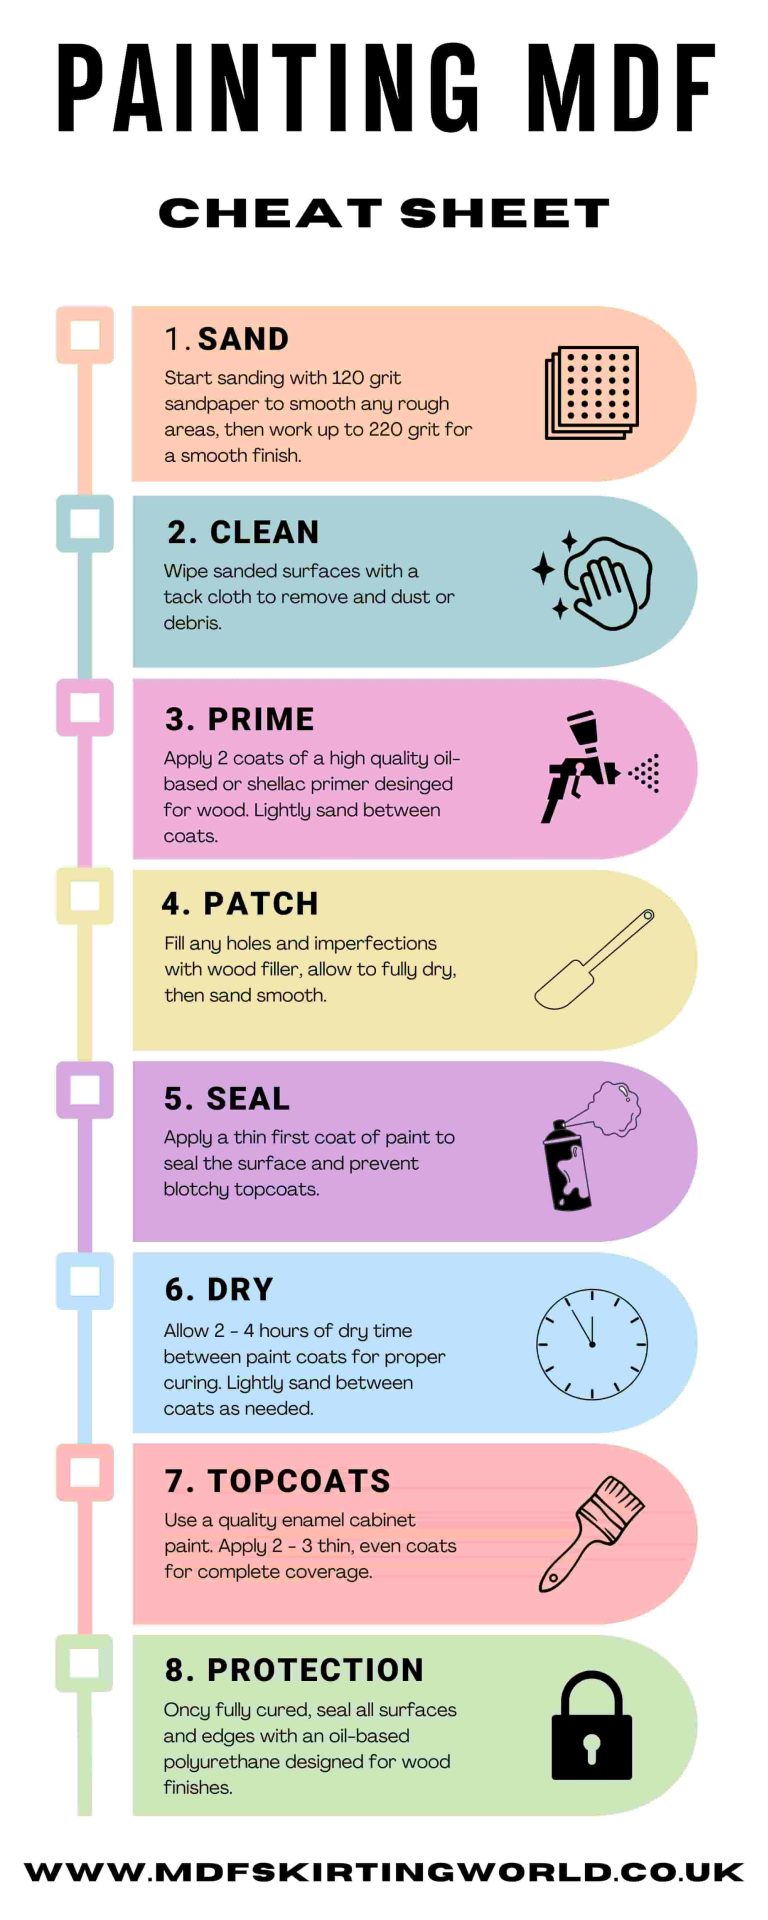
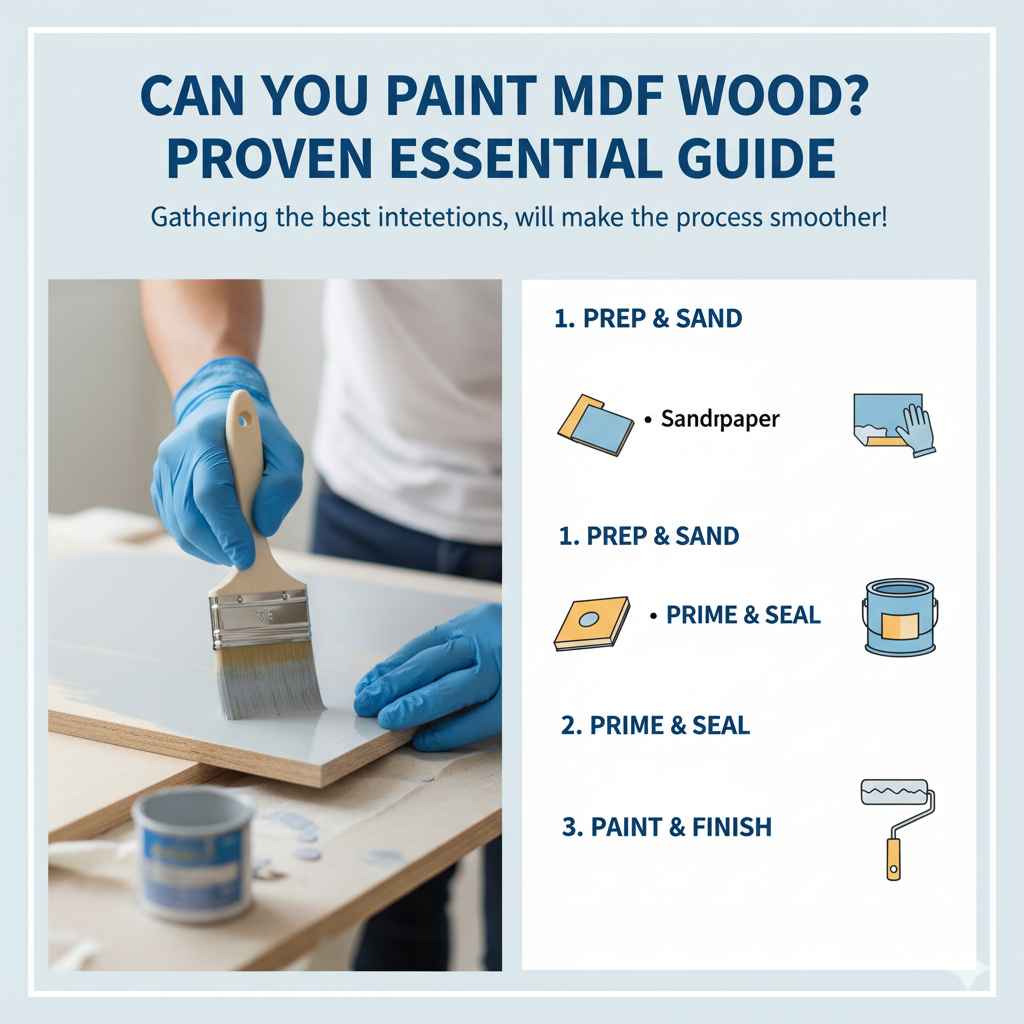
Step-by-Step Guide: How to Paint MDF Wood
Painting MDF isn’t complicated, but it does require a few key steps to ensure a smooth, durable finish. Follow these steps, and you’ll be amazed at the results!
Step 1: Inspect and Prepare Your MDF
Before you even think about primer, take a good look at your MDF piece. Are there any dents, scratches, or rough edges? If you’re working with raw MDF, the edges can be quite absorbent and slightly fuzzy. For any imperfections, use a putty knife to apply a small amount of wood filler. Let it dry completely according to the product instructions. Once dry, gently sand the filled areas smooth with medium-grit sandpaper, then transition to fine-grit sandpaper for a silky finish.
Step 2: Sanding for Smoothness
Even if your MDF piece looks smooth, a light sanding is always beneficial. For raw MDF, a gentle sanding helps to knock down any fuzzy fibers, especially on the edges, and creates a better surface for the primer to adhere to. Use fine-grit sandpaper (220-320 grit). The goal here isn’t to remove material, but to scuff up the surface just enough for the primer to grab hold. Don’t over-sand, as MDF can be damaged.
Step 3: Clean Off the Dust
After sanding, your MDF will be covered in fine dust. This is a critical step that many beginners overlook! Dust left on the surface will get trapped in your primer and paint, creating an uneven and unprofessional look. Use a tack cloth to wipe down the entire surface. A slightly damp microfiber cloth can also work, but make sure the MDF dries completely before moving on. For a really thorough job, you can also use a vacuum with a brush attachment to get into corners and along edges.
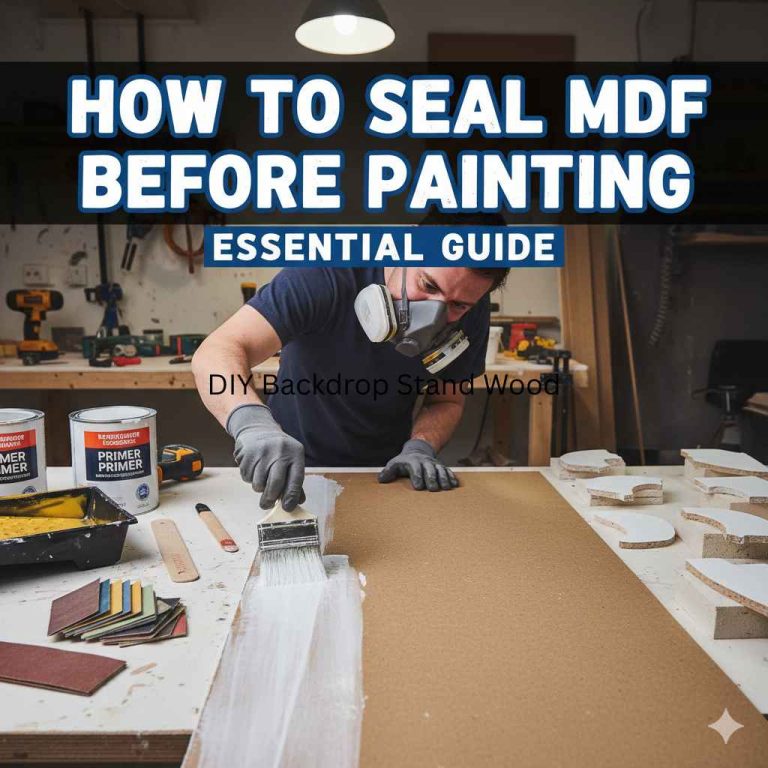
Step 4: Apply a Quality Primer (This is Key!)
This is arguably the most important step when painting MDF. MDF is very porous, especially on the cut edges. If you skip primer or use a low-quality one, your paint will soak in unevenly, requiring many coats and likely still looking splotchy. You need a good primer that seals the material.
Why primer is essential for MDF:
- Seals the surface: Prevents the MDF from absorbing too much paint.
- Blocks stains: Some MDF can contain resins that might bleed through lighter paint colors.
- Provides a uniform base: Ensures consistent paint adhesion and color.
- Smooths imperfections: Fills tiny pores and fibers.
For MDF, I highly recommend an oil-based or shellac-based primer. These offer superior sealing properties compared to many water-based primers. Apply one or two thin, even coats. Allow each coat to dry completely according to the manufacturer’s instructions. You might notice the edges puff up slightly after the first coat – this is normal. Once dry, lightly sand the primed surface with very fine-grit sandpaper (320 grit or higher) and wipe away the dust with a tack cloth. This will give you an incredibly smooth surface!
Step 5: Sand and Clean Again
After your primer has dried thoroughly, give it a light sanding with fine-grit sandpaper (220-320 grit). This smooths out any minor imperfections or brush strokes from the primer and creates an even better surface for your paint. Again, wipe away all the dust thoroughly with a tack cloth or a slightly damp cloth. A clean surface is crucial for a flawless paint job.
Step 6: Apply Your Paint
Now for the fun part – applying your chosen color! Whether you’re using latex or oil-based paint, apply it in thin, even coats. Thick coats lead to drips and an uneven finish.
Application tips:
- Use a high-quality roller or brush: Foam rollers or small microfiber rollers are great for smooth surfaces. For tighter areas or edges, use a good quality synthetic brush for water-based paint or a natural bristle brush for oil-based.
- Work in long, even strokes: Avoid stopping and starting mid-panel if possible.
- Paint the edges first: Then move to the larger flat surfaces.
- Allow drying time: Let each coat dry completely before applying the next. This might take a few hours depending on humidity and paint type.
You will likely need two to three thin coats of paint to achieve full coverage and a solid color. Always allow proper drying time between coats.
Step 7: Light Sanding Between Coats (Optional but Recommended)
For an exceptionally smooth and professional finish, consider a very light sanding between paint coats. After the first coat of paint has thoroughly dried, lightly sand the entire surface with extra-fine grit sandpaper (320-400 grit). This removes any tiny dust nibs or imperfections that may have settled on the surface. Wipe away all dust with a tack cloth. This extra step makes a noticeable difference in the final smoothness.
Step 8: Apply the Final Coat
Once you’re happy with the smoothness after sanding and cleaning, apply your final coat of paint. Again, aim for thin, even strokes. Step back frequently to check for coverage and consistency. Once done, allow the final coat to dry completely. This might take longer than previous coats, especially in humid conditions, so be patient!
Step 9: Curing Time
Paint needs time to ‘cure’ – to harden fully and reach maximum durability. While your project might feel dry to the touch within a few hours, it can take days, or even weeks, for the paint to fully cure. During this time, be gentle with your freshly painted MDF. Avoid heavy scrubbing or placing very heavy items on surfaces that might scratch or mar the paint. Check the paint manufacturer’s recommendations for specific curing times.
Choosing the Right Paint for MDF
The type of paint you use significantly impacts the final look and durability of your MDF project. Here’s a breakdown:
Latex (Water-Based) Paints
These are popular for their easy cleanup (with soap and water), low odor, and fast drying times. They come in a vast array of colors and finishes (matte, satin, semi-gloss, gloss). For MDF, especially when using a good primer, latex paints can provide a beautiful, durable finish. Look for paints with good adhesion properties.
Oil-Based (Alkyd) Paints
Oil-based paints are known for their exceptional durability, hardness, and smooth leveling properties. They create a tough finish that is very resistant to wear and tear, making them ideal for high-traffic areas like cabinet doors or furniture. However, they have a stronger odor, require mineral spirits for cleanup, and take longer to dry. If you’re after a rock-hard, super-smooth finish and don’t mind the cleanup process, oil-based enamel is a great choice.
Enamel Paints
This term often refers to paints formulated for durability and a hard finish. Both latex and oil-based paints can be enamels. When you see “enamel” on a paint can, it generally signals a tougher, more resilient coating. For MDF, an enamel paint (either water-based or oil-based) is highly recommended over a standard interior wall paint.
Table: Paint & Primer Comparison for MDF
| Feature | Oil-Based Primer/Paint | Water-Based (Latex) Primer/Paint | Specialty MDF Primer |
|---|---|---|---|
| Sealing Ability | Excellent for blocking tannins and resins. | Good, especially with an oil-based primer first. | Excellent, specifically formulated seals. |
| Durability | Very high, hard finish. | Good to very good, depending on paint quality. | N/A (focus is on prep for paint) |
| Ease of Use | Requires mineral spirits for cleanup, strong odor. | Easy cleanup with soap and water, low odor. | Easy cleanup with soap and water. |
| Drying Time | Slower. | Faster. | Dries relatively fast. |
| Best For | High-traffic items, achieving a glass-like finish. | General furniture, cabinets, decorative items. | Ensuring a perfect base for any paint type. |
Common Problems and How to Fix Them
Even with the best intentions, you might run into a few hiccups. Here are some common issues and how to address them:
- Soggy/Fuzzy Edges: This happens when raw MDF edges absorb moisture. Lightly sand them smooth with fine-grit sandpaper before priming. Using a good quality, slightly thicker primer (like a shellac-based one) can help seal and flatten these fibers.
- Paint Soaking In Unevenly: This is a clear sign that primer was insufficient or skipped. Apply another coat of primer, ensuring it covers all areas. Sand lightly and clean again before painting.
- Brush Strokes or Roller Marks: Too much paint applied at once, or using the wrong tool. Apply paint in thinner coats and use a high-quality roller or brush. For brush strokes, sand lightly between coats.
- Drips and Runs: Usually caused by applying too much paint. Load your brush or roller sparingly, wipe off excess on the edge of the tray, and apply in thin, even coats. If you get a drip, let it dry slightly, then carefully try to sand it down and repaint the affected area.
- Paint Peeling: This can happen if the surface wasn’t clean, wasn’t properly primed, or if you tried to paint over a glossy, un-sanded surface. Ensure thorough sanding and cleaning between all stages.
Remember, a little patience goes a long way! Most small imperfections can be fixed with a bit of careful sanding and an extra coat of paint.
Painting MDF Edges: The Secret to a Flawless Finish
The edges of MDF are its Achilles’ heel when it comes to painting. They are porous and can soak up paint like a sponge, leading to an uneven look. Here’s how to tackle them:
- Prime Generously: Apply extra primer to the edges. You might need two coats just on the edges before priming the entire piece.
- Sand and Seal: After the primer dries on the edges, you might notice they’ve become slightly rough or fuzzy. Lightly sand them smooth with fine-grit sandpaper.
- Consider Edge Banding: For a truly seamless look, especially on cabinet doors or furniture sides, you can apply iron-on edge banding before you start. This material covers the raw MDF edge and creates a surface that paints just like the flat panels. You can find this at most hardware or woodworking stores. Check out resources like Rockler’s guide on edge banding for more in-depth information.
- Use a Small Brush: When painting, use a smaller, high-quality brush to meticulously paint the edges, ensuring even coverage without overloading.
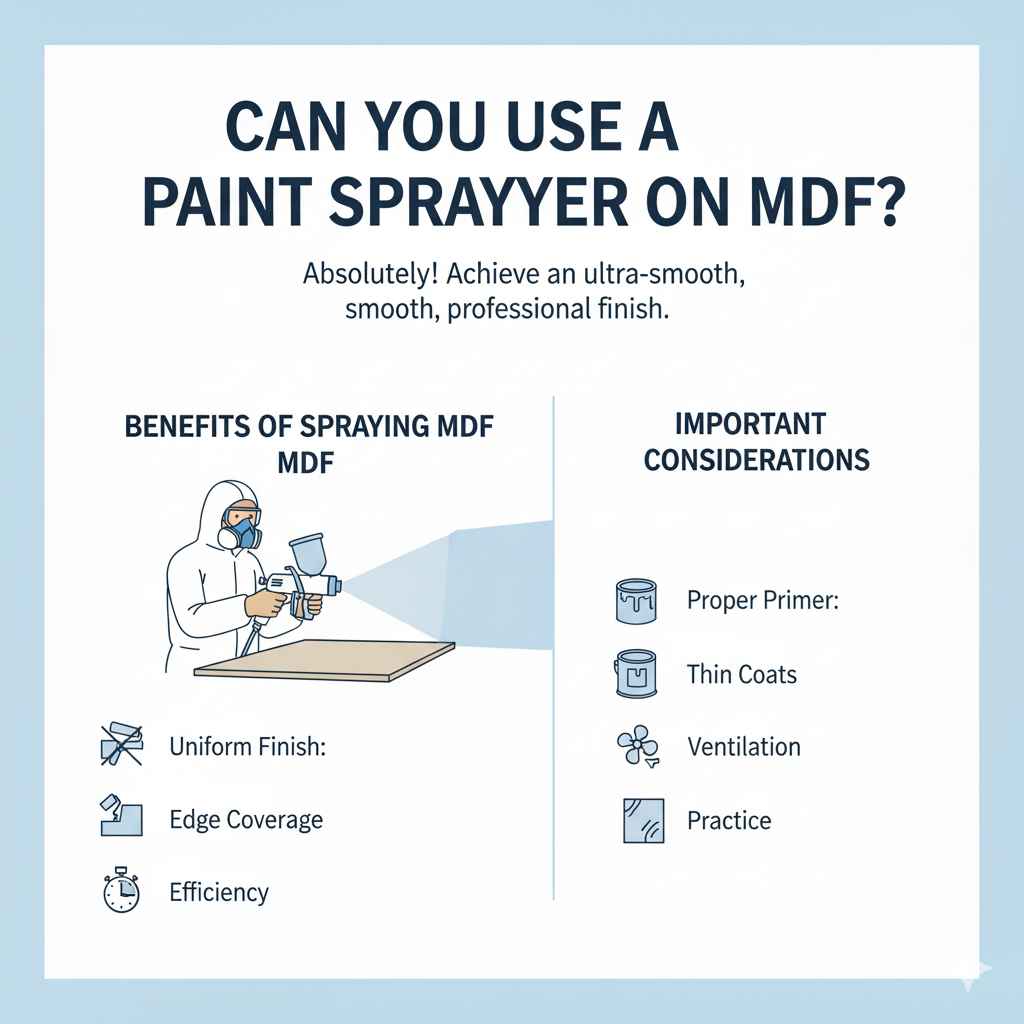
Can You Use a Paint Sprayer on MDF?
Absolutely! If you have access to a paint sprayer (like an HVLP sprayer) and are comfortable using one, it’s an excellent way to achieve an ultra-smooth, professional finish on MDF.
Benefits of Spraying MDF:
- Uniform Finish: Sprayers lay down paint in a very even mist, eliminating brush strokes and roller marks.
- Edge Coverage: They can provide excellent, consistent coverage on edges.
- Efficiency: For large projects, spraying can be faster than brushing or rolling.
Important considerations for spraying:
- Proper Primer: Always prime thoroughly first.
- Thin Coats: Apply multiple thin coats rather than one heavy coat.
- Ventilation: Ensure you have excellent ventilation and wear a respirator.
- Practice: If you’re new to spraying, practice on scrap pieces of MDF first to get a feel for the spray pattern and distance.
For those looking to invest in a good sprayer, resources from organizations like the Environmental Protection Agency (EPA) offer guidance on best practices for painting operations, including ventilation and material use.
FAQ: Your MDF Painting Questions Answered
Q1: Do I really need to prime MDF before painting?
A: Yes, absolutely! Priming is the most critical step when painting MDF. It seals the porous surface, prevents paint absorption issues, blocks potential stains, and provides a smooth base for your paint to adhere to, ensuring a professional, even finish.
Q2: What kind of primer is best for MDF?
A: For MDF, oil-based or shellac-based primers are highly recommended because they offer superior sealing properties. They effectively block the porosity of MDF and any potential resins that might bleed through. Water-based primers can work, but might require more coats and an extra sanding step.
Q3: Can I use regular household paint on MDF?
A: Yes, you can use regular latex (water-based) or oil-based enamel paints. However, the quality of the paint matters. Opt for good quality paints designed for durability, especially for furniture or cabinets. Always use a dedicated primer first for the best results.
Q4: How many coats of paint do I need on MDF?
A: Typically, you will need two to three thin coats of paint after priming. The exact number depends on the color of your paint, its coverage, and the finish you desire. Always allow each coat to dry completely before applying the next.