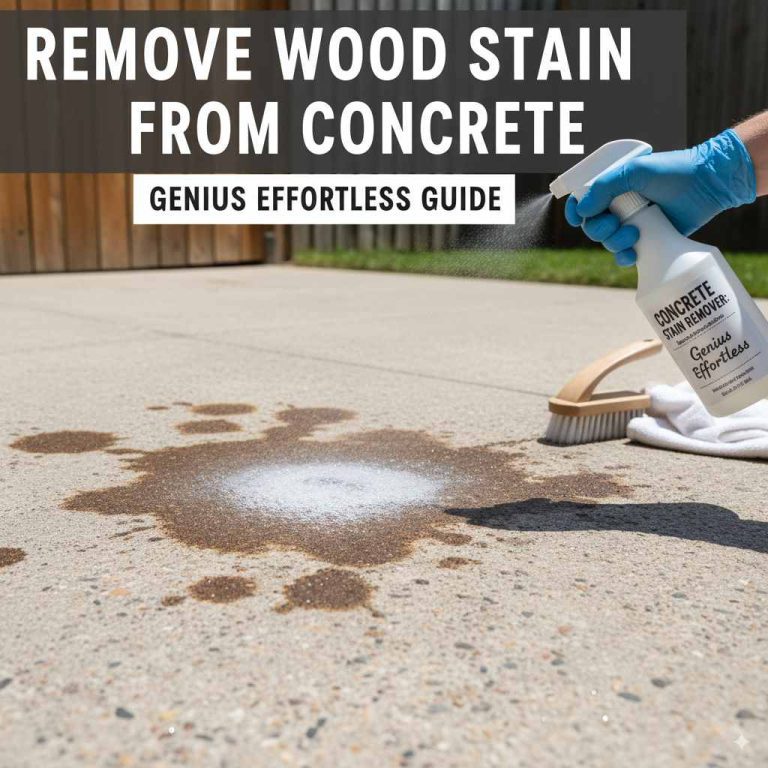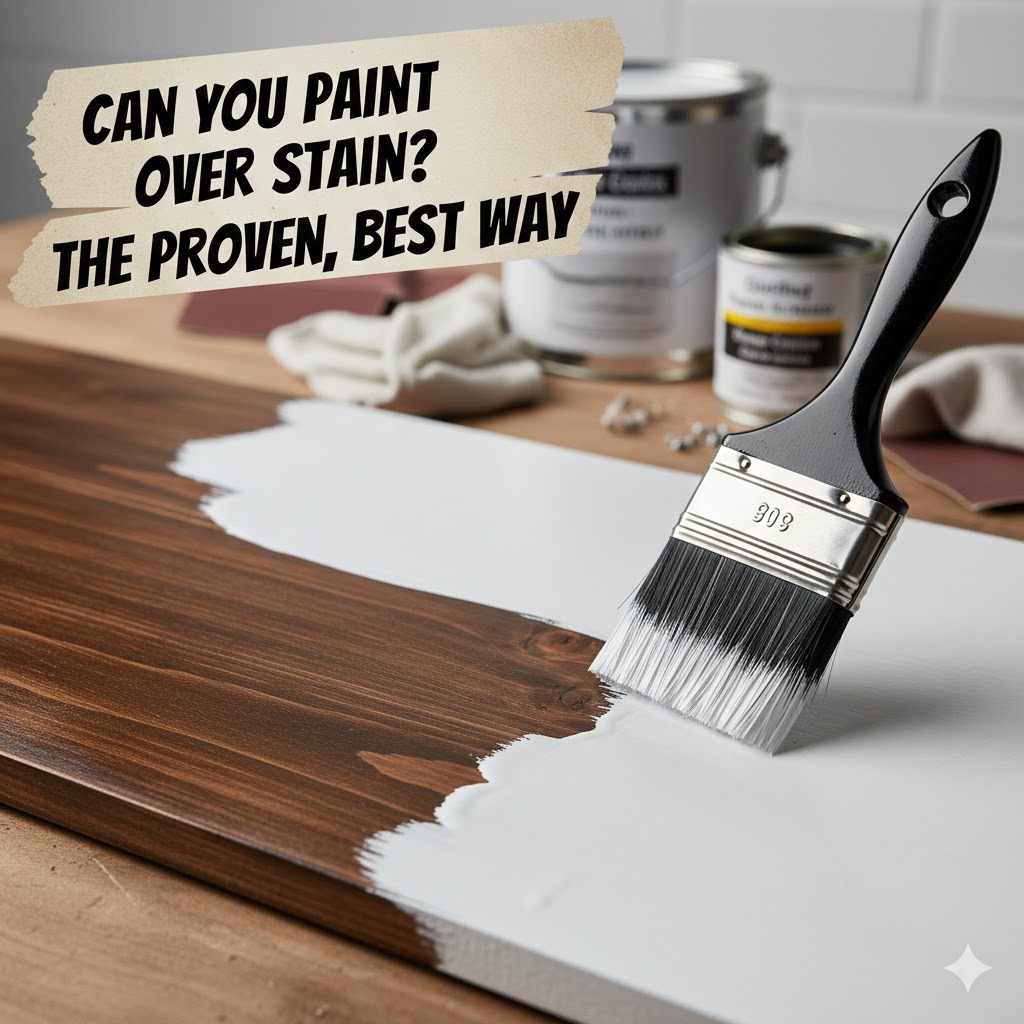
Can You Paint Over Stain? The Proven, Best Way
Yes, you can absolutely paint over stain. The key to a durable, professional finish is to properly clean the surface, scuff sand it to create grip, and most importantly, use a high-quality stain-blocking primer. This essential step prevents the old stain from bleeding through and ensures your new paint color looks perfect.
Hello, friends! I’m Md Meraj. It’s a question I hear all the time in the workshop: you have a beautiful piece of stained wood, but your style has changed. Maybe it’s an old coffee table, kitchen cabinets, or window trim. You love the piece, but not the color. So, can you paint over that stain?
I’m here to tell you with a smile that yes, you can! It’s one of the best ways to completely transform a room. But there’s a right way and a wrong way to do it. Just slapping paint on top will lead to peeling, chipping, and ugly bleed-through. Don’t worry. I’ll walk you through the proven, best way to get a flawless finish that lasts for years. You’ve got this!
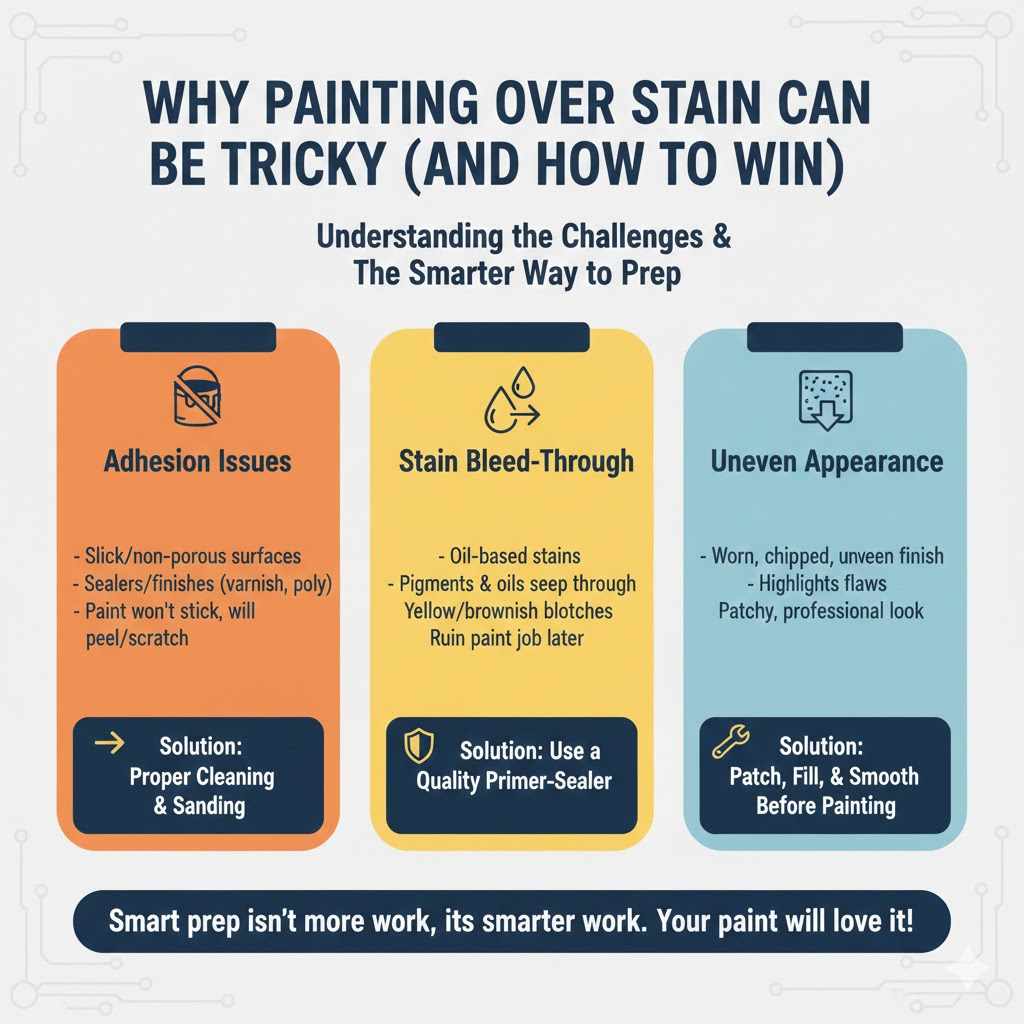
Why Painting Over Stain Can Be Tricky (And How to Win)
Before we grab a brush, it’s helpful to know what we’re up against. Stained wood isn’t like a plain, unfinished board. It has a few characteristics that can cause problems for paint.
The main challenges are:
- Adhesion Issues: Most wood stains contain a sealer or a finish like varnish or polyurethane. Paint has a very hard time sticking to these slick, non-porous surfaces. Without proper prep, your paint will easily peel or scratch off.
- Stain Bleed-Through: Wood stains, especially older oil-based ones, contain pigments and oils. These can slowly seep through layers of paint over time, creating ugly yellowish or brownish blotches. This is often called “tannin bleed.” It can ruin your beautiful new paint job weeks or even months later.
- Uneven Appearance: If the original stained finish is worn, chipped, or uneven, painting directly over it will just highlight those flaws. Your final coat will look patchy and unprofessional.
But here’s the good news: all of these problems are 100% preventable. With a little bit of prep work and the right materials, you can create a perfect surface that your paint will love. The secret isn’t more work, it’s smarter work.
The Right Tools and Materials for the Job
Having the right supplies on hand makes any project easier and more enjoyable. You don’t need a professional workshop, just a few key items. Think of this as your recipe for success.
Essential Supplies List:
- Cleaner: A solution of Trisodium Phosphate (TSP) or a good degreasing cleaner. Simple soap and water can work for light cleaning.
- Clean Rags or Sponges: You’ll need some for cleaning and wiping away dust.
- Sandpaper: Medium-grit (120-150) sandpaper is perfect for scuff sanding. You might also want fine-grit (220) for smoothing between coats. A sanding block or orbital sander helps keep things even.
- Tack Cloth: This sticky cloth is amazing for picking up every last bit of dust after sanding.
- Painter’s Tape: To protect any areas you don’t want to paint.
- Drop Cloths: To protect your floors and furniture.
- Stain-Blocking Primer: This is your most important tool! We’ll talk more about which type to choose below.
- Paint: A high-quality latex (water-based) or enamel paint is best for durability.
- Brushes and Rollers: A good quality angled brush for cutting in edges and a small foam roller for smooth surfaces.
- Safety Gear: Don’t forget your safety! This includes gloves, a dust mask (especially for sanding), and safety glasses. Good ventilation is also key when working with primers and paints. The Occupational Safety and Health Administration (OSHA) has important guidelines on protecting yourself from wood dust.
The Proven, 5-Step Method to Paint Over Stain
Ready to get started? Just follow these steps carefully, and you’ll get a result you can be proud of. We’ll take it one step at a time, making sure each one is done right. No rushing allowed!
Step 1: Clean the Surface Thoroughly
You can’t paint over dirt, grime, or furniture polish. The first step is always a deep clean. This ensures your sandpaper and primer can do their jobs effectively.
- Mix Your Cleaner: If using TSP, follow the directions on the box to mix it with warm water. If using a degreaser, get it ready in a bucket or spray bottle.
- Scrub the Wood: Wearing gloves, use a sponge or rag to scrub down the entire surface. Pay extra attention to greasy spots, like on kitchen cabinets or tabletops.
- Rinse Thoroughly: After scrubbing, wipe the surface clean with a separate rag dampened with fresh water. You need to remove all the cleaning residue.
- Let it Dry Completely: Give the wood plenty of time to dry. This could take a couple of hours or more, depending on the humidity. Don’t move to the next step until it’s bone dry.
Step 2: Sand for Success (Scuff Sanding)
We are not trying to remove the old stain. Let me say that again: you do not need to sand down to bare wood. Our goal is just to “scuff up” the shiny topcoat.
This light sanding creates microscopic grooves and scratches on the surface. These little grooves give the primer something to bite into, creating a strong mechanical bond. Think of it like a rock climber needing handholds to scale a cliff. We’re giving our primer handholds.
- Put on Your Safety Gear: A dust mask and safety glasses are a must for this step.
- Start Sanding: Using your 120- or 150-grit sandpaper, lightly sand the entire surface. Always sand in the direction of the wood grain. The goal is to simply knock off the gloss. When the surface looks dull and matte, you’re done.
- Clean Up the Dust: This is critical! First, vacuum the surface and the surrounding area. Then, wipe everything down with a tack cloth. A tack cloth is sticky and will pick up any fine dust particles left behind. Any dust left on the surface will create a gritty, bumpy finish in your paint.
For very old furniture, it’s wise to consider the possibility of lead paint. The Environmental Protection Agency (EPA) provides guidance on how to safely handle surfaces that might contain lead.
Step 3: Prime Like a Pro
If sanding is the handhold, primer is the glue. This is the single most important step for a lasting paint job over stain. Do not skip it!
A good stain-blocking primer does two amazing things:
- It sticks to the old finish like nothing else.
- It creates a powerful barrier that stops oils and tannins from the old stain from bleeding through to your new paint.
Apply one even coat of your chosen primer with a brush or roller. Make sure to cover every inch of the surface. Don’t worry if it looks a little thin or streaky; its job is to seal and bond, not to look perfect. Let the primer dry completely according to the manufacturer’s instructions. Some primers dry in an hour, while others may need to dry overnight. For dark stains, a second coat of primer is a great insurance policy.
Step 4: Apply Your Paint Coats
Now for the fun part—seeing your vision come to life! With the surface clean, scuffed, and primed, the painting itself is straightforward.
- Lightly Sand the Primer: If the primed surface feels a little rough, give it a very light sanding with 220-grit sandpaper. This creates an ultra-smooth base for your paint. Wipe away any dust with a tack cloth.
- Apply the First Coat of Paint: Using a high-quality brush or roller, apply your first coat of paint. Use long, even strokes. Don’t try to cover everything perfectly in one go. A thin, even coat is better than a thick, drippy one.
- Let it Dry: Follow the paint can’s instructions for dry time. Be patient! Rushing the next coat will ruin the finish.
- Apply the Second Coat: Once the first coat is fully dry, apply your second coat. This coat will provide the full, rich color and even coverage you’re looking for. Most projects will need at least two coats of paint.
Step 5: Protect Your Finish (Optional but Recommended)
For high-traffic surfaces like tabletops, cabinets, or chairs, a final protective topcoat is a fantastic idea. It adds a layer of defense against scratches, scuffs, and spills.
A water-based polyurethane or polycrylic is a great choice. They are durable, dry clear, and don’t yellow over time like oil-based finishes can. Apply one or two thin coats with a brush, following the manufacturer’s instructions. Let it cure completely (this can take several days) before putting the item back into heavy use.
Choosing the Right Primer: Your Most Important Decision
The primer aisle can be confusing, but for painting over stain, your choices are usually narrowed down to three types. Each has its strengths, and choosing the right one will make your project a success.
| Primer Type | Best For | Pros | Cons | Cleanup |
|---|---|---|---|---|
| Shellac-Based Primer | Blocking heavy stains, knots in wood, and strong odors. The ultimate problem-solver. |
|
| Denatured alcohol |
| Oil-Based Primer | Bare wood and stained surfaces, especially those with oil-based stains. Great for durability. |
|
| Mineral spirits |
| Water-Based (Latex) Primer | General purpose use on clean, lightly stained surfaces. Best for projects with light-colored stains. |
|
| Soap and water |
For most projects involving painting over a dark or unknown stain, I almost always recommend a shellac-based primer like Zinsser B-I-N. It is virtually foolproof for stopping bleed-through. If you are sensitive to fumes, a high-quality water-based stain-blocking primer can also work, but you may need an extra coat.
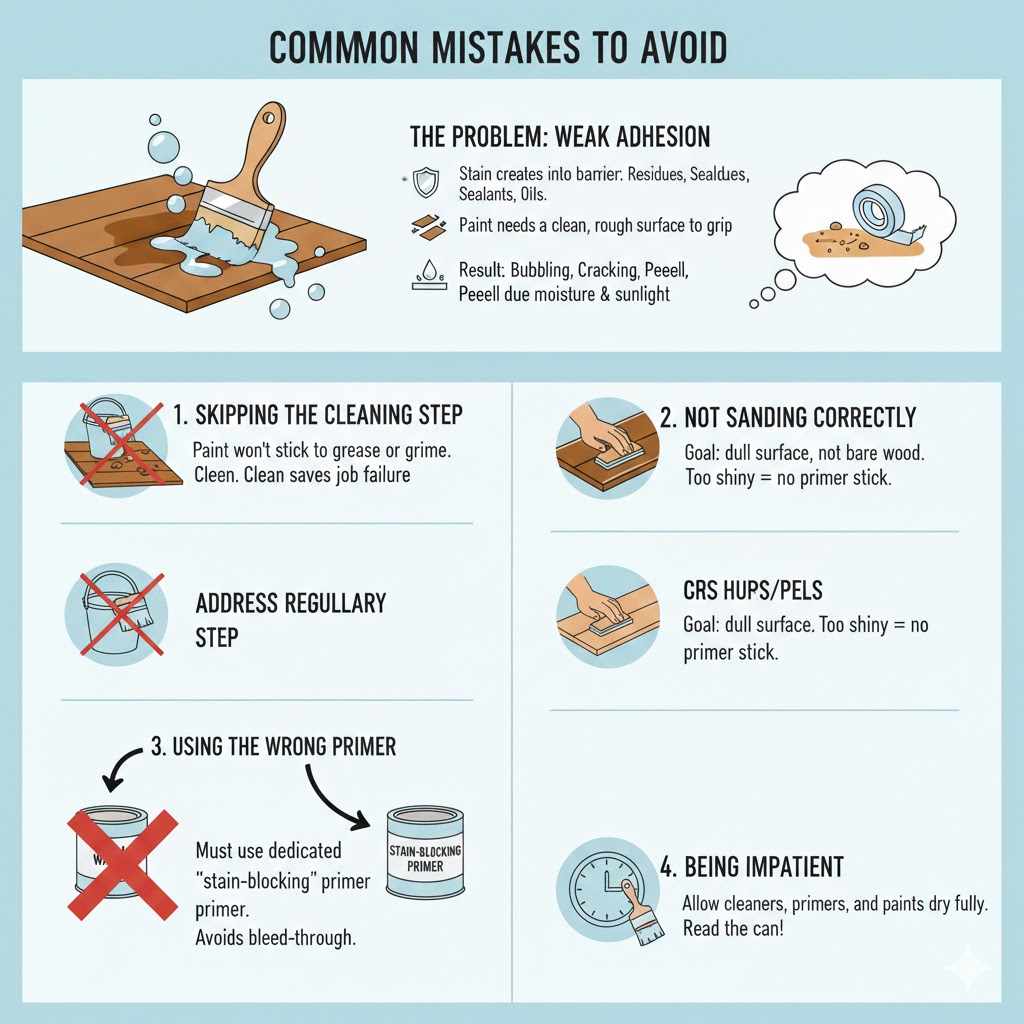
Common Mistakes to Avoid
We all make mistakes, but here are a few common ones you can easily steer clear of:
- Skipping the Cleaning Step: Paint won’t stick to grease or grime. A 10-minute clean can save you from a paint job that fails in 6 months.
- Not Sanding Enough (or Sanding Too Much): The goal is a dull surface, not bare wood. If it’s still shiny, the primer won’t stick. If you sand too much, you’re just making extra work for yourself.
- Using the Wrong Primer (or No Primer!): This is the biggest mistake of all. Using regular wall primer won’t stop stains from bleeding through. You must use a dedicated “stain-blocking” or “stain-killing” primer.
- Being Impatient: Not letting cleaners, primers, and paints dry fully between steps is a recipe for a soft, gummy finish that will never harden properly. Read the can and trust the process!
Frequently Asked Questions (FAQ)
1. Do I have to sand before painting over stain?
Yes, but it’s just a light “scuff” sand. You don’t need to strip off the old finish. The purpose is simply to dull the glossy surface so the primer has something to grip onto. It’s a critical step for durability.
2. Can I use a liquid deglosser instead of sanding?
You can, but I often recommend sanding anyway. Liquid deglossers (or liquid sandpaper) are chemicals that soften the topcoat to help primer adhere. While they can work, they don’t provide the same physical “tooth” that real sanding does for the primer to bond to. For the most reliable, long-lasting results, a quick scuff sand is best.
3. What kind of paint is best to use over stain?
Once you have properly primed the surface, you can use almost any high-quality paint. For furniture, cabinets, and trim, a durable latex enamel or an acrylic-alkyd hybrid paint is an excellent choice. They level out nicely for a smooth finish and are tough enough for everyday use.
4. How can I tell if my stain is oil-based or water-based?
Here’s an easy test: find a hidden spot on the piece and rub a little bit of denatured alcohol on it with a cotton ball. If the stain color comes off on the cotton ball, it’s likely a shellac-based finish. If nothing happens, try the same test with lacquer thinner. If that removes color, it’s a lacquer finish. If neither works, it is most likely an oil-based varnish or polyurethane, which is the most common type.
5. Why is my white paint turning yellow or pink over the old stain?
This is classic stain bleed-through. It’s the oils or tannins from the wood and the old stain leaching up through your paint. This happens when you skip primer or use a primer that isn’t strong enough. The only way to fix it is to apply a coat of a powerful stain-blocking primer (like a shellac-based one) right over the discolored paint, let it dry, and then repaint.
6. Can I paint over a wood stain without primer?
I strongly advise against it. While some “paint-and-primer-in-one” products exist, they are not designed to handle the powerful bleed-through from wood stains. Without a dedicated stain-blocking primer, you risk poor adhesion (peeling paint) and discoloration (blotches) down the road. Taking the time to prime is the best insurance for your project.
You Can Do This!
Painting over stained wood is one of the most rewarding DIY projects you can tackle. It can feel like a big job, but when you break it down into these simple, proven steps, it’s completely achievable. Remember the magic formula: Clean, Scuff, Prime, and Paint.
By preparing the surface correctly and using a quality stain-blocking primer, you are setting yourself up for a beautiful, durable finish that will completely change the look of your furniture or your room. You’ll be amazed at the transformation, and you’ll have the satisfaction of knowing you did it the right way.
So go ahead, pick out that new paint color, and give that old stained piece a new lease on life. You have the knowledge, you have the steps, and I know you can get a result you’ll be proud of for years to come. Happy building!