Can You Shellac Over Paint? Expert Answer
Many DIYers wonder, “Can You Shellac Over Paint? Expert Answer.” It’s a common question because shellac is a fantastic finish, but putting it over paint can seem tricky. Beginners often worry about compatibility and how to get a smooth, lasting result without issues.
Don’t stress! This guide breaks it all down simply. We’ll show you the easy way to make sure your shellac-coated painted surfaces look great.
Shellac Over Paint The Big Question Answered
The simple answer to “Can You Shellac Over Paint? Expert Answer” is yes, you absolutely can, with the right preparation and technique. Shellac is a versatile finish that can adhere to many surfaces, including properly prepared painted ones.
Many people use shellac as a sealer or topcoat to add durability, a nice sheen, and protection to painted furniture, cabinets, or trim. It dries quickly and is relatively easy to work with, making it a popular choice for both beginners and experienced woodworkers. However, success hinges on understanding a few key principles.
Not all paints are created equal, and the condition of the paint surface plays a significant role. Overlooking crucial preparation steps can lead to adhesion problems, bubbling, or a less-than-ideal finish. This section will lay the groundwork for understanding why shellac works and what makes the process successful.
Understanding Shellac As A Finish
Shellac is a natural resin derived from the lac beetle, processed into flakes and then dissolved in alcohol to create a liquid finish. It’s one of the oldest wood finishes known and has been used for centuries in furniture making, instrument building, and more. Its unique properties make it a desirable choice for various applications.
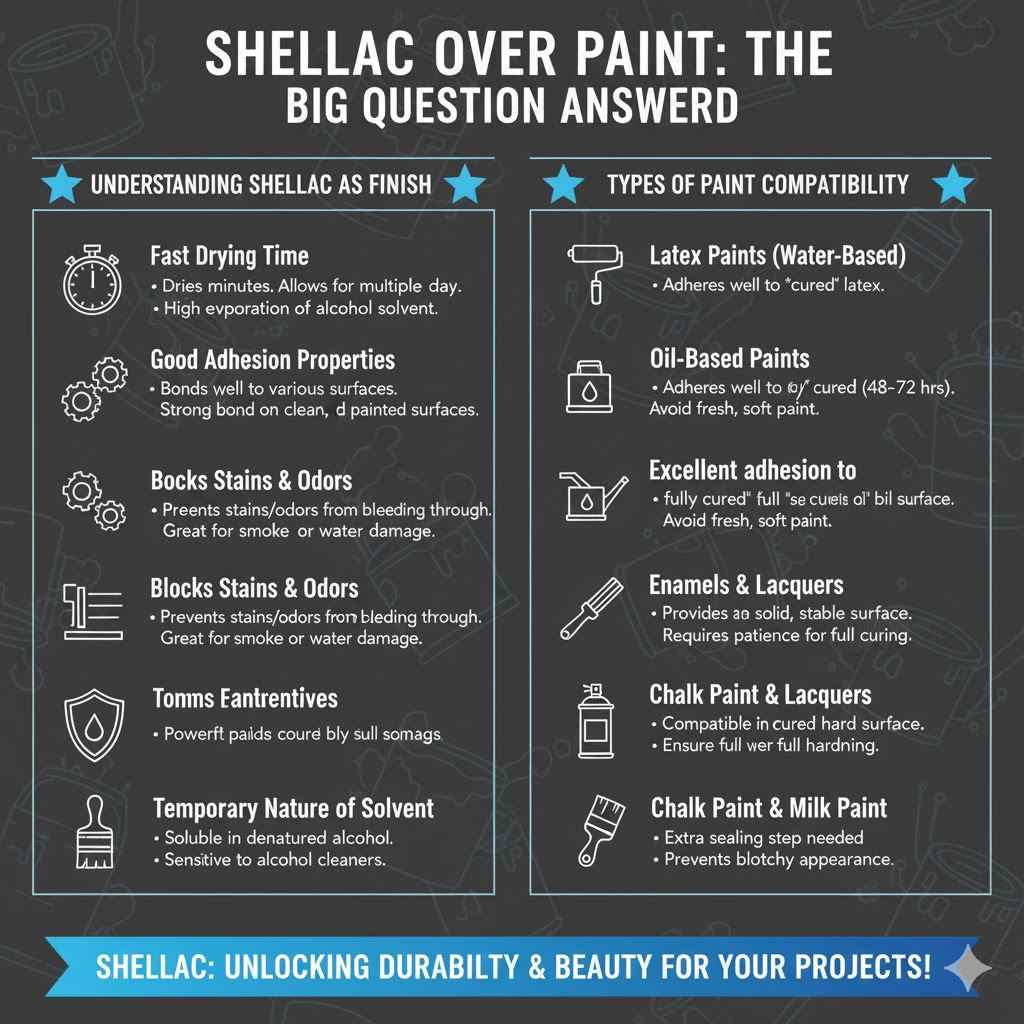
Fast Drying Time
Shellac dries very quickly, often within minutes of application. This is a major advantage for projects where you need to apply multiple coats or move on to the next step without long waits. For example, when refinishing a piece of furniture, you can often apply several coats of shellac in a single day, significantly speeding up the project timeline. This rapid drying is due to the high evaporation rate of the alcohol solvent.
Good Adhesion Properties
Shellac adheres well to a variety of surfaces, including bare wood, stains, and many types of finishes. When applied over a clean, sound painted surface, it can form a strong bond. This ability to stick well is what makes it suitable for use as a sealer or a topcoat, provided the underlying surface is prepared correctly.
Blocks Stains And Odors
One of the key benefits of shellac is its ability to act as a powerful sealer. It is particularly effective at blocking stains and odors. For instance, if you are painting over a piece of wood that has water stains or lingering smoke odors, a coat of shellac can effectively seal these in, preventing them from bleeding through subsequent paint layers or affecting the overall smell of the finished project.
Temporary Nature Of Solvent
Shellac is soluble in denatured alcohol. This means that future applications of shellac can melt into and bond with previous coats, making repairs and recoating straightforward. However, it also means that shellac can be damaged by alcohol-based cleaners or solvents, which is a consideration for its long-term durability in high-wear areas.
Types Of Paint Compatibility
Not all paints behave the same way under a shellac finish. Understanding the types of paint commonly used in DIY projects will help you predict how well shellac will adhere and what precautions might be necessary. The chemistry of the paint, its binder, and its curing process all influence its compatibility with shellac.
Some paints are more forgiving, while others require extra steps to ensure a proper bond. This knowledge is key to avoiding common pitfalls.
Latex Paints (Water-Based)
Latex paints are very common for interior projects like walls, trim, and furniture. Generally, shellac adheres well to cured latex paint. The key is that the latex paint must be completely dry and well-cured. Fresh latex paint can sometimes be “soft” and might lift or react with the alcohol in shellac, causing problems. Ensure the paint has had at least 48-72 hours to cure fully before applying shellac.
Oil-Based Paints
Oil-based paints are known for their durability and smooth finish. Shellac typically adheres very well to fully cured oil-based paints. The curing process for oil-based paints can take longer than latex, so patience is essential. Once an oil-based paint is fully hardened, it provides a solid, stable surface for shellac.
Enamels And Lacquers
These finishes, often used on cabinets and furniture, can also be compatible with shellac. Enamels and lacquers cure to a hard, non-porous surface. Similar to oil-based paints, ensure these finishes are completely cured before applying shellac. Some lacquers contain strong solvents that could potentially re-emulsify or soften under the alcohol in shellac, so a test is always recommended.
Chalk Paint And Milk Paint
These specialty paints are more porous and have a different binder system. While shellac can be applied over them, they often require a specific type of shellac (like de-waxed) or an extra sealing step first to prevent issues. Chalk paint, in particular, can be quite absorbent, and if not sealed properly, the shellac might soak in unevenly or cause a blotchy appearance.
Preparing Your Painted Surface For Shellac
The success of applying shellac over paint hinges almost entirely on the preparation of the painted surface. This isn’t a step to rush or skip. Proper preparation ensures that the shellac will adhere correctly, dry smoothly, and provide the desired protective qualities without lifting or reacting negatively with the underlying paint.
Think of it as building a strong foundation for your finish. A little extra time here will save you a lot of potential headaches later on. This involves cleaning, deglossing, and ensuring the paint is fully ready for the shellac.
Cleaning The Painted Surface
Dirt, grease, dust, and grime on the painted surface can prevent shellac from forming a proper bond. Even a seemingly clean surface can harbor invisible contaminants. A thorough cleaning is the first and most critical step.
This removes anything that might interfere with adhesion, ensuring a smooth, even application of shellac.
Wipe Down With A Mild Cleaner
Start by wiping the entire surface with a damp cloth. For more stubborn grime or grease, use a mild soap and water solution or a dedicated TSP (trisodium phosphate) substitute cleaner. Make sure to rinse thoroughly with clean water to remove any soap residue, as leftover soap can also impede adhesion.
Use A Tack Cloth For Dust Removal
After the surface is dry, use a tack cloth to pick up any remaining dust particles. Tack cloths are sticky and excellent at grabbing fine dust that might be invisible to the naked eye. This step is especially important if the painted surface has been recently sanded or if you are working in a dusty environment.
Degreasing For Oily Surfaces
If the painted surface is in a kitchen or high-traffic area, it might have accumulated grease. In such cases, a degreaser can be very effective. Apply the degreaser according to its instructions, and then wipe the surface clean with a damp cloth and allow it to dry completely.
Ensure Complete Dryness
Before moving to the next step, make sure the painted surface is absolutely dry. Applying shellac to a damp surface can trap moisture, leading to clouding or adhesion issues. Allow ample drying time, especially if you used a lot of water or cleaner.
Sanding And Deglossing
While shellac can adhere to glossy surfaces, sanding to create a slight “tooth” significantly improves its grip. This process, known as deglossing, provides microscopic scratches for the shellac to cling to. It’s a crucial step for ensuring long-term durability and preventing the shellac from peeling or flaking off later.
Light Sanding With Fine-Grit Paper
Use fine-grit sandpaper, such as 220-grit or 320-grit. The goal is not to remove the paint but to scuff up the surface. Lightly sand the entire painted area with gentle, even pressure. This creates a surface that the shellac can mechanically bond to, rather than relying solely on chemical adhesion.
Feather Sanding Edges
If there are any areas with chipped or uneven paint, you can feather sand the edges to create a smoother transition. This helps to blend the repaired areas with the surrounding paint and ensures that the shellac goes on evenly.
Clean Up Sanding Dust Thoroughly
After sanding, it is imperative to remove all dust. Use a vacuum cleaner with a brush attachment to remove the bulk of the dust, then follow up with a tack cloth. Any remaining dust can act as a barrier, preventing the shellac from adhering properly.
Test Sanding In An Inconspicuous Area
If you are unsure about the paint’s condition or how it will react to sanding, test your sanding technique in a small, hidden area first. This allows you to gauge the paint’s hardness and ensure you are not causing any damage.
Checking Paint Cure Time
The cure time of paint is distinct from its dry time. Dry time refers to when the surface feels dry to the touch, while cure time refers to when the paint has reached its maximum hardness and durability. Applying shellac before the paint has fully cured is a common mistake that can lead to adhesion failures.
Understand The Difference Between Dry And Cure
Most water-based latex paints are dry to the touch within an hour or two, but they can take anywhere from 7 to 30 days to fully cure, depending on the brand, temperature, and humidity. Oil-based paints can take even longer, sometimes up to 60 days or more to cure completely.
Consult Paint Manufacturer Guidelines
The best way to know the cure time for your specific paint is to check the manufacturer’s instructions on the can or their website. They will provide recommended cure times before applying topcoats or subjecting the paint to heavy use.
Consider Environmental Factors
Cure times can be significantly affected by environmental conditions. Low temperatures and high humidity will slow down the curing process. Conversely, warm, dry conditions will speed it up. Always err on the side of caution and allow more time if conditions are not ideal.
Perform A Scratch Test
A simple scratch test can give you an idea of the paint’s hardness. After the paint has had ample time to cure, try gently scratching a small, inconspicuous area with your fingernail or a dull object. If the paint gouges or comes off easily, it’s likely not fully cured.
Applying Shellac Over Your Painted Surface
Once your painted surface is clean, lightly sanded, and fully cured, you’re ready to apply the shellac. This is where the magic happens. Shellac is relatively easy to apply, but a few techniques will ensure a smooth, professional-looking finish.
The key is to apply thin, even coats and allow each coat to dry properly before applying the next. This process builds up a durable and beautiful protective layer.
Choosing The Right Shellac Product
Shellac comes in different formulations, and choosing the right one depends on your project and preferences. The most common types are based on their dewaxing process and color. Understanding these differences helps in selecting the best product for your needs.
Dewaxed vs. Waxy Shellac
Traditional shellac flakes contain wax. When dissolved, this wax can cause problems with subsequent finish coats, especially if you plan to apply polyurethanes or lacquers over the shellac later. Dewaxed shellac has the wax removed and is generally preferred for most applications, particularly as a sealer or topcoat over paint. Waxy shellac can be useful for certain artistic effects or if you are not planning any further finishes.
Blonde/Clear Shellac
This is the lightest color of shellac, with very little pigment. It’s ideal when you want to preserve the color of your paint and add protection without altering the hue. Blonde shellac is excellent for sealing over light-colored paints or for a virtually invisible finish.
Amber/Orange Shellac
Amber or orange shellac has a warmer tone due to natural impurities from the lac bug. It can add a warm, antique look to your project. It’s often used on wood to bring out the grain and add depth, but it can also slightly tint lighter painted surfaces.
Dewaxed Shellac Sealers
Many hardware stores sell pre-mixed dewaxed shellac in cans, often labeled as “sanding sealer” or “wood sealer.” These are convenient and ready to use. They are typically blonde or clear and formulated for easy application and sanding.
Application Methods For Shellac
There are several effective ways to apply shellac, each offering slightly different results and levels of effort. The best method for you will depend on the size and shape of your project, as well as your personal preference and available tools.
Brushing Shellac
Brushing is the most common and accessible method. Use a high-quality natural bristle brush for oil-based finishes or a synthetic brush for water-based finishes; however, since shellac is alcohol-based, a natural bristle brush is generally recommended. Apply thin, even coats, working in the direction of the grain if applicable, or in smooth, overlapping strokes on painted surfaces. Avoid over-brushing, which can lead to streaks or bubbles.
Spraying Shellac
Spraying provides the smoothest, most uniform finish, especially on large or intricate surfaces. You can spray shellac using a hvlp (high volume, low pressure) sprayer or a conventional spray gun. Thin the shellac appropriately according to the sprayer’s recommendations. Proper ventilation and personal protective equipment (respirator) are essential when spraying.
Wiping With A Rag (French Polishing Technique)
This is a more advanced technique known as French polishing, which creates an incredibly smooth, high-gloss finish. It involves applying many thin layers of shellac using a rubbing pad (a cloth wrapped around a ball of steel wool or cotton). This method is labor-intensive but yields exceptional results, though it’s less common for sealing over painted surfaces unless a very high gloss is desired.
Using Shellac Sticks For Repairs
Shellac sticks are solid sticks of shellac that can be melted into cracks or defects using a heated tool. While not an application method for a whole surface, they are useful for touching up small imperfections in a shellac finish.
Tips For A Smooth, Even Coat
Achieving a flawless shellac finish requires attention to detail. By following these tips, you can ensure that your application is smooth, even, and free from common imperfections like brush marks, drips, or bubbles.
Apply Thin Coats
This is perhaps the most important tip. Thin coats dry faster and are less prone to drips and runs. It is always better to apply multiple thin coats than one thick, heavy coat. You can build up the desired thickness gradually.
Work Quickly But Deliberately
Shellac dries fast, so you need to work efficiently. Apply the shellac with smooth, overlapping strokes, covering the area as quickly as possible without overworking the finish. Once the shellac starts to set, don’t go back over it, as this can cause lifting or unevenness.
Maintain A Wet Edge
When brushing or spraying, always maintain a “wet edge” where the freshly applied shellac meets the area that is still wet. This ensures that the edges blend smoothly and prevents lap marks. Work in manageable sections.
Sand Lightly Between Coats (Optional)
For an exceptionally smooth finish, you can lightly sand between coats with very fine-grit sandpaper (320-grit or higher) or use a fine steel wool (0000 grade). This knocks down any dust nibs or minor imperfections. Always clean off the dust with a tack cloth before applying the next coat.
Watch For Runs And Drips
Because shellac dries so quickly, runs and drips can be hard to fix once they start. Keep an eye on the edges and corners of your project. If you spot a run forming, you can sometimes gently feather it out with a brush before it dries hard.
Troubleshooting Common Issues With Shellac Over Paint
Even with careful preparation, you might encounter a few snags when applying shellac over paint. Knowing what to look for and how to fix it can save your project. Common problems include adhesion issues, bubbling, and an uneven finish.
Addressing these promptly will ensure your painted and shellac-coated item looks its best.
Adhesion Problems And How To Fix Them
If your shellac starts to peel, flake, or lift from the painted surface, it’s a clear sign of an adhesion problem. This usually stems from inadequate surface preparation or applying the shellac to a paint that wasn’t fully cured.
Identify The Cause
The most common reasons for poor adhesion are a dirty surface, a greasy surface, insufficient sanding (lack of tooth), or applying shellac to uncured paint. Revisit the preparation steps to determine where the process might have gone wrong.
Scrape And Sand Away Loose Areas
Carefully scrape or sand away any areas where the shellac is peeling or flaking. Work until you reach the intact paint layer. Feather the edges of the removed shellac to create a smooth transition back to the existing paint.
Re-prepare The Surface
Thoroughly clean the exposed area and surrounding paint with a tack cloth. If you suspect the paint beneath is still not fully cured, allow more drying time. If the original preparation was insufficient, consider a light scuff sanding of the entire area again.
Reapply Shellac Carefully
Once the surface is prepared, reapply the shellac in thin coats, ensuring each coat dries properly before the next. Pay close attention to the repaired areas to ensure a smooth blend.
Dealing With Bubbles And Fisheyes
Bubbles in shellac can appear as small blisters, while “fisheyes” are small, crater-like imperfections with a ring of material around them. These are often caused by contaminants or surface tension issues.
Contaminants On The Surface
Fisheyes are almost always caused by surface contamination, such as silicone, wax, or oils. Even trace amounts can cause this problem. If you encounter fisheyes, you likely missed a cleaning or degreasing step, or there was a contaminant in your application tools.
Moisture Or Air Trapped
Bubbles can sometimes form if the shellac is applied too thickly, trapping solvent vapors or moisture. Rapid drying in hot, dry conditions can also sometimes lead to bubbles as the surface hardens too quickly.
Correction For Bubbles And Fisheyes
For fresh bubbles or fisheyes, you can often gently smooth them out with a brush before the shellac fully hardens. If they have already dried, you will need to lightly sand them down until they are flush with the surface.
Clean And Reapply
After sanding, thoroughly clean the area with a tack cloth to remove all dust. Then, reapply shellac in thin coats, ensuring your application tools are clean and the surface is free of contaminants. Consider using a flow improver or a de-bubbling agent in the shellac if this is a recurring issue.
Ensuring A Uniform Sheen
Sometimes, shellac can dry with an uneven sheen, appearing patchy or dull in some areas and glossy in others. This can be due to inconsistent application, inadequate drying between coats, or using shellac that has been improperly mixed.
Consistent Application Technique
The most common cause of uneven sheen is inconsistent application. Ensure you are applying the shellac evenly, with consistent pressure and coverage. Avoid going over areas that have already started to dry, as this can create lap marks and uneven gloss.
Proper Drying Times
Make sure each coat of shellac has adequate drying time before applying the next. Rushing the process can lead to issues with adhesion and the final appearance of the sheen.
Thorough Mixing Of Shellac
If you are mixing shellac from flakes, ensure it is fully dissolved and thoroughly mixed. Undissolved particles or uneven mixing can lead to an inconsistent finish. For pre-mixed shellac, stir it gently but thoroughly to avoid introducing too many air bubbles.
Light Sanding Between Coats
As mentioned before, a light sanding between coats with very fine-grit sandpaper can help to level out any slight variations in sheen or texture, leading to a more uniform final appearance. Always follow up with a tack cloth.
Can You Shellac Over Paint? Expert Answer Summary
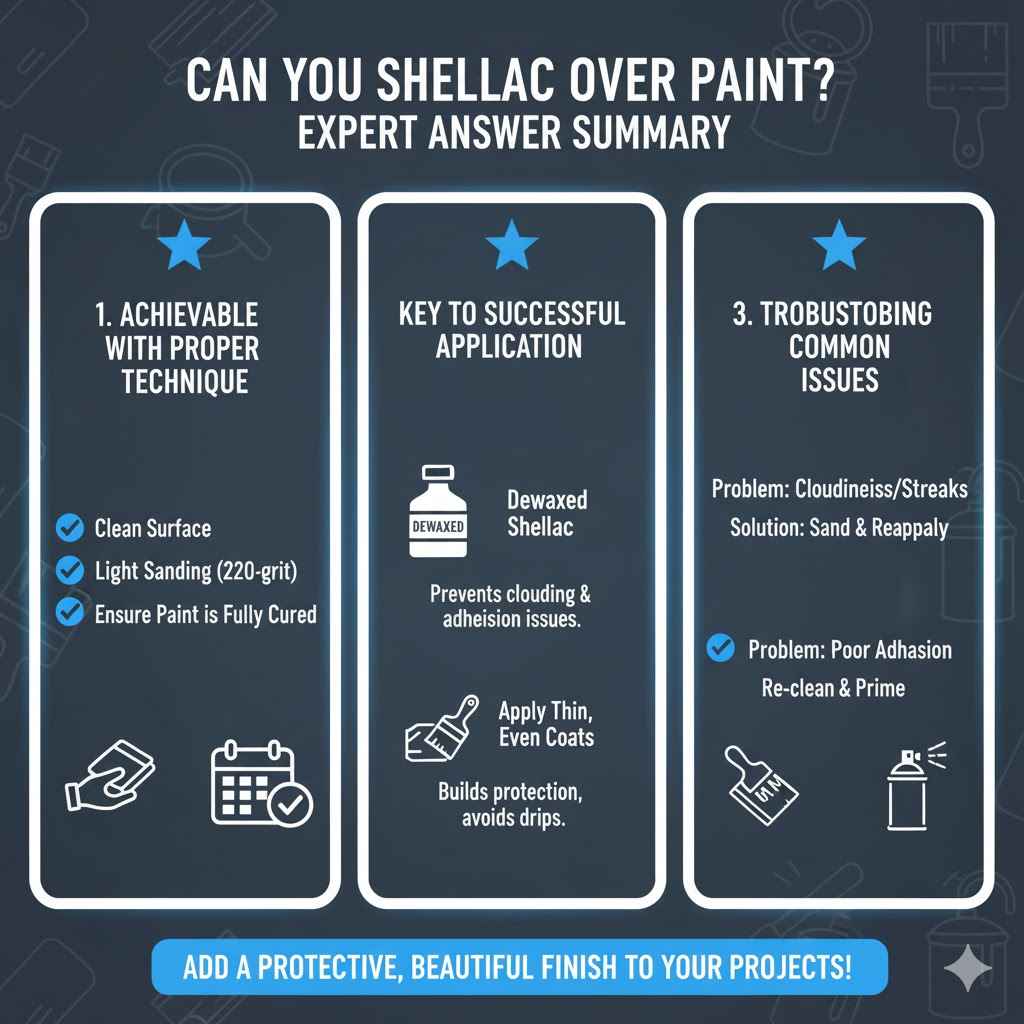
This guide has explored the question, “Can You Shellac Over Paint? Expert Answer.” We’ve established that yes, it’s achievable with proper technique. Success relies on cleaning, light sanding, and ensuring your paint is fully cured.
Choosing the right dewaxed shellac and applying it in thin, even coats are key. If issues arise, they are usually fixable with careful sanding and reapplication. You can confidently use shellac to add a protective and beautiful finish to your painted projects.
Frequently Asked Questions
Question: Can I apply shellac over fresh latex paint?
Answer: No, it is not recommended to apply shellac over fresh latex paint. The paint needs to be fully cured, which can take several days to weeks, to avoid adhesion issues and reactions with the shellac’s alcohol solvent.
Question: Does shellac darken paint?
Answer: Blonde or clear dewaxed shellac will minimally alter the color of the paint. Amber or orange shellac, however, will add a noticeable warm tint to the paint color.
Question: How many coats of shellac should I apply over paint?
Answer: For most painted surfaces, two to three thin coats of shellac are sufficient for protection and to build a nice sheen. You can apply more if a higher level of durability is desired.
Question: Can I use shellac on kitchen cabinets that are painted?
Answer: Yes, shellac can be a good choice for sealing painted kitchen cabinets, as it provides a durable, moisture-resistant barrier. Ensure the cabinets are thoroughly cleaned and the paint is fully cured before application.
Question: Will shellac protect against water damage on painted surfaces?
Answer: Shellac offers good water resistance, making it suitable for protecting painted surfaces from minor spills and moisture. However, it is not completely waterproof and can be damaged by prolonged exposure to water or alcohol-based cleaners.
Wrap Up
You’ve learned that indeed, you can shellac over paint for an excellent finish. The process involves careful cleaning, light sanding, and patience for paint curing. Selecting dewaxed shellac and applying it thinly ensures success.
Minor issues are usually fixable. Go ahead and enjoy adding this protective layer to your projects.