Can You Stain Caulk: Expert Tips and Techniques
Yes, you can stain caulk. But it depends on the type of caulk used.
Some caulks take stain well, while others don’t. Understanding the staining of caulk is important for home improvement projects. Caulking is a common task for sealing gaps and cracks. But sometimes, the caulk’s color doesn’t match the surrounding area. Staining caulk can help blend it in with the rest of the surface.
This guide will explore which types of caulk can be stained, how to do it, and the best practices to ensure a seamless finish. Whether you’re working on a bathroom, kitchen, or any other area, knowing how to stain caulk can enhance the look of your project. Let’s dive into the details and make your caulking job look professional.
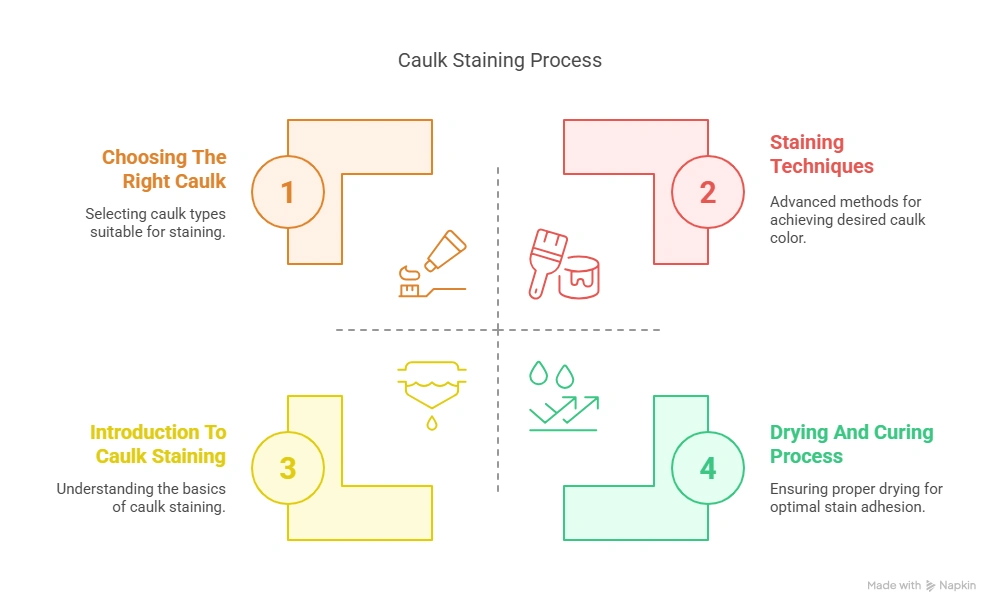
Introduction To Caulk Staining
Staining caulk can change its color. This makes it match your decor. Stained caulk blends with the surroundings. It hides gaps and seams. This gives a clean look.
Stained caulk looks better. It can match walls, tiles, or wood. This helps in home improvement projects. Using the right stain is important. It must stick well to the caulk.
| Type | Use |
|---|---|
| Silicone | Kitchen and bathroom |
| Acrylic | Paintable areas |
| Polyurethane | Outdoor projects |
Choosing The Right Caulk
Silicone caulk is perfect for wet areas. It is water-resistant and lasts long. But, you cannot paint or stain it – pure silicone repels most stains and paints because nothing bonds well to its slick, non-porous surface. Acrylic caulk (often labeled “painter’s caulk” or “paintable caulk”) is great for dry areas. It can be painted or stained. It is not as water-resistant as silicone. Choose based on where you need it.
DAP and GE are top brands for silicone caulk. Alex Plus and Red Devil are popular for acrylic. Each brand offers different features. Read the labels to choose the right one.
Which Caulk Types Actually Take Stain?
| Caulk Type | Takes Stain? | Notes |
|---|---|---|
| 100% silicone | No | Non-porous surface repels stain and paint; use a matching pre-colored silicone instead |
| Pure acrylic latex | Yes | Porous enough to absorb stain once fully cured |
| Siliconized acrylic (hybrid) | Sometimes | Takes stain less evenly than pure acrylic – test a small bead first |
| Polyurethane | Yes, with the right stain | Common for exterior wood trim and log homes; check the label for stainability |
| Paintable/stainable wood filler caulk | Yes | Specifically formulated to accept stain – the easiest choice when the goal is matching wood tone |
If a project specifically needs to be stained to match wood trim or siding, the simplest fix is choosing a caulk labeled “paintable and stainable” from the start, rather than trying to force stain onto a caulk that was never designed to take it.
Preparing Caulk For Staining
First, make sure the surface is clean. Dirt and grime can affect the stain. Use a damp cloth to wipe the caulk. Soap and water work best. Dry the surface fully. This ensures the stain looks even.
Sanding helps the stain stick. Fine-grit sandpaper works well. Sand gently to avoid damaging the caulk. Smooth out rough spots. This prepares the surface for staining. Clean off dust after sanding. Use a damp cloth again. Dry the surface before applying the stain.
Staining Techniques
Stain pens work well on small areas. They are easy to use. Simply apply the pen on the caulk. Let it dry for a few minutes. Repeat if needed for a darker color. Stain pens come in many colors. Choose the one that matches your caulk.
Gel stains cover larger areas. Use a brush to apply. Spread evenly on the caulk. Wait for it to dry. This may take a few hours. Apply more layers if you want a deeper color. Gel stains also come in many shades. Make sure to pick the right one for your project.
Drying And Curing Process
Caulk needs time to dry before staining. Usually, it takes about 24 hours. Some caulk types may take longer. Check the label for exact drying times. Make sure the caulk is fully dry before you stain it.
For best results, let caulk cure for 2-3 days. This ensures the caulk is ready for staining. Avoid touching or moving the caulk during this period. Ventilation helps the caulk cure faster. Open windows or use a fan. Humidity can slow down curing. A dry environment is better.
Common Mistakes To Avoid
Using too much stain can cause problems. The caulk might not dry well. It can stay sticky for a long time. Too much stain can also look uneven. It is better to apply a thin layer. Let it dry properly.
Skipping prep work is a big mistake. Clean the area well. Remove any old caulk. Smooth the surface. This helps the new stain stick better. Proper prep leads to better results.
- Trying to stain 100% silicone caulk. No amount of prep will make stain bond to pure silicone – replace it with a pre-tinted or paintable caulk instead.
- Staining before the caulk fully cures. Uncured caulk is still slightly soft and can smear or absorb stain unevenly. Wait the full cure time on the label, not just the surface-dry time.
- Not testing color on a scrap piece first. Stain color can look different on caulk than it does on the surrounding wood or trim – test on a hidden bead or a scrap of the same caulk before committing.
- Forgetting to seal the stained caulk. Without a clear topcoat, a stained caulk line can fade or wear unevenly faster than the stained wood around it.
Maintenance Tips
Keep stained caulk looking fresh. Clean it often with mild soap and water. Avoid harsh chemicals. They can damage the stain. Dry the caulk well after cleaning. Wet caulk can mold.
Use a fan in the bathroom. This reduces moisture. Less moisture means less chance of mold. Check caulk every few months. Look for cracks or peeling. Fix any damage quickly.
Stained caulk may need touch-ups. Use a matching stain. Apply it carefully with a small brush. Let it dry fully. Check the color. Apply more if needed.
Seal the caulk after staining. Use a clear sealant. This protects the stain. Keeps it looking new longer.
Expert Advice
Start by cleaning the caulk. Dirt and grime can affect the stain. Choose a high-quality stain for the best results. Try to match the stain with the surrounding area. Apply the stain with a small brush or cloth. Use light, even strokes for a smooth finish. Let the stain dry completely before touching it.
- Small brush or cloth
- High-quality stain
- Clean rags
- Protective gloves
- Drop cloth or newspaper
Frequently Asked Questions
Can You Change The Color Of Caulk?
Yes, you can change the color of caulk. Use a paintable caulk or mix tint into clear caulk.
Should I Caulk Before Staining?
No, stain before caulking. Stain can prevent proper adhesion of caulk. Caulk after staining for best results.
Can I Tint Caulk?
Yes, you can tint caulk. Use acrylic paint or pigment to mix with clear caulk for desired color. Ensure proper mixing for consistency.
Can You Stain Over Sealant?
No, you cannot stain over sealant. Sealant creates a barrier that prevents the stain from penetrating the surface.
How Do I Know If My Caulk Is Stainable?
Check the tube or label for words like “paintable” or “stainable.” If the label doesn’t say either, do a small test on a hidden section before committing to the whole bead – pure silicone caulk almost never accepts stain regardless of prep.
Conclusion
Staining caulk can be tricky, but it’s possible with the right steps. Always choose the correct type of caulk for your project – pure silicone won’t take stain no matter how well you prep it, while acrylic and paintable caulks will. Remember to clean the surface well before starting. Use a good quality stain for the best results. Practice on a small area first.
Patience and careful work lead to a great finish. Now, you can tackle your next caulking task with confidence. Your home projects will look more polished and professional. Happy staining!
Sponsored / affiliate links. As an Amazon Associate I earn from qualifying purchases. I may earn additional commission from eligible campaigns.