How to Glue a Veneer Patch Into Damaged Furniture
For tight, clean veneer joints, many makers use liquid hide glue or yellow PVA. Use epoxy mainly when the substrate is crumbly or missing. I always patch over a flat, stable base first. Bad repairs telegraph through finish, leave ridges, and can fail again when the patch shrinks or the wood moves. This guide shows how I match the patch, stabilize the damaged area, and pick the adhesive by failure mode.
This guide is part of our Wood glue essentials: types, uses, and cure times series.
What kind of veneer damage are you repairing?


Start by calling the failure what it is. A small chip, a lifted edge, and a missing section each need different prep, different adhesive behavior, and different trimming risk. The substrate under the veneer matters just as much. If it is swollen, loose, or missing core material, the patch will only be as good as the base beneath it.
Small chips
Small chips often leave a fairly clean cavity with intact veneer around it. They are the easiest repairs if the surrounding veneer is sound and the substrate is flat, dry, and stable. These spots often take a tiny patch cut from matching veneer and glued with PVA wood glue, since the bond area is small and easy to clamp.
Lifted edges
Lifted edges are usually a bond failure, not a missing-wood problem. If the veneer still exists and can be pressed back down without cracking, the fix is often re-bonding rather than replacing the section. If the edge has gone brittle or splintered, cut back to sound veneer before you decide on a patch.
Missing sections
Missing sections need the most careful matching. Cut the replacement piece a bit oversized, match the grain direction and color as closely as you can, and trim it after bonding. If the cavity reaches into soft, broken core or crumbling MDF, stop and repair the substrate first or the patch may sink later.
Check the substrate before choosing glue
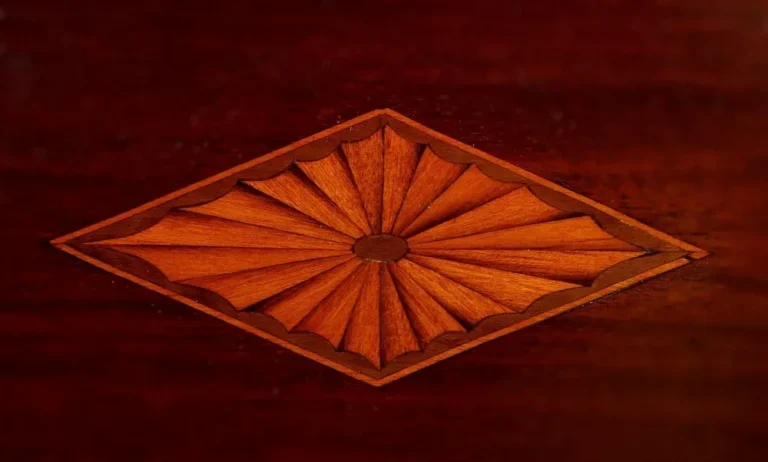
Wood veneer is a thin layer of wood used on furniture and cabinets. It may be paper-backed or wood-backed, and either type generally needs a flat, clean substrate. That substrate can be plywood, solid wood, MDF, or particle board, and it must be stable and dry before any patch goes in.
How do you prepare the damaged area for a patch?
Strip away finish, dust, wax, loose fibers, and anything that keeps glue from reaching bare wood. Then test the surrounding veneer for soundness. If the base is raised, soft, swollen, or loose, stabilize it before patching. Clean surfaces and a flat repair area make the bond work.
Clean, flatten, and test
Scrape away loose finish and debris with a sharp blade or a small chisel, then vacuum the dust. If the surrounding veneer has raised fibers, flatten them gently. Do not force a patch over a hollow or springy spot. That usually shows through the finish later.
Stabilize the damaged substrate first
If the substrate is damaged too, patching veneer over it is a waste of time. Tighten loose fibers, rebuild missing core, or replace weak material so the top surface is firm. A veneer patch needs a base that stays put after the adhesive cures.

Which adhesive should you use for veneer repair?
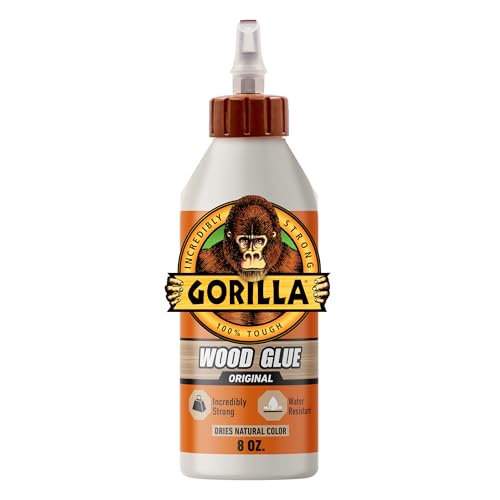
Pick adhesive by failure mode, not habit. PVA wood glue is the best fit for small, porous, well-fitting repairs where clamp pressure can hold the patch flat. Contact cement fits repairs that need instant grab across larger areas, but it gives little room for correction and demands careful alignment.
When PVA wood glue is the better choice
PVA wood glue is a polyvinyl acetate adhesive. It mainly works for wood, paper, and other porous materials, so it suits veneer and wood substrates well. It will not bond metal, glass, or plastic. It is water-soluble when wet, and it usually needs clamps to hold a patch in place while it sets. (familyhandyman.com)
PVA is the better choice when the patch is small, the cavity is neat, and the parts can be pressed together without sliding. It also helps when you want cleanup with water while the glue is still fresh.
When contact cement fits a veneer patch repair
Contact cement is typically applied to both surfaces and bonds after it dries. That makes it useful when clamping is awkward or the patch area is broad and thin, such as a reattached loose field where alignment is already established. It is also common for veneer and laminates when a fast bond is needed.
It is less forgiving than PVA. Once the coated surfaces touch, they grab. That means the patch must be positioned accurately before contact, especially on visible furniture parts where a slight shift would show immediately.
How failure mode drives the choice
For a tiny chip, PVA often gives the cleanest control. For a lifted edge, either PVA or contact cement can work, depending on access and how much of the edge has to be reopened. For a larger missing patch, PVA is best if clamps can press the repair flat; contact cement fits only when the piece is thin, well cut, and easy to place accurately.
How do you cut and fit a veneer patch?
Cut the veneer patch slightly oversized, then trim it after bonding. Match grain direction, color, and veneer thickness as closely as possible, because those details decide whether the repair disappears or reads as a bright rectangle. Dry-fit the patch before glue goes down so the fit is confirmed before the clock starts.
Match grain direction and color
Grain should run in the same direction as the original field when possible. Color mismatch is harder to hide than a tiny seam line, especially on older furniture with aged finish. If the original veneer is wood-backed, choose replacement material with similar thickness so the patch sits flush instead of proud or sunken.
Cut slightly oversized
An oversized patch gives room for final trimming and minor grain matching adjustments. The goal is a piece that fits the cavity without forcing the edges apart. If the patch is cut dead to size, even a small chip-out at the edge can ruin the fit.
Dry-fit before glue
Place the patch in the opening and check that it lies flat, follows the grain, and does not rock. On curved or worn furniture, a patch that fits by eye can still leave a ridge. A dry fit shows that problem before the adhesive begins to set.
How do you glue and clamp the veneer patch?
Spread a thin, even glue coat and avoid flooding the joint. Set the patch before the glue skins over, then use clamp pressure, cauls, or weight as needed to keep the patch flat. Wipe squeeze-out while it is still wet, especially with PVA, because dried residue is harder to remove without scuffing the finish.
Apply glue evenly
For PVA, coat the mating surfaces lightly. A thin film is enough when the fit is good. Excess glue can float the patch, create a visible ridge, or ooze into surrounding grain. Contact cement goes on both surfaces and must dry before contact, so the timing and alignment need extra care.
Use clamp pressure or weight when needed
Clamp pressure can help improve holding power and even out the bond line. On flat furniture parts, a caul can spread pressure across the patch without denting the surface. On a small repair, a weighted flat block may be enough. If the patch slips under pressure, the fit is too loose or the glue choice is wrong for the job.
Clean squeeze-out while wet
Remove squeeze-out immediately while it is still wet. With PVA, a damp rag and water work well, but keep water off nearby finish surfaces as much as possible. If glue dries on the finish, it can leave a dull spot or a hard ridge that later sanding may not fully remove.
Repair decision table: chip, lifted edge, or missing patch
This table maps the repair path by failure type. Use it as a sequence guide: stabilize the base, choose adhesive by bond need, then trim and finish with the least aggressive method that still gives a flush surface.
| Damage type | Prep steps | Adhesive choice | Clamp time | Trim method | Finish-up risks |
|---|---|---|---|---|---|
| Small chip | Clean the cavity, flatten loose fibers, check for solid substrate | PVA wood glue for a tight porous fit | Use light clamp pressure until fully set | Flush trim with a sharp knife after cure | Chip-out at the edge if the knife is dull |
| Lifted edge | Open only enough to remove dust, test for brittle veneer, flatten the edge | PVA if re-bonding; contact cement if alignment is already fixed and clamp access is poor | PVA needs clamp pressure; contact cement needs careful press-on timing | Trim only if fibers telegraph beyond the edge | Visible seam if the edge is not pressed flat across its full length |
| Missing patch | Remove weak material, rebuild or harden damaged substrate, dry-fit oversized patch | PVA for clampable repairs; contact cement for thin, well-positioned patches | Clamp until the bond is stable, or press once for contact cement after drying | Flush trim after full cure with knife or trimming tool | Patch may print through if the base is not flat or if the grain match is poor |
How do you trim, blend, and finish the repair?
Trim the patch only after the adhesive cures. Flush trimming with a sharp knife or trimming tool can lower chip-out risk compared with forcing a patch flush while the glue is still soft. After that, use light sanding only where it is safe, then blend the seam and touch up finish with care so the repair does not catch the eye.
Flush trim after cure
A cured patch is less likely to shift or tear when trimmed. Work from the patch toward the field, taking small passes. Heavy sanding can burn through surrounding veneer fast, especially on old furniture where the top layer may be thin and brittle.
Blend the seam
Feather the edge only enough to remove a hard line. Fillers should be used sparingly and only where a tiny void remains after the patch is seated. Overfilling can create a shiny seam that looks worse than the original damage. Touch-up stain or finish can help, but age patina is hard to duplicate exactly.
Finish with restraint
Once the patch is level and the seam is closed, finish the repair to match the surrounding surface rather than trying to make it perfect in isolation. The goal is a quiet repair, not a new-looking square in an old field. Small color differences are easier to hide than a ridge or a reflection line.
Frequently asked questions
How do you glue a veneer patch into damaged furniture?
Clean the damaged spot, make sure the substrate is solid and dry, cut the patch slightly oversized, and test the fit before glue goes down. Use PVA for tight porous repairs with clamp pressure, or contact cement for repairs that need immediate grab and careful alignment.
What glue is best for veneer repair on furniture?
For most furniture veneer patches, PVA wood glue is the best default because it bonds wood and other porous materials, cleans up with water while wet, and works well with clamps. Contact cement is better when the patch area is thin, broad, and hard to clamp, but it allows less correction.
Do you need clamps for a veneer patch?
Clamps are usually needed for PVA repairs because they keep the patch flat and hold the bond line tight while the glue sets. A small weighted caul can work on simple flat areas. Contact cement does not use clamps the same way, but the patch must be placed accurately on the first press.
How do you hide the seam around a veneer patch?
Hide the seam by matching grain direction, color, and thickness before gluing, then trim flush after cure. Keep the patch slightly oversized so you can fine-tune the edge. Use filler only for tiny gaps, and avoid heavy sanding that can flatten the surrounding finish and make the repair stand out.
Can you use wood glue on veneer repairs?
Yes. Wood glue is a polyvinyl acetate adhesive that works well on wood, paper, and other porous materials. It will not bond metal, glass, or plastic, so it is not a universal fix. For veneer patches, it is a strong choice when the substrate is flat, clean, and ready for clamping.
What do you do if the substrate under veneer is damaged too?
Repair the substrate first. If the base is swollen, soft, or missing core material, a veneer patch on top will fail or sink later. Stabilize or rebuild the underlying wood, plywood, MDF, or particle board until it is flat, stable, and dry, then fit the veneer patch over that sound base.
Sponsored / affiliate links. As an Amazon Associate I earn from qualifying purchases. I may earn additional commission from eligible campaigns.