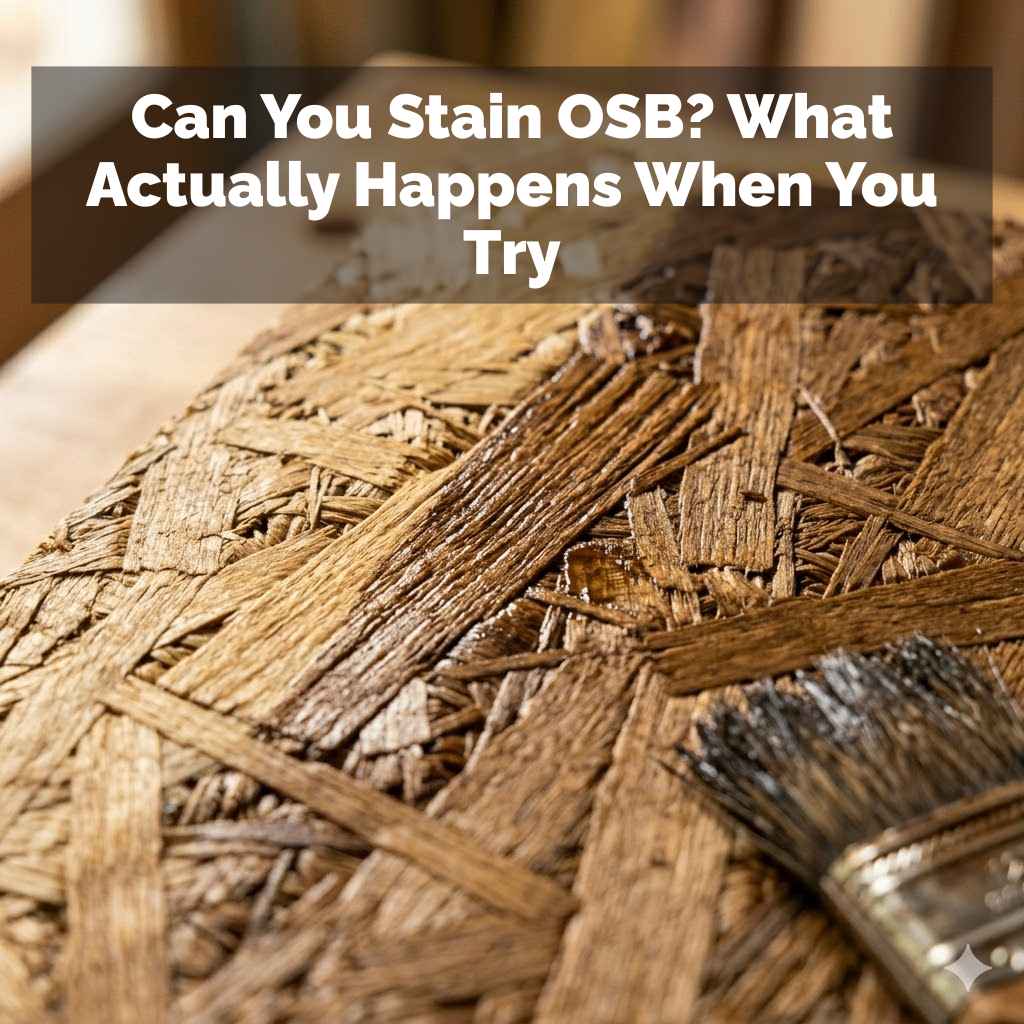
Can You Stain OSB? What Actually Happens When You Try
The simple answer is yes, you can stain OSB. However, the results can be unpredictable due to its uneven texture and the glue used in its manufacturing. Proper preparation is key to achieving a decent finish, and sometimes painting or sealing is a better option.
Understanding OSB Before You Stain
OSB is made from wood strands. These strands are glued together with a resin. Heat and pressure bind it all.
This creates a strong, affordable panel. It’s super useful for building. Think walls, floors, and roofs.
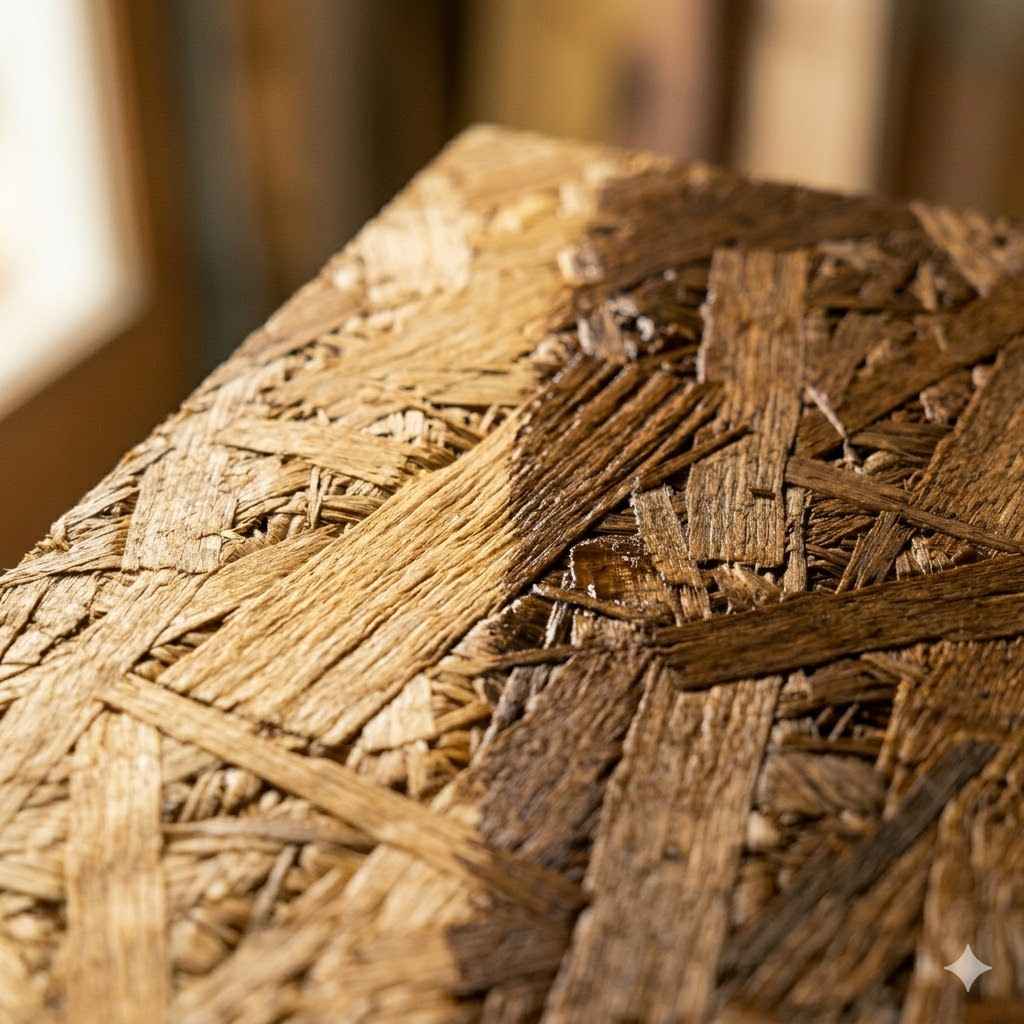
But that surface, it’s rough. It’s not like smooth plywood. You see those wood chips and strands?
They’re all different sizes. They stick out in places.
This rough texture is key. It means stain won’t soak in evenly. Some spots will grab more color.
Other spots might look blotchy. The glue used is also a big factor. It can block the stain.
It creates dark or light patches. It’s like trying to paint a bumpy wall. You need to prep it right.
Without good prep, your staining project might look messy.
My OSB Staining Adventure: A True Story
I remember this one time, I was building a new workbench in my garage. I used OSB for the top because it was cheap and tough. I thought, “Hey, I’ll stain this a nice dark walnut color.
It’ll look awesome!” Famous last words, right? I grabbed a can of my favorite wood stain, a brush, and dove in. What happened next was… an education.
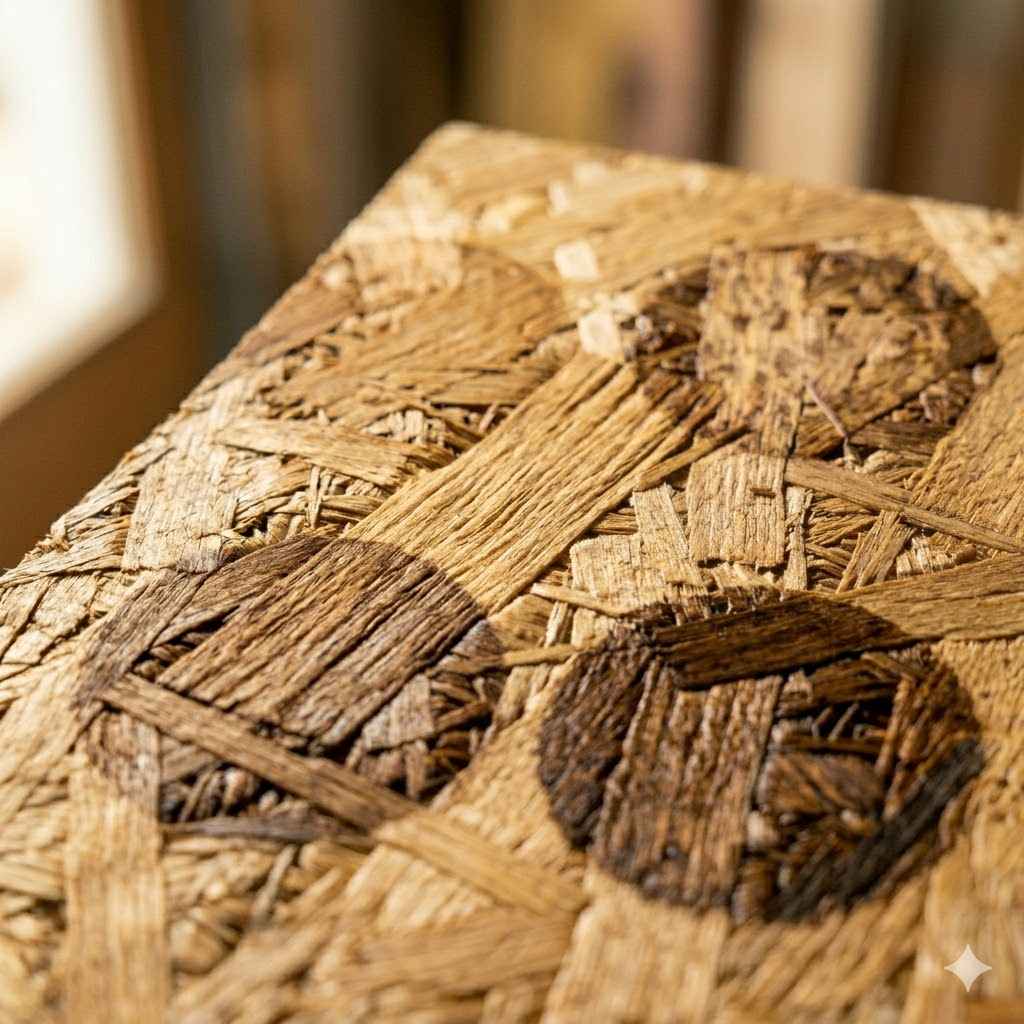
The stain just didn’t go on right. It soaked into some areas like crazy, making them almost black. Other areas just beaded up, like the wood wouldn’t accept the color at all.
It looked like a giant, poorly done watercolor painting. Panic started to set in. I had a deadline for the workshop makeover.
This workbench top was the centerpiece. I’d spent hours cutting and assembling. Now it looked worse than plain, unfinished wood.
I felt a huge wave of frustration wash over me. I’d clearly underestimated the nature of OSB.
OSB Surface Characteristics
Wood Strands: Varying sizes and shapes create an uneven surface. This makes stain absorption inconsistent.
Adhesives: Resins and glues can act as a stain blocker, causing blotchiness.
Roughness: The textured surface requires specific sanding and sealing techniques.
Density: Areas of higher density absorb less stain.
Preparing OSB for Stain: The Real Secret Sauce
Okay, so my first try didn’t go great. But that’s where the learning happens. The biggest secret to staining OSB is proper preparation.
You can’t just slap stain on and expect magic. You need to get that surface ready. This means filling in those gaps and making it more uniform.
It’s like preparing a canvas before you paint.
First, you need to sand it. A lot. Start with a rough grit, maybe 60 or 80.
This knocks down the biggest bumps. It smooths out those raised wood strands. Then, move to a finer grit.
Think 120 or even 150. This makes the surface feel smoother. It also helps the stain go on more evenly.
Always sand with the grain. Wipe away all the dust. A shop vac is your friend here.
Then use a tack cloth. This gets the really fine dust off.
After sanding, you might need to use a wood filler. This is especially true for larger gaps or really rough spots. Choose a filler that can take stain.
Some fillers dry a different color. You want one that blends in. Apply it carefully.
Let it dry fully. Then, sand it smooth again. You want the filled areas to be flush with the surface.
Step-by-Step OSB Surface Prep
1. Initial Sanding: Use 60-80 grit sandpaper. Focus on high spots and rough patches.
2. Dust Removal: Vacuum thoroughly. Use a tack cloth for fine dust.
3. Wood Filler (Optional): Fill large gaps or deep gouges. Let dry completely.
4. Final Sanding: Use 120-150 grit sandpaper. Sand filled areas smooth.
5. Final Dust Removal: Vacuum and use a tack cloth again.
Stain Types and How They Behave on OSB
Now, let’s talk about the stain itself. Not all stains are created equal. And their behavior on OSB can be quite different.
You have a few main types to consider. Each has its own pros and cons for this challenging material.
Oil-based stains are traditional. They often penetrate wood well. On OSB, they can still be tricky.
They might grab too much in some spots. This leads to dark, uneven patches. They can also highlight the texture even more.
You might need multiple thin coats. And you’ll need to wipe off excess stain very, very thoroughly. This helps manage the blotchiness.
They also smell strong and need mineral spirits for cleanup.
Water-based stains are newer. They clean up with water. They can be a bit more forgiving.
But on OSB, they might not penetrate as deeply. This can lead to a more superficial color. They can still be blotchy, but sometimes less so than oil.
You might find they raise the wood grain more. This means you’ll need to sand after the first coat. Always check the can for application tips.
Gel stains are a popular choice for tricky woods. They are thicker. They sit more on the surface than penetrating.
This can be a good thing for OSB. They have less tendency to soak in unevenly. They give you more control.
You can build up the color slowly. This helps avoid those super dark, blotchy spots. They are often used for furniture.
They can give a richer, more uniform look on materials like OSB. I’ve had better luck with gel stain on my OSB projects.
Stain Type Comparison for OSB
Oil-Based:
Pros: Deep penetration.
Cons: High blotchiness risk, strong odor, difficult cleanup.
Water-Based:
Pros: Easy cleanup, lower odor.
Cons: May not penetrate well, can raise grain.
Gel Stain:
Pros: Sits on surface, better control, less blotchiness.
Cons: Can be thick, may require multiple thin coats for depth.
The Magic of Pre-Stain Conditioners
This is a game-changer for OSB. Seriously. A pre-stain conditioner is like a primer for stain.
It’s designed to help the wood absorb stain more evenly. How does it work? It seals the wood a bit.
But it seals it in a way that still allows for some penetration. This makes the absorption rate more consistent across the whole board.
You apply the conditioner first. Let it soak in for a bit, usually 15-30 minutes. Then you apply your stain over it.
It really helps reduce those dark, blotchy spots. It makes the color more uniform. It’s especially useful for woods like pine or birch.
OSB, with its mixed-density strands and glue pockets, benefits hugely. It’s not always the prettiest product to look at before you stain. But trust me, it’s worth it.
It can save your project from looking like a disaster.
After applying the conditioner, you don’t sand it. You just apply the stain according to the stain’s instructions. Usually, you wipe off the excess stain after a few minutes.
The amount of time you leave the stain on before wiping affects the darkness. Experiment on a scrap piece first. This is crucial with OSB.
You need to see how the conditioner and stain interact with your specific board.
How Pre-Stain Conditioner Helps
Even Absorption: Seals wood pores to prevent blotchiness.
Uniform Color: Creates a consistent stain color across the surface.
Better Control: Gives you more predictable results.
Reduces Streaks: Minimizes the appearance of uneven stain lines.
Application Techniques for Better Results
Once you’ve prepped and conditioned, it’s time to apply the stain. The way you apply it matters. Thin coats are your friend.
Thick, gloppy coats will just make things worse. They’ll pool in the low spots and dry unevenly. This is especially true with OSB.
Use a good quality brush or a lint-free cloth. Apply the stain in long, even strokes. Always work with the direction of the wood grain, or strand direction if you can tell.
Don’t go back and forth too much. This can create lap marks. Apply a thin layer.
Let it sit for the time recommended on the can. This is usually just a few minutes for OSB.
Then, you must wipe off the excess. Use a clean, lint-free cloth. Wipe gently.
Again, go with the grain. You want to remove all the stain that hasn’t soaked in. If you leave too much on, it will dry sticky and blotchy.
This is the most important step for a smooth finish. If you want a darker color, apply another thin coat after the first one has dried. Always let each coat dry completely before applying the next.
Patience is key here.
Some people have success with a foam brush. Others prefer a good quality synthetic brush. For larger areas, a small paint roller might work.
But you need to be careful with rollers. They can spread the stain too thin or too thick. They can also create roller marks.
For the best control on OSB, I still lean towards a brush or a rag.
Application Tips for Stain
Thin Coats: Apply stain in thin, even layers.
Work with Grain: Always brush or wipe in the direction of wood strands.
Wipe Excess: Thoroughly remove all excess stain with a clean cloth.
Multiple Layers: Build color gradually with thin, dried coats.
Test First: Always test on a scrap piece of OSB.
When Staining Isn’t the Best Option
Let’s be honest. Even with all this prep and care, staining OSB can be a gamble. Sometimes, the inherent roughness of the material just wins.
You might end up with a look that’s more rustic than you intended. Or maybe just plain messy. In these cases, there are other options that might give you a more predictable and professional-looking finish.
Painting is a fantastic alternative. OSB takes paint very well. You still need to prep it.
Sanding and priming are important. A good quality primer will seal the surface. It will help the paint go on smoothly.
Then you can apply your paint. You can get a solid, uniform color. This hides the OSB texture completely.
You can choose any color you like. This gives you a lot of design flexibility.
Sealing is another option. If you like the natural look of OSB, but want to protect it, you can just seal it. A clear coat of polyurethane or a varnish will do the trick.
This will protect the board from moisture and wear. It will also slightly darken the wood. It will bring out some of the natural colors.
It won’t change the color drastically like stain does. It’s a good way to preserve the OSB look.
Using a tinted poly or glaze can also be a good middle ground. A glaze is a thin, pigmented coating. It sits on the surface.
You can wipe it off to create a subtle color effect. A tinted poly is a clear finish with a bit of color mixed in. These methods offer more control than a traditional stain.
They can give you a more consistent color without the deep penetration issues of stain.
Alternatives to Staining OSB
Painting: Offers solid, uniform color and hides texture.
Clear Sealing: Protects the OSB while enhancing its natural look.
Tinted Polyurethane: Provides a subtle color tint and protective finish.
Wood Glazes: Offer controlled, superficial color effects.
Sealing Your Stained OSB Project
After you’ve stained your OSB and you’re happy with the color (or as happy as you can be!), you absolutely must seal it. OSB is porous. It needs protection from moisture, dirt, and wear.
If you don’t seal it, your beautiful (or surprisingly decent!) stained finish won’t last long. It will get dirty easily. It might even start to peel or chip.
Polyurethane is a great choice. It’s durable. It comes in different finishes: matte, satin, and gloss.
For a workbench top, you might want a satin or semi-gloss finish. These are a bit more durable and easier to clean than matte. For walls or decorative pieces, matte or satin might be better.
Apply the polyurethane in thin coats. Again, work with the grain. Let each coat dry completely.
Lightly sand between coats with a very fine grit sandpaper (like 220 or 320). This helps the next coat adhere better. It also makes the final finish smoother.
Wipe away the dust after sanding. You’ll probably need at least two or three coats for good protection, maybe more for high-traffic areas like a tabletop.
Other options include polycrylic (a water-based version of polyurethane) or a good quality varnish. Polycrylic is lower in VOCs and dries faster. Varnish is also very durable.
Whatever you choose, make sure it’s designed for the type of surface and the level of wear it will experience. Read the product labels carefully.
Sealing Your OSB Finish
Why Seal: Protects against moisture, dirt, and wear.
Product Options: Polyurethane, Polycrylic, Varnish.
Application: Apply multiple thin coats, sanding lightly between each.
Finish Types: Matte, Satin, Semi-Gloss, Gloss.
Durability: Choose a finish suitable for the intended use.
Real-World Contexts for Stained OSB
Where might you actually see stained OSB? It’s not as common as stained plywood or hardwood. But it does have its place.
Understanding these contexts helps set expectations.
Workshops and Garages: This is a big one. OSB is tough and cheap. Staining it can make a workshop feel less utilitarian.
A stained OSB workbench or tool cabinet can look surprisingly good. It holds up to abuse. You can easily wipe off grease and grime.
The rough texture can actually hide minor scuffs and scratches.
Basement Walls/Ceilings: In unfinished or semi-finished basements, OSB is often used for walls or ceilings. Staining it can offer a more finished look than bare OSB. It can create a rustic or industrial vibe.
This is popular in modern home decor. It’s a budget-friendly way to get a unique look.
Utility Rooms: Similar to garages, utility rooms can benefit from OSB. Staining it can make it look more intentional. It’s practical for areas where durability is key.
Think laundry rooms or mudrooms.
Temporary Structures/Event Spaces: For trade shows, pop-up shops, or temporary art installations, OSB is a common building material. Staining it can give these temporary spaces a more polished appearance without breaking the bank.
DIY Furniture Projects: Some DIYers embrace the raw look of OSB. They might use it for shelving, simple tables, or accent pieces. Staining it adds a layer of color and protection.
It makes the piece look more complete.
Where Stained OSB Fits In
Practical Spaces: Workshops, garages, utility rooms for durability.
Rustic/Industrial Decor: Basement walls, accent features.
Budget-Friendly Finishes: Cost-effective alternative to other woods.
DIY Projects: Shelving, simple furniture, accent panels.
What This Means for Your Project
So, what’s the takeaway? Can you stain OSB? Yes.
Should you always stain OSB? Maybe not. It really depends on what you’re trying to achieve and how much effort you’re willing to put in.
When it’s normal to try staining: If you’re aiming for a rustic, industrial, or deliberately raw look. If you’re working on a project where perfect uniformity isn’t critical, like a workbench or workshop shelves. If you’re on a tight budget and want a bit of color without the cost of nicer woods.
When to worry or consider alternatives: If you want a smooth, furniture-grade finish. If you expect perfect, even color like you’d get on hardwood. If you’re working on a highly visible area like a living room accent wall where any blotchiness will stand out.
If you’re short on time and don’t want to deal with extensive prep work.
Simple checks before you start: Always buy an extra piece of OSB. This is your test board. Try different prep methods and stain types on it.
See what looks best. Check the type of OSB you have. Some have a smoother side.
Try to use that side for your main visible surface. Look for any very rough or splintery areas that might need extra attention. Consider the environment where the OSB will be used.
Will it be exposed to moisture? This will affect your sealing choices.
Project Planning Checklist
Desired Look: Rustic, industrial, or smooth?
Time Commitment: Are you prepared for extra prep work?
Budget: OSB is cheap, but prep materials add cost.
Location: High traffic, moisture exposure?
Test Area: Always use a scrap piece first.
Quick Tips for Staining OSB
Let’s sum up some of the most important points. If you’re set on staining your OSB, keep these tips front and center. They will help you get the best possible outcome.
- Prep is Paramount: Sand aggressively with coarse then fine grits.
- Consider Filler: Use wood filler for deep gouges and sand smooth.
- Use a Pre-Stain Conditioner: This is your secret weapon against blotchiness.
- Choose Gel Stain: It offers better control for an uneven surface.
- Apply Thin Coats: Never apply stain too thickly.
- Wipe Thoroughly: Remove all excess stain after the recommended time.
- Build Color Slowly: Use multiple thin coats for darker shades.
- Seal Immediately: Protect your work with at least 2-3 coats of polyurethane.
- Test, Test, Test: Always practice on scrap OSB first.
Don’t expect perfection. Embrace the unique texture of OSB. It’s part of its charm.
With the right approach, you can get a finish that’s both attractive and durable. It just takes a little more planning and a lot more prep than you might think.
Frequently Asked Questions About Staining OSB
Can I just spray stain onto OSB?
While you can spray stain, it’s generally not recommended for OSB if you’re looking for an even finish. Spraying can make it harder to control the amount of stain applied and can lead to overspray, making blotchiness worse. Brushing or wiping on thin coats is usually best for OSB.
How do I get rid of the rough texture on OSB before staining?
You can’t entirely eliminate the rough texture of OSB, as it’s made of wood strands. However, aggressive sanding with coarse-grit sandpaper (60-80 grit) followed by finer grits (120-150 grit) can significantly smooth the surface. Using a wood filler on deep gouges and then sanding those areas flush also helps.
What is the best stain color for OSB?
Darker colors like walnut, dark oak, or espresso tend to be more forgiving on OSB. They can help mask minor inconsistencies in stain absorption better than lighter stains. However, always test your chosen color on a scrap piece first, as the final color will vary.
Will OSB warp if I stain it?
While staining itself is unlikely to cause significant warping, excessive moisture can. Ensure you are not oversaturating the OSB with stain or water-based products. Proper sealing with polyurethane afterward will also help protect it from moisture in the air, reducing the risk of warping.
Can I use a wood dye instead of stain on OSB?
Wood dyes can also be used, but they behave similarly to stains in terms of absorption. You will still need extensive preparation and likely a pre-dye conditioner for even results. Dyes penetrate more deeply than stains, so blotchiness can be harder to fix if it occurs.
Is OSB considered an exterior grade material?
Some OSB is rated for exterior use, but it’s crucial to check the manufacturing label. Exterior grade OSB has added moisture-resistant adhesives. However, even exterior grade OSB needs proper sealing and finishing if it’s to be exposed to weather for long periods.
Standard OSB is for interior use only.
Final Thoughts on Staining OSB
Staining OSB is definitely a project that requires patience and understanding. It’s not a simple weekend task for beginners. But with the right prep, the right products, and realistic expectations, you can achieve a unique and appealing finish.
Embrace the challenge, and you might just surprise yourself with what you can do.