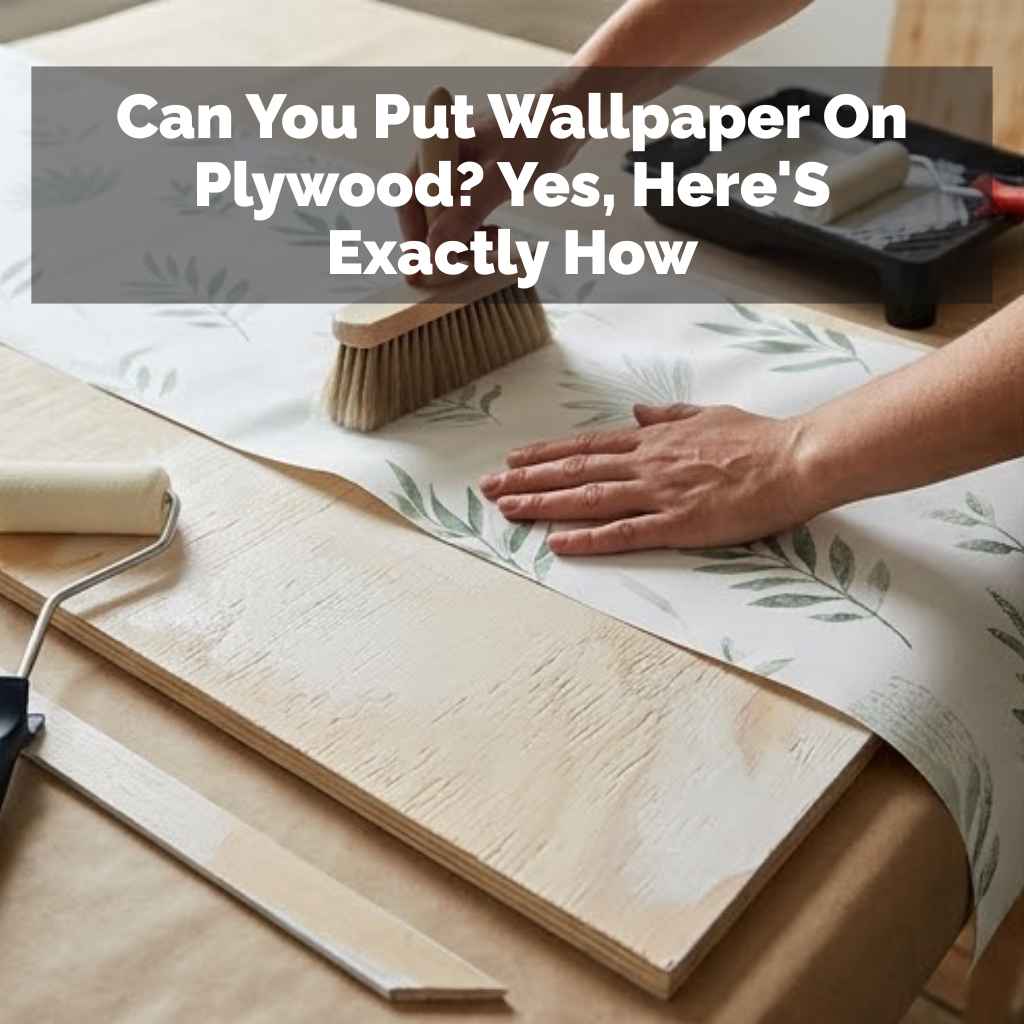
Can You Put Wallpaper On Plywood? Yes, Here’S Exactly How
It’s a question many DIYers ask when looking at a plywood surface. You’ve got that plywood, maybe it’s a wall, a cabinet, or even a piece of furniture. You want to give it a makeover.
You’re thinking about wallpaper. But can you really stick wallpaper right onto plywood? It feels a bit uncertain, right?
You’ve probably heard that smooth, prepped walls are best. Plywood can be a bit rough. It has texture.
It might have seams. You worry about the wallpaper peeling off later. Or worse, the plywood showing through.
This article is here to clear up that confusion. We’ll walk you through exactly how to get a beautiful, finished look. You can use wallpaper on plywood.
We’ll show you how to do it right. This way, your project looks amazing and lasts a long time. Get ready to transform that plywood.
Yes, you can put wallpaper on plywood. The key is proper preparation. You need to seal, prime, and often skim coat the plywood first.
This creates a smooth, stable surface for the wallpaper. It prevents issues like bubbling, peeling, or the wood grain showing through.
What It Means to Wallpaper Plywood
Wallpapering plywood means covering the surface of this engineered wood product with decorative paper. Plywood itself is made from thin layers of wood veneer. These are glued together.
They are stacked in alternating directions. This makes it strong. It’s also quite common in construction.
You find it in walls, subfloors, and even roofs. But it’s not usually a finished surface. It has a visible grain.
It can have knots. The edges can be rough. These features can cause problems for wallpaper.
Wallpaper is designed for smooth, stable walls. Plywood is often not. So, putting wallpaper directly on raw plywood is a bad idea.
It won’t look good. It won’t stick well. The wood’s natural texture can show.
The seams between plywood sheets can crack over time. This is especially true if the wood expands or shrinks. Proper preparation is crucial.
It’s like laying a good foundation for a house. Without it, the whole structure is weak.
Why does this matter? Because if you skip the prep, you’ll likely be unhappy. The wallpaper might bubble.
It might peel at the edges. The wood grain might show through. This makes the whole effort look messy.
It doesn’t give you the clean, polished look you want. So, understanding what plywood is helps you understand why it needs special treatment. It’s not a standard drywall surface.
It requires extra steps to make it ready for wallpaper. Think of it as building a strong base. This base supports the beautiful finish you’re trying to achieve.
It ensures your wallpaper lasts and looks its best.
My Own Plywood Wallpaper Adventure
I remember this one project vividly. I had an old built-in bookshelf in my den. It was made of decent plywood.
It wasn’t the fancy, smooth kind. It had that standard texture. I thought, “Easy peasy, I’ll just slap some wallpaper on it.” I bought this gorgeous floral paper.
I was so excited. I just started pasting it right onto the plywood shelves. It seemed to go on okay at first.
I smoothed it down. I trimmed the edges. But within a week, I noticed something.
The edges of the paper were curling up a bit. Then, I saw tiny little bumps. It was the wood grain trying to push through.
And the seams between the plywood panels started to show a faint line. It looked… sloppy. I felt so frustrated.
All that work, and it was already looking bad. I had to peel it all off. Then I learned the hard way about priming and sealing.
That mistake taught me a lot about preparing surfaces. It showed me that you can’t cut corners with plywood.
Plywood vs. Drywall for Wallpaper
Plywood:
- Engineered wood, layers glued together.
- Can have knots, grain, and rough texture.
- Requires sealing and priming for a smooth finish.
- Needs extra care for seams.
Drywall:
- Mineral plaster pressed between paper.
- Usually a smooth, uniform surface.
- Generally ready for primer and paint/wallpaper with minimal prep.
- Seams need taping and mudding.
Both can be wallpapered, but plywood needs more work upfront.
The Essential Steps Before You Wallpaper
So, how do we get that plywood ready? It takes a few key steps. These steps are not optional.
They are your ticket to success. Skipping them is how I ended up redoing my bookshelf. First, you need to clean the plywood.
Make sure it’s free of dust, dirt, and grease. A good wipe-down with a damp cloth and mild soap works. Let it dry completely.
Next is filling any holes or imperfections. If there are screw holes or gouges, use wood filler. Let that dry and then sand it smooth.
You want a perfectly flat surface.
Now comes the really important part. You need to seal the plywood. This is where you stop the wood from soaking up the primer and wallpaper paste unevenly.
A good quality wood sealer or a shellac-based primer is best. Apply one or two coats. Let it dry fully between coats.
This step is crucial. It prevents the wood grain from showing through. It also stops the plywood from absorbing too much moisture from the paste.
This moisture can cause the plywood to swell or warp. After the sealer is dry, you’ll apply primer. Use a good quality primer.
A water-based or oil-based primer will work. Apply one or two coats. Sand lightly after the primer dries.
This gives you a super smooth surface. It also helps the wallpaper adhesive stick better. The goal is a uniform, non-porous surface.
This is what your wallpaper dreams are made of.
What About Skim Coating?
For an absolutely perfect finish, especially on lower-grade plywood, you might consider skim coating. This is an extra step. But it can make a world of difference.
Skim coating means applying a very thin layer of joint compound (mud) over the entire plywood surface. You use a wide putty knife or a drywall trowel. You spread it out in a thin, even coat.
It fills in any tiny imperfections you missed. It covers any remaining texture or grain. It truly creates a glass-smooth surface.
After the joint compound dries, you need to sand it very, very smooth. Then, you dust it off completely. After sanding, you apply your primer.
The primer will go on beautifully over this smooth surface. It’s like creating a new, perfect wall on top of the plywood.
This is especially helpful if your plywood has a very pronounced grain or is not the highest quality. Some plywood has more texture than others. Skim coating essentially gives you a blank canvas.
It’s like starting with brand new drywall. It’s more work, yes. But if you want that wallpaper to look absolutely flawless, and not have any hint of the plywood underneath, skim coating is the way to go.
It’s the professional touch. It ensures the wallpaper lies flat and smooth. It prevents any of the plywood’s natural characteristics from showing up later.
Think of it as insurance for your wallpaper project. It guarantees a professional-looking result.
Quick-Scan Prep Checklist
| Step | Purpose | Notes |
|---|---|---|
| Clean | Remove dust, grease. | Use mild soap, let dry. |
| Fill/Sand | Smooth holes, gouges. | Use wood filler, sand flat. |
| Seal | Block wood pores, prevent moisture. | Use wood sealer or shellac primer. 2 coats. |
| Prime | Create uniform surface. | Water or oil-based. 1-2 coats. |
| Sand (Lightly) | Ensure smoothness. | After primer dries. |
| Skim Coat (Optional) | Perfectly smooth surface. | Use joint compound, sand well, prime again. |
Choosing the Right Wallpaper for Plywood
Now that your plywood is prepped, let’s talk about wallpaper. Not all wallpapers are created equal. And some will work better on a prepared plywood surface than others.
For plywood, you generally want a thicker, more robust wallpaper. This helps hide any minor imperfections that might still exist. It also provides a better barrier.
Vinyl-backed wallpaper is a great choice. The vinyl layer adds durability. It also helps prevent moisture from the paste from reaching the plywood too quickly.
It adds an extra layer of protection.
Paper-backed wallpapers can also work. But they might be more prone to showing texture if your prep wasn’t absolutely perfect. Consider the pattern.
Busy patterns can be more forgiving. They tend to mask slight inconsistencies better than solid colors or subtle textures. If you’re using a very light-colored or white wallpaper, any hint of wood grain showing through will be very obvious.
So, if your prep isn’t flawless, a busy or dark pattern might be a safer bet. Also, think about the adhesive. Some wallpapers come with pre-applied adhesive.
These are called “peel and stick.” While convenient, they can sometimes be trickier on less-than-perfect surfaces. They can be more prone to lifting if the surface isn’t perfectly smooth and sealed. Traditional paste-the-wall or paste-the-paper wallpapers often give you more control and a better bond on a well-prepared surface like sealed plywood.
Think about the weight of the paper too. A heavier wallpaper will drape better. It will feel more substantial on the wall.
It’s less likely to wrinkle or tear during application. When in doubt, always buy an extra roll. This accounts for pattern matching.
It also gives you some extra material in case of mistakes. Always follow the manufacturer’s instructions for the specific wallpaper you choose. They often have recommendations for the type of adhesive to use and the best application methods.
Wallpaper Types & Plywood
Best Choices for Plywood:
- Vinyl-backed: Durable, good moisture resistance, hides minor flaws.
- Heavy paper-backed: Offers good coverage, feels substantial.
- Busy or Dark Patterns: More forgiving, mask imperfections.
Use with Caution on Plywood:
- Thin paper-backed: May show texture or grain if prep isn’t perfect.
- Peel-and-stick: Requires an exceptionally smooth and stable surface.
- Light or Solid Colors: Any imperfection will be very visible.
Dealing with Plywood Seams
One of the biggest challenges with plywood is the seams. Plywood sheets are usually installed with some space between them. Or they might butt up against each other.
Over time, especially with changes in humidity, plywood can expand and contract. This movement can cause problems for wallpaper. The seams can crack.
The wallpaper can pull apart. It can also create a visible line through the wallpaper. There are ways to minimize this.
The first is proper installation of the plywood itself. Ensure it’s installed securely. If you’re building something new, leave a small gap between panels.
This is called a control joint. It allows for expansion. Then you fill this gap with a flexible sealant or caulk.
This sealant will move with the wood. It won’t crack like drywall mud would.
If you’re working with existing plywood, you might need to address seams differently. Sometimes, applying a thin layer of flexible caulk along the seams after sealing and priming can help. This caulk should be paintable and flexible.
Another method, especially if you’re skimming the whole surface, is to embed drywall tape into the joint compound as you skim coat. This creates a stronger, more stable seam. It bridges the gap and prevents cracking.
When you apply your primer, make sure you cover these seams well. You want them to be completely sealed. The goal is to make the plywood surface as monolithic as possible.
This means making it seem like one solid piece. This reduces the chances of movement causing visible damage to your wallpaper.
Most standard wallpaper adhesives will not bridge a gap. They need a solid surface to adhere to. So, filling and reinforcing those seams is absolutely critical.
If you don’t, you are almost guaranteed to see a crack appear eventually. It’s a common failure point. Taking the time to properly address the seams will save you a lot of heartache down the road.
It ensures your beautiful wallpaper stays looking beautiful.
Seam Management Strategies
For New Installations:
- Leave small gaps (control joints) between panels.
- Fill gaps with flexible sealant or caulk.
For Existing Installations:
- Apply flexible, paintable caulk along seams.
- Embed drywall tape in joint compound during skim coating.
- Ensure all seam treatments are sealed and primed.
Why it Matters: Plywood expands and contracts, causing seams to crack if not managed.
The Actual Wallpapering Process on Plywood
Once your plywood is prepped, sealed, primed, and your seams are handled, the actual wallpapering process is similar to hanging wallpaper on any other surface. But remember, you’ve worked hard for that smooth base. So, be careful.
Start by reading the wallpaper instructions. They will tell you if you need to book the paper (fold it on itself to let the paste soak in) or if it’s ready to hang immediately. You’ll need a good wallpaper adhesive.
Ensure it’s the right type for your wallpaper. You’ll also need a smoothing tool, a sharp utility knife or razor blade, and a straight edge.
Measure and cut your wallpaper strips. Always allow extra length for trimming at the ceiling and floor. If your wallpaper has a pattern, make sure you match the pattern repeat between strips.
This is crucial for a professional look. Start in a corner or a prominent spot. Apply the adhesive to the wall or the back of the paper, depending on the type.
Carefully position the first strip. Use your smoothing tool to work out any air bubbles or wrinkles. Start from the center and work your way out.
Smooth towards the edges.
When you get to a seam between plywood panels, apply the wallpaper over it smoothly. Use your smoothing tool to press the paper down firmly into any treated seam. Trim the excess wallpaper at the ceiling and floor with your sharp knife.
Take your time. A dull blade will tear the paper. A sharp blade will give you a clean cut.
Continue with each strip. Overlap seams slightly if the wallpaper instructions say to. Or butt them up against each other if that’s the recommended method.
If you’re using paste-the-wall paper, you apply paste directly to the wall surface.
For vinyl or heavier wallpapers, you might find it easier to use a wider smoothing tool or even a wallpaper brush. Work from top to bottom. Ensure the paper is firmly pressed against the primer.
Any bubbles you see should be dealt with immediately. You can often prick a tiny bubble with a pin and then smooth it down. But it’s always best to avoid them in the first place.
After all the strips are hung, let the adhesive cure completely. This usually takes 24 hours. Then you can admire your work.
If you’ve done your prep work thoroughly, it will look fantastic.
Plywood Wallpapering: Key Tips
- Follow Instructions: Always read the wallpaper and adhesive directions.
- Sharp Blade: Use a fresh utility knife for clean cuts.
- Smooth Carefully: Work out bubbles and wrinkles from the center outwards.
- Pattern Match: Pay close attention to pattern repeats for a seamless look.
- Seam Treatment: Ensure wallpaper is pressed firmly into prepared seams.
- Allow Curing Time: Let the adhesive dry completely for best results.
When Is Plywood Not the Best Choice?
While you can put wallpaper on plywood, there are times when it might not be the best idea. Or at least, it will require a lot more effort. If the plywood is very old, warped, or damaged, it might be too unstable.
Trying to wallpaper severely damaged wood is like trying to build on a shaky foundation. It’s unlikely to end well. If the plywood has extensive rot or water damage, you need to address that first.
Wallpaper won’t fix underlying structural issues. It will just hide them for a while. And the moisture will continue to damage the wood and the wallpaper.
If the plywood has been painted multiple times with old, peeling paint, that paint needs to be removed or at least thoroughly prepped. Old paint can prevent the new primer and adhesive from adhering properly. Also, if you’re looking for an extremely high-gloss, mirror-like finish, very inexpensive or textured plywood might not be the best starting point.
Even with skim coating, achieving that level of perfection can be challenging on some surfaces. Sometimes, if the plywood is meant to be a temporary solution, or if the budget is extremely tight, you might consider other options. For instance, a temporary wallpaper or even a large mural that covers the entire surface might be simpler than full prep on poor-quality plywood.
Consider the location too. In areas with very high humidity, like a bathroom that gets a lot of steam, even well-prepped plywood might be more susceptible to moisture issues than properly finished drywall. You’d need a vinyl wallpaper and very good ventilation.
Ultimately, the condition and quality of the plywood are the biggest factors. If it’s in decent shape, with a reasonably smooth surface, then wallpapering is a great option. If it’s falling apart or extremely rough, you might need to consider replacing it or using a different covering material altogether.
When to Reconsider Plywood for Wallpaper
- Severe Damage: Rot, warping, or significant structural issues.
- Peeling Paint: Old paint layers need removal or solid prep.
- Extremely Rough Texture: May require excessive skim coating.
- High Humidity Areas: Needs careful consideration and specific wallpaper types.
- Temporary Solutions: May not be worth the extensive prep time.
Maintaining Your Plywood Wallpaper
Once your wallpaper is up and looking great, you want it to stay that way. Maintenance is pretty straightforward for most wallpapers, especially if you used good quality materials and did your prep work. For vinyl-backed wallpapers, cleaning is usually easy.
You can wipe them down with a damp cloth. Sometimes, a mild soap solution can be used for tougher spots. Always test this in an inconspicuous area first.
Make sure the soap doesn’t damage the print or the material. Gently blot spills and stains. Avoid scrubbing too hard, as this can damage the surface or the seams.
For paper-backed wallpapers, cleaning is more delicate. A dry dusting with a soft brush or a vacuum cleaner attachment is usually best. Avoid getting them wet.
If you must clean a spot, use a very lightly dampened cloth. Work from the outside of the stain inwards. Be extremely gentle.
Always allow the area to dry completely. For any wallpaper, try to keep direct sunlight off it for long periods. Sunlight can fade the colors over time.
This is true for any wall covering, not just on plywood.
Keep an eye on the edges and seams. If you notice any lifting, it’s usually a sign that the adhesive is failing or the surface underneath has a moisture issue. Small lifts can sometimes be re-glued with a wallpaper adhesive or a small dab of appropriate glue.
Make sure the area is clean and dry before applying more adhesive. If you have kids or pets, try to keep them from touching or damaging the walls. A well-maintained wallpapered plywood surface can last for many years.
It’s a beautiful and durable finish when done correctly. The key is always in that initial preparation.
Frequently Asked Questions About Wallpapering Plywood
Can I wallpaper over painted plywood?
Yes, you can, but the paint must be in good condition. If the paint is peeling, cracked, or chalky, you must remove it. If it’s sound, clean the surface well, then prime it with a good quality primer before applying wallpaper.
This ensures proper adhesion.
What is the best primer for plywood before wallpapering?
A good quality acrylic or oil-based primer works well. For extra sealing, especially on knotty or porous plywood, a shellac-based primer is excellent. It blocks stains and provides a uniform surface for the wallpaper adhesive.
How do I deal with knots in plywood before wallpapering?
Knots can bleed through paint and primer, and thus wallpaper. You should spot-prime knots with a stain-blocking primer before priming the entire surface. Then, proceed with the regular priming steps.
Skim coating can also help cover them completely.
Can I use peel-and-stick wallpaper on plywood?
Yes, but only if the plywood is exceptionally smooth and well-prepared. Peel-and-stick wallpapers rely on strong adhesion. Any texture or imperfection on the plywood surface can prevent them from sticking properly and lead to lifting.
Ensure it’s sealed, primed, and very smooth.
Do I need to fill the gaps between plywood sheets before wallpapering?
Absolutely. Unfilled gaps are a major point of failure. You need to fill them with a flexible caulk or embed them with drywall tape and joint compound.
This creates a stable, continuous surface that won’t crack or pull the wallpaper apart.
How many coats of primer are needed on plywood for wallpaper?
Typically, one to two coats of primer are sufficient. However, if the plywood is very porous or you’re concerned about showing texture, a third coat might be beneficial. Ensure each coat is dry before applying the next.
Bringing It All Together
So, there you have it. Putting wallpaper on plywood is totally doable. It just takes a little more care than a standard wall.
The secret isn’t in the wallpaper itself, but in the preparation of the plywood. A clean, sealed, primed, and smooth surface is everything. Don’t skip those steps!
They are your best friends for a beautiful, long-lasting finish. With the right approach, your plywood surface will look like a million bucks. You can achieve stunning results.
Enjoy your newly transformed space!