Can You Paint Plywood Walls? Here’S What You Need To Know
Yes, you can paint plywood walls. With proper preparation, including cleaning, sanding, and priming, you can achieve a smooth and durable finish on plywood surfaces. Choosing the right paint and application method is also key to success.
What is Plywood and Why Paint It?
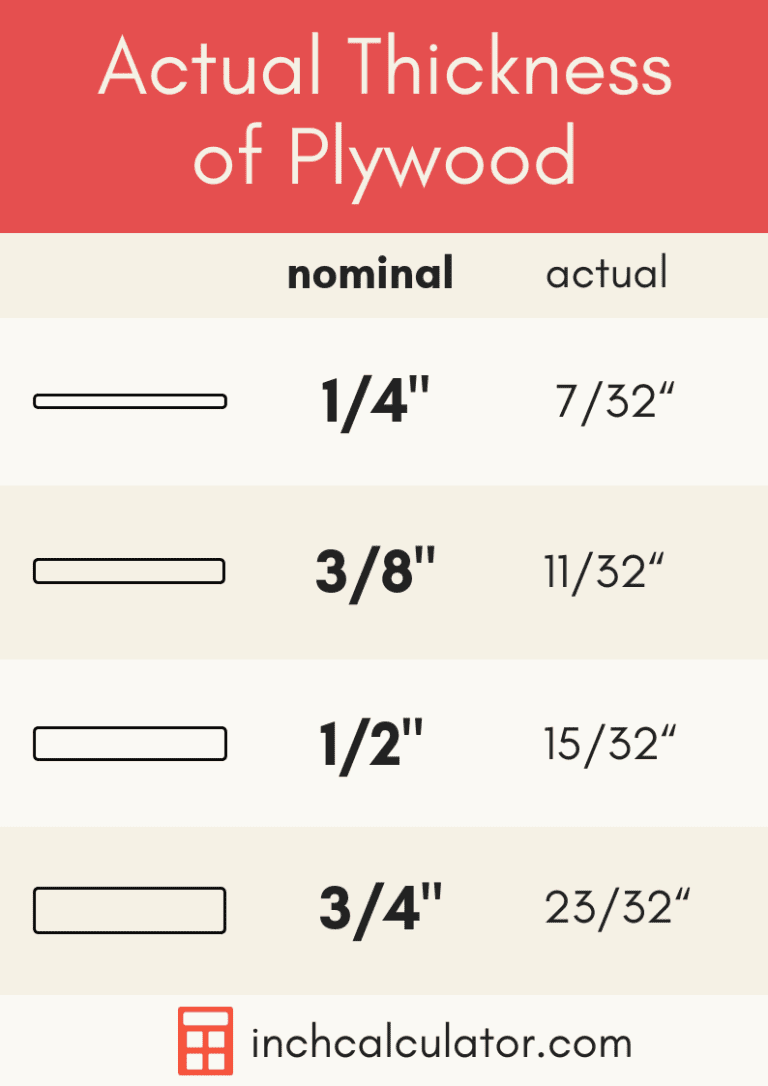
Plywood is a manufactured wood product. It’s made by gluing thin layers, or “plies,” of wood veneer together. These layers are pressed with their grain running in different directions. This makes plywood strong and stable. It’s often used in construction for subflooring, sheathing, and even in furniture making. Sometimes, plywood is used for walls. This can be for a modern, industrial look, or to save money on building materials. But raw plywood can look unfinished. It can also show imperfections. Painting it can transform its appearance completely.
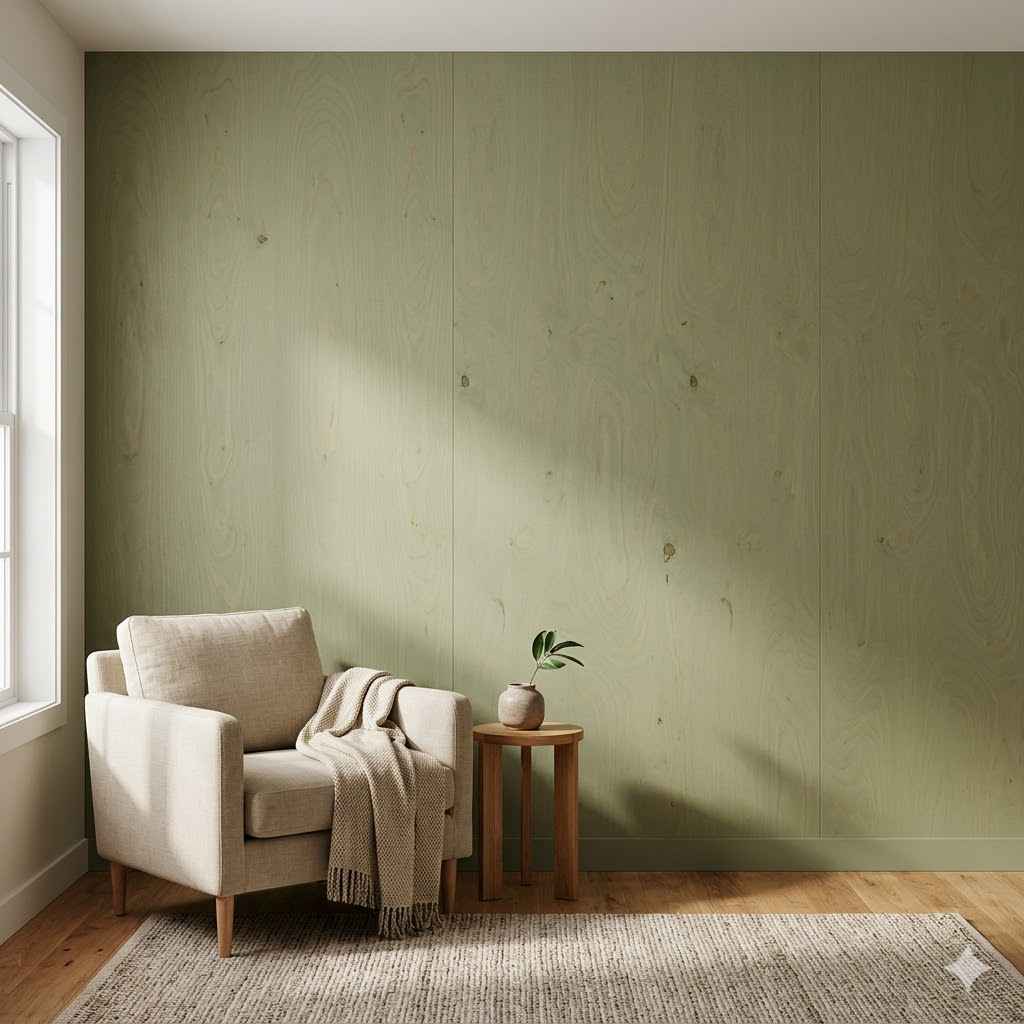
The main reason people paint plywood walls is for aesthetics. Raw plywood has a distinct look. It shows the wood grain and the lines where the sheets meet. While some people like this rustic charm, many want a smoother, more uniform finish. Paint can hide the plywood’s natural texture. It can also cover up small dents or scratches. You can match the walls to your decor. This makes the space feel more cohesive and welcoming. It’s a great way to update a room without replacing the walls themselves.
Another reason is protection. Paint acts as a barrier. It can help protect the wood from moisture and dirt. This is especially true if you use a durable paint like latex or enamel. For areas that get a lot of use, like a garage or workshop, a painted finish is easier to clean. It can also prevent the wood from absorbing stains. So, beyond just looking good, painting plywood can also add a layer of practical protection.
My First Plywood Painting Fiasco
I remember my first attempt at painting plywood. It was years ago, in a small rental cabin I was fixing up. The walls were gorgeous, knotty pine plywood. But they were also very dark and dated. I thought, “Easy! Just slap on some white paint!” So, I bought a gallon of cheap interior paint and a roller. I dove right in. The paint went on thick in some spots. It pooled in the low spots. The grain showed through in patchy ways. It looked like a bad watercolor painting. I was so disappointed. The knots bled through, making brown splotches. It was a mess. I felt a bit foolish for not doing more research. That experience taught me a valuable lesson: prep work is everything. You can’t skip steps with plywood.
Understanding Plywood Types
Not all plywood is the same. Knowing your type helps prep. Construction grade plywood might have more knots and voids. It’s cheaper but rougher. Cabinet grade plywood is smoother. It has fewer imperfections. It’s often made with hardwood veneers. For walls, you’ll likely encounter construction grade. Sometimes it’s called OSB (Oriented Strand Board). OSB has a very different texture. It’s made of wood chips, not smooth plies. Painting OSB requires extra care. It soaks up paint like a sponge. Always check what kind of plywood you have.
The Crucial Prep Work: Getting Ready to Paint
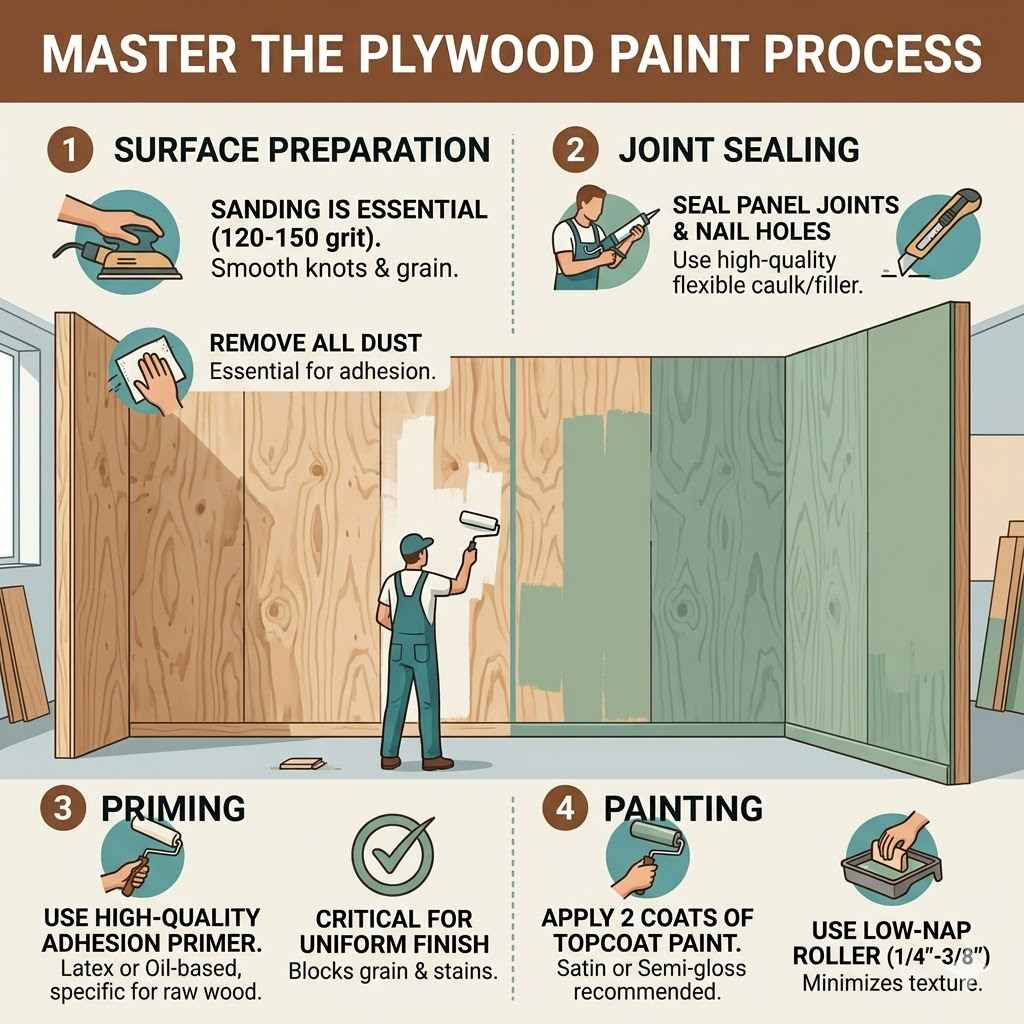
This is where the magic happens. Good prep makes a good paint job. Bad prep means a bad paint job, no matter how good your paint is. We need to get the plywood surface ready for paint. This means cleaning, smoothing, and sealing. Each step is important for a lasting finish. Don’t rush this part! It’s the foundation of your painted walls.
First, you must clean the walls. Dust and dirt are paint’s enemies. They stop paint from sticking. Use a soft brush or a vacuum attachment. Get rid of all loose debris. Then, use a mild soap and water solution. A degreaser might be helpful if there are greasy spots. Wipe down the walls. Rinse them well with clean water. Let the walls dry completely. This might take a day. Ensure good air circulation. Open windows if you can. A damp cloth can also pick up fine dust.
Next comes sanding. This is key to a smooth surface. Plywood often has a rough texture. It might have splinters or raised grain. Use medium-grit sandpaper, maybe 120-grit. You can use a sanding block or an orbital sander. If using an electric sander, go slow. You don’t want to remove too much wood. Sand the entire surface. Focus on any rough spots or edges. The goal is to make it feel smooth to the touch. After sanding, you’ll have a lot of dust. Clean it up thoroughly. Use a shop vac first. Then, wipe down with a tack cloth. This sticky cloth grabs tiny dust particles.
Dealing with Plywood Seams and Gaps
Plywood walls have seams where the sheets meet. They also might have small gaps. You need to fill these. Use a good quality wood filler or spackle. Apply it with a putty knife. Press it into the gaps. Smooth it flat with the wall. Let it dry completely. This usually takes a few hours. Some fillers shrink as they dry. You might need a second coat. Once dry, sand the filled areas smooth. They should blend in with the rest of the wall. This step is vital for a seamless painted look. If you skip it, the seams will be very obvious under paint.
Don’t forget about knots. Plywood often has knots. These are natural imperfections in the wood. Sometimes, sap can bleed through paint. This is called knot bleed-through. To prevent this, you need a stain-blocking primer. Apply a thin coat of primer over each knot. Let it dry. Then, apply another coat if needed. A good stain-blocking primer is essential for a clean paint job on plywood. This is especially true for oil-based primers. They offer great sealing power. Wait for the primer to be fully dry before moving on.
The Magic of Priming
Primer is not just a suggestion; it’s a must. Think of it as a bridge. It connects the raw plywood to your topcoat of paint. A good primer will seal the wood. It will give your paint something to grip onto. This helps paint go on evenly. It also prevents blotchiness. You want a primer that is designed for wood. A stain-blocking primer is the best choice for plywood. It stops those knots from showing through.
Apply the primer in thin, even coats. Use a roller or a brush. Make sure to get into any grooves or textures. Cover the entire surface. Pay special attention to the seams and filled areas. Let the first coat dry completely. Check for any spots you missed. You might need a second coat of primer. This is especially true if the plywood is very porous or has dark knots. A good primer coat ensures your final paint color will look true. It also helps paint adhere better. This means fewer touch-ups later on.
Primer Types to Consider
Oil-based primers are excellent for blocking stains. They offer superior adhesion and sealing. However, they have strong fumes. You’ll need good ventilation. Cleanup requires mineral spirits. Water-based (latex) primers are easier to use. They dry faster and have fewer fumes. Look for a high-quality latex primer with stain-blocking properties. Some newer primers are hybrids. They combine the best of both worlds. For plywood, a dedicated stain-blocking primer is always a safe bet.
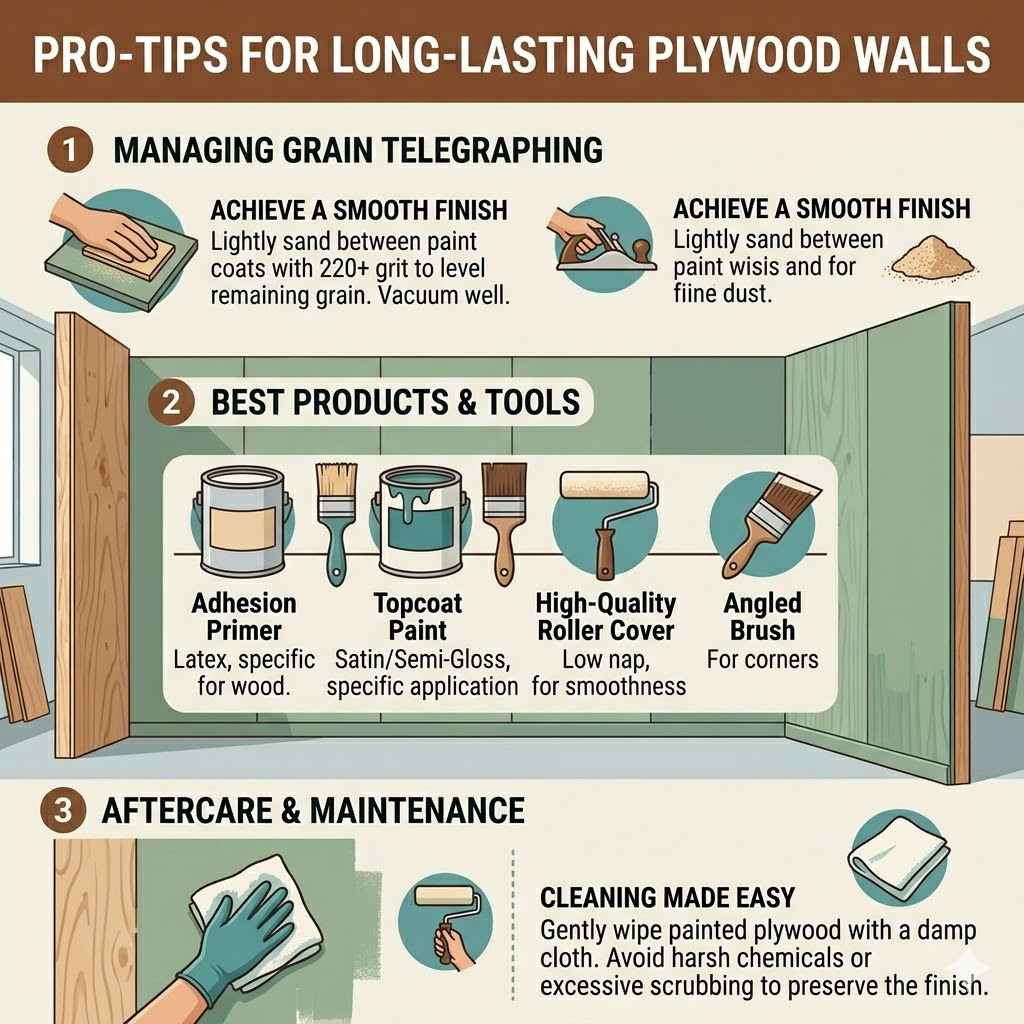
After the primer is dry, give the walls another light sanding. Use fine-grit sandpaper, like 220-grit. This is called sanding between coats. It removes any tiny bumps or dust nibs that settled. This step creates an incredibly smooth surface for your paint. Wipe away the dust again with a tack cloth. Now your walls are perfectly prepped and ready for color.
Choosing the Right Paint
Now for the fun part: choosing your paint color! But the type of paint matters too. For plywood walls, you want a durable finish. Latex paint is a popular choice. It’s water-based, which makes cleanup easy. It’s also flexible, so it won’t crack as easily as oil-based paint. It comes in many finishes, from matte to high gloss.
For plywood walls, I often recommend a satin or semi-gloss finish. These finishes are more durable than flat or matte paints. They are also easier to wipe clean. This is great for high-traffic areas. A satin finish offers a nice sheen without being too shiny. A semi-gloss is even more durable and scrubbable. It can highlight imperfections more, so your prep work needs to be top-notch. If you want a very smooth, modern look, consider a high-quality acrylic latex paint.
If you’re painting in a humid environment, like a bathroom or kitchen, look for paints with mold and mildew resistance. Some paints are specifically designed for these areas. For a workshop or garage, an enamel paint might be a good choice. Enamel paints are very tough and durable. They can withstand a lot of wear and tear. They often come in oil-based or water-based formulas.
Paint Finish Matters
Matte finishes hide imperfections best. They absorb light. However, they are harder to clean. They can scuff easily. Eggshell is a bit more scrubbable than matte. It has a slight sheen. Satin finishes offer a bit more shine. They are good for most rooms. They are moderately durable. Semi-gloss is quite shiny and very durable. It’s good for trim and high-moisture areas. High-gloss is the shiniest. It’s very durable but shows every flaw. For plywood walls, satin or semi-gloss is often the sweet spot.
When buying paint, don’t skimp on quality. Higher quality paints have better pigments. They offer better coverage. This means you might need fewer coats. It also means the color will be richer and last longer. Always buy a little more paint than you think you’ll need. This ensures you have matching paint for touch-ups later. It’s also good to get paint from the same batch number. This helps avoid slight color variations.
Applying the Paint: Tips for Success
You’ve prepped, you’ve primed, you’ve chosen your paint. Now it’s time to apply the color. The key here is patience and technique. You want smooth, even coats. This will give your plywood walls a professional look. Start with the edges and corners. Use a good quality angled brush for these areas. This is called “cutting in.” Make sure your brush strokes are clean and steady. This helps create crisp lines.
For the main wall surfaces, use a roller. A 3/8-inch nap roller is usually a good choice for smooth surfaces. If your plywood has a bit of texture, you might go with a slightly thicker nap. Load your roller with paint, but don’t overload it. Roll out the excess paint on the roller tray’s grid. Apply the paint in a W or M pattern. This helps distribute the paint evenly. Then, go back over the area with long, even strokes. This smooths out the paint. Avoid pressing too hard. Let the roller do the work.
Apply paint in thin, even coats. It’s always better to apply two or three thin coats than one thick, gloppy coat. Thin coats dry faster. They are less likely to drip or run. They also provide a more durable finish. Between coats, let the paint dry completely. Check the paint can for recommended drying times. You might need to lightly sand between coats. This is especially important if you notice any dust nibs or rough spots. Use fine-grit sandpaper, around 220-grit. Wipe away the dust with a damp cloth or tack cloth.
Painting Techniques for Plywood
Roller application is best for large areas. Use steady, overlapping strokes. Brush application is for edges and trim. Keep your strokes smooth and consistent. Consider a sprayer for a very smooth finish. Sprayers require more practice and masking. For plywood, multiple thin coats are key. Avoid applying paint too heavily. This can cause drips and hide subtle wood grain if you want some visible.
If you’re painting plywood that has a distinct grain pattern you want to preserve, you might try a technique called “grain filling.” This involves using a special wood filler or glaze. You apply it to the grain. Then you wipe it off. This fills the open pores. This makes the wood smoother for painting. However, for most people wanting a solid color finish, good prep and primer are enough. If you want a stained look, that’s a different process altogether. This guide focuses on painting.
What About Different Types of Plywood Walls?
Not all plywood walls are created equal. Some are smooth, some are rough. Some have large knots, others are clear. The type of plywood you have will affect your prep. For example, painting OSB (Oriented Strand Board) is different from painting fine hardwood plywood. OSB is made of wood chips. It’s very porous. It will soak up paint like a sponge. You’ll need a good quality primer. You might need two coats of primer. It also has a rougher texture. You may need to use a thicker nap roller or even a brush to get into all the little nooks and crannies.
If you have plywood with a lot of knots, as I mentioned, a good stain-blocking primer is essential. These knots can bleed through paint, leaving yellow or brown stains. A quality primer will seal these in. If the plywood has a veneer on top, be careful not to sand through it. Veneer is very thin. If you sand too much, you’ll reveal the layers underneath. This can look patchy. Always test your sanding and painting on a small, inconspicuous area first.
Plywood Grades and Painting
A-A or A-B grade: Smooth veneers on one or both sides. Good for painting. Little prep needed for the face veneer. C-C or C-D grade: More imperfections, knots, and patches. Needs more prep. Sanding and good primer are key. Exterior grade plywood: Often has waterproof glues. Can be painted. Ensure it’s clean and dry. Interior grade plywood: For indoor use. Standard prep applies.
Sometimes, plywood is used for a specific look. For example, in a workshop or garage. In these cases, the focus might be more on durability and ease of cleaning. You might choose a more robust paint finish like semi-gloss or even an epoxy coating. The same prep steps apply. Cleaning, sanding, and priming are always the first steps. These ensure the paint sticks and lasts. Even for utilitarian spaces, a nice paint job makes a big difference.
When is it Okay to NOT Paint Plywood Walls?
There are times when you might want to leave plywood walls as they are. Or perhaps enhance their natural beauty. If you have high-quality plywood with a beautiful grain pattern, staining might be a better option. Staining lets the natural wood show through. It adds color while highlighting the wood’s character. This is common in cabins or rustic-themed homes. You would still need to prep the wood. Sanding is always needed. Then, you’d apply a wood stain. After the stain dries, you would seal it with a clear coat like polyurethane or varnish.
Another scenario is if the plywood is part of a deliberate design choice. For example, some modern or industrial lofts use exposed plywood as a feature. In this case, you might just seal the plywood. A clear sealant can protect it. It can also give it a slight sheen. This preserves the raw wood look. It’s important to ensure the plywood is clean and free of any blemishes. Otherwise, those imperfections will be highlighted.
Enhancing Natural Plywood
Sealing: For a natural look, use a clear sealer like polycrylic or polyurethane. This protects the wood and adds a slight sheen. Staining: Choose a wood stain color that complements your decor. Apply it evenly. Wipe off excess. Clear coats over stain: Always follow stain with a protective topcoat. This protects the color and the wood.
Consider the overall style of your home. If your space is very modern, clean lines, and minimalist, you might prefer a crisp painted finish. If it’s more rustic, natural, or bohemian, letting the wood show through could be more fitting. Ultimately, the decision depends on the look you are trying to achieve. And the quality of the plywood itself. High-grade plywood can be beautiful on its own.
Troubleshooting Common Plywood Painting Problems
Even with the best intentions, problems can pop up. One common issue is knot bleed-through. If you see brown or yellow spots appearing after painting, the primer wasn’t strong enough. Or maybe you didn’t use a stain-blocking primer. The fix? Let the paint dry completely. Then, lightly sand the stained spots. Re-prime those areas with a good stain-blocking primer. Let it dry thoroughly. Then, re-paint. It’s a bit of extra work, but it will hide the stains.
Another problem is uneven paint coverage. This often happens if you don’t prep the surface well. Or if you apply paint too thinly or too thickly in spots. If you see patchiness or uneven color, you’ll likely need another coat of paint. Ensure you’re using consistent strokes. And that you’re not leaving roller marks. Lightly sanding between coats can help fix minor issues. It creates a smoother base for the next layer.
Common Plywood Paint Issues
Knot Bleed: Use a stain-blocking primer. Re-prime and repaint if needed. Uneven Coverage: Apply thin, even coats. Ensure enough paint on the roller. Sanding Marks: Sand lightly between coats with fine grit. Peeling Paint: Surface was not clean or properly primed. May need to scrape and reapply.
Sometimes, the wood grain can show through too much. This is more likely with oil-based paints or primers. Or if the plywood itself has a very coarse grain. If you want a perfectly smooth finish, you might need to use a wood filler or grain filler. You apply it to fill the pores. Then sand it smooth. This is a more intensive process. For most DIYers, a good quality primer and a few coats of paint are enough. If you want a very smooth finish, consider skim-coating the walls with a thin layer of joint compound.
Long-Term Care for Painted Plywood Walls
Once your plywood walls are painted, they need a little care to stay looking good. The key to easy maintenance is the type of paint you chose. As mentioned, satin and semi-gloss finishes are more durable. They are easier to clean than matte finishes. For everyday dust, a soft cloth or a vacuum cleaner with a brush attachment works well.
For scuffs or minor marks, use a damp sponge. You can add a tiny bit of mild soap. Gently wipe the area. Rinse the sponge and wipe again to remove soap residue. Always test any cleaning method in an inconspicuous spot first. Avoid abrasive cleaners or scrub brushes. These can damage the paint finish. Especially if it’s a softer sheen like satin.
Maintenance Tips
Regular dusting: Keep surfaces clean from dust buildup. Spot cleaning: Use a damp cloth for minor marks. Avoid harsh chemicals: Stick to mild soaps and water. Touch-ups: Keep leftover paint for easy repairs of nicks or scratches.
If you notice any nicks or scratches over time, touch them up promptly. Use your leftover paint. This prevents small issues from becoming bigger ones. Always make sure the area is clean before touching up. Apply the paint carefully with a small brush. Feather the edges so the touch-up blends in. Proper care will ensure your painted plywood walls look great for years to come.
Frequently Asked Questions
Can I paint plywood without sanding?
While it’s not ideal, some very smooth plywood might take paint with just cleaning and priming. However, sanding creates a better surface for paint to adhere to. It helps ensure a smoother, more durable finish. Skipping sanding can lead to paint peeling or an uneven look.
What is the best primer for plywood walls?
A high-quality stain-blocking primer is best for plywood walls. This is especially important if the plywood has knots. Oil-based primers offer excellent stain blocking. However, good water-based primers with stain-blocking properties are also very effective and easier to use.
Do I need to fill the seams between plywood sheets?
Yes, filling the seams is crucial for a smooth, finished look. Use wood filler or spackle to fill the gaps. Sand it smooth once dry. This prevents the seams from showing through the paint.
Can I use latex paint on plywood?
Yes, latex paint is a great choice for plywood walls. Make sure you use a good primer underneath. Latex paints are flexible, easy to clean, and come in many colors and finishes. A satin or semi-gloss finish is often recommended for walls.
How many coats of paint do I need for plywood?
It often takes two to three thin coats of paint for good coverage on plywood. This ensures a smooth, even color. Always allow each coat to dry completely before applying the next. Light sanding between coats can improve the finish.
What kind of roller is best for plywood walls?
For most plywood walls, a 3/8-inch nap roller is a good choice. This nap length works well on smooth or slightly textured surfaces. If your plywood is very rough, you might consider a roller with a slightly thicker nap to ensure paint gets into all the grooves.
Final Thoughts on Painting Plywood
Painting plywood walls is totally achievable. It can transform a basic material into a polished surface. The key is to not skip the prep work. Cleaning, sanding, filling, and priming are your best friends here. With a little effort and the right materials, you can achieve a beautiful, durable finish. Your painted plywood walls will look intentional and stylish. You’ve got this!