Can You Paint Osb Plywood? Pro Tips For A Perfect Result
It’s a question many DIYers and builders ponder. You’ve got this OSB plywood, and you want it to look nice. Maybe it’s for a wall, a shelf, or even a whole room.
You start thinking, “Can I just paint this?” It seems simple enough, right? But then you remember those times when painting something tricky didn’t go so well. You might have seen paint peel, or the surface looked bumpy and uneven.
That can be super frustrating. You want a good result, something that looks finished and lasts. Well, let’s talk about painting OSB plywood.
We’ll cover what you need to know to get a great finish. You’ll learn how to prepare it, what paint to use, and how to make it look professional.
Painting OSB plywood is definitely possible. The key is proper preparation. You need to seal the surface, fill gaps, and use the right primer and paint. This ensures a smooth, durable finish that looks good and lasts. Following a few steps will make all the difference.
What is OSB Plywood and Why Paint It?
So, what exactly is OSB? It stands for Oriented Strand Board. It’s made from wood strands, chips, and flakes.
These are mixed with adhesives. Then, they are pressed together under heat and pressure. This creates a strong, stable panel.
OSB is often used in construction. It’s common for subflooring, walls, and roof sheathing. It’s a budget-friendly alternative to traditional plywood.
People also use it for furniture, shelves, and craft projects. It has a unique look with those visible wood strands. But sometimes, that look isn’t what you want.
You might want a smoother finish. Or, you need it to match existing decor. Painting is a great way to change its appearance.
It lets you customize your project. It can also add a layer of protection.
Why would you want to paint OSB? Well, it’s often not the prettiest material. Those wood strands can be rough.
They can also absorb paint unevenly. This can lead to a splotchy look if you’re not careful. Painting can hide the rough texture.
It can give you a solid color. You can match it to any color scheme. For furniture or shelves, a painted finish looks more polished.
It makes the item feel more complete. For walls, it can create a modern, industrial look. Or, you can simply cover up its raw appearance.
Painting is also a way to seal the surface. This can protect it from moisture and dirt. It makes it easier to clean.
Understanding OSB’s Unique Surface
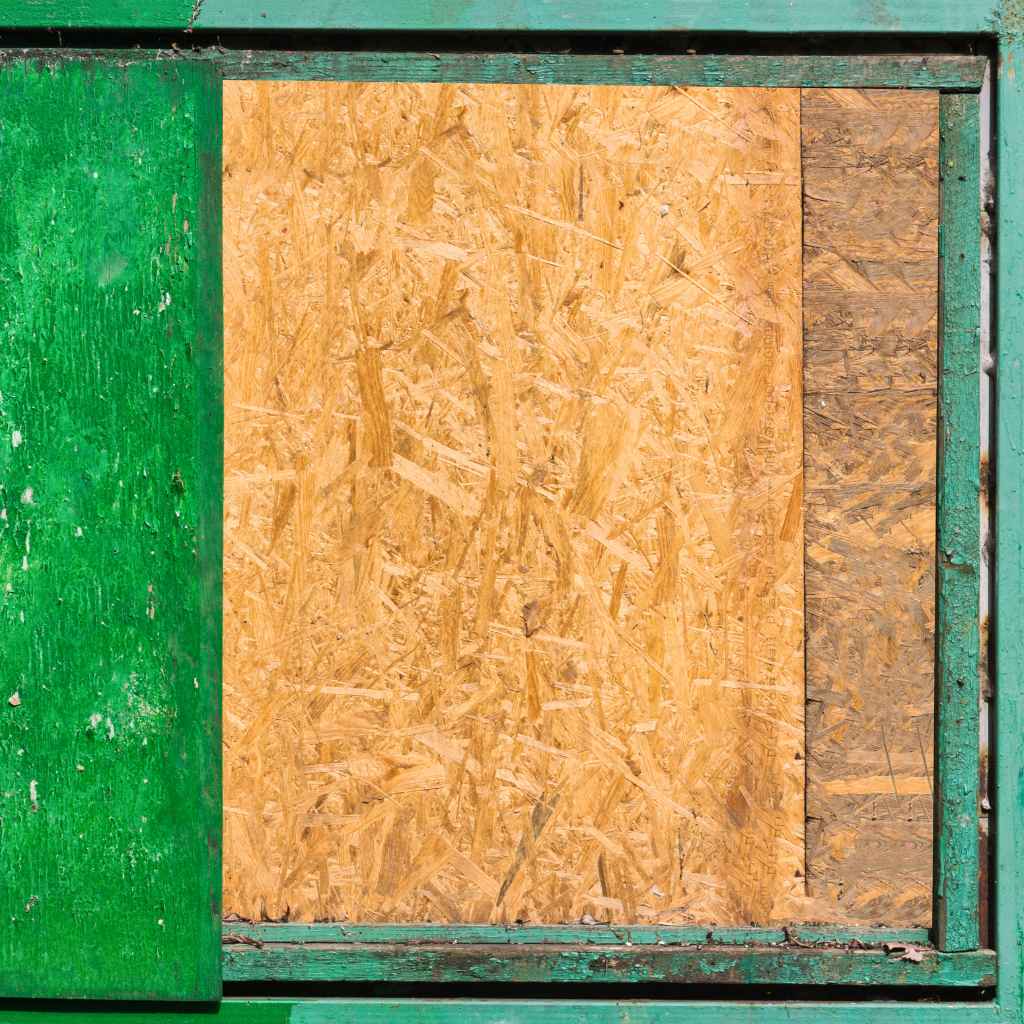
The main challenge with painting OSB is its surface. It’s not like smooth plywood or drywall. It’s made of compressed wood strands.
These strands have different textures. Some are smooth, and some are rough. There are often gaps between the strands.
You might see small voids or knots. The surface can also be a bit uneven. It’s porous.
This means it soaks up liquid paint very quickly. If you don’t seal it first, the paint will sink into the wood. This uses up a lot of paint.
It also results in a patchy, uneven color. You might see darker and lighter spots. This is because some areas absorb more paint than others.
These areas dry faster and look different.
Another thing to consider is the adhesive used in OSB. While generally safe, it can sometimes react with certain paints or primers. This can cause issues like bubbling or discoloration.
It’s usually not a major problem, but it’s good to be aware of. The wood strands themselves can also swell or warp if they get too wet. This is especially true for lower-grade OSB.
So, how much liquid you apply matters. You want to seal it well. But you don’t want to saturate it.
This is why a good primer is super important.
OSB Surface vs. Other Materials
OSB: Made of wood strands. Rough, textured, porous surface. Can have gaps and voids.
Absorbs paint quickly.
Plywood: Made of thin wood plies. Smoother surface than OSB. Fewer gaps.
Less absorbent than OSB.
Drywall: Smooth, gypsum-based material. Needs joint compound and tape. Takes paint very evenly.
MDF: Medium Density Fiberboard. Very smooth and dense. Can be painted easily but needs sealing.
My First Time Painting OSB: A Humbling Experience
I remember the first time I decided to paint some OSB. It was for a DIY shelving unit in my garage. I thought, “How hard can it be?
It’s just wood.” I bought some paint, grabbed a roller, and went for it. I didn’t do much prep. Maybe a quick wipe down.
I figured the primer would cover everything. Oh, was I wrong. The primer went on okay, but it soaked in so fast.
It felt like I was painting wet sand. Some spots were dark, and some were almost clear. I put on a second coat of primer.
It helped a little. But then I started painting the topcoat. It was a disaster.
The color was uneven. You could see the grain of the OSB strands everywhere. It looked patchy and unprofessional.
I felt so disappointed. All that work, and it looked worse than before. I ended up having to sand it down.
I used a lot more primer. Then I tried a different technique. It was a good lesson.
You really can’t skip the prep work with OSB.
That experience taught me a lot. It showed me that OSB needs special attention. It’s not a forgiving material when it comes to paint.
You have to work with its unique texture. You have to respect its absorbency. Now, I always take my time with OSB.
I plan my steps carefully. It’s worth the extra effort. The final result is so much better.
It looks like a professional job. And it lasts longer too.
The Essential Preparation Steps
Okay, let’s get to the good stuff. How do you prepare OSB so paint sticks and looks great? This is the most crucial part.
Don’t skip any of these steps.
1. Cleaning and Dust Removal
First, you need a clean surface. OSB can be dusty. It might have sawdust from cutting.
It could also have dirt or grease. Use a stiff brush or a vacuum cleaner. Get rid of all loose debris.
If the OSB is in a workshop, it might have oil or grime. In that case, you might need to wipe it down with a damp cloth. You can use a mild detergent if needed.
Make sure it dries completely before moving on. Any dust left behind will show up under the paint. It can make the surface feel gritty.
This is a simple step, but it makes a big difference.
2. Filling Gaps and Imperfections
OSB often has small voids. It can also have rough edges or dents. You want a smooth surface for painting.
Use a good quality wood filler or spackling compound. For larger gaps, use a wood filler. For smaller holes, spackling compound works well.
Apply it with a putty knife. Press it into the voids. Make it smooth and level with the surrounding surface.
Let it dry completely. Check the manufacturer’s instructions for drying times. Once dry, sand the filled areas smooth.
Make sure they are flush with the rest of the OSB. This step is key to a uniform finish.
3. Sanding for Adhesion
Even if you don’t have many voids to fill, sanding is important. OSB can have a slightly waxy or rough surface. Sanding helps to create a better grip for the primer.
Use medium-grit sandpaper. Around 100-120 grit is usually good. You don’t need to sand it super smooth.
You just want to lightly scuff the surface. This opens up the pores of the wood. It helps the primer soak in and bond better.
After sanding, clean off all the dust again. A vacuum with a brush attachment works well. You can also use a tack cloth for a final wipe-down.
This ensures no fine dust remains.
Quick Sanding Checklist
- Tool: Medium-grit sandpaper (100-120 grit) or sanding sponge.
- Goal: Lightly scuff the surface.
- Areas to focus on: All exposed OSB surfaces.
- After sanding: Thoroughly clean all dust.
Choosing the Right Primer is Key
This is where many people go wrong. They think any primer will do. But OSB needs a special kind of primer.
You need one that can seal the wood well. It also needs to block any potential stains or resins. A good primer will create a uniform surface.
It will make your topcoat look much better.
Oil-Based or Shellac-Based Primers
For OSB, oil-based or shellac-based primers are often the best choice. These are excellent at sealing porous surfaces. They create a barrier.
This prevents the paint from soaking in too much. They also help block any tannins or resins from the wood. These can bleed through water-based paints.
This is called “bleeding.” Oil-based primers are thicker. They fill in some of the surface texture too. Shellac-based primers are very effective.
They dry fast and seal incredibly well. You can usually find them in spray cans or liquid form. They are known for their excellent adhesion.
If you opt for an oil-based primer, you’ll need mineral spirits for cleanup. Shellac-based primers often require denatured alcohol. Make sure you have good ventilation when using these types of primers.
They can have strong fumes. Apply it evenly with a brush or roller. Make sure you get into all the small nooks and crannies.
Let the first coat dry completely. Then, apply a second coat. Two coats of primer are usually recommended for OSB.
This ensures complete coverage and sealing. After the primer dries, you might need a light sanding. Use fine-grit sandpaper (like 220 grit).
This will smooth out any brush marks or imperfections. Wipe away the dust again.
Water-Based Primers as an Option
In some cases, a high-quality water-based primer might work. Look for one that is specifically designed for sealing wood or for blocking stains. Sometimes called “liquid sandpaper” primers.
These can be a good option if you want to avoid the fumes of oil or shellac. They are also easier to clean up with water. However, they might not offer the same level of sealing power as oil or shellac.
You might need more coats. Always test in an inconspicuous area first. If you notice any bleeding or unevenness, switch to an oil or shellac-based primer.
Primer Power: What to Look For
- Type: Oil-based or Shellac-based are best.
- Function: Seals porous surfaces, blocks stains, adheres well.
- Application: Apply two even coats.
- Drying: Allow full drying time between coats.
- Post-primer: Light sanding and dusting.
What Kind of Paint Works Best?
Once your OSB is primed and ready, it’s time for paint. For the topcoat, you have a few good options. The best choice depends on where the OSB is and how you want it to look.
Latex or Acrylic Paints
High-quality latex or acrylic paints are generally a good choice for the topcoat. These paints are durable. They come in a wide range of colors and finishes.
For walls or furniture that will see a lot of use, choose a paint with good durability. Semi-gloss or satin finishes are often recommended. They are easier to clean than flat finishes.
They also hide imperfections a little better. A satin finish offers a soft sheen. A semi-gloss finish is more reflective and very washable.
Flat or matte finishes can be used, but they might show more texture. They can also be harder to clean.
When applying the topcoat, use thin, even coats. Don’t try to cover everything in one thick layer. This can lead to drips and unevenness.
It’s better to apply two or three thin coats. Let each coat dry completely before applying the next. This will give you the smoothest and most durable finish.
You can use a high-quality roller with a medium nap. Or, you can use a good paintbrush. For large areas, a sprayer can also work wonders.
It provides a very smooth, factory-like finish. But it requires practice.
Using Specialty Paints
You can also consider specialty paints. For example, chalk paint can give a nice matte finish. It adheres well to most surfaces.
It often requires a topcoat sealant for durability. For a more industrial look, you could try a concrete or masonry paint. These are very tough and can adhere well to textured surfaces.
Always check the paint can. Make sure it’s suitable for wood or composite materials. Also, check if it’s compatible with your primer.
Paint Finish Guide for OSB
- Flat/Matte: Hides texture but harder to clean. Best for low-traffic areas.
- Eggshell/Satin: Soft sheen, good balance of washability and appearance.
- Semi-Gloss: More reflective, very durable and washable. Great for trim or furniture.
- High-Gloss: Very shiny, highlights imperfections. Use with caution.
My Second Attempt: A Transformation Story
After my first failed attempt, I was determined to get it right. I was working on a built-in bookshelf project for my living room. I wanted a clean, modern look.
I used higher-grade OSB this time. I knew I had to take my time. First, I cleaned the boards thoroughly.
Then, I used a wood filler to fill all the small voids and knots. I made sure to get it nice and flush. After the filler dried, I sanded the whole surface.
I used 120-grit sandpaper. Then I vacuumed and wiped it down with a damp cloth. The surface felt much smoother already.
Next came the primer. I chose a high-quality oil-based primer. I applied two generous coats.
I let it dry completely between coats. It looked so much better. The OSB was sealed.
It was a uniform color. I lightly sanded it again with 220-grit sandpaper. I wiped away all the dust.
For the topcoat, I picked a nice satin finish latex paint in a soft gray. I applied it with a good quality roller. I used thin, even coats.
I applied three coats in total. The difference was astonishing. The shelves looked smooth, professional, and like they were made of solid wood.
No patchy spots. No visible OSB texture. It looked fantastic.
It was proof that preparation is everything. This second attempt was a complete success.
Real-World Contexts: Where Painted OSB Shines
Painting OSB isn’t just for DIY furniture projects. It’s used in many real-world applications. Understanding these contexts can help you decide if it’s right for your project.
Accent Walls and Interior Paneling
In modern interior design, OSB is sometimes left exposed. But it can also be painted to create unique accent walls. If you paint it a solid color, it can look like textured plaster or modern paneling.
It adds a lot of visual interest to a room. For this, you need to ensure the OSB is installed smoothly. Gaps between panels should be minimal.
The sanding and priming steps are crucial here. A durable, washable paint finish is also important for walls.
Garage and Utility Spaces
OSB is a popular choice for walls and shelving in garages, workshops, and utility rooms. These areas often don’t need a high-end finish. Painting the OSB makes it easier to clean.
It also prevents dust and debris from sticking to the rough surface. A practical, durable paint is best here. Think semi-gloss or gloss for easy wiping.
You can paint it a bright color to make the space feel more open and clean.
Furniture and Shelving Units
As seen in my own projects, OSB is great for building custom furniture. Bookshelves, cabinets, desks, and even entertainment centers can be made from OSB. Painting it transforms it from a raw material into a finished piece of furniture.
It allows you to match any decor style. You can achieve a look that rivals store-bought items. For furniture, a slightly more durable paint finish is a good idea.
This is because furniture gets touched and moved around a lot.
Temporary Structures and Event Booths
Because OSB is cost-effective, it’s often used for temporary structures. This includes things like trade show booths, stage sets, or movie props. Painting these structures is essential for their appearance.
A good paint job can make them look more professional and appealing. The speed of application might be a factor here. Spraying paint can be a good option for these types of projects.
OSB Projects: Where It Makes Sense
- Budget-Friendly Construction: Subfloors, wall sheathing.
- Custom Furniture: Bookshelves, cabinets, tables.
- Creative Interiors: Accent walls, feature panels.
- Functional Spaces: Garages, workshops, storage areas.
- Temporary Builds: Booths, sets, props.
What This Means For Your Project
Knowing all this, what should you expect for your own project? Painting OSB is not just slapping paint on. It’s a process.
But it’s a process that yields great rewards.
When is Painted OSB a Good Choice?
Painted OSB is a good choice when you want a budget-friendly material. It’s excellent when you need to customize the look. It works well for projects where durability and washability are important.
If you’re looking for a modern, textured look, painted OSB can deliver. It’s also great for areas where aesthetics are secondary but a finished look is desired, like a garage. The key is that you are willing to put in the prep work.
When Should You Consider Alternatives?
If you want a perfectly smooth, furniture-grade finish without a lot of effort, OSB might not be your first choice. Traditional plywood with a smoother veneer or MDF might be easier. If your project requires a very high-end, flawless surface without any visible texture, OSB could be challenging.
Also, if the OSB will be exposed to extreme moisture or direct water contact, it might not be the best material, even when painted. Its core is still wood-based.
Simple Checks Before You Start
Before you even buy paint, check the OSB itself. Is it warped or damaged? Is it very rough with large voids?
If so, you might need to select better quality boards. Or, you might need to use more filler and sanding. Also, check the temperature and humidity of the area where you’ll be painting.
Extreme conditions can affect drying times and paint application.
When you look at the OSB, imagine it painted. Can you see a way to fill the texture? Can you get it smooth enough for your liking?
If the answer is yes, you’re probably on the right track. If you’re already picturing a perfectly smooth surface with no hint of wood strands, you might want to rethink the material choice. Or, be prepared for a lot of sanding and filling.
Tips for a Smooth, Durable Finish
Let’s recap some of the most important tips. These will help you achieve that professional look.
- Prep is King: Never skip cleaning, filling, and sanding. This is the most critical step for OSB.
- Seal It Right: Use an oil-based or shellac-based primer. Apply two coats for best results.
- Smooth it Out: Lightly sand between primer coats and between paint coats. This builds up a smooth surface.
- Thin Coats: Apply paint in thin, even layers. Avoid thick applications that can drip.
- Quality Tools: Use good quality brushes, rollers, or sprayers. They make a difference in the finish.
- Patience: Allow adequate drying time between all steps. Rushing will lead to mistakes.
- Ventilation: Ensure good airflow, especially when using oil-based products.
Think of painting OSB like preparing to paint a car. You need to smooth out any dents. You need to clean the surface.
You need a good primer. Then you can apply the color. It takes time.
But the end result is worth it. A smooth, durable finish protects your project. It also makes it look beautiful.
This will make you proud of your work.
Frequently Asked Questions About Painting OSB
Can I paint OSB without primer?
It’s strongly not recommended. OSB is very porous. Without primer, paint will soak in unevenly.
This leads to a patchy, splotchy finish. Primer seals the wood and creates a uniform surface for paint adhesion.
What is the best primer for OSB?
Oil-based or shellac-based primers are usually best. They offer superior sealing and stain-blocking properties for OSB’s rough, porous surface. Look for a high-quality product designed to seal wood.
Do I need to sand OSB before painting?
Yes, a light sanding is important. It helps scuff the surface. This allows the primer and paint to adhere better.
Sand after cleaning and again after priming for a smoother finish.
How many coats of paint do I need on OSB?
Typically, two to three thin coats of paint are needed. This is after the primer has been applied. Thin coats build up a smooth, even finish.
Avoid applying paint too thickly.
Can I paint OSB with a roller or a brush?
Both a roller and a brush can work. A roller is faster for large areas. A high-density foam roller or a short-nap roller is good.
A good quality paintbrush works well for edges and details. For the smoothest finish, a paint sprayer is an excellent option.
Will painting OSB hide the wood strand texture?
Painting can significantly reduce the visibility of the OSB texture, especially with good primer and multiple thin coats of paint. However, some subtle texture might remain. A very smooth, flawless finish might require extra smoothing or a different material.
Conclusion
So, can you paint OSB plywood? The answer is a resounding yes! It’s a versatile and affordable material.
With the right approach, you can transform its appearance. Proper preparation, including cleaning, filling, sanding, and crucially, priming, is essential. Using quality materials and applying paint in thin, even coats will lead to a beautiful, durable finish.
Don’t be discouraged by its raw look; a little effort goes a long way.