Clean Wooden Blinds Fast: A Safe and Easy Cleaning Guide
Cleaning wooden blinds can seem tricky at first. Many people worry about damaging the wood or not getting them fully clean. Don’t stress! Clean Wooden Blinds Fast: Safe DIY Guide offers a simple way to get your blinds looking great without any headaches. This guide will show you exactly what you need and how to do it step-by-step. Let’s explore how to make your blinds sparkle!
Gathering Your Cleaning Supplies
Before you begin, gathering the right tools is essential for effective cleaning and protecting your blinds. Using the correct supplies ensures you don’t damage the wood or leave behind streaks. It also makes the cleaning process much easier and more enjoyable. Let’s look at a collection of items that will help you prepare for the task.
Essential Cleaning Tools
- Soft Cloths or Microfiber Dusters: These are the workhorses of your cleaning kit. Soft cloths are gentle on the wood and won’t scratch the surface. Microfiber cloths are particularly good at grabbing dust and dirt, making them ideal for cleaning wooden blinds. Always use clean cloths to prevent spreading dirt around. Make sure you have several on hand, so you always have a fresh one when needed.
Using a clean cloth prevents the recirculation of dirt and dust particles. Microfiber cloths, in particular, have a unique ability to capture and hold onto dust, ensuring a more effective and thorough cleaning. If you don’t have these, use a soft cotton cloth, but avoid anything abrasive.
- Mild Soap or Wood Cleaner: Choose a gentle soap or a cleaner specifically designed for wood surfaces. Strong chemicals can damage the finish of your wooden blinds. Always test the cleaner on a small, hidden area of a slat first to ensure it doesn’t discolor or react poorly with the wood. Look for cleaners that are pH-neutral or specifically state they are safe for wood.
Mild soap or wood cleaner is specifically formulated to clean without stripping the natural oils of the wood. Using a specialized wood cleaner will help to preserve the beauty and longevity of your blinds. Always follow the manufacturer’s instructions for the best results and dilution ratios.
- Bucket or Basin: A bucket or basin is needed to mix your cleaning solution. Ensure it’s clean and large enough to comfortably dip your cloths or sponges. Having a dedicated bucket for cleaning purposes helps to keep your cleaning supplies organized and ready to use.
The bucket holds the cleaning solution. A clean bucket is important to avoid contaminating your cleaning solution and thus preventing streaking or smudging of the blinds. It also allows you to easily control the amount of liquid you are using, reducing the risk of water damage to the blinds.
- Vacuum Cleaner with Brush Attachment: A vacuum cleaner with a soft brush attachment is an excellent tool for removing loose dust and debris before you start wet cleaning. This step prevents the dirt from turning into a muddy mess. The brush attachment ensures that you can reach into all the crevices.
Using a vacuum cleaner with a brush attachment is a crucial first step for removing loose dirt, dust, and allergens. This makes the cleaning process significantly easier. The soft brush attachment is designed to gently lift dirt without scratching the wood, ensuring the blinds are clean without causing any damage.
Preparing Your Blinds
Preparation is key for cleaning wooden blinds. Before applying any cleaning solution, you need to prepare the blinds. This involves removing any loose dust, which can get messy if mixed with water. It will also help prevent streaks when you wipe the blinds. Here’s how to get ready for the main cleaning process.
Dusting the Blinds
- Use a Soft Brush Attachment: Start by using your vacuum cleaner with the brush attachment. This tool allows you to gently remove dust from the blinds. Work from top to bottom, being careful not to push the dust further into the slats. Make sure you get between the slats, where dust often accumulates.
The soft brush attachment is ideal for dusting wooden blinds. The soft bristles gently sweep away dust and dirt without scratching the wood’s surface. This method is effective and safe. Always vacuum in the same direction to prevent streaks.
- Dust with a Microfiber Cloth: If you don’t have a vacuum or want a more detailed approach, a dry microfiber cloth is a great option. Use the cloth to wipe each slat, working your way from one end to the other. Ensure you remove dust from both sides. Microfiber is effective because it attracts and traps dust, preventing it from spreading.
A microfiber cloth is highly effective at capturing dust and other small particles. Its structure ensures a thorough cleaning. Wiping each slat carefully ensures that all dust is removed. This step is especially useful for blinds exposed to direct sunlight or located in high-traffic areas.
- Consider a Feather Duster: Another option is a feather duster, particularly for a quick touch-up. Gently swipe the duster across each slat to remove loose dust. This method is suitable for routine dusting but may not be as effective for heavier dirt or grime. Make sure the feather duster is clean to prevent spreading dust.
Feather dusters are great for routine dusting. They can quickly remove light dust and debris without much effort. For more stubborn dirt or cleaning, however, you’ll need a more effective method. The effectiveness of a feather duster depends on the quality of the duster and the amount of dust.
Protecting Your Surroundings
- Lay Down Drop Cloths: Before you start wet cleaning, place drop cloths or old towels on the floor beneath your blinds. This is important to catch any drips or spills. These cloths will protect your floors and prevent water damage.
Drop cloths are vital because they can capture drips from cleaning and protect your floor from water damage. They also make cleanup much easier. Choose cloths large enough to cover the entire area under the blinds.
- Close and Protect Nearby Furniture: If there’s furniture nearby, you might also want to cover it with plastic or drop cloths. This prevents splashes or drips from landing on them. Move any valuable or sensitive items out of the immediate cleaning area.
Protecting furniture from water is a simple precaution. Covering nearby items prevents water spots and potential damage to your furniture. A few minutes of prep can save you from having to clean up any water-related messes.
- Ensure Good Ventilation: Open windows or use a fan to improve airflow in the room. This helps the blinds to dry faster. Improved ventilation can also reduce the risk of mold or mildew growth, which can happen if moisture lingers.
Good ventilation is key for efficient drying. It helps prevent water stains and any issues. Make sure the room is well-ventilated during and after the cleaning. Proper airflow ensures that the blinds will be completely dry before you close them again.
Cleaning Your Wooden Blinds
With preparation complete, the next step is the actual cleaning of your wooden blinds. This section will walk you through the process, ensuring your blinds look their best without any damage. We’ll cover how to safely and effectively use cleaning solutions and techniques.
Mixing Your Cleaning Solution
- Choose the Right Cleaner: For wooden blinds, a mild soap solution is often the best choice. Mix a few drops of dish soap (make sure it’s mild) with warm water in a bucket. Avoid using harsh chemicals or abrasive cleaners, as they can damage the wood’s finish.
A mild soap solution is gentle enough not to harm the wood. Harsh chemicals can strip away the protective coating. Always follow the instructions on the soap container, and start with a small amount of soap to test it.
- Use a Wood-Specific Cleaner: If you prefer, opt for a commercial wood cleaner. These products are specifically formulated to clean wood surfaces without causing damage. Always read and follow the manufacturer’s instructions for the best results. Test on an inconspicuous area first.
Wood cleaners are specially designed to clean wood without causing damage or discoloration. They may also contain ingredients that can help to preserve the wood’s natural oils. These cleaners are a good choice when you want a professional-looking finish.
- Test Your Solution: Before you begin cleaning all the blinds, test your cleaning solution on a hidden area of one slat. This allows you to check for any adverse reactions, such as discoloration or damage. Wait a few minutes to see if any problems arise.
Testing the solution on a hidden area prevents any unwanted surprises. If the test area shows no damage, you can safely proceed with cleaning the rest of the blinds. Always wait a few minutes to assess the outcome fully.
Wet Cleaning Techniques
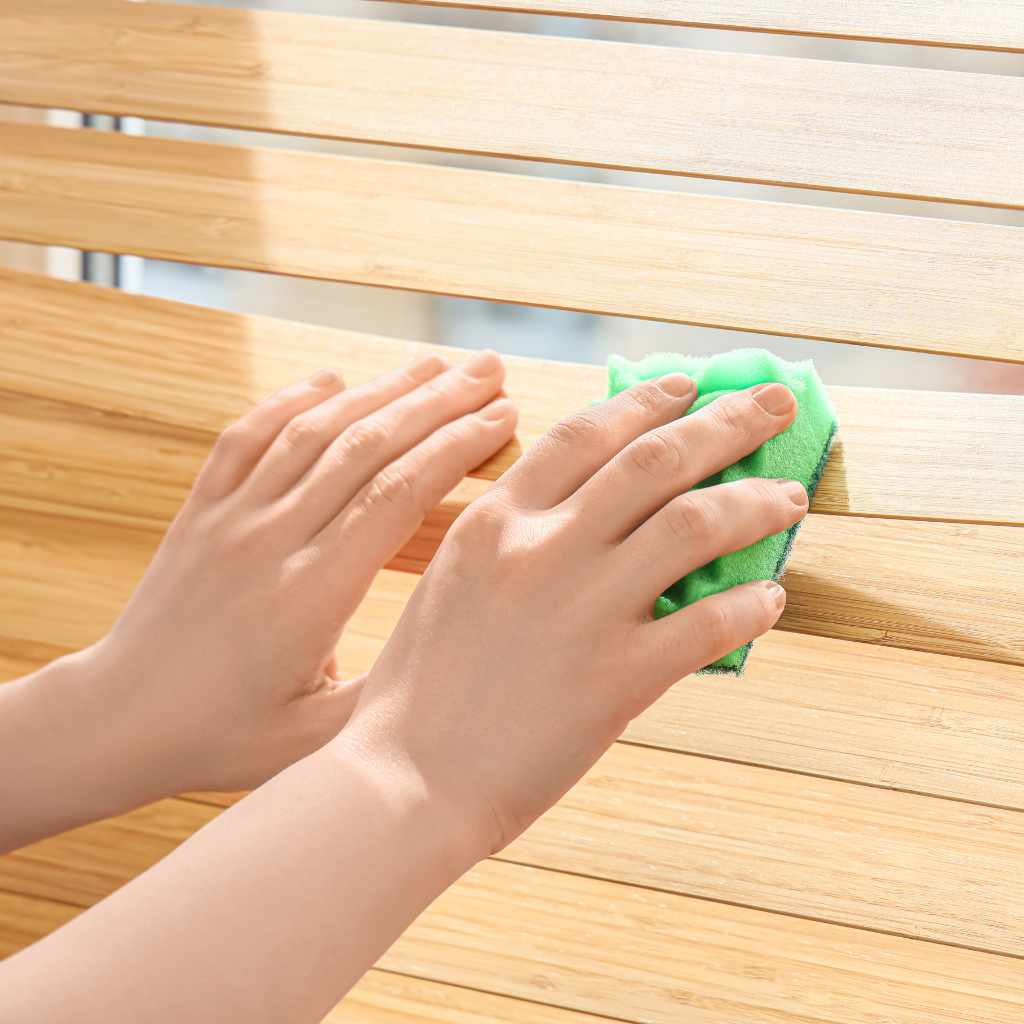
- Dampen a Soft Cloth: Dip a soft cloth or a microfiber cloth into your cleaning solution, and then wring it out very well. The cloth should be damp, not dripping. Excess water can damage the wood. A damp cloth will effectively clean the blinds without leaving excess moisture.
Using a damp cloth is important to avoid saturation. Wringing the cloth ensures that you control the amount of water applied to the wood. This approach minimizes the risk of water damage and helps to prevent streaks.
- Wipe Each Slat: Wipe each slat from top to bottom, cleaning both sides. This will remove dust, dirt, and grime. Ensure that you wipe each slat completely to remove all the dirt. Work methodically to ensure you don’t miss any spots.
Wiping each slat from top to bottom ensures that all dirt is removed. Working methodically guarantees that every surface is cleaned, leaving your blinds looking clean and fresh. Make sure to wipe the top and bottom of each slat.
- Dry Immediately: After wiping each slat, use a clean, dry cloth to dry it immediately. This prevents water spots and damage to the wood. Drying prevents water from seeping into the wood and causing potential warping or damage.
Drying the blinds right after cleaning is important to prevent water spots and potential water damage. The dry cloth can quickly absorb any excess moisture, leaving the blinds looking their best. Complete drying is essential for the durability of the blinds.
Dealing with Stubborn Stains and Dirt
Sometimes, your blinds might have stubborn stains that don’t come off easily with basic cleaning. This section shows you how to handle these tough spots using safe and effective methods. It’s crucial to be gentle when addressing these problems to avoid damage.
Identifying Stubborn Spots
- Inspect Your Blinds: After the initial cleaning, carefully examine your blinds for any spots that remain. Look closely for things like greasy fingerprints, sticky marks, or any areas that look dirtier than others. Identifying the specific type of stain helps you choose the right cleaning approach.
A thorough inspection is important. This is your chance to focus on specific areas. Note any spots that haven’t been removed by your normal cleaning methods. Identifying the type of stain helps you find the right cleaning method.
- Check for Grime Build-up: Pay special attention to areas that get a lot of touch, such as the bottom slats or the edges near the pull cords. These areas tend to gather more dirt and grime over time. These spots might require a more focused cleaning approach.
Grime build-up is common in high-touch areas. These spots often need extra attention. You may have to apply more effort. Make sure you don’t overlook these spots because they can really affect the look of your blinds.
- Consider the Age of the Stain: The age of the stain can affect how easily it comes off. Fresh stains are often easier to remove than those that have been there for a long time. Address stains as soon as you notice them for better results.
Fresh stains respond better to cleaning efforts. Older stains can be more difficult because they have had time to set into the wood. Quick action when dealing with stains will usually lead to better cleaning results and prevent potential permanent marks.
Specific Stain Removal Methods
- For Greasy Marks: Use a small amount of mild dish soap and warm water, or try a diluted solution of white vinegar and water. Gently blot the stain with a soft cloth. Don’t rub hard, as this can damage the finish.
Greasy marks can be removed by using mild dish soap. Use a cloth and blot the stain. Always try a gentle approach at first, which helps prevent scratching the surface. Never scrub hard, as this can cause damage.
- For Sticky Residue: Use a damp cloth to wipe the area. If that doesn’t work, try a small amount of rubbing alcohol. Apply the alcohol to a cloth, and then gently blot the area. Avoid using too much alcohol to prevent damage to the finish.
Sticky residue is common, and it can usually be removed with rubbing alcohol. Make sure you don’t apply the alcohol directly to the wood. You want to blot with a cloth. Always test a small area first to make sure the alcohol doesn’t damage the finish.
- For Dust Build-up: If dust build-up is a problem, use a vacuum cleaner with a brush attachment or a microfiber cloth. For stubborn dust, a slightly damp cloth can help. Always dry the area immediately after cleaning to prevent water damage.
Dust build-up needs regular attention. Use a vacuum, brush, or damp cloth. Drying the area is important to prevent moisture from damaging the blinds. Focus on these areas, and your blinds will look great.
Drying and Finishing Touches
After you’ve cleaned your wooden blinds, the final steps involve drying them completely and adding any finishing touches. Ensuring they are fully dry prevents water spots, warping, and the growth of mold. This part focuses on getting everything perfect.
Ensuring Complete Drying
- Air Dry: The best way to dry your blinds is to let them air dry. Open the blinds fully and ensure good airflow in the room. This helps speed up the drying process. Good ventilation is key to drying your blinds effectively and to prevent any issues.
Air drying is best. Open the blinds fully. Good ventilation and sufficient air circulation are important. This prevents water spots and helps the wood stay in good shape. Air drying can take a bit, so allow plenty of time.
- Use Fans: If you need to speed up the drying, you can use fans. Place fans near the blinds to circulate air. Fans can significantly reduce drying time, especially in humid conditions. Using fans is a practical measure when you need your blinds dried faster.
Fans speed up the drying process. Proper ventilation and air circulation are important. This is especially good if you’re in a humid area, where blinds can take longer to dry. This helps prevent water spots or damage.
- Avoid Direct Sunlight: While drying, keep the blinds out of direct sunlight. Sunlight can damage the wood. While the blinds dry, it’s best to keep them out of direct sunlight. Direct sunlight can fade or damage the finish.
Sunlight can damage the wood. It can cause fading and drying. Avoid direct sunlight. This step ensures that your blinds keep their original color and finish. During the drying phase, keeping the blinds out of direct sunlight protects the wood.
Final Inspections and Adjustments
- Inspect for Streaks: Once the blinds are dry, check for any streaks or spots you may have missed. If you find any, simply re-clean those specific areas with a damp cloth and dry them immediately. Take a careful look at the blinds.
Check for any streaks or missed spots. Make sure every slat is clean. If you see streaks, it’s easy to fix them. You can simply repeat the cleaning process in any problem areas. This quick fix will ensure your blinds look spotless.
- Check the Operation: Make sure the blinds operate smoothly after cleaning. Check the cords and tilt mechanism to ensure they work. If you notice any issues, carefully check the mechanisms for any obstructions or tangles.
Check the tilt mechanism to make sure it’s working properly. This ensures that your blinds are functional. It can detect and address problems before they become bigger issues. Smooth operation ensures the blinds are working as they should.
- Apply a Wood Polish (Optional): If you want to give your blinds some extra shine and protection, you can apply a wood polish. Use a polish specifically designed for wooden blinds. Follow the instructions on the product. Use a soft cloth.
Wood polish can add extra shine and protection. Always use products made for wood. Applying polish is optional. It will give your blinds an improved look and offer additional protection. Polish will enhance their appearance and add to their life.

Frequently Asked Questions
Question: How often should I clean my wooden blinds?
Answer: It depends on the environment. Routine dusting (once a week) is a good idea. For deeper cleaning, do it every few months, or when they visibly need it.
Question: Can I use a pressure washer on my wooden blinds?
Answer: Never use a pressure washer. The high pressure can damage the wood’s finish and structure. It can cause permanent damage.
Question: What if my blinds have a strong odor after cleaning?
Answer: Ensure they’re completely dry, and open windows to air them out. A mild odor should disappear quickly. If it doesn’t, check for any lingering moisture that might be causing a problem.
Question: Is it safe to use commercial cleaning products on my blinds?
Answer: Yes, but always test them first on a small, hidden area to ensure they don’t damage the wood. Choose products made specifically for wood.
Question: What’s the best way to clean very dusty blinds?
Answer: Start with a vacuum cleaner with a brush attachment to remove loose dust. Then, use a damp microfiber cloth for a thorough clean. Dry each slat immediately to avoid damage.
Final Thoughts
Following this guide, you now have a straightforward way to keep your wooden blinds looking their best. From gathering your cleaning supplies to tackling tough spots, we’ve walked through every step to ensure your blinds are sparkling clean. Remember, the key is using gentle methods and avoiding harsh chemicals, which preserves your blinds and helps to protect them. The cleaning process is simple and can be done effectively with the right tools and techniques. Now go ahead and give your blinds the attention they deserve. With regular cleaning, your wooden blinds will continue to enhance the beauty of your home for years to come!