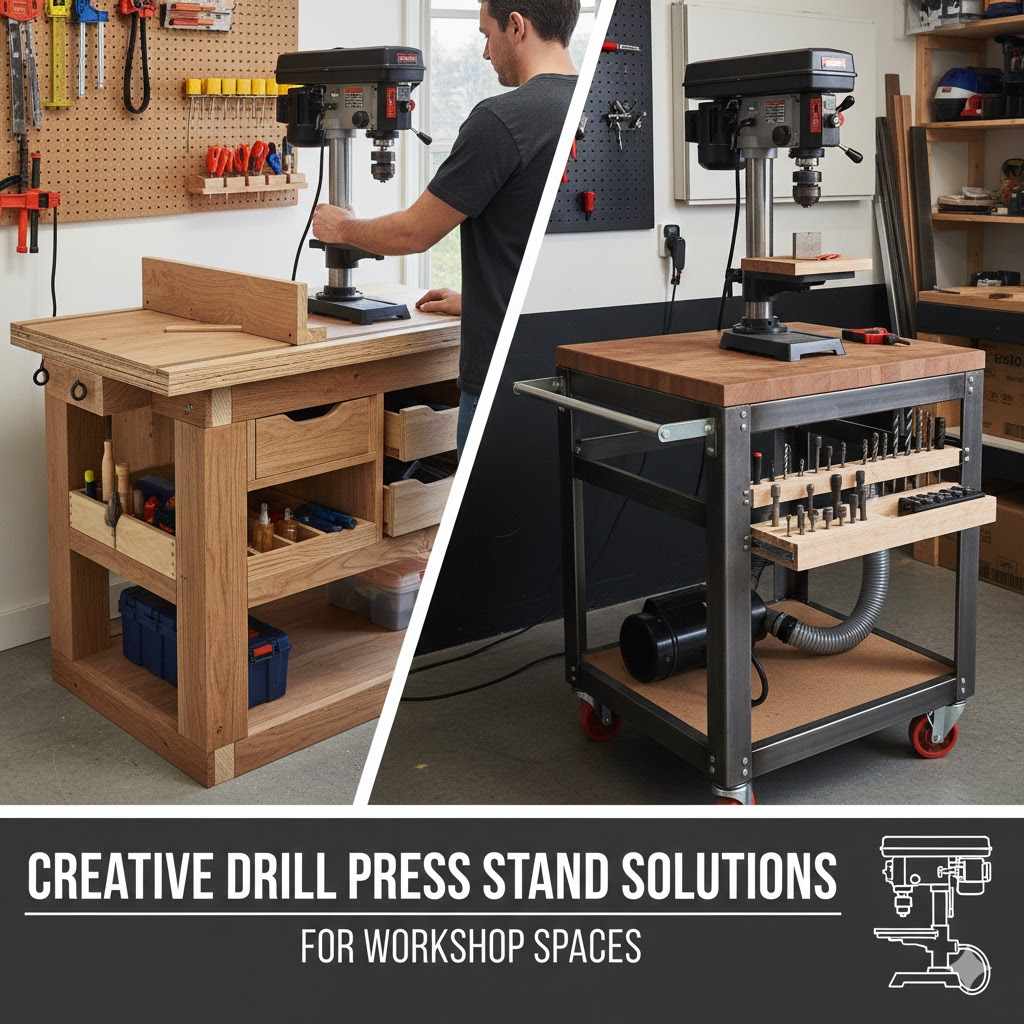
Creative Drill Press Stand Solutions for Workshop Spaces
Figuring out Creative Drill Press Stand Ideas for Small Workshops can be tricky. It’s tough because you need something sturdy, space-saving, and easy to use. Beginners often face challenges with limited space and choosing the right materials. Don’t worry, we’re here to help! We’ll show you some simple, step-by-step solutions to build your own drill press stand. Let’s explore some clever ideas!
Choosing the Best Stand Design for Your Drill Press
Before you start building, the most important thing is picking the right design. Think about your available space and the kinds of projects you plan to do. A basic stand could be a simple box, while more advanced designs might have storage or wheels for moving it around. Consider what features will be most useful for you. This means thinking about how you use your drill press on a daily basis and what would make your work easier. Making a careful selection at the beginning sets you up for success. We’ll explore some different design options to get you started.
Simple Box Stand
A simple box stand is a great starting point for beginners. It’s usually made from plywood or MDF (medium-density fiberboard) and is shaped like a box. The drill press sits on top, and you can add a shelf inside for storing tools. The design is straightforward, which means you don’t need fancy tools or lots of experience to build it. It’s also very stable, which is important for safety. To customize the stand, consider adding a drawer for smaller items, like drill bits, or casters to move it around your workshop. This is a very cost-effective way to get the job done!
- Easy to build: It requires basic woodworking skills.
- Stability: The box shape offers a solid base, reducing vibration.
- Storage: You can add shelves or drawers inside the box for extra storage space.
- Cost-effective: Materials like plywood or MDF are relatively inexpensive.
Mobile Drill Press Stand
If you need to move your drill press around, a mobile stand is the way to go. This type of stand uses wheels, also known as casters, so you can easily reposition the drill press. You can build it similarly to the box stand, but add a base with casters. This is perfect for small workshops where space is limited and you need to keep tools out of the way when they’re not in use. Some mobile stands include locking casters, which keep the stand firmly in place while you’re working. This provides the flexibility to position your drill press wherever you need it.
- Increased flexibility: Easy to move the drill press wherever it is needed.
- Space-saving: Move the drill press out of the way when not in use.
- Locking casters: Ensure the stand is secure during operation.
- Suitable for small workshops: Helps to maximize available space.
Combination Stand with Storage
Want to combine functionality? Try a stand that includes built-in storage. This type of stand often features drawers, shelves, or even a cabinet to store drill bits, clamps, and other accessories. This keeps everything organized and within easy reach, which makes your work more efficient. The extra storage is perfect for small workshops, where space is always at a premium. These stands are usually made of sturdy materials to handle the weight of the drill press and the stored items. With thoughtful design, you can maximize your storage while keeping a compact footprint.
- Organized workspace: Everything you need is easily accessible.
- Efficient work: Reduces time searching for tools.
- Maximizes space: Combines tool storage with the stand.
- Customizable: You can design it to fit your specific needs.

Materials and Tools for Your Project
Selecting the right materials and tools will make your drill press stand project easier and more successful. While you can tailor your choices to the stand you are building, the basics remain the same. The materials you choose will affect the stand’s durability and overall cost. The tools you use determine how accurately and easily you can put your project together. Remember, safety comes first, so always use the correct protective equipment. A little planning here saves time and frustration later. Let’s examine some of the key components you will need.
Choosing the Right Wood
The type of wood you select affects the strength and look of your drill press stand. Plywood is a popular choice because it’s strong and stable. MDF is another good option, especially if you plan to paint the stand. Solid wood, like pine or oak, can also be used, but it might be more costly and require more advanced woodworking skills. The thickness of the wood is also important; thicker wood provides more stability. Consider your budget, the tools you have, and the overall design when picking out your materials. The best wood will depend on your specific needs.
- Plywood: Strong and stable; easy to find.
- MDF: Smooth surface, great for painting.
- Solid wood: Durable, but more expensive.
- Wood thickness: Important for stability and strength.
Essential Tools for Assembly
You’ll need several key tools to build your drill press stand. A measuring tape, a pencil, and a square are crucial for accurate measurements. A saw, either a circular saw or a hand saw, is needed to cut the wood to size. A drill and a screwdriver are essential for assembling the parts. Clamps will help hold pieces together while the glue dries, and sandpaper will smooth any rough edges. Safety equipment, such as safety glasses, a dust mask, and hearing protection, is very important. Always review the tool instructions and safety recommendations before you begin your project.
- Measuring tools: Tape measure, pencil, square for accurate cuts.
- Saw: Circular saw or handsaw to cut the wood.
- Drill and screwdriver: For assembly and securing parts.
- Clamps: Hold pieces together while the glue dries.
- Sandpaper: Smooth edges for a clean finish.
Example Scenario: Building a Basic Box Stand
Let’s say you decide to build a basic box stand. Here is a simple step-by-step guide to get you started. First, measure your drill press base and plan your box’s dimensions. Cut the plywood pieces based on your measurements. Next, assemble the box by joining the sides, top, and bottom, using glue and screws. Add a shelf inside for extra storage. Finally, sand all the edges and add a finish to protect the wood. You’ll soon have a sturdy and practical stand ready for your drill press. This example is an excellent starting point for any beginner.
- Measure and plan: Determine the size of the stand.
- Cut the wood: Use a saw to cut the plywood to the right sizes.
- Assemble the box: Glue and screw the sides together.
- Add a shelf: Create extra storage space.
- Sand and finish: Smooth the edges and protect the wood.
Building Your Stand Step by Step
Now, let’s get into the specifics of building your drill press stand. We’ll walk through the process, from measuring and cutting the wood to assembling and finishing the stand. Remember to always double-check your measurements, use safety equipment, and follow the instructions carefully. This can seem like a lot, but taking it one step at a time makes the process manageable. Let’s make sure that you build a solid, functional stand that will make your workshop tasks easier.
Cutting and Preparing the Wood
Precise cutting is vital for a well-built stand. Start by making an accurate materials list based on your design. Then, use a measuring tape, pencil, and square to mark the wood pieces. When cutting, take your time and follow the lines carefully. A circular saw or hand saw will work, but using a guide will help you achieve straighter cuts. Once all the pieces are cut, sand the edges to smooth them. This prepares the wood for assembly and gives your stand a more polished look. Accurate preparation sets the foundation for a successful project.
- Measure carefully: Make accurate measurements.
- Mark the wood: Use a pencil and square to mark the cutting lines.
- Cut the pieces: Use a saw to cut the wood.
- Sand the edges: Smooth the edges for a clean finish.
Assembling the Stand
Once you’ve cut the wood, it’s time to put the stand together. Start by assembling the main box structure. Apply wood glue to the edges and use screws to hold the pieces together. Clamps will help keep the pieces aligned while the glue dries. For added stability, you can add corner braces. Make sure all the corners are square. If your design includes shelves or drawers, assemble them separately and then install them inside the box. Proper assembly ensures a strong and functional stand. The goal is to create a structure that will securely hold your drill press.
- Glue and screw the sides: Attach the sides together.
- Use clamps: Hold the pieces in place while the glue dries.
- Add corner braces: Increase the stand’s stability.
- Install shelves and drawers: Add storage space.
Finishing the Drill Press Stand
The last steps involve finishing the stand to protect the wood and improve its appearance. Start by sanding the entire stand to remove any rough spots or imperfections. Next, apply a wood finish, such as paint, varnish, or stain. Paint is a good option if you want to change the look or protect the wood. Varnish and stain highlight the natural grain of the wood. Be sure to follow the instructions on your chosen finish and let it dry completely. Proper finishing protects your stand from wear and tear. A good finish extends its life.
- Sand the stand: Remove any imperfections.
- Choose a finish: Paint, varnish, or stain to protect the wood.
- Apply the finish: Follow the manufacturer’s directions.
- Let it dry: Allow the finish to dry completely.
Advanced Stand Features and Ideas
If you have experience, or if you want to take your project to the next level, here are some advanced ideas. Consider incorporating features that improve the stand’s usability and functionality. These enhancements not only make your stand more efficient, but also demonstrate your woodworking skills. Whether you want to improve storage or boost safety, the possibilities are vast. This will help you get the most out of your drill press. The best part is, you can customize the stand to meet your specific needs.
Integrating Storage Solutions
Optimizing storage is a great way to improve your drill press stand. You can add drawers, shelves, or a cabinet to keep tools organized and within easy reach. Drawers are ideal for storing smaller items, like drill bits, while shelves can hold larger items, like clamps or safety equipment. Using a cabinet provides enclosed storage to protect your tools from dust. Think about what tools and accessories you use most often and design your storage around them. Integrated storage will save you time and space in your workshop. This is really about making your workspace efficient.
- Drawers: Store small items.
- Shelves: Store larger items.
- Cabinet: Enclosed storage to protect from dust.
- Consider tool use: Design storage based on the tools you use most.
Adding a Work Surface and Fence
Improving the work surface is another way to expand the capabilities of your drill press stand. You can attach a larger surface to the stand to provide more support for your projects. A fence helps guide the material and ensures accurate drilling. A fence is easily adjustable to accommodate different sizes and types of materials. A work surface provides more stability, particularly for larger items. These are excellent add-ons, and they will simplify your drilling tasks. Think of these as upgrades that help you improve accuracy and safety.
- Extended work surface: Provides support for larger projects.
- Adjustable fence: Guides the material for accurate drilling.
- Enhance the usability: Improves accuracy.
- Safety: Keeps the material stable.
Making the Stand Mobile with Casters
As we mentioned earlier, adding casters is a great way to make your stand mobile. This is especially useful if you need to move the drill press around your workshop or if space is limited. Use heavy-duty casters to handle the weight of the drill press. Locking casters are important because they prevent the stand from moving while you are working.
This feature adds flexibility to your setup. You can easily move the drill press out of the way when it is not in use. Mobile stands help to maximize space. Remember to select casters appropriate for the weight of your drill press and any added materials.
- Heavy-duty casters: Handle the weight of the drill press.
- Locking casters: Prevent movement while working.
- Increased flexibility: Easy to move around the workshop.
- Maximize space: Move the drill press out of the way.
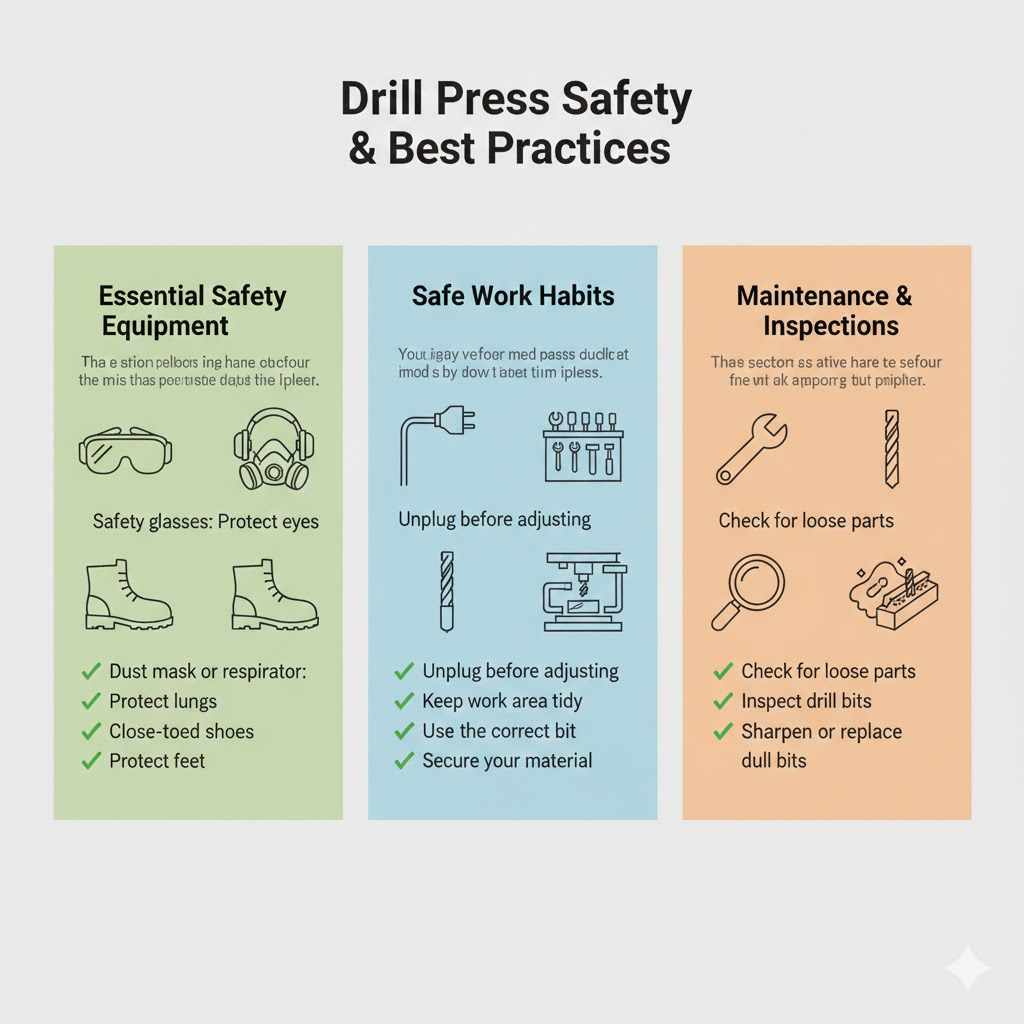
Safety Measures and Best Practices
When working with woodworking tools, safety is of utmost importance. Always wear safety glasses and hearing protection. Make sure your workspace is well-lit and free of clutter. Follow all the manufacturer’s safety recommendations. Using the right tools and techniques also contributes to your safety. Consider these safety measures as part of the job. Safety should always be your top priority. Always double-check your equipment before you start using it.
Essential Safety Equipment
Always have the right safety gear on hand. Safety glasses protect your eyes from flying debris. Hearing protection will protect your ears from loud noises. A dust mask or respirator will prevent you from inhaling wood dust. Close-toed shoes are a must in any workshop. Having the right protective gear makes your projects much safer and more enjoyable. These simple precautions help prevent injuries, allowing you to focus on your work. The goal is to work safely and prevent any issues.
- Safety glasses: Protect your eyes.
- Hearing protection: Protect your ears.
- Dust mask or respirator: Protect your lungs.
- Close-toed shoes: Protect your feet.
Safe Work Habits
Develop good habits to stay safe in your workshop. Always unplug your drill press before making adjustments or changing bits. Keep your work area tidy to reduce the risk of accidents. Use the correct type of bit for the material you are drilling. Use clamps to secure your material, so it doesn’t move while you are working. Always pay attention and concentrate on what you are doing. Careful work practices and attention to detail reduce your chances of accidents. Safe habits improve the outcome of your projects.
- Unplug before adjusting: Prevent accidental starts.
- Keep your work area tidy: Reduce the risk of accidents.
- Use the correct bit: Ensures proper drilling.
- Secure your material: Prevents movement.
Maintenance and Regular Inspections
Maintenance and inspections also keep your tools in safe working order. Regularly check your drill press for any loose parts or damage. Inspect the drill bits for wear and tear. Keep the drill press clean and lubricated. Sharpen or replace dull bits, as they can cause accidents. Proper maintenance is also important for the life of your equipment. It is important to know the condition of your equipment. Taking care of your equipment will help it last longer. Regular maintenance increases your safety and improves your project results.
- Check for loose parts: Ensure proper function.
- Inspect drill bits: Prevent accidents.
- Keep the drill press clean: Improves its function.
- Sharpen or replace dull bits: Reduces the chance of accidents.
Frequently Asked Questions
Question: What’s the best wood for a drill press stand?
Answer: Plywood and MDF are both excellent options. Plywood is strong and stable, while MDF has a smooth surface that’s great for painting.
Question: How do I make the stand mobile?
Answer: Attach heavy-duty casters to the base of the stand. Make sure to use locking casters to keep the stand secure while you work.
Question: How do I cut the wood for the stand?
Answer: Use a circular saw or hand saw to cut the wood. Always measure carefully and use a square to ensure accurate cuts.
Question: What safety gear do I need?
Answer: You’ll need safety glasses, hearing protection, a dust mask or respirator, and close-toed shoes.
Question: How can I add storage to my drill press stand?
Answer: Add drawers, shelves, or a cabinet. This helps keep tools organized and within easy reach.
Final Thoughts
Choosing the right drill press stand design is just the beginning. Selecting the correct materials, from sturdy wood to durable hardware, is a vital first step. Building your own stand provides several benefits, including customization and cost savings. Remember, safety comes first, so equip yourself with the proper gear and implement smart work habits.
Whether you choose a simple box stand or add more advanced features like storage and mobility, you’ll be able to create a functional and helpful addition to your workshop. Armed with these ideas, you’re ready to start building your own stand. Now you can easily organize your workspace and make your projects easier. Go for it!