DIY Drill Charging Station: Build an Efficient Organizer Today
Are you tired of hunting for your drill charger every time you need to power up your tools? Imagine having a neat, dedicated spot where your drill and its charger live together, ready to go whenever you are.
Building your own DIY drill charging station is easier than you think—and it can save you time, reduce clutter, and keep your workspace organized. In this post, you’ll discover simple steps to create a charging station that fits your tools perfectly and makes your projects run smoother.
Ready to take control of your workspace? Let’s dive in!
Benefits Of A Drill Charging Station
A drill charging station offers many benefits for anyone who uses cordless drills. It keeps your workspace neat and saves you time. It also helps your drill batteries last longer. A well-organized charging station makes it easier to find and charge your tools quickly. This simple setup improves your daily work and protects your investment.
Enhanced Organization
A drill charging station keeps all your chargers and batteries in one place. No more searching for misplaced parts. It reduces clutter and keeps cords untangled. This organized setup helps you focus on your work. Everything is ready and easy to access.
Improved Workspace Efficiency
With a charging station, you charge multiple batteries at once. This means less waiting for your drill to be ready. You can swap batteries quickly and keep working. It saves time and avoids interruptions during projects. Your work flows smoothly and finishes faster.
Prolonged Battery Life
A proper charging station protects batteries from overcharging. It ensures the right charging speed for each battery. This care helps batteries stay healthy and last longer. You avoid damage from improper charging. In the end, you spend less on replacements.
Materials And Tools Needed
Building a DIY drill charging station is a simple and useful project. You need the right materials and tools to complete it successfully. Gathering everything beforehand saves time and keeps your work organized.
Materials and tools vary depending on the design. Some projects need just basic supplies, while others require power tools. Safety equipment is important to protect yourself during the build.
Basic Supplies
- Wood board or plywood (size based on your drill charger)
- Wood screws or nails
- Sandpaper for smoothing edges
- Wood glue for extra hold
- Paint or finish (optional for protection)
- Drill charger and cords to fit the station
- Hooks or small containers to hold drill bits
Power Tools Required
- Electric drill or screwdriver for fast assembly
- Jigsaw or handsaw for cutting wood pieces
- Sander or sanding block to smooth surfaces
- Measuring tape or ruler for accurate cuts
- Clamps to hold pieces while gluing or screwing
Safety Equipment
- Safety goggles to protect your eyes
- Dust mask to avoid inhaling sawdust
- Work gloves to prevent splinters and cuts
- Ear protection if using loud power tools
- Proper clothing to avoid loose sleeves near tools
Choosing The Right Design
Choosing the right design for your DIY drill charging station is key to keeping your workspace tidy and efficient. The design affects how you store, charge, and access your drills. It also helps protect your tools and saves time during projects. Think about your space, how many drills you have, and what extra storage you need.
Compact Vs. Spacious Layouts
Compact layouts save space and fit small work areas. They keep drills close together and easy to reach. Best for those with limited room or just one drill. Spacious layouts offer more room for multiple drills and accessories. They let you organize tools with plenty of space to avoid clutter. Choose based on your workspace size and number of drills.
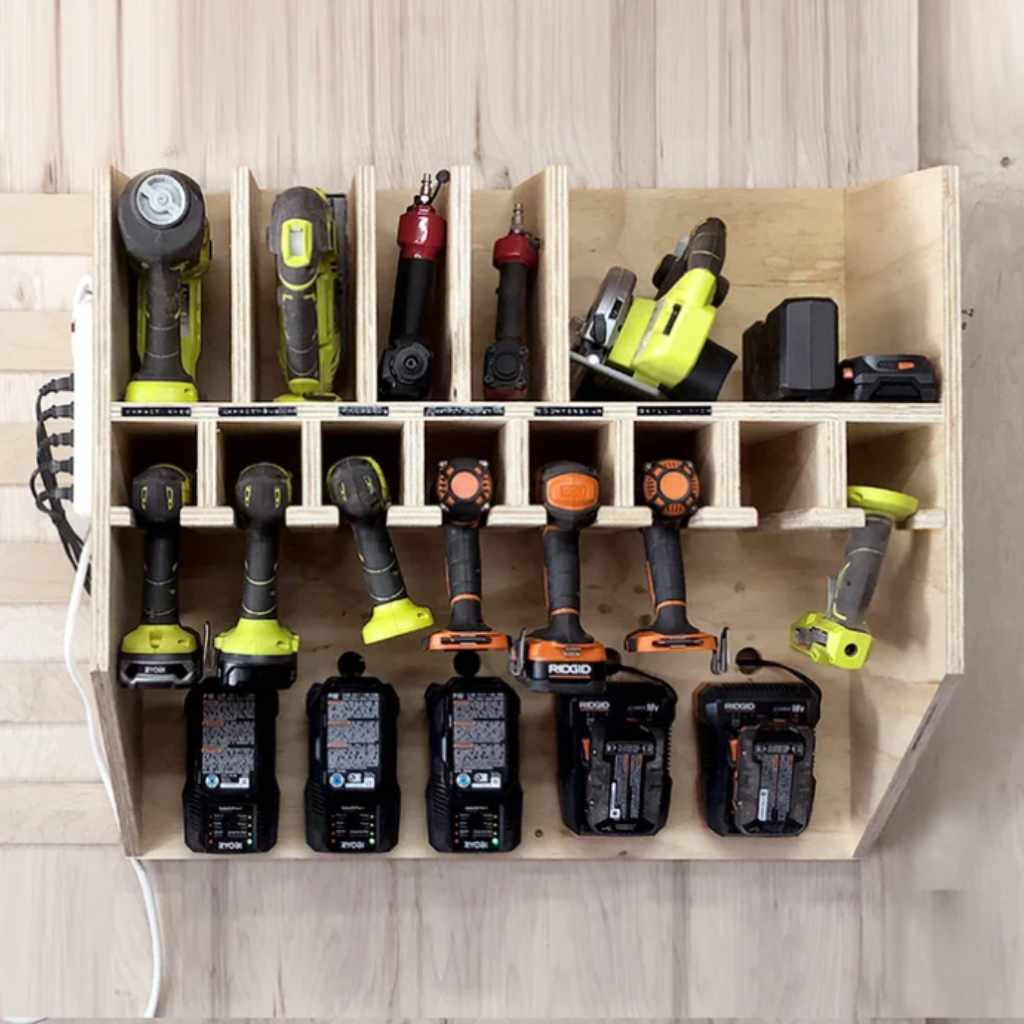
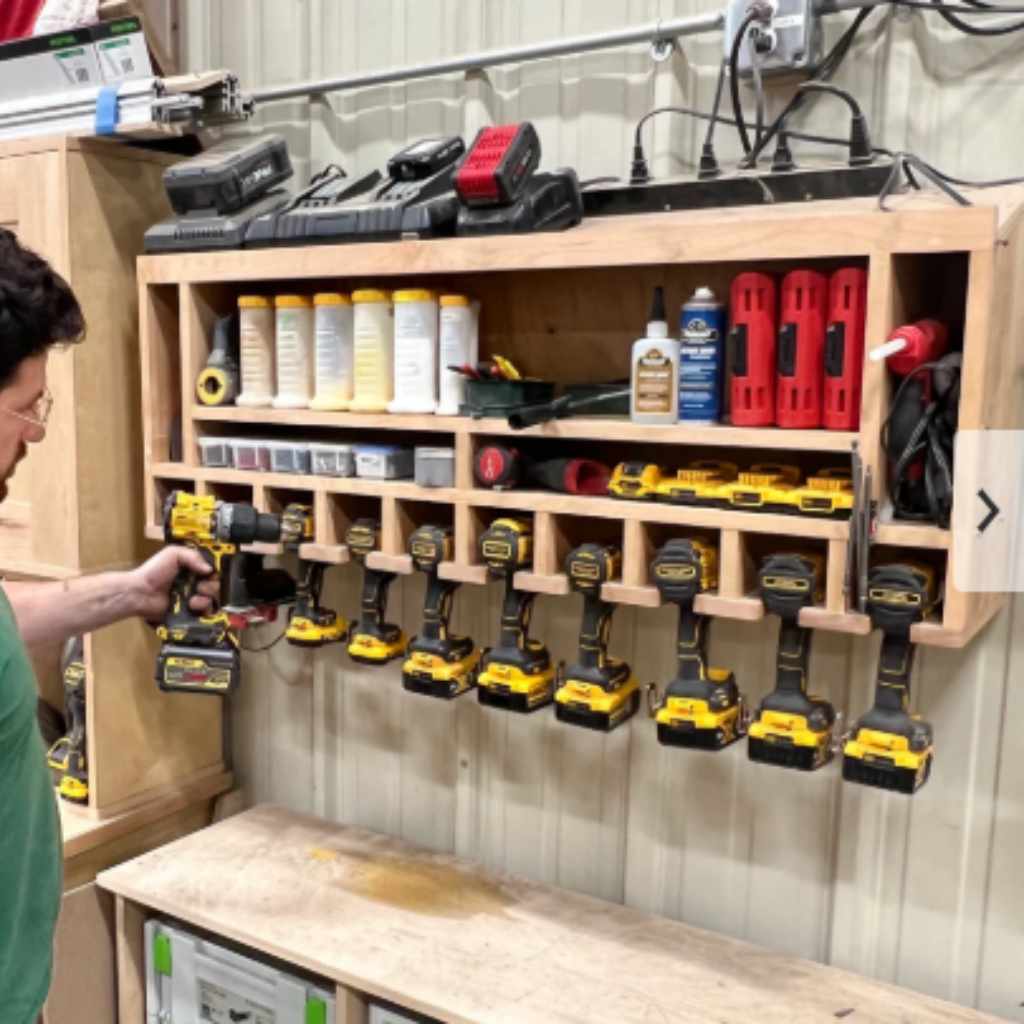
Customizing For Multiple Drills
Custom designs help charge several drills at once. Separate slots prevent cords from tangling. Label each spot for quick tool identification. Add adjustable holders to fit different drill sizes. This setup works well if you own many drills or share tools with others.
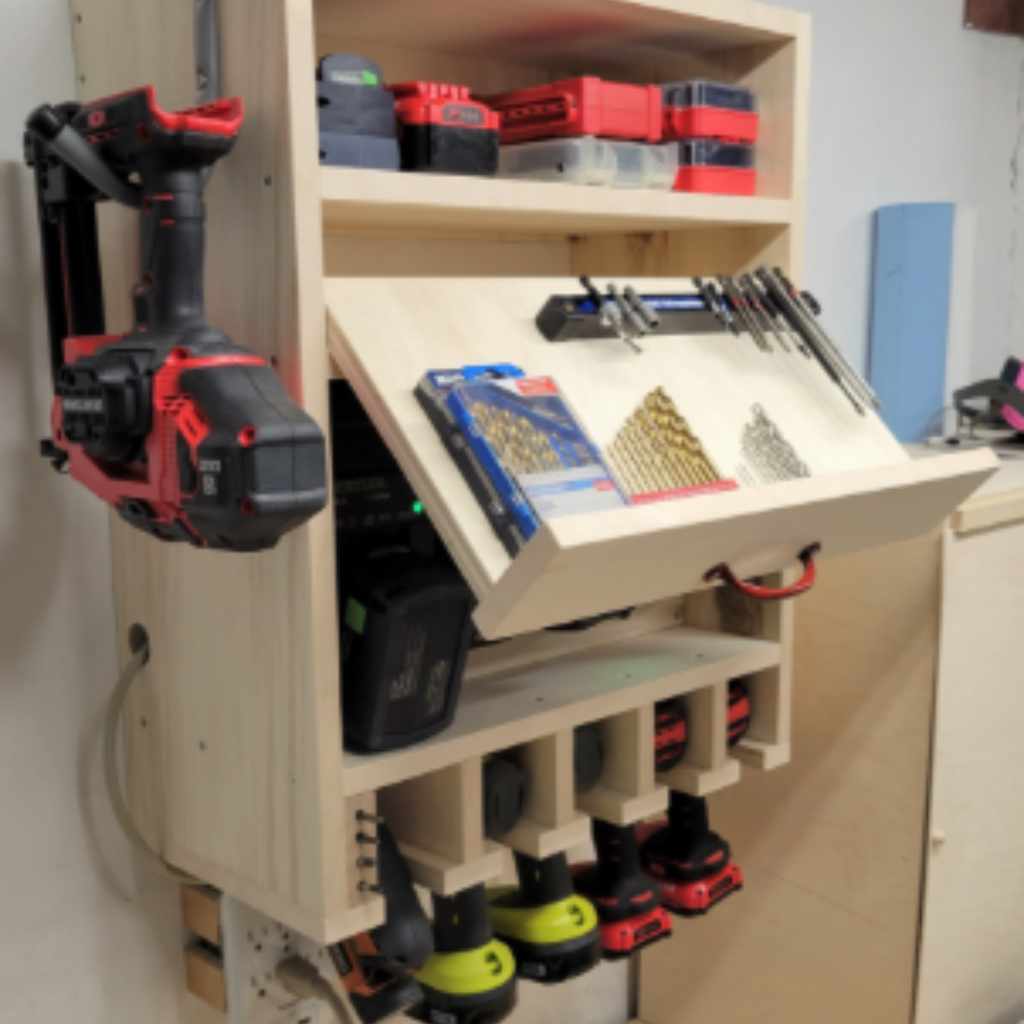
Incorporating Additional Storage
Extra storage keeps bits, batteries, and chargers handy. Drawers or small shelves work well for accessories. Use hooks or compartments for cords and small parts. Including storage makes your station a one-stop shop. It reduces mess and saves time searching for items.
Step-by-step Building Process
Building a DIY drill charging station is simple and fun. This step-by-step process guides you through making a neat and useful organizer. Follow each step carefully to get a sturdy and functional charging station.
Measuring And Cutting Components
Start by measuring the size of your drills and batteries. Mark the wood pieces according to these measurements. Use a saw to cut the wood cleanly. Make sure each piece fits well before moving on.
Assembling The Frame
Join the cut pieces to form the base and sides of the frame. Use wood glue and screws for strong joints. Check that the frame is square and stable. Let the glue dry completely before the next step.
Installing Charging Slots
Design slots that hold each drill and battery securely. Cut or drill holes where the charging cords will fit. Attach small dividers to keep drills separated. Ensure easy access to each charging port.
Finishing Touches
Sand all surfaces to remove rough edges. Paint or stain the wood for a clean look. Add rubber feet to the bottom to prevent slipping. Place your drills and cords in the slots and enjoy your new station.
Tips For Maintenance And Upkeep
Maintaining your DIY drill charging station keeps it working well for a long time. Simple care steps prevent damage and improve safety. Regular checks help avoid future problems. Follow these tips to keep your station neat and efficient.
Regular Cleaning
Dust and dirt can build up on your charging station. Clean it often with a soft cloth. Avoid using water or harsh chemicals. Keep vents and openings free from dust. Clean contacts gently to ensure good charging connection.
Checking Electrical Connections
Loose or damaged wires cause poor charging or safety issues. Check all connections regularly. Tighten screws and plugs as needed. Look for frayed cords or exposed wires. Replace damaged parts immediately to prevent accidents.
Upgrading Storage Options
Add shelves or hooks to organize drill bits and accessories. Use small containers for screws and nails. Clear storage helps you find tools fast. Upgrade your station as your tool collection grows. A tidy space keeps your work smooth and safe.
Creative Variations And Enhancements
Creative variations and enhancements can make your DIY drill charging station unique and more useful. Small changes improve functionality and appearance. They also help keep your workspace neat and organized.
Adding Led Indicators
LED indicators show the charging status of your drill. They light up when charging and turn off when done. This feature saves time by avoiding guesswork. Simple wiring and small LEDs work well for this upgrade.
Incorporating Cord Management
Good cord management keeps cables tidy and prevents tangles. Use hooks, clips, or small channels to guide the cords. This keeps your station safe and easy to use. It also extends the life of your charging cables.
Using Recycled Materials
Recycled materials reduce waste and lower costs. Old wood, plastic containers, or metal scraps work well. Choose materials that are sturdy and easy to work with. This approach adds character and helps the environment.
Frequently Asked Questions
What Materials Are Needed For A Diy Drill Charging Station?
You need wood, screws, a drill, a charger holder, and mounting brackets. Optional tools include sandpaper and paint for finishing. These materials help create a sturdy, organized charging station for your drill and its accessories.
How Do I Organize Drill Chargers Efficiently?
Use designated slots or compartments for each charger. Label each space for easy identification. This setup prevents tangling cords and keeps chargers accessible, saving time and maintaining a tidy workspace.
Can I Customize My Diy Drill Charging Station?
Yes, customize size, compartments, and finish to fit your workspace. Add hooks for accessories or LED lights for visibility. Personalization improves functionality and matches your workshop style perfectly.
Is It Safe To Charge Drills In A Diy Station?
Ensure proper ventilation and avoid stacking chargers. Use non-conductive materials to prevent electrical hazards. Following safety guidelines keeps your charging station secure and prevents damage.
Conclusion
Creating a DIY drill charging station saves space and keeps tools ready. It helps you stay organized and avoid clutter. You can build one with simple materials at home. This project does not take much time or skill. A neat charging station makes your workspace safer and cleaner.
Try making your own to enjoy these benefits. Small steps like this improve your daily tool use. Easy and useful—a smart addition to any workshop.