DIY Plywood Desk Plans: Build Your Dream Workspace
A DIY plywood desk needs three real decisions, not just a saw: 3/4″ plywood for the top (anything thinner will flex under a monitor arm), an apron frame underneath the top for rigidity (a flat panel alone will sag over a 4-5 foot span), and a leg attachment method that won’t work loose over time. One sheet of 3/4″ birch or Baltic birch plywood, basic power tools, and an afternoon are genuinely enough for a solid result if you get those three things right.
Choosing Plywood And Planning Cuts
Best Desk Legs For This Build
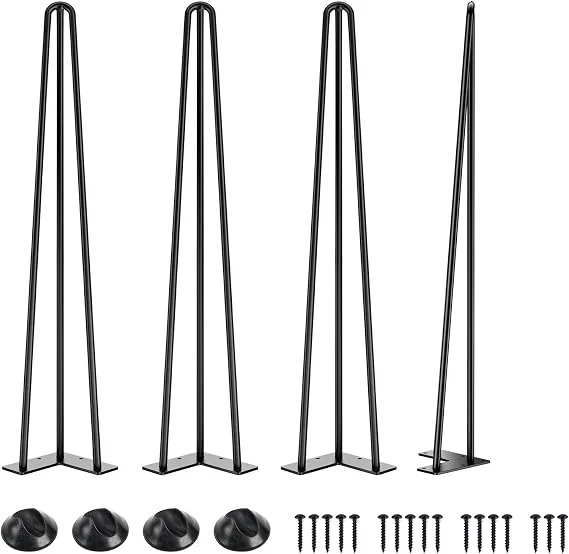 |
SMARTSTANDARD 28″ Hairpin Desk Legs, Set of 4 – $32.99 28″ is standard desk height once you add the plywood top’s thickness – skips the leg-cutting step entirely.
|
- Thickness: 3/4″ (18mm), no exception. Anything thinner will visibly flex under normal desk loads (monitor arm, elbows leaning on it) across a typical 4-5 foot span.
- Birch or Baltic birch plywood gives the cleanest edge grain and the smoothest face for a modern look – cabinet-grade or ApplePly-style product if your lumberyard carries it, standard birch plywood otherwise.
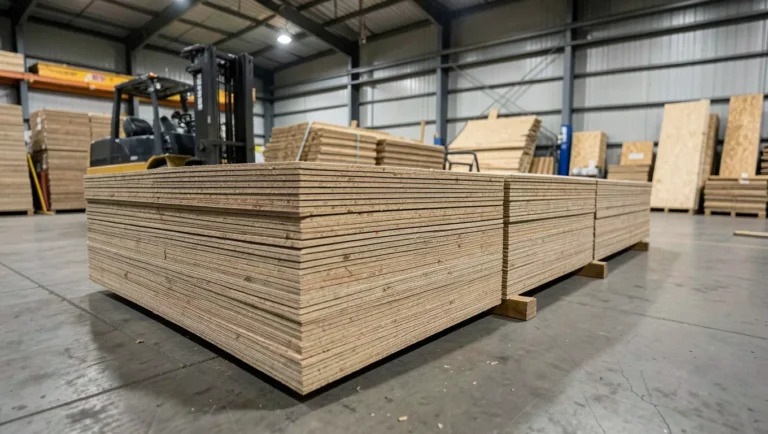
- Buy one full 4×8 sheet and plan your cut list on paper first – a 60″ x 24″ desktop plus a simple apron frame comfortably nests on one sheet with material left for the apron pieces.
- Check the sheet for flatness before you buy – sight down the edge at the lumberyard. A warped sheet stays warped after cutting.
Tools And Materials
- Circular saw with a straight-edge guide rail (or a table saw if you have one) – a guide rail is what actually gets you a clean, straight cut on a full sheet without a track saw.
- Drill/driver, orbital sander (80 then 150 then 220 grit), tape measure, combination square, wood glue, pocket-hole jig or exterior wood screws, clamps.
- Safety glasses, hearing protection, and a dust mask – cutting a full plywood sheet makes real dust and noise.
Cutting The Plywood
- Mark all cut lines with a pencil and square before making a single cut – measure the whole cut list out on the sheet first so you’re not discovering a shortage mid-project.
- Cut with the good face down when using a circular saw (up when using a table saw) – the saw’s teeth exit on the up-cut side, and that’s where tear-out happens. This one detail is the difference between a clean edge and a chipped one on plywood veneer.
- Use a guide rail or straight-edge clamp for every cut – freehanding a circular saw on an 8-foot line is where most plywood desk builds go visibly crooked.
- Cut the desktop panel, then the apron pieces (front, back, and two sides) that will frame the underside of the top.
Building The Apron Frame
This is the step most quick tutorials skip, and it’s the difference between a desk that stays flat and one that sags in the middle within a year. A single flat plywood panel spanning 4-5 feet will deflect under normal use – a frame of apron pieces glued and screwed to the underside, set back a couple inches from the edge, adds the rigidity a flat sheet doesn’t have on its own.
- Cut apron strips from the same 3/4″ plywood, about 3-4″ wide, for the front, back, and two ends.
- Attach with wood glue and screws (or pocket-hole joinery if you have a jig) from the underside so no fasteners show on top.
- Set the apron back 1-2″ from the desktop edge for a cleaner look from the side.
- This is also where you attach the leg mounting hardware, so the legs connect to the apron frame, not just the thin desktop panel – a leg screwed only into 3/4″ plywood face grain will work loose over time.
Finishing The Surface And Edges
- Sand progressively: 80-grit to level any mismatch, 150-grit to smooth, 220-grit for the final pass before finish. Sand with the grain, not across it.
- Edge treatment matters more on plywood than solid wood – raw plywood edge shows the ply layers, which reads as unfinished. Iron-on edge banding (veneer or PVC tape, trimmed flush after applying) is the fastest clean fix; a router with a roundover bit gives a more finished, rounded edge but takes more skill.
- For the finish, a hardwax oil penetrates the wood rather than sitting on top like polyurethane, so it’s easier to spot-repair later (light sanding and a fresh coat, no stripping required) – a real practical advantage for a desk surface that will see daily wear.
Attaching Legs And Adding Stability
- Attach leg mounting plates to the apron frame, not the bare desktop panel – screws into face-grain plywood alone will loosen with repeated stress; anchoring into the thicker apron gives real holding strength.
- Check level on the finished desk with a spirit level before final tightening – shim under the mounting plate if needed rather than forcing an uneven leg.
- For desks over about 4 feet wide or carrying heavy monitors/equipment, add a center support leg or a crossbar between the front legs – four corner legs alone can rack (twist) under lateral pressure on a long desk.
Custom Additions Worth Considering
- Cable grommet: a 2-2.5″ hole saw drilled through the desktop near the back edge, fitted with a plastic grommet ring, keeps cables running through the surface instead of draped over the back edge.
- Drawer or shelf below the apron: a simple plywood drawer box mounted on basic slides adds real storage without changing the desk’s footprint.
- Cable management tray: a shallow plywood or wire tray screwed to the underside keeps power strips and cable slack off the floor.
Maintenance
Dust regularly with a dry or slightly damp cloth; avoid harsh chemical cleaners on a hardwax-oiled surface, which can strip the finish. For minor scratches, a light sanding of just that spot followed by a fresh coat of the same oil blends back in – this is the practical advantage of an oil finish over polyurethane, which usually needs a full strip-and-recoat to fix a damaged patch.
Frequently Asked Questions
Can I Build A Desk With Plywood?
Yes. Use 3/4″ plywood (birch or Baltic birch for the cleanest look) for the desktop, and build an apron frame underneath it for rigidity – a bare flat panel will sag over a typical 4-5 foot desk span without that frame.
How Thick Should Plywood Be For A Desk?
3/4″ (18mm) is the standard, and going thinner risks visible flex under normal use. An apron frame underneath adds the rigidity a flat panel alone can’t provide over a wide span.
Are Plywood Desks Good?
Yes, when built with 3/4″ plywood and a proper apron frame underneath. Without that frame, even 3/4″ plywood can sag over a wide span – the frame, not just the panel thickness, is what makes a plywood desk hold up long-term.
What Is The Best Finish For A Plywood Desk?
Hardwax oil is a strong choice because it penetrates the wood instead of sitting on top, making scratches easy to spot-repair with light sanding and a fresh coat – no full strip-and-recoat needed like a damaged polyurethane finish requires.
Conclusion
A DIY plywood desk comes down to three things done right: 3/4″ plywood for the top, an apron frame underneath it so the span doesn’t sag, and legs anchored into that apron rather than the bare panel. Get those right and the rest – edge finish, cable management, drawers – is just customization on a genuinely solid base.
Sponsored / affiliate links. As an Amazon Associate I earn from qualifying purchases. I may earn additional commission from eligible campaigns.