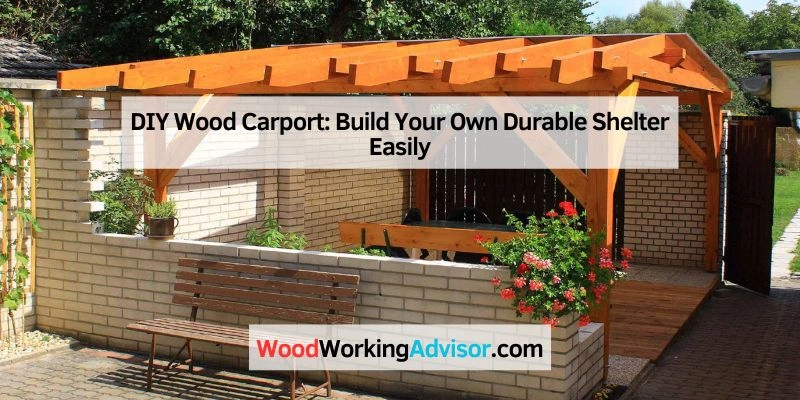
DIY Wood Carport: Build Your Own Durable Shelter Easily
Building a DIY wood carport offers a practical and stylish way to protect your vehicle. It’s an affordable and customizable solution for homeowners.
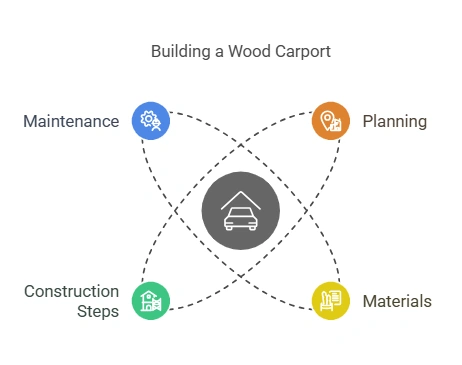
Constructing your own wood carport can be a rewarding project. It not only saves money but also adds a personal touch to your home. Whether you’re a seasoned DIY enthusiast or a beginner, creating a wood carport is achievable with the right tools and guidance.
This project allows you to choose the design that best fits your needs and complements your home’s appearance. By following simple steps, you can build a sturdy and attractive carport that shields your vehicle from weather elements. Ready to get started? Let’s explore the essentials of building your own wood carport.
Introduction To DIY Wood Carport
Building a DIY wood carport can be a rewarding project. It provides shelter for your vehicle and adds value to your property. With the right tools and a bit of patience, you can create a sturdy and attractive carport.
Benefits Of Building Your Own Carport
Constructing your own carport saves money. Hiring contractors is expensive. Doing it yourself cuts costs. You gain valuable skills. Plus, you can customize the design. Choose materials and finishes that match your home. A DIY project also gives a sense of accomplishment.
Overview Of The Project
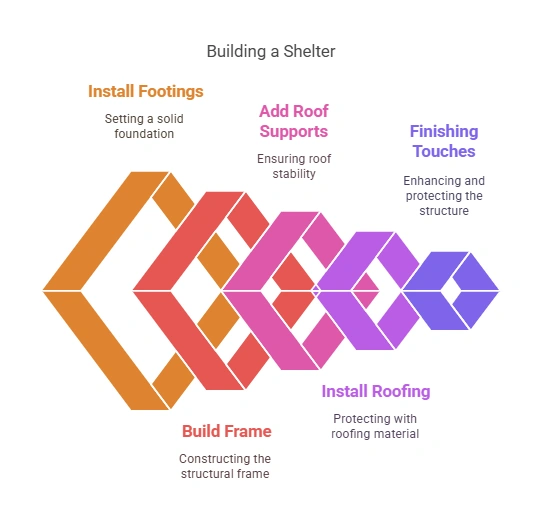
First, plan your design. Measure the area where the carport will stand. Decide on the size and style. Gather your materials and tools. You will need wood, nails, screws, and roofing materials. Follow a step-by-step guide or blueprint. Ensure you have all necessary permits. Check local building codes. Prepare the ground and lay a foundation. Assemble the frame. Attach the roof. Finish with paint or stain to protect the wood.
By following these steps, you will have a carport that meets your needs. It will protect your vehicle from the elements. Plus, it will enhance the overall look of your property.
Planning And Design
Building a DIY wood carport is a fulfilling project that not only shelters your vehicle but also enhances your home’s curb appeal. However, before you grab your tools, it’s crucial to have a solid plan and design. This section will guide you through the essentials, ensuring your carport is both functional and attractive. Let’s dive into the details of planning and design, focusing on choosing the right location and gathering the necessary materials and tools.
Choosing The Right Location
First things first, where should you build your carport? The location can make or break your project. Here are a few tips to help you decide:
- Accessibility: Ensure the carport is easily accessible from the street or driveway. It should be a breeze to drive in and out.
- Level Ground: Choose a spot with level ground. Slopes can complicate construction and lead to stability issues.
- Proximity to the House: Consider building the carport close to your home for convenience, especially during bad weather.
- Sun Exposure: Think about the sun’s path. A shaded area will protect your car from the harsh sun, prolonging its life and reducing interior heat.
By carefully selecting the right location, you set the stage for a successful carport project. Remember, a good foundation starts with a good location.
Materials And Tools Needed
Now that you’ve chosen the perfect spot, it’s time to gather your materials and tools. Here’s a handy checklist to get you started:
| Materials | Tools |
|---|---|
| Wooden Posts | Measuring Tape |
| Beams | Hammer |
| Roof Panels | Saw |
| Concrete | Drill |
| Screws and Nails | Level |
| Brackets | Safety Gear |
Having the right materials and tools on hand will make your project go smoother and faster. Trust me, there’s nothing worse than realizing you’re missing a key item halfway through the build.
Building a DIY wood carport might seem daunting, but with proper planning and design, you’ll find it not only manageable but also enjoyable. And who knows, it might even become a weekend project you look forward to!
Foundation Preparation
Building a DIY wood carport begins with a strong foundation. Proper foundation preparation ensures your carport stands firm. It also makes the structure last longer. Let’s break down the steps to get your foundation ready.
Marking The Area
First, mark the area where you plan to build your carport. Use stakes and string to outline the carport’s perimeter. Make sure the area is level and clear of debris. Double-check your measurements to ensure accuracy.
Setting The Posts
Once the area is marked, it’s time to set the posts. Dig holes at each corner of the marked area. The holes should be deep enough to hold the posts firmly. Typically, this is about one-third of the post’s length.
Place each post into a hole. Use a level to make sure each post is straight. Fill the holes with concrete to secure the posts in place. Allow the concrete to cure for at least 24 hours.
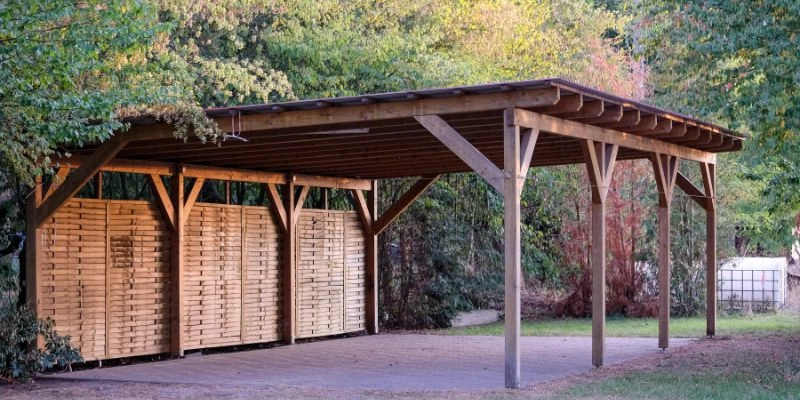
Building The Frame
So, you’ve decided to build a wood carport. Awesome! It’s a great way to protect your car and add a stylish element to your home. But where to start? The frame is the backbone of your carport. Let’s dive into the nitty-gritty of building it, starting with the base, and then moving on to the uprights.
Constructing The Base
The base of your carport is crucial. Think of it as the foundation of a house. If it’s not sturdy, nothing else will be. First, pick a level spot in your yard. Then, measure and mark the area where the carport will stand. You might want to use stakes and string to outline the base.
Here’s a quick checklist for constructing the base:
- Clear the area of any debris or plants.
- Level the ground as much as possible.
- Place gravel or concrete pads at the corners for stability.
- Use treated lumber for durability.
Once the base is marked, it’s time to lay down the beams. Ensure they are level and secure. This will make the next steps a breeze!
Erecting The Uprights
With the base in place, it’s time to get those uprights standing tall. These vertical posts will hold up the roof of your carport. You’ll need at least four, but more if your carport is large.
Follow these simple steps to erect the uprights:
- Position the posts at the corners of the base.
- Use brackets or post anchors to secure them to the base.
- Ensure each post is plumb (perfectly vertical) using a level.
- Brace them temporarily with diagonal supports if needed.
Imagine you’re building a giant Lego structure. Each piece must fit perfectly for the whole thing to stand firm. Take your time with this step. After all, you wouldn’t want your carport to topple over, right?
And there you have it, the frame of your carport is up! Next, you’ll need to add the roof and maybe some sides, but we’ll cover that another time. For now, give yourself a pat on the back for a job well done.
Roof Installation
So, you’re ready to take on the challenging yet rewarding task of building a DIY wood carport. Great choice! One of the critical phases in this project is the Roof Installation. This stage can be a bit daunting, but don’t worry. With a bit of patience and careful planning, you’ll have a sturdy and stylish roof over your carport in no time. Let’s break it down into manageable steps, starting with installing the roof beams and then adding the roof panels.
Installing Roof Beams
First things first, let’s talk about installing the roof beams. This part is crucial as these beams will hold the entire weight of your carport roof. Here’s a simplified guide to get you started:
- Measure and Cut: Measure the length of your carport and cut the beams accordingly. Remember, measure twice, cut once!
- Position the Beams: Position the beams on top of the vertical posts. Make sure they are evenly spaced.
- Secure the Beams: Use strong bolts to secure the beams in place. Double-check they are firmly attached.
It’s helpful to have a friend assist you with lifting and positioning the beams. Trust me, having an extra pair of hands will make this task much easier and safer.
Adding Roof Panels
Next up is adding the roof panels. This part is where your carport starts to look like a carport. Follow these steps to get it right:
- Select Your Material: Choose your roofing material. Metal panels are popular because they are durable and easy to install.
- Cut to Size: Cut the panels to fit the dimensions of your roof. Use a circular saw with a metal cutting blade for precise cuts.
- Position and Secure: Place the panels on the beams, starting from one end and working your way to the other. Overlap each panel slightly to prevent leaks.
- Screw Down: Use roofing screws to secure the panels to the beams. Ensure they are tight but don’t over-tighten, which can damage the panels.
Remember, when working with metal panels, wear gloves to protect your hands from sharp edges. Safety first, always!
There you have it! With these steps, you’re well on your way to completing the roof installation of your DIY wood carport. Take it slow, double-check your work, and soon you’ll have a carport you can be proud of. Happy building!
Finishing Touches
So, you’ve put in the hard work and your DIY wood carport is almost ready. But wait, don’t stop just yet! The finishing touches are what can turn your carport from functional to fabulous. These final steps not only enhance the look but also add durability. Ready to give your carport the perfect finishing touch? Let’s dive in!
Painting And Sealing
Painting your wooden carport isn’t just about making it look pretty. It’s also about protecting the wood from the elements. Here’s how you can do it:
- Choose the right paint: Opt for exterior wood paint. It’s designed to withstand weather and protect the wood.
- Prep the surface: Sand the wood to remove any rough spots. Clean it well to remove dust and dirt.
- Apply primer: A good primer helps the paint stick better and last longer.
- Paint: Apply at least two coats of paint, letting each coat dry completely.
- Seal: Finish with a clear sealer to add an extra layer of protection against moisture.
Adding a coat of paint and a sealer is like giving your carport a suit of armor. It shields the wood from rain, sun, and pests. Plus, you can choose a color that matches your house, making the carport look like it’s always been part of your home.
Adding Gutters And Drainage
Think gutters are just for houses? Think again! Adding gutters to your carport can prevent water damage and keep the area dry. Here’s what you need to know:
- Choose the right gutters: Vinyl and aluminum are popular choices. They’re lightweight and easy to install.
- Install gutter hangers: These hold the gutters in place. Space them about 3 feet apart.
- Attach the gutters: Secure them to the hangers. Make sure they’re slightly tilted towards the downspout for proper drainage.
- Add downspouts: These direct the water away from the carport. Position them where the water can flow away without causing erosion.
By adding gutters, you protect the wood from water damage. It also keeps the ground around your carport from turning into a muddy mess. Trust me, your car and your shoes will thank you!
Taking these extra steps might seem like a lot of work, but they pay off in the long run. A well-finished carport not only looks great but lasts longer. Plus, it’s a satisfying way to end your DIY project. So grab your paintbrush and gutter kit, and let’s finish this carport in style!
Maintenance Tips
Maintaining your DIY wood carport ensures its longevity and durability. Simple maintenance steps can prevent costly repairs. Regular care keeps your carport looking fresh and functioning well. Follow these easy tips to maintain your wood carport.
Regular Inspections
Conduct regular inspections to spot potential issues early. Check for signs of wear or damage. Look for cracks, splits, or warping in the wood. Inspect the roof for missing or damaged shingles. Ensure the structure remains sturdy and stable.
Inspect the foundation for any signs of shifting or settling. Check for pests or termites that could damage the wood. Regular inspections help you catch problems before they become serious. Aim for at least a monthly inspection.
Repairing Damage
Repairing damage promptly prevents further deterioration. Address any cracks or splits in the wood immediately. Use wood filler to fix small cracks. For larger damage, consider replacing the affected section.
Ensure the roof remains intact to prevent water damage. Replace any missing or damaged shingles. Treat the wood with sealant to protect against moisture. Regularly painting or staining the wood also helps in maintaining its appearance and durability.
Check the foundation and make necessary adjustments if needed. Ensure the carport remains level and stable. Repairing damage quickly helps maintain the carport’s structural integrity.
Conclusion And Benefits
Building a DIY wood carport is a project that comes with numerous benefits. Not only does it provide a practical solution for protecting your vehicle, but it also offers a sense of accomplishment once completed. In this section, we’ll explore the conclusion and benefits of constructing your own wood carport, focusing on long-term advantages and personal satisfaction.
Long-term Advantages
There are several long-term advantages to building a wood carport yourself:
- Cost-effective: By doing it yourself, you save on labor costs. Wood is also often cheaper than metal or other materials.
- Durability: With proper maintenance, a wood carport can last for many years, providing a reliable shelter for your vehicle.
- Customization: You have the freedom to design the carport to your specific needs and preferences, including size, shape, and style.
- Increase Property Value: Adding a carport can boost your home’s value, making it a wise investment.
Personal Satisfaction
Beyond the practical benefits, building your own carport can be a deeply rewarding experience:
- Sense of Achievement: There’s nothing quite like the feeling of completing a project with your own hands. It’s a testament to your skill and determination.
- Learning Experience: Throughout the building process, you’ll learn new skills and techniques that can be applied to future projects.
- Creative Expression: Designing and building your carport allows you to express your creativity and personal style.
- Bonding Opportunity: If you decide to take on this project with family or friends, it can be a great way to bond and create lasting memories.
In conclusion, constructing a DIY wood carport offers both practical and personal benefits. It’s a cost-effective solution that provides long-term protection for your vehicle while adding value to your property. Additionally, the sense of achievement and personal growth you gain from completing such a project is invaluable. So, why not roll up your sleeves and get started on your own carport today?
| Benefits | Details |
|---|---|
| Cost-effective | Save on labor and material costs |
| Durability | Long-lasting with proper maintenance |
| Customization | Design to fit your specific needs |
| Increase Property Value | Boosts your home’s market value |
Frequently Asked Questions
Is It Cheaper To Build Your Own Carport?
Building your own carport can be cheaper. You save on labor costs and can choose budget-friendly materials.
How Much Does It Cost To Build A 20×20 Wood Carport?
The cost to build a 20×20 wood carport ranges from $4,000 to $10,000. Prices depend on materials and labor.
Can You Build A Carport Out Of Wood?
Yes, you can build a carport out of wood. Wood is durable, cost-effective, and aesthetically pleasing for carports.
What Size Carport Can You Build Without A Permit?
You can typically build a carport up to 200 square feet without a permit. Check local regulations for specifics.
Conclusion
Building your own wood carport is rewarding. You save money and customize it. Follow the steps carefully. Use quality materials for durability. Enjoy the satisfaction of a job well done. A sturdy carport protects your vehicle. Plus, it adds value to your home.
Ready to start? Gather your tools and materials. Take your time and have fun. You’ll love the results.