How To Use Butyl Tape For Deck Joists The Right Way
It’s really frustrating when you’re building something nice, like a deck, and you worry about it not lasting. You want it to be strong and safe for years. Water can be a deck’s worst enemy. It soaks into the wood, especially where parts meet. This can lead to rot and weak spots. That’s where special tapes come in. They act like a shield. This guide will show you how to use butyl tape on your deck joists. We’ll make sure you do it right so your deck stays solid.
Butyl tape is a strong, sticky sealant. You use it on deck joists. It stops water from getting into the wood. This helps prevent rot and makes your deck last much longer. Applying it correctly is key to its success.
What Is Butyl Tape and Why Use It on Deck Joists?
So, what exactly is this butyl tape we’re talking about? Think of it as a super-tough, stretchy, sticky strip. It’s made from a material called butyl rubber. This rubber is known for being really good at sealing things off. It doesn’t dry out or crack easily. It also stays flexible even when the weather changes.
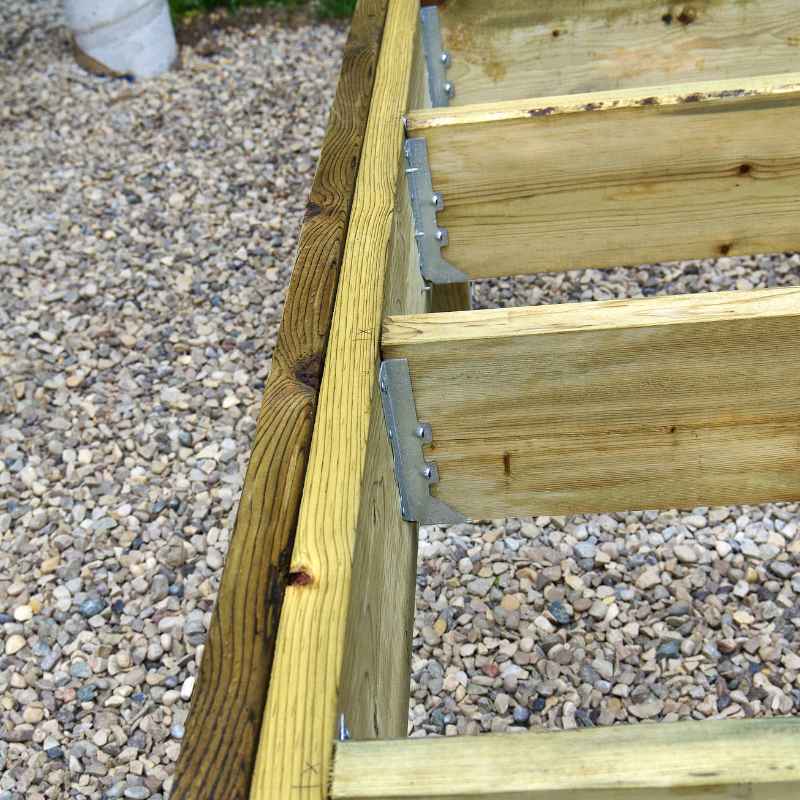
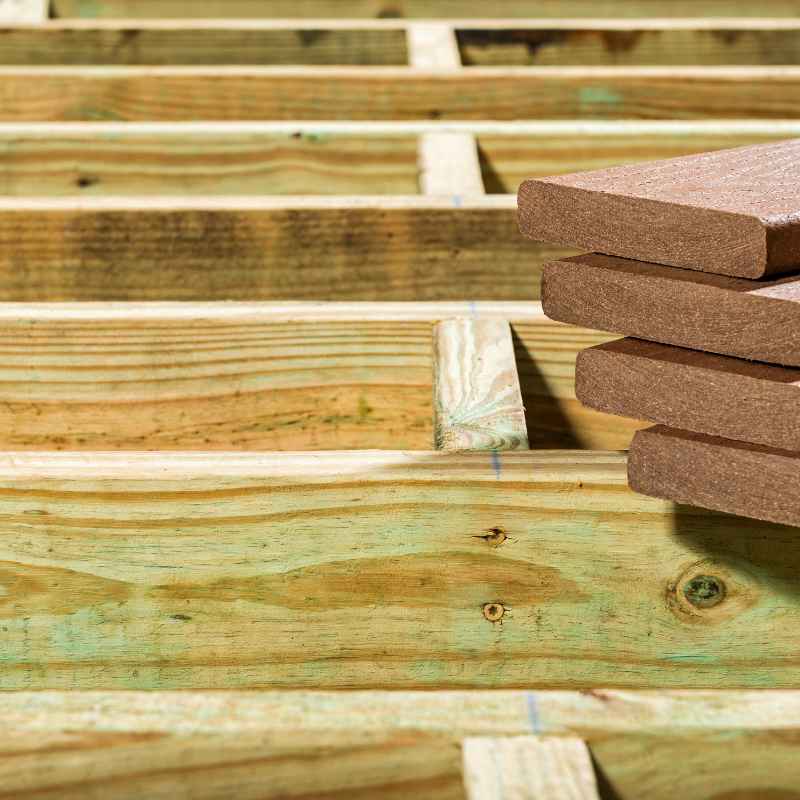
Now, why put this on deck joists? Joists are the main wooden beams that support your deck boards. They sit on top of your deck’s frame or posts. Where the deck boards attach to the joists is a prime spot for trouble. Water can seep down into the tiny cracks and screw holes. This moisture is like a dinner bell for rot. It can also cause the wood to swell and shrink. This weakens the whole structure over time.
Using butyl tape creates a waterproof barrier. It sits right between the deck boards and the joists. When you screw down a deck board, the screw goes through the board, then through the tape, and into the joist. The tape seals around the screw hole. It also seals the entire surface of the joist. This means water has no easy way in. It’s a simple step that makes a huge difference. It protects your investment and keeps your deck safe.

My Own Deck Woes: A Story of Overlooked Protection
I remember building my first deck. I was so excited. I picked out the best lumber I could find. I spent days measuring and cutting. I got the frame built solid. Then came the deck boards. I laid them out, screwing them in one by one. It looked amazing. I felt so proud.
Then, about three years later, I noticed a board felt a little soft when I walked on it. I thought maybe it was just a bad spot in the wood. But then another spot felt weird. I got worried. I started poking around with a screwdriver. To my dismay, I found soft, rotten wood underneath. The joists were starting to go.
At the time, I didn’t know about using butyl tape. I thought just screwing down the boards was enough. I had no idea that all the water was slowly working its way into the wood through those screw holes. It was a harsh lesson. I had to replace several joists and a bunch of deck boards. It was a lot more work and cost than I expected. That experience taught me how vital that little bit of extra protection is.
Understanding the Science: How Butyl Tape Works
Let’s break down why butyl tape is so effective. It’s all about its properties.
First, adhesion. Butyl tape sticks really well to wood. This is super important. If it peels up, it won’t seal anything. The surface of the joist needs to be clean and dry for the tape to grab on tight.
Second, flexibility and elasticity. Wood expands and contracts with changes in temperature and moisture. Deck boards can move a bit. Butyl tape is stretchy. It can move with the wood. It doesn’t tear or pull away. This keeps the seal intact no matter what the weather does.
Third, waterproofing. This is the main job. Butyl rubber is naturally resistant to water. It creates a continuous barrier. Water can’t get through it. Even if water pools on the deck surface for a while, the tape stops it from soaking into the joist.
Fourth, durability. Good quality butyl tape is made to last. It doesn’t break down quickly when exposed to the elements like sun and rain. It can handle the pressure of screws going through it. This means it keeps working for years, protecting your deck.
When is Butyl Tape a Must-Have for Your Deck?
It’s not always an absolute must for every single deck project. But there are times when it really shines.
Using Non-Treated Lumber
If you’re building a deck with lumber that isn’t pressure-treated, you absolutely need protection. Non-treated wood is much more vulnerable to rot and insects. Butyl tape adds a critical layer of defense.
Building in Wet Climates
If you live somewhere with a lot of rain or humidity, your deck will face constant moisture. Think of the Pacific Northwest or the humid South. In these areas, adding butyl tape is like giving your deck armor. It’s a proactive step against inevitable dampness.
Elevated Decks or Decks Near Water
Decks that are high off the ground or close to pools, ponds, or the ocean are exposed to more moisture. Humidity can be higher, and spray can get onto the structure. Butyl tape helps shield the joists from this constant dampness.
Using Certain Decking Materials
Some decking materials, like composite or PVC boards, have different expansion and contraction rates than wood. This can put extra stress on the joists. Butyl tape can help manage this by providing a forgiving, sealed surface.
Maximizing Deck Lifespan
Even if you’re in a dry climate and using good treated lumber, why not make your deck last as long as possible? Butyl tape is a small effort for a big reward in terms of longevity. It’s like a little insurance policy for your deck.
Types of Butyl Tape for Decking Projects
Not all butyl tapes are created equal. When you’re shopping, you’ll see a few different kinds.
Standard Butyl Sealant Tape
This is the most common type. It’s usually a grey or black tape. It comes in rolls of various widths. It’s typically applied directly to the top of the joists. It’s designed for sealing gaps and seams.
Decking-Specific Butyl Tape
Some brands make butyl tape specifically for decking. These often come in wider rolls. They might be a bit thicker. They are engineered to withstand the pressure of deck screws and the movement of deck boards. They can also offer better UV resistance.
Butyl Flashing Tape
This is similar but often thicker and stronger. It’s used for window and door flashing but can also work for decks. It might be a bit more expensive. But it offers robust protection.
When choosing, check the product description. Look for terms like “deck flashing,” “joist tape,” or “waterproof sealant tape.” Also, consider the width. You want tape that covers most of the top surface of your joist. A common width is 2-3 inches.
Step-by-Step Guide: Applying Butyl Tape Correctly
Getting this right is important. Here’s how to do it, step by step.
Step 1: Gather Your Materials
Before you start, make sure you have everything. You’ll need:
Your chosen butyl tape (make sure it’s wide enough for your joists).
A utility knife or scissors to cut the tape.
A clean rag or brush.
Rubbing alcohol or a similar cleaner (optional, but good for a strong bond).
Gloves (optional, as it can be sticky).
Step 2: Prepare the Joist Surface
This is crucial for a good seal. The top of your joists needs to be clean and dry.
Clean: Brush off any dirt, dust, sawdust, or debris. If there’s any old gunk, try to scrape it off.
Dry: Make sure the wood is completely dry. If it’s damp, wait for it to dry out. You can use a clean, dry rag to wipe it down. For extra stickiness, you can wipe it with rubbing alcohol. Let the alcohol evaporate completely.
Surface Preparation Checklist
- Brush off debris: Remove all loose dirt and sawdust.
- Ensure dryness: Wood must be completely dry to the touch.
- Wipe clean: Use a rag to remove any film.
- Optional: Alcohol wipe: For a super strong bond, use rubbing alcohol and let it dry.
Step 3: Measure and Cut the Tape
You’ll want to cover the entire top surface of each joist.
Measure the length of the joist.
Cut a piece of butyl tape to that exact length. It’s better to cut it a little long than too short. You can trim any excess later.
Step 4: Apply the Tape
This is where the magic happens.
Start at one end of the joist.
Peel back about 6-12 inches of the paper backing from the butyl tape.
Carefully align the edge of the tape with the edge of the joist.
Press the exposed sticky part firmly onto the joist.
Slowly peel off the rest of the backing as you go.
Press the tape down firmly as you work. Use your hand or a clean rag. You want to make sure there are no air bubbles. You want it to lie flat and smooth.
Application Tips
Peel and Stick: Peel back only a small section of the backing at a time.
Press Firmly: Use your hand or a roller to push out air and ensure adhesion.
Overlap if needed: If one piece doesn’t cover the whole joist, overlap the next piece by about an inch. Ensure the overlap is also pressed down well.
Step 5: Seal the Ends (Optional but Recommended)
For extra protection, especially on end joists, you can seal the ends.
After the tape is applied to the joist, fold the tape down over the end of the joist.
Press it firmly against the end grain. This blocks water from getting in from the side or the bottom end.
Step 6: Install Your Deck Boards
Now you’re ready to put your deck boards on.
Lay your first deck board directly on top of the butyl tape.
Align it carefully.
Screw the deck board into the joist. As you drive the screws, the butyl tape will seal around the screw shank and head. This creates a complete waterproof barrier.
Step 7: Trim Excess (If Any)
Once all the deck boards are down, you might have a little bit of butyl tape sticking out on the sides.
Use your utility knife to carefully trim off any excess tape that’s visible along the edges. This gives a neat finish.
Common Mistakes to Avoid When Using Butyl Tape
Even with a clear guide, mistakes can happen. Here are a few to watch out for.
Mistake 1: Not Cleaning the Surface
This is the most common error. If you apply the tape over dirt or dust, it won’t stick well. The seal will be weak. Water will eventually find its way underneath. Always take the time to clean and dry the joist surface.
Mistake 2: Applying Tape in Cold Weather
Butyl tape can be harder to work with when it’s cold. It becomes stiff. It might not stick as well. It’s best to apply it when the temperature is mild, generally above 40°F (4°C). If you must work in the cold, you can try warming the tape slightly with a hairdryer on a low setting, but be careful not to overheat it.
Mistake 3: Not Pressing It Down Enough
Air bubbles are bad. They create gaps where water can get in. Make sure you press the tape down firmly all along its surface. Go over it with your hand or a clean rag a few times.
Mistake 4: Using the Wrong Width Tape
If the tape is too narrow, it won’t cover the entire top surface of the joist. You’ll have exposed wood. Try to find tape that is the same width or slightly wider than your joists.
Mistake 5: Leaving Gaps in the Tape
When you’re covering a long joist, you might need to use more than one piece of tape. Make sure you overlap the ends of the tape pieces by at least an inch. Press the overlap down very firmly to create a continuous seal.
Mistake vs. Solution
| Mistake | Solution |
|---|---|
| Dirty surface | Clean and dry thoroughly before applying. |
| Cold application | Apply in mild temperatures (above 40°F). |
| Poor adhesion | Press tape down firmly; avoid air bubbles. |
| Too narrow tape | Use tape wide enough to cover the joist top. |
| Gaps between tape pieces | Overlap pieces by 1 inch and press firmly. |
Real-World Context: Joists Under Pressure
Think about what your deck joists go through every day. They are constantly holding weight. People walk on them. Furniture rests on them. They are exposed to sun, rain, snow, and temperature swings. If the wood starts to rot, it loses its strength. A rotten joist is a serious safety hazard.
The screws used to attach deck boards are also points of entry for water. When you drive a screw, it creates a small channel. If that channel isn’t sealed, water can wick down into the joist. Butyl tape creates a flexible seal around each screw, keeping that water out.
Consider the different types of joists you might have. They could be standard dimensional lumber like 2x8s or 2x10s. Or you might have engineered wood products or even steel. Butyl tape generally adheres well to wood. Always check the tape manufacturer’s recommendations for compatibility with different materials.
What This Means for Your Deck’s Health
Using butyl tape is a simple step that has big implications for your deck.
When it’s Normal (and Good!)
Water beads up: You’ll notice water sitting on top of the deck boards, not soaking into the wood underneath. That’s exactly what you want.
No soft spots: After a few years, you should still have firm deck boards and joists.
Longer lifespan: Your deck will likely last much longer than a deck without this protection. You’ll get more enjoyment out of it before needing major repairs.
When to Worry (and What to Check)
Visible rot: If you see soft, crumbly wood, that’s a clear sign of trouble. This might mean the tape wasn’t applied correctly or has failed.
Warped boards: Significant warping can sometimes be caused by moisture getting into the joists.
Loose screws or boards: If screws are pulling out or boards are lifting unexpectedly, it could be a sign of wood degradation.
Mold or mildew growth: While some surface mold is normal, excessive growth might indicate persistent moisture issues.
If you suspect a problem, gently probe suspect areas with a screwdriver. Look for any signs of softness or decay. If you find rot, you’ll need to address it. This might involve replacing the affected joist or section of wood.
Simple Checks You Can Do
Visual inspection: Regularly look at your deck. Check for any obvious signs of damage or wear.
Sound test: Walk across your deck. Listen for any creaking or popping sounds that seem unusual.
Probe test: Every couple of years, take a screwdriver and gently poke at the joists, especially around screw holes, to check for softness.
Quick Fixes and Tips for Better Decking
While butyl tape is a preventative measure, here are some tips for maintaining your deck.
Regular Cleaning
Keep your deck clean. Sweep away leaves and debris regularly. This prevents moisture from getting trapped. It also stops mold and mildew from growing.
Inspect Seals Annually
Once a year, do a quick check of your deck boards and joists. Look for any tears or lifting in the butyl tape (if visible). Make sure screws are still tight.
Proper Drainage
Ensure water can drain off your deck easily. Don’t let water pool on the surface. If you have planters, make sure they have drainage holes.
Sealant Application
Consider applying a good quality deck sealant to your deck boards every few years. This adds another layer of protection against the elements, even on top of the butyl tape.
Frequently Asked Questions About Butyl Tape for Decks
Is butyl tape really necessary for deck joists?
Butyl tape is not always mandatory, but it’s highly recommended, especially if you want your deck to last as long as possible. It adds a critical layer of waterproofing that prevents rot in the joists, which is the most common cause of deck failure. It’s a proactive measure that saves trouble later.
What is the best width for butyl tape for deck joists?
The best width depends on the size of your joists. Ideally, you want the tape to cover the entire top surface of the joist. For standard 2×8 or 2×10 joists, a tape that is 2 to 3 inches wide is usually suitable. Check the dimensions of your joists and choose a tape that provides full coverage.
Can I use regular construction adhesive instead of butyl tape?
No, standard construction adhesive is not a good substitute for butyl tape on deck joists. Construction adhesives are designed to bond materials together but typically do not offer the same long-term flexibility or waterproof barrier that butyl tape provides. Butyl tape is specifically made to remain flexible and seal out water for many years.
How long does butyl tape for decking typically last?
High-quality butyl tape designed for outdoor use can last for many years, often 10 to 20 years or even longer. Its durability depends on the quality of the tape, the application, and the environmental conditions it’s exposed to. It doesn’t dry out or crack like many other sealants.
Do I need to tape both sides of the joist?
You only need to apply the butyl tape to the top surface of the joist, where the deck boards will rest. This is the primary area where water can infiltrate and cause rot. Taping the sides or bottom is generally not necessary for joist protection.
What’s the difference between butyl tape and flashing tape?
Butyl tape is a type of sealant tape made from butyl rubber. Flashing tape is a broader category that uses various adhesive technologies, often including butyl rubber or acrylic. For deck joists, a tape specifically marketed as “deck flashing tape” or “joist tape” is usually best, as it’s formulated for this purpose.
Conclusion: A Simple Step for a Stronger Deck
Adding butyl tape to your deck joists is a small effort that pays off big time. It’s like giving your deck a strong, waterproof shield right where it needs it most. By taking a little extra time to prepare the surface and apply the tape correctly, you’re helping to prevent rot and ensure your deck stays safe and beautiful for years to come. It’s a smart choice for any deck builder who wants lasting quality.