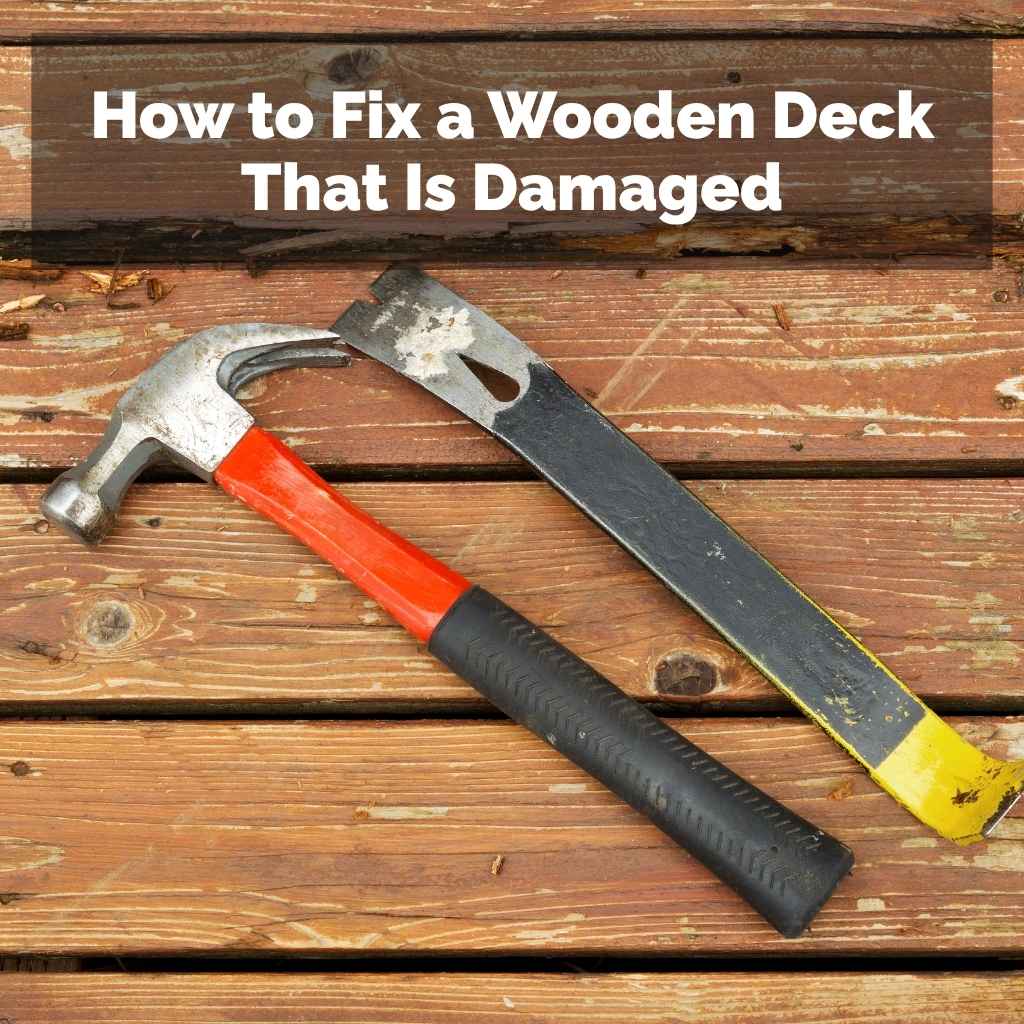
How to Fix a Wooden Deck That Is Damaged
Many homeowners love their wooden decks. They are great for relaxing outside. But time and weather can take a toll, leaving them looking rough and even unsafe.
If you’re new to DIY projects, learning How to Fix a Wooden Deck That Is Damaged or Worn Out can seem a bit tricky at first. Don’t worry! This guide breaks it down into simple steps.
We will show you how to bring your deck back to life, step by step.
Assess Your Deck’s Damage
Before you grab any tools, it’s smart to look closely at what needs fixing on your deck. This first step is key to planning your repairs. You need to know if it’s just a few loose boards or something more serious like rot in the main supports.
Checking everything helps you figure out what materials you’ll need and how much time the job might take. It’s like seeing a doctor before getting medicine; you want to know exactly what’s wrong.
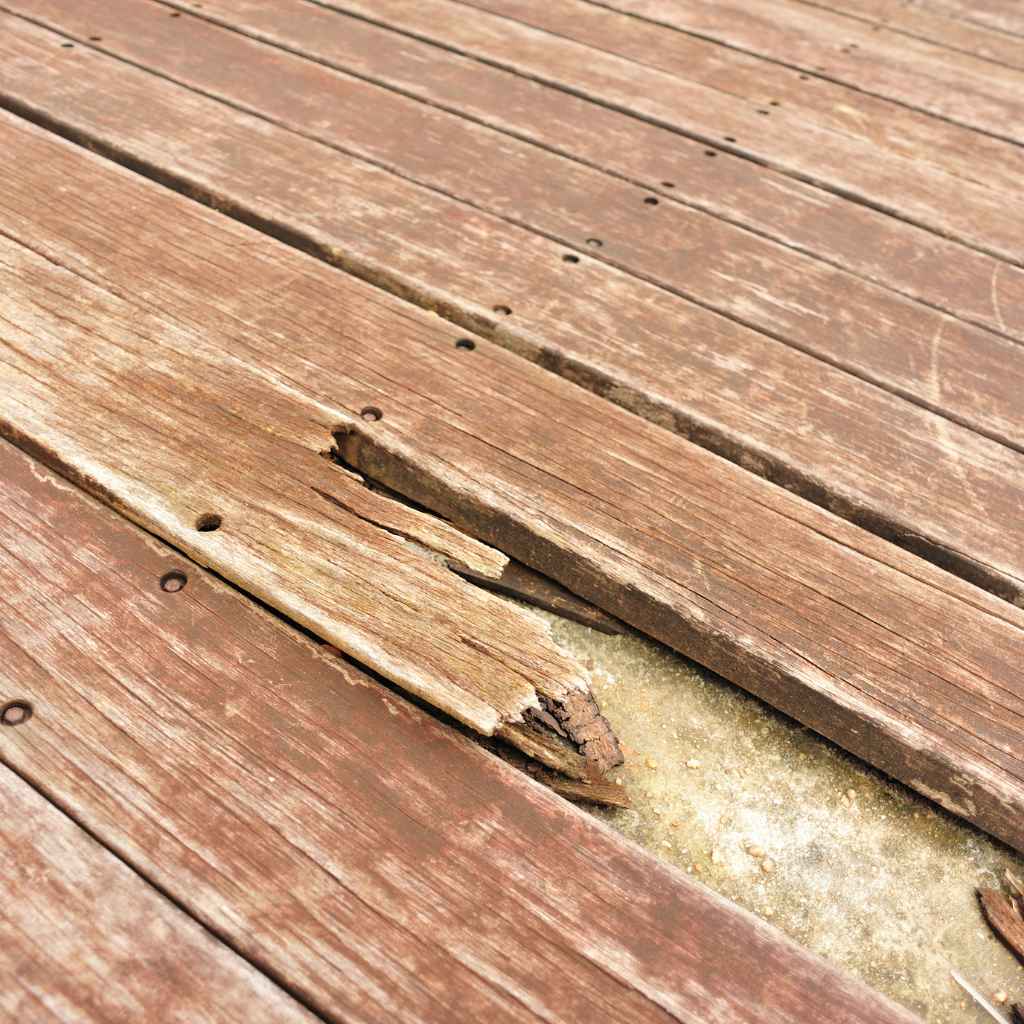
Identifying Different Types of Deck Damage
Wooden decks can suffer from a variety of issues. Understanding these helps you address them properly. Common problems include surface wear, splintering, cracks, and loose or warped boards.
Deeper issues like rot or structural weakness are more serious and require careful inspection. Sometimes, the damage is just cosmetic, like faded color or mildew. Other times, it affects the deck’s safety and stability.
Surface wear is very common. This happens when the deck’s finish wears off from foot traffic, sun, and rain. It makes the wood look dull and gray.
Splintering is when small, sharp pieces of wood lift off the surface. This is a safety hazard and can also be unsightly. Cracks can appear in boards due to drying and shrinking.
If these cracks are small, they might be okay, but large ones can weaken the wood.
Loose or warped boards are also frequent. Wood expands and contracts with moisture and temperature changes. Over time, this can cause boards to pull away from their fasteners or twist out of shape.
Rot is a major concern. It’s caused by moisture and fungi, which break down the wood fibers. Rot usually starts in areas that stay damp, like near the ground or under poorly drained sections of the deck.
You can often spot rot by a spongy texture or dark discoloration.
Mildew and algae growth can make a deck look dirty and slippery. These are living organisms that thrive in damp, shady conditions. They don’t usually damage the wood itself but can stain it and make it unsafe.
When to Call a Professional
While many deck repairs are DIY-friendly, some situations are best left to the experts. If you find extensive rot, especially in the main support beams or posts, it’s crucial to get professional advice. Structural integrity is paramount for safety.
Large areas of significant damage or decks that are very old and have multiple issues might also warrant a pro. If you’re unsure about the extent of damage or how to fix it safely, consulting a contractor is a wise move. They have the experience and tools to assess and repair complex problems effectively.
A professional can also help ensure your repairs meet local building codes.
Gathering Your Tools and Materials
Once you know what you need to do, it’s time to get ready. Having all your tools and materials gathered before you start will make the whole process go much smoother. You won’t have to stop midway to run to the store.
This section lists the essential items you’ll likely need for common deck repairs. Having everything at hand means you can focus on the job and get it done right.
Essential Tools for Deck Repair
You’ll want a good set of basic tools for most deck repair jobs. A tape measure is vital for measuring boards and cuts. A pencil is needed for marking.
Safety glasses are a must to protect your eyes from sawdust and debris. Work gloves will protect your hands.
For removing old fasteners, a pry bar and a hammer are useful. A reciprocating saw or a circular saw can help cut out damaged boards. A power drill with various drill bits and driver bits is indispensable for installing new screws and fasteners.
A wire brush or a stiff broom will be handy for cleaning surfaces.
If you plan to sand your deck, an orbital sander or a belt sander can save a lot of time and effort. For cleaning, a garden hose and a deck brush are helpful. If you’re dealing with loose boards or minor structural issues, you might also need a level and a clamp.
Choosing the Right Materials
The materials you choose depend on the type of repair. For replacing damaged boards, you’ll need new deck boards. It’s best to match the type of wood to your existing deck, such as pressure-treated pine, cedar, or redwood.
If you can’t find an exact match, consider the wood’s durability and how it will look with the rest of the deck.
Fasteners are also important. Use exterior-grade screws designed for decks. These are usually made of stainless steel or coated to resist rust and corrosion.
Nails can sometimes pop out over time, so screws are generally preferred for durability. You might also need wood filler for small holes or cracks. For more significant repairs, you might need new joist hangers, support posts, or concrete for footings.
If you’re refinishing the deck, you’ll need deck cleaner, a deck stain, or sealant. Make sure the product is suitable for your type of wood and the desired finish. Consider the color and whether you want a transparent, semi-transparent, or solid stain.
Sealant helps protect the wood from moisture and UV rays, extending its life.
Safety Gear and Precautions
Safety should always be your top priority when working on your deck. Always wear safety glasses to protect your eyes from flying debris or sawdust. Work gloves are recommended to prevent splinters and provide a better grip.
If you’re doing any sanding or working with pressure-treated wood, a dust mask or respirator is a good idea to avoid inhaling fine particles. Wear sturdy, closed-toe shoes for good footing. If you’re working at heights, consider a sturdy ladder and ensure it’s placed on a stable surface.
Never work alone on a project that could be dangerous, and let someone know your plans. Always unplug power tools when changing blades or bits. Be aware of your surroundings, especially if you have children or pets nearby.
Repairing Damaged Deck Boards
Damaged deck boards are one of the most common issues people face. This section walks you through how to fix them, from removing old ones to putting new ones in place. Making sure your deck boards are sound is key to having a safe and beautiful outdoor space.
We will cover the steps to replace boards that are rotten, cracked, or warped.
Removing Damaged Boards
First, you need to safely remove the old, damaged board. If the board is completely rotten, it might break apart easily. For boards that are just loose or warped, you’ll need to carefully pry them up.
Start by locating the fasteners (screws or nails) holding the board down.
Use a pry bar and a hammer to gently lift the edge of the board. Work your way along the length of the board, loosening it from the joists. Be careful not to damage the surrounding boards or the joists underneath.
If screws are holding the board, you might be able to unscrew them with a drill. Sometimes, nails are harder to remove, and you may need to cut them off with a metal-cutting blade on a reciprocating saw if they are stubborn.
Once the fasteners are free, lift the board completely away. If the board is badly deteriorated, you might need to break it into smaller pieces to remove it. Be sure to sweep up any loose debris and old nails or screws from the joists.
This prepares the area for the new board.
Installing New Deck Boards
Before installing a new board, check the joists underneath. Make sure they are in good condition and free of rot. If a joist is damaged, you’ll need to repair or replace it first.
You might need to cut the new deck board to the correct length. Measure the space where the old board was and mark your cut on the new board. Use a circular saw for a straight, clean cut.
Position the new board in the gap. Make sure it aligns with the other boards. You’ll want to create a small, consistent gap between the new board and the adjacent boards.
This space allows for expansion and contraction of the wood due to moisture changes. A common gap size is about the width of a nail or a quarter of an inch.
Secure the new board to the joists using exterior-grade deck screws. Drive the screws so they are flush with or slightly below the surface of the wood. Using two screws per joist is standard practice for good stability.
Make sure the screws are long enough to go through the deck board and into the joist securely. If your new board is a different color, remember that it will weather and fade over time to blend in better.
Dealing with Warped or Cracked Boards
Warped boards can sometimes be fixed without replacement. If a board is only slightly warped, you might be able to force it back into place by using clamps and driving longer screws into the joists. However, if the warp is severe, replacement is usually the best option.
A warped board can create tripping hazards and stress on surrounding boards.
Cracked boards can be a bit trickier. Small cracks might be filled with an exterior wood filler. For this, you would clean out the crack, apply the filler, and then sand it smooth once it dries.
However, larger cracks, especially those that go all the way through the board or significantly weaken its structure, often mean the board needs to be replaced. A cracked board is a weak point and can break under pressure.
When replacing a cracked board, follow the same steps as replacing any other damaged board. Carefully remove the old one and install a new one. Ensure the new board is properly secured to prevent future issues.
Always inspect the joists beneath any cracked or warped board to make sure they are not also compromised.
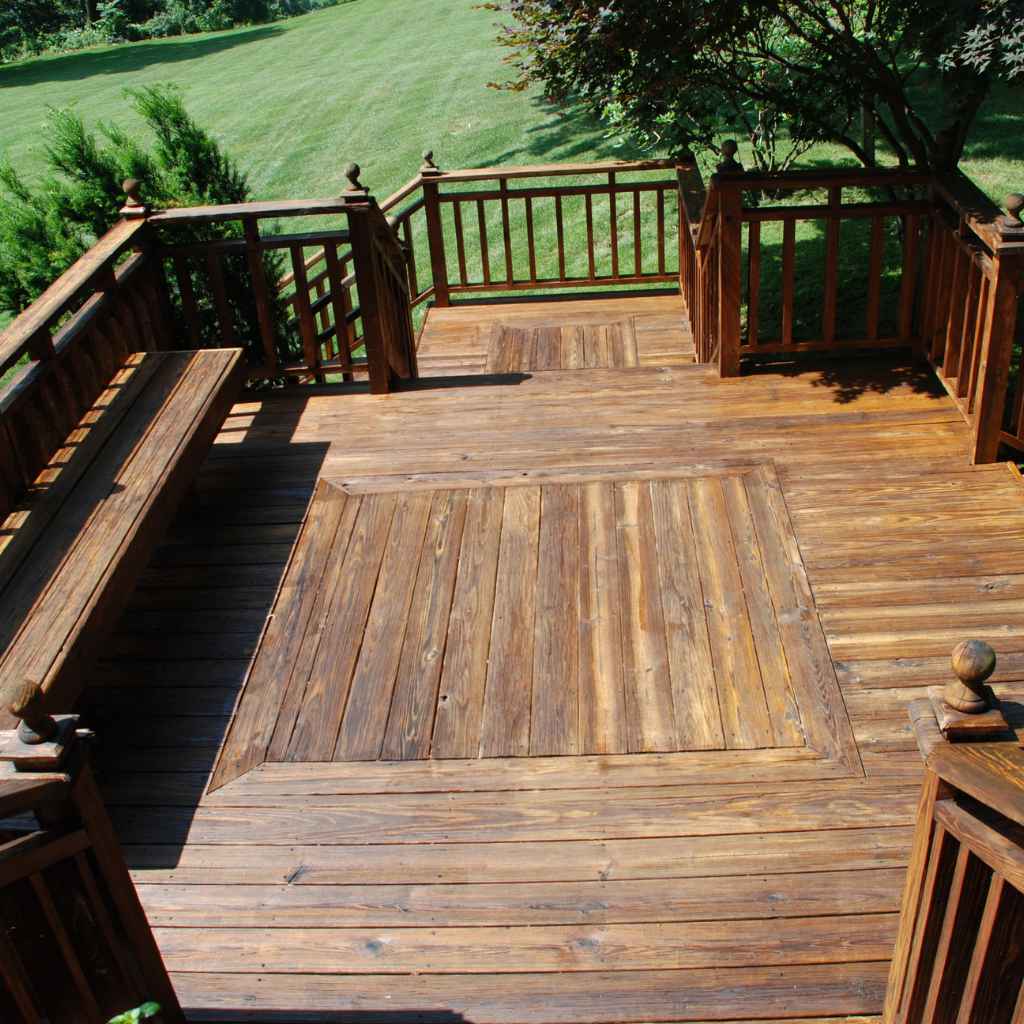
Restoring the Deck Surface and Structure
Beyond individual boards, the overall look and strength of your deck can be improved. This involves cleaning, sanding, and making sure the underlying structure is sound. A well-maintained deck surface not only looks good but also lasts much longer.
This part covers bringing back the charm and stability to your deck.
Cleaning and Preparing the Deck
Start by clearing everything off your deck. Remove furniture, plants, and any decor. Sweep the deck thoroughly to get rid of loose dirt, leaves, and debris.
For a deeper clean, use a deck cleaner. Follow the product instructions carefully. Some cleaners need to be diluted with water, while others are ready to use.
Apply the cleaner to the deck surface using a garden sprayer or a roller. Let it sit for the recommended time, usually 15-20 minutes, to allow it to work on dirt, mold, and mildew. Do not let the cleaner dry on the wood.
If it starts to dry, mist it with water.
After the cleaner has worked, scrub the deck with a stiff-bristled brush or a deck brush. Work in the direction of the wood grain. For stubborn spots or tough stains, you might need to apply more cleaner or scrub harder.
Once you’ve scrubbed the entire deck, rinse it thoroughly with a garden hose or a pressure washer on a low setting. Be cautious with pressure washers, as too much power can damage the wood fibers. Ensure all cleaner residue is washed away.
Let the deck dry completely. This can take 24-48 hours, depending on the weather. The wood needs to be completely dry before you proceed to sanding or applying finishes.
Any moisture trapped under a new finish can lead to peeling or blistering later.
Sanding for a Smooth Finish
Sanding is a great way to smooth out rough patches, remove old finishes, and prepare the wood for staining or sealing. If your deck has loose splinters or just feels rough, sanding is the answer. You can use an orbital sander for larger areas, which is easier to handle.
For edges or tight spots, you might need a sanding block or a handheld detail sander.
Start with a coarser grit sandpaper, like 60 or 80 grit, to remove any old finish, deep scratches, or significant roughness. Always sand in the direction of the wood grain. Overlap your strokes to ensure an even finish.
If you’re using an orbital sander, move it in steady, overlapping passes.
After using the coarser grit, switch to a finer grit sandpaper, such as 100 or 120 grit. This step smooths the surface further. If you plan to stain the deck, sanding with a finer grit will give you a much nicer final look.
Always wear a dust mask while sanding to avoid inhaling wood dust.
Once you’re done sanding, use a shop vacuum or a leaf blower to remove all the dust from the deck surface. You can also wipe it down with a tack cloth or a slightly damp cloth. A clean surface is essential for the stain or sealant to adhere properly and look its best.
Addressing Structural Integrity Issues
While cosmetic fixes are important, the strength of your deck is vital for safety. Look closely at the main support beams, posts, and joists. These are the backbone of your deck.
If you find any signs of rot, cracking, or weakness in these critical areas, they must be addressed.
Rotten posts are a serious problem. If a post is compromised, the deck’s stability is at risk. You might need to dig out the old post and
Joists are the horizontal beams that support the deck boards. If joists are sagging or rotten, they need repair or replacement. Sometimes, a sagging joist can be reinforced by sistering it, which means attaching a new joist right next to the old one.
Rotten joists need to be cut out and replaced. Ensure any new joists are properly spaced and supported. Always use appropriate hardware like joist hangers for secure connections.
If you’re unsure about assessing or repairing structural components, it’s best to consult a qualified contractor. They can identify hidden problems and perform repairs that ensure your deck is safe and meets building codes. Structural issues are not typically beginner DIY projects.
Finishing and Protecting Your Deck
After making the necessary repairs and getting your deck surface smooth, it’s time for the final step: protecting your work. Applying a good quality finish will not only make your deck look great but also shield it from the elements. This helps your repairs last longer and keeps your deck in good condition for years to come.
Choosing and Applying Deck Stain or Sealant
Deck stains come in various opacities, from transparent to solid. Transparent stains let the wood grain show through. Semi-transparent stains offer more color while still showing some grain.
Solid stains act more like paint, covering the wood grain completely and offering maximum protection.
Sealants, on the other hand, are typically clear and focus on repelling water and UV rays. They don’t add much color but can protect the natural look of the wood. For heavily damaged or weathered decks, a solid stain can provide a fresh start and hide imperfections.
For decks in good condition, a semi-transparent stain or a clear sealant might be preferred.
Before applying any finish, make sure the deck is completely clean and dry. Stir the stain or sealant thoroughly. Use a brush, roller, or sprayer to apply the product.
Work in manageable sections, and always apply in the direction of the wood grain. Avoid applying too much product, which can lead to puddles or drips. Overlap your strokes slightly to ensure even coverage.
If you’re using a stain, apply a second coat if needed, following the manufacturer’s instructions. Most stains recommend waiting a specific amount of time between coats. For sealants, one coat is often sufficient.
Allow the finish to cure completely before putting furniture back on the deck.
Maintenance Tips for Longevity
Regular maintenance is key to keeping your deck looking good and preventing future damage. The most important thing you can do is keep it clean. Sweep away leaves and debris regularly, as they can trap moisture and promote mold growth.
Wash the deck at least once a year, or more often if it gets very dirty or shows signs of mildew.
Inspect your deck periodically for any new issues, such as loose boards, protruding nails, or small cracks. Addressing these problems early can prevent them from becoming bigger, more expensive repairs. Reapply deck stain or sealant every 1-3 years, depending on the product and your climate.
This protective layer is your deck’s first line of defense against the weather.
Trim any bushes or trees that overhang the deck. This helps to reduce the amount of shade, allowing the deck to dry more quickly after rain. It also reduces the amount of debris that falls onto the deck.
If you live in an area with heavy snowfall, consider clearing snow off the deck in winter to prevent excess moisture buildup and potential damage from ice.
Make sure that water drains away from your deck. Poor drainage can lead to constant moisture exposure, which accelerates rot and decay. Check that gutters and downspouts are directing water away from the deck’s foundation.
Proper ventilation under the deck is also important to allow air to circulate and moisture to escape.
Frequently Asked Questions
Question: What is the best way to fix a rotten deck board?
Answer: The best way to fix a rotten deck board is to
Question: How often should I reseal or restain my wooden deck?
Answer: You should typically reseal or restain your wooden deck every 1 to 3 years, depending on the climate, the type of product used, and the amount of wear and tear it receives.
Question: Can I repair a cracked deck board without replacing it?
Answer: Small cracks in deck boards can often be repaired using an exterior wood filler. However, larger cracks or those that significantly weaken the board usually require replacement for safety and durability.
Question: What kind of screws should I use for deck repairs?
Answer: For deck repairs, always use exterior-grade deck screws. These are made from materials like stainless steel or have special coatings to resist rust and corrosion, ensuring they hold up well outdoors.
Question: How can I tell if my deck’s support structure is damaged?
Answer: You can tell if your deck’s support structure is damaged by looking for signs of rot, significant sagging in beams or joists, large cracks, or loose connections. If you suspect structural damage, it’s best to consult a professional.
Summary
Fixing a damaged wooden deck is a rewarding project. You’ve learned how to identify issues, gather tools, and replace boards. Protecting your deck with stain or sealant ensures your hard work lasts.
With these steps, you can restore your deck’s beauty and safety.